

DTF Garment Sizing Process: From Measure to Print
A transfer can look perfectly balanced on the design screen and still land wrong on the shirt. That happened three times in one morning: a left-chest logo drifted toward the armhole, a full-front graphic ran into a hoodie pocket, and an oversized tee made a proven design look strangely short. None of those files was technically broken. The sizing decisions were.
A reliable DTF sizing process starts with the blank garment, not a copied width from a chart. You need to connect the blank, printable area, transfer dimensions, placement, fabric behavior, and customer fit into one locked specification. That record gives the press operator something more useful than “make it about ten inches wide.”
Why Most DTF Prints Sit Wrong Before They Hit the Press
The transfer usually gets blamed after a crooked application, but the mistake often happens earlier. Someone chooses a familiar size, opens the artwork, scales it to that width, and assumes the garment will provide the same usable space as the last order. A hoodie, women's cut, or drop-shoulder tee quickly exposes that assumption.
Modern clothing sizing developed alongside mass-produced apparel and U.S. Civil War uniforms from 1861 to 1865, when manufacturers moved from individually made-to-measure garments toward broad categories such as small, medium, large, and extra-large, as described by the ANSI overview of clothing size designation. Factory sizing made repeat production possible, but a nominal size still describes a category, not an identical physical blank across every supplier and cut.
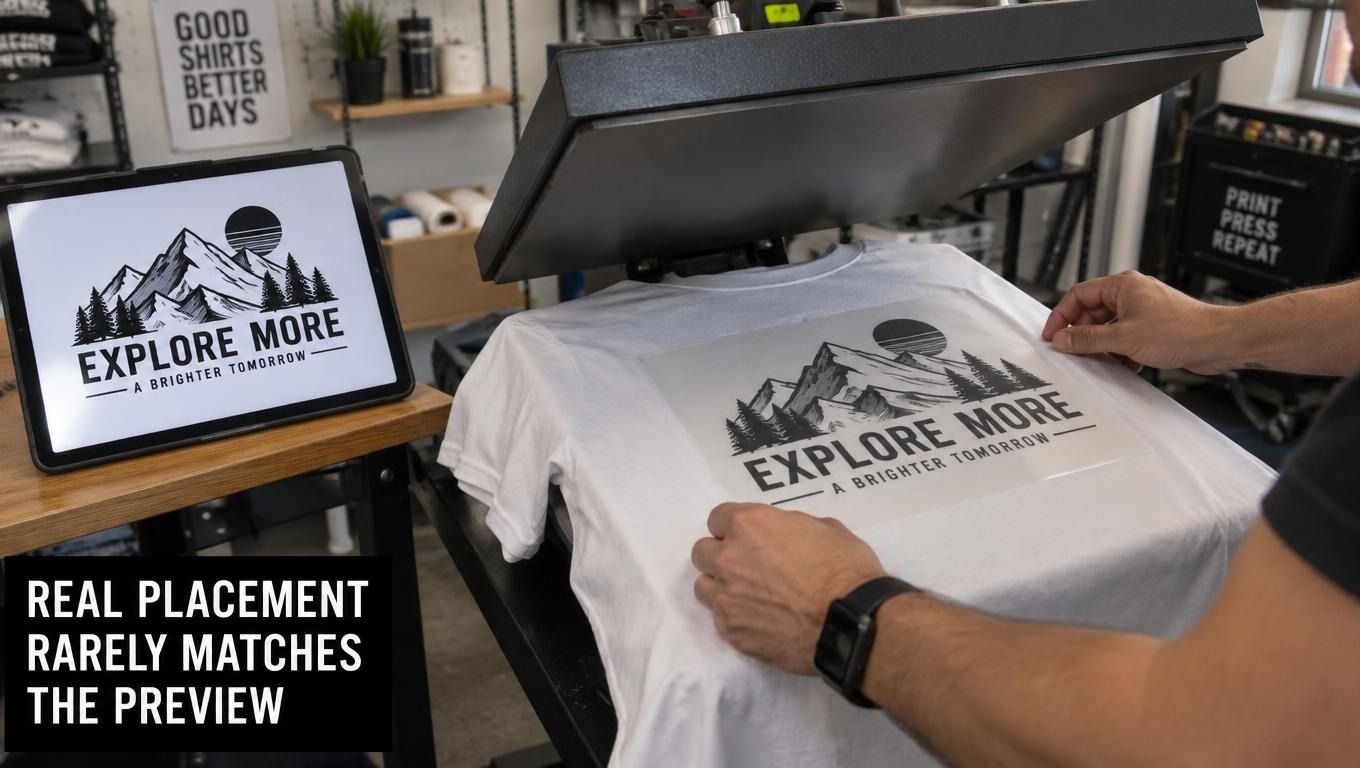
The chart is a starting point, not a production specification
Generic ranges can help you begin a conversation with a customer, but they don't account for a pocket, hood seam, armhole, neckline, or an unusually narrow torso. They also don't show how a graphic's proportions interact with the blank. A tall design may fit the stated width while extending too close to the collar, while a wide design may look cramped when the armholes curve inward.
Shop-floor rule: If nobody measured the actual blank, the transfer size is still an assumption.
The correct sequence is simple, but each decision depends on the last one:
- Measure the finished blank in a relaxed, standardized state.
- Define the printable area between real seams and obstacles.
- Select transfer width within that area.
- Preserve the artwork's aspect ratio when setting height.
- Validate the physical placement before releasing the file.
- Save the approved combination of garment, transfer, and coordinates.
That approach prevents the most expensive kind of “small” error, the one discovered only after the transfer is pressed. A size chart tells you what might fit a category. A locked specification tells your team what belongs on this exact garment.
Measuring the Blank Garment the Way a DTF Shop Should
Start with the finished blank, not the customer's body chart. A body chart helps the buyer choose a shirt size. A DTF shop needs the shirt's actual dimensions to decide where decoration can sit and how large it can be without crossing construction lines.
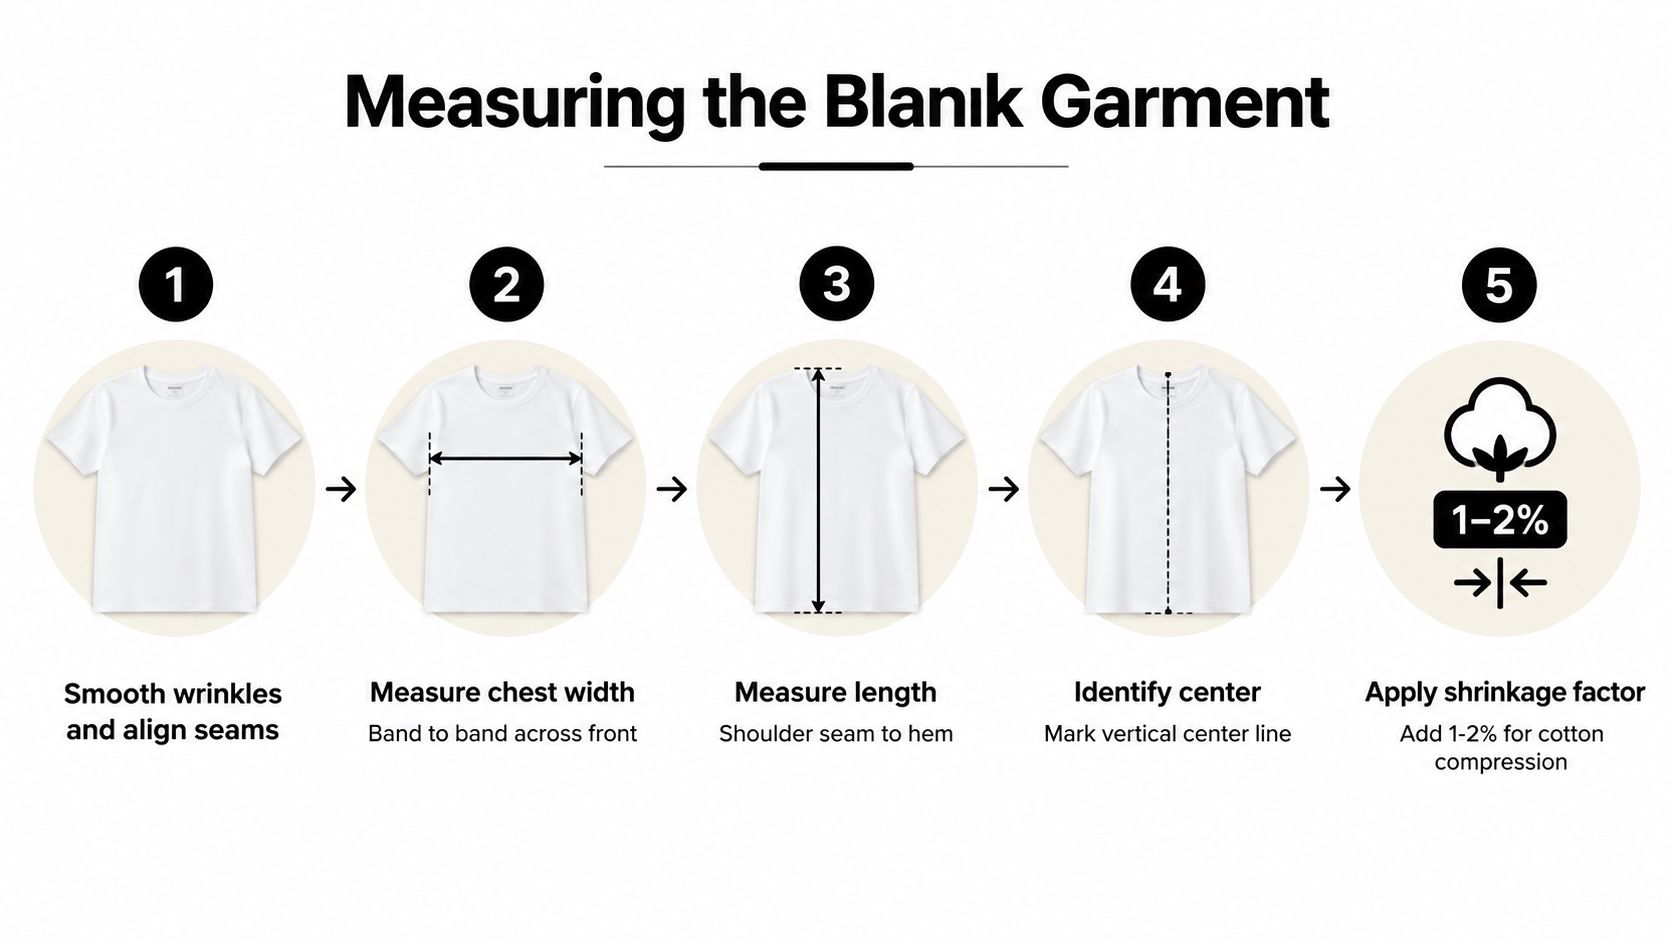
Lay the blank on a clean, flat surface. Smooth wrinkles without pulling the fabric, align the side seams, and make sure the shoulders aren't twisted. Record the style name, supplier, nominal size, color, fabric composition, and cut before taking measurements. If you change any of those variables, treat the result as a new blank specification.
Capture the measurements that control decoration
Use a flexible tape and write down finished-garment measurements rather than relying on a supplier's general grid.
- Chest width: Measure straight across from side seam to side seam at the chosen print zone. Keep the garment relaxed.
- Body length: Measure from the shoulder seam near the collar to the hem. This defines the available vertical field.
- Neck width: Note the collar opening and the distance from the collar seam to the intended artwork start.
- Printable width: Measure between the seams or armhole boundaries where the artwork can safely sit.
- Printable height: Mark the usable distance after excluding the collar, pocket, hood overlap, hem, and other obstructions.
- Centerline: Establish the vertical center from the neckline and body, then mark the horizontal reference used for placement.
- Sleeve area: For sleeve graphics, record the seam-to-seam width and usable length instead of borrowing a chest measurement.
Measure the blank in the state it will enter production. Stretching a knit while measuring gives you a wider canvas than the press operator will see, and it hides how the graphic will behave when worn. For technical documentation habits, teams can also find engineering drawings guides to improve how they label reference edges, dimensions, and revision notes.
Build a blank record before ordering transfers
A ten-minute measurement template should include a simple sketch or photograph, measurement labels, and a printable-area rectangle. Note whether the blank is standard, relaxed, fitted, oversized, youth, women's, or tall. A supplier's nominal size isn't enough to release a file.
When the dimensions are approved, size-specific options such as DTF Transfers By Size can be evaluated against the recorded placement rather than selected by habit. The useful information is the approved width and height, not merely the product's preset label.
Keep one physical sample for each recurring style. That sample becomes the reference for customer proofs, repeat orders, and operator training. If the garment changes construction, supplier, or cut, reopen the measurement record before reusing the old transfer.
Turning the Printable Area Into a Transfer Size
Once the blank is measured, convert usable geometry into artwork dimensions. Choose the longest artwork edge first, then set the other dimension by preserving the original aspect ratio. Don't force every design into the same rectangle. A portrait graphic and a wide wordmark can occupy the same placement but need different decisions.
Hoodies deserve a separate check. Their pockets, hood seams, and front construction can remove usable height, while an oversized tee may need more width without a matching increase in height. Youth, women's, tall, and fitted cuts also change the printable area, so a generic chart should be treated as a starting point only, as shown in this DTF transfer size guide.
Use placement-specific starting ranges
The ranges below are starting points, not approvals. The measured blank and scaled proof override them.
| Placement | Width (in) | Height (in) | Blank Notes |
|---|---|---|---|
| Left chest | 3–4 | Proportional | Keep clear of the collar, armhole, and side seam |
| Full front | 10–12 | Proportional | Check neckline, hem, pocket, and torso curvature |
| Center back | 10–12 | Proportional | Measure between shoulder blades and side seams |
| Sleeve | 3–4 | Proportional | Check sleeve seam, taper, and rotation around the arm |
For a left-chest logo, establish the vertical centerline first. Then check the distance to the armhole and collar before approving width. A graphic that technically fits the chest can still look crowded if its outside edge follows the armhole too closely.
A full-front design needs a top boundary and a bottom boundary. On a tee, the area may be relatively open. On a hoodie, the pocket can make a nominal full-front size impossible without crossing a seam or sitting on a change in fabric thickness. If the pocket is fixed, reduce height, move the graphic upward only if the collar allows it, or redesign the placement.
Preserve proportions on irregular and oversized artwork
Don't increase width and height independently just because the blank is larger. For an oversized garment, widening a broad design while keeping its height restrained can preserve visual balance. A tall illustration may need a smaller width than a wide badge, even when both are assigned to the same shirt category.
A gang-sheet workflow can help organize approved variants. The DTF Transfers Gangsheet Builder allows artwork to be uploaded, scaled, duplicated, and arranged with a live layout preview. That layout tool doesn't replace garment measurement, but it can preserve the dimensions you already approved across a mixed run.
For a deeper reference on placement decisions, use this guide to DTF transfer sizes. The practical test remains physical: print or plot a scaled proof, lay it on the blank, and inspect the edges against seams before ordering the production transfer.
The Five-Stage DTF Sizing Control Sequence
A production sizing process needs a handoff that a new operator can follow without interpreting someone's memory. Use five control stages, and record the result at each one.
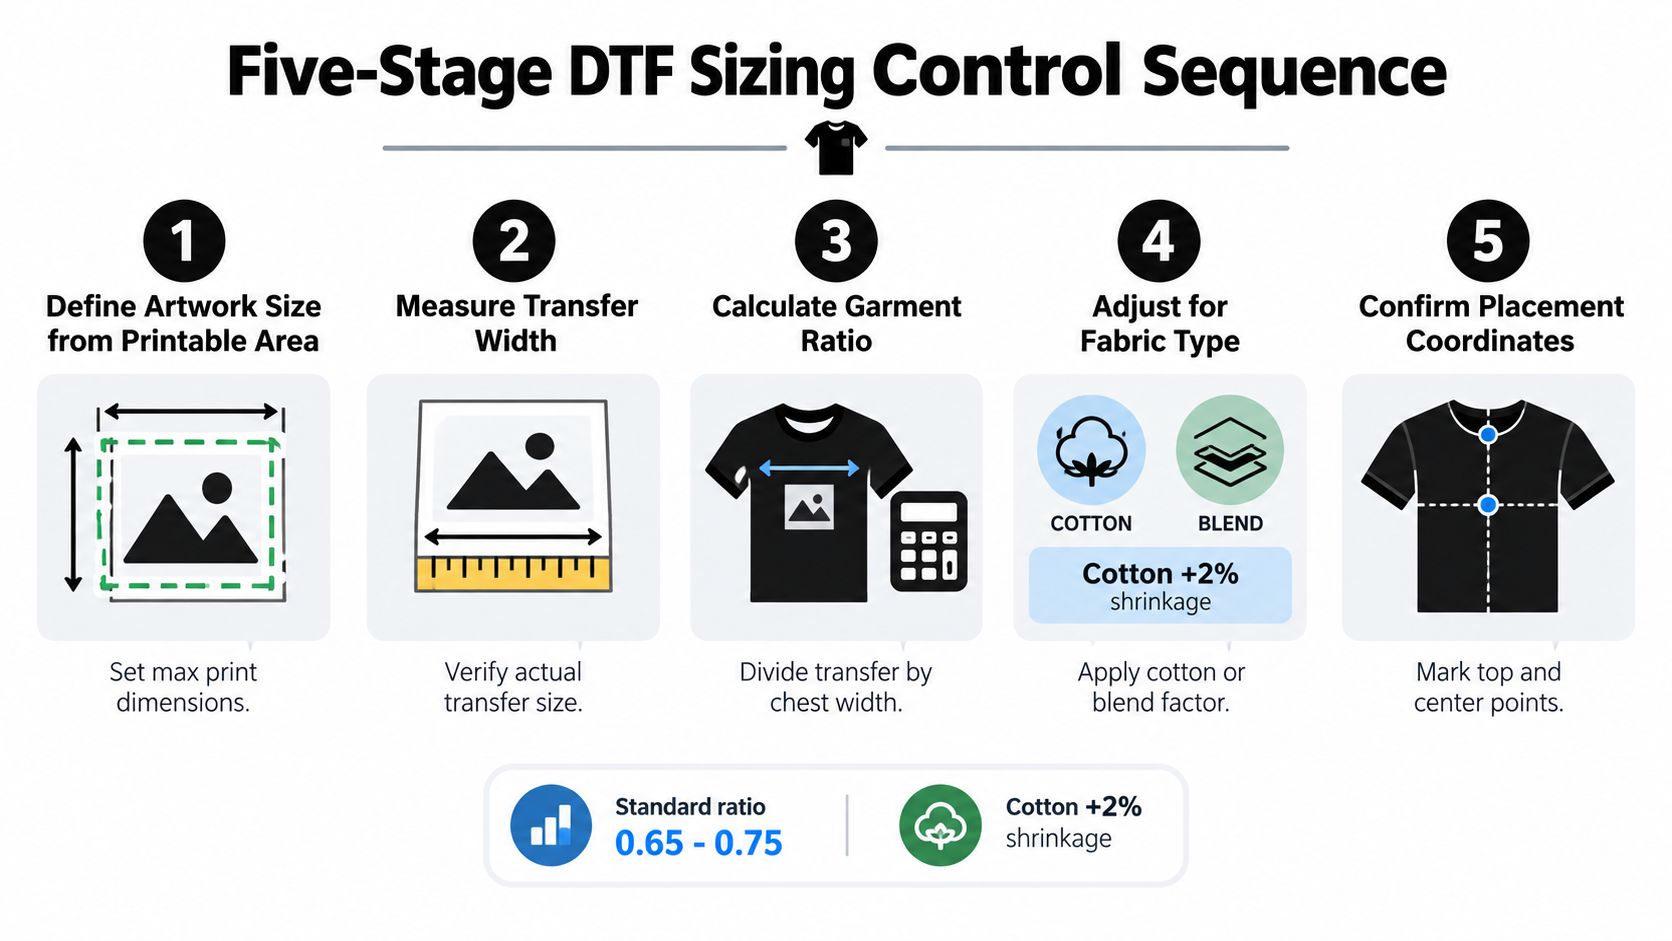
1. Define the finished-artwork size
Start with the measured printable area. Set a maximum width and height based on the garment's real boundaries, then choose the artwork dimensions inside that box. The finished transfer, not the digital canvas or transparent padding, is the dimension that belongs in the specification.
2. Verify width and height separately
Measure the transfer itself after production. Width alone can hide a height error, especially with tall artwork or files containing transparent margins. Record both dimensions and confirm that the aspect ratio matches the approved proof.
3. Account for process variables
Film, adhesive powder, pressing, and fabric response can affect the result. Keep the artwork dimensions separate from the application variables, then record the settings used for curing and pressing. If the transfer changes visually after application, identify whether the issue is dimensional, positional, color-related, or adhesion-related.
4. Validate visual placement
Mark the garment centerline and top reference point. Check the transfer against collars, seams, pocket edges, armholes, and sleeve taper. A transfer can meet a dimensional target and still look wrong because the placement is visually unbalanced.
5. Lock the specification
Save the garment style, nominal size, actual blank measurements, transfer width, transfer height, placement coordinates, artwork revision, fabric composition, and approval status. Add a photograph of the approved sample when possible. That record is what prevents the next order from reverting to a generic chart.
Dimensional error isn't the same as visual fit
A rigid tolerance borrowed from woven products can mislead a knitwear operation. Research found that a 0.1 cm tolerance specified by a retailer was inappropriate for knitted apparel because knitted-fabric extensibility creates a larger measurement-error margin than woven construction, as reported in this knitwear fit study.
A tee should be measured relaxed, checked flat, and inspected worn. One measurement state cannot answer every fit question.
Set wider internal acceptance bands for stretchy tees and blends than you would for rigid materials. Don't use that flexibility as permission to approve sloppy work. Instead, define what variation is acceptable for the fabric, then inspect both the transfer and the worn garment before releasing the job.
How Cut and Fabric Change the Right Size
The same transfer can read as balanced on one blank and undersized on another. A standard unisex tee gives a familiar, relatively open front. A fitted women's tee narrows toward the waist and may bring the armhole closer to the print. An oversized drop-shoulder tee offers more width, but its lower shoulder and wider body can make a centered graphic feel visually high or too small if you reuse the standard file unchanged.
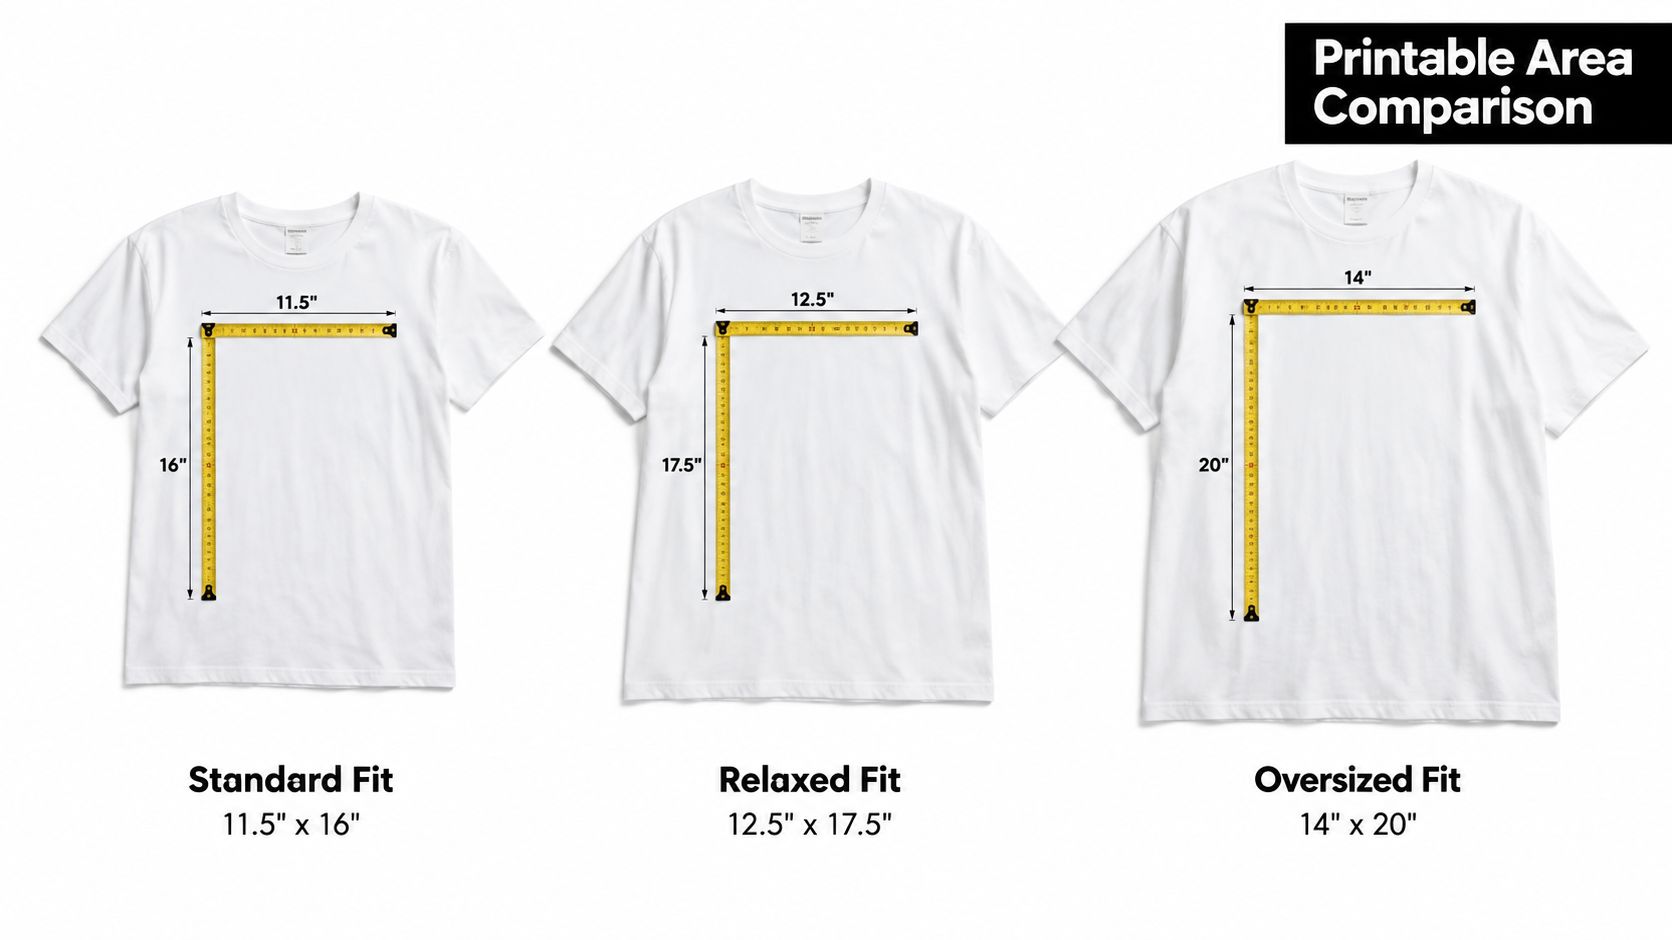
Compare the blank before changing the transfer
Take a proven full-front design and test it on three cuts:
- Standard unisex: The established width may sit comfortably between the armholes and leave a predictable collar clearance.
- Fitted women's: The same width can approach the armholes or become visually dominant as the torso narrows.
- Oversized drop shoulder: The transfer may have enough horizontal room, but its height can look insufficient against the larger body field.
The right response isn't automatically “make it bigger.” Increasing width until the artwork nearly reaches the armholes can reduce perceived quality, particularly when the garment shifts during pressing or when the design crosses a seam. Reduce width, adjust height proportionally, or change placement based on the blank's construction.
Fabric adds another variable. Cotton, polyester, and blends can differ in stretch, surface behavior, heat response, and how the decorated area looks when worn. A practical cotton versus polyester comparison can support material selection, but the production file still needs the exact composition and style attached to it.
Let construction set the acceptance band
A relaxed tee may tolerate a broader visual field than a fitted shirt. A heavy hoodie may require a pocket and seam review even when its chest measurement appears generous. A stretchy blend can shift during application and should be measured and pressed using a controlled method.
Use a style matrix rather than one universal transfer chart:
| Blank characteristic | What to inspect | Likely decision |
|---|---|---|
| Narrow or fitted torso | Armhole and waist taper | Reduce width or move inward |
| Wide oversized body | Shoulder drop and visual center | Increase width cautiously or reduce height |
| Stretch knit | Relaxed measurement and worn fit | Use a wider internal acceptance band |
| Heavy hoodie | Pocket, hood, and seam boundaries | Reduce usable height or revise placement |
The best size balances artwork proportions, garment geometry, fabric behavior, placement, and customer preference. Width is only one input.
Prepress Validation That Beats a Generic Size Chart
A size chart can't show you how a transfer will sit on a particular hoodie. A scaled proof can. Before releasing a new style, place a physical or accurately scaled representation of the finished artwork on the blank and inspect it from the same angle customers will see.
Start with the blank measurement record. Confirm the centerline, top reference, pocket boundary, collar clearance, and side boundaries. Then measure the transfer after it is produced, apply it using recorded settings, and inspect the result flat and worn. The worn check matters because stretch can change the apparent placement and visual balance.
Test the process, not just the artwork
Pretreatment and environmental conditions belong in the same production record as width and height. Digital textile-printing research found that pretreatment changes ink spread and color yield, so the substrate and application chemistry can influence what the operator sees after pressing. Run a controlled compatibility test for the fabric and color, print a standardized test graphic, record cure or press time, temperature, and pressure, then inspect edge spread, adhesion, color, and wash durability.
Humidity deserves a log in Texas production spaces. A textile-printing study reported a mean defect rate of 3.1% with dehumidification during humid periods compared with 14.6% without it, a difference of 11.5 percentage points, as documented in this textile-printing process study. The figure isn't a sizing tolerance, but it shows why environmental conditions can't be separated from repeatable output.
Use heat press test strips as part of the documented setup rather than relying on a quick visual judgment. Quarantine a lot when humidity shifts materially, and use test strips before a large run.
Lock the approved version
A repeat-order specification should contain:
- Blank identity: Supplier, style, cut, color, composition, and nominal size.
- Physical measurements: Chest, length, neck, sleeve, and printable boundaries.
- Transfer dimensions: Finished width and height, with aspect ratio preserved.
- Placement coordinates: Top edge, centerline, and clearance from construction features.
- Process settings: Pretreatment or compatibility result, cure, press conditions, and environment.
- Acceptance result: Flat inspection, worn inspection, color and adhesion checks, and approver.
Save the customer-approved artwork dimensions and garment style as a locked reference. If the same nominal size produces a different result on a new fabric construction, do not blindly reuse the old approval. Revise the specification and obtain sign-off again.
Wiring Sizing Into Ordering, Returns, and Repeat Business
A customer doesn't buy a transfer width. They buy a finished garment that fits their body and looks intentional. Body measurements and finished-garment measurements answer different questions, so made-to-order sellers should publish both whenever possible, especially when a decorated item may not be easy to exchange.
Fit uncertainty has a direct commercial cost. Shopify cites a 2025 survey of 6,000 consumers in which 61% returned apparel because it didn't fit, and reports online apparel return rates of roughly 24.4%, with size and fit among the leading causes, in its sizing-guide research. Use those figures as a reason to improve the decision aid, not as a promise that one chart will eliminate returns.
Give customers a decision they can actually make
Publish the exact blank's finished dimensions, identify whether the cut is standard, relaxed, oversized, fitted, unisex, women's, youth, or tall, and show a photograph of the fit. Ask the buyer to compare the chart with a shirt they already own, measured flat and relaxed. Before pressing, confirm the chosen size when the order carries meaningful fit uncertainty.
A small shop can put this into practice quickly:
- Measure one sample of every recurring blank.
- Photograph the fit and record actual dimensions.
- Attach an approved transfer size and placement to that blank.
- Confirm the customer's choice before pressing.
- Reuse only the locked specification for repeat orders.
For mixed-size runs, keep the approved artwork dimensions visible in the order record and reproduce the layout consistently through the production workflow. A gang-sheet builder can help organize those approved variants, but the garment record remains the authority.
The change to make this week is straightforward: stop storing “adult full front” as a sufficient instruction. Store the blank, the finished transfer width and height, the placement coordinates, the fabric, the press conditions, and the customer approval together. That turns sizing from a one-time guess into a repeatable operating control.
Cobra DTF provides size-specific DTF transfers and a gang-sheet workflow that can support locked artwork dimensions across recurring apparel orders. Visit Cobra DTF to review transfer options and build a sizing process around the exact blanks your shop presses.