
Your Guide to Perfect DTF Transfer Sizes
Nailing your DTF transfer size is what separates a professional, retail-quality custom shirt from one that just looks... homemade. A design that's perfectly sized and placed looks intentional and balanced, giving the whole garment a high-end feel. Think of it like framing a piece of art—the wrong size frame can make even a masterpiece look awkward.
Why Getting DTF Transfer Sizes Right Matters
Learning to master DTF transfer sizing isn't just a technical skill; it's a core part of building your brand, running an efficient shop, and keeping customers happy. A well-proportioned graphic instantly bumps up the perceived value of your apparel. On the flip side, a design that’s way too big for a small tee or comically small on a hoodie can look cheap, hurting your brand's reputation before it even gets off the ground.
This guide is built to be your go-to resource for getting this right every time. We'll walk through the fundamentals first and then build on that knowledge, so you don't just know what sizes to use, but you understand why they work.
The Impact of Professional Sizing
When you get your sizing right, your whole production process gets smoother. By setting up standard sizes for your most common placements—like full-front designs or left-chest logos—you get rid of the guesswork. No more second-guessing yourself or wasting time measuring every single shirt. This consistency is your secret weapon for cranking out high-quality orders, whether you're pressing one shirt or a hundred.
For a small apparel business, consistency is everything. A perfectly sized and placed design builds trust with your customers. They'll come back because they know they can count on you for quality.
This principle isn't just limited to apparel. Understanding the importance of precise visual dimensions is a universal rule in design, and it's what makes products look good and connect with customers.
From Basics to Business Strategy
We're covering it all in this guide, from the ground up:
- Brand Perception: How the right size makes your products look more premium.
- Customer Satisfaction: Creating a finished garment that looks exactly like it should.
- Production Efficiency: Saving time, money, and materials by standardizing your sizes.
- Profitability: Using smart techniques like gang sheeting to drive down your costs per print.
By the time you're done here, you'll be able to make smart, creative, and profitable decisions for every single piece of apparel you make. Of course, the transfer is only half the battle; choosing the right garment is just as critical. Check out our guide on the best shirts for DTF to make sure your perfectly sized designs have the perfect canvas.
Standard DTF Transfer Sizes for Common Apparel
Jumping into the world of custom apparel means getting familiar with a few industry standards that make life a whole lot easier. When it comes to dtf transfer sizes, you don’t need to reinvent the wheel for every single project. There are established, go-to dimensions that work perfectly for the most common garments, making sure your designs look professional and well-balanced every time.
These standards didn’t just appear out of nowhere; they’re based on decades of real-world printing experience. They take into account everything from visual appeal to the physical size of a heat press. For instance, a standard adult full-front design is typically 10 to 11 inches wide. This is the sweet spot—large enough to make an impact on a size large t-shirt but not so big that it overwhelms a size small.
The demand for this kind of easy customization is booming. The Global Direct to Film (DTF) Printing Market was valued at around USD 2.72 billion in 2024 and is expected to climb to USD 3.92 billion by 2030. That growth is all about people wanting versatile, affordable custom gear, which makes getting your sizing right more important than ever for running a smooth operation. You can dig deeper into these market trends over at 360iResearch.com.
Common Sizes for Adult Apparel
For adult clothing, sizing is refreshingly straightforward. Most brands can get away with using one standard-sized transfer for all their unisex sizes from Small to Extra-Large. This is a massive time-saver.
- Left Chest/Pocket Logo: This classic placement is usually 3 to 4 inches wide. It’s the perfect spot for company branding, subtle logos, or small icons.
- Full Front Graphic: This is your bread and butter for t-shirts and hoodies. A full front graphic typically measures 10 to 11 inches wide.
- Oversized Front: If you’re going for a modern, streetwear vibe, an oversized print can be 12 to 14 inches wide. This creates a bold, statement-making design.
- Full Back Graphic: Just like a full front, a standard back design is about 10 to 12 inches wide. It's usually placed a few inches down from the collar for the best look.
- Sleeve Print: For long sleeves, designs are often 2 to 3 inches wide and can run up to 11 inches long, typically placed down the forearm.
Pro Tip: Before you commit to a full run of transfers, print your design on a piece of paper at the size you're planning to use. Place the paper mockup on an actual garment to see how it looks. This simple trick lets you visually confirm the scale and placement and has saved me from countless mistakes.
To give you a clearer picture, here’s a quick-reference chart mapping these sizes to their best uses.
Common DTF Transfer Sizes and Recommended Uses
| Transfer Size Category | Typical Dimensions (Inches) | Best For | Common Placement |
|---|---|---|---|
| Pocket / Left Chest | 3" x 3" to 4" x 4" | Logos, small icons, branding | Left or right chest |
| Adult Full Front | 10" x 12" to 11" x 14" | T-shirts, hoodies, crewnecks (Sizes S-XL) | Center chest |
| Oversized Front/Back | 12" x 15" to 14" x 16" | Streetwear, statement pieces (Sizes L-3XL) | Full front or back |
| Youth Full Front | 7" x 9" to 9" x 10" | Kids' t-shirts, youth hoodies | Center chest |
| Toddler / Infant | 4" x 4" to 6" x 6" | Toddler tees, infant onesies | Center chest |
| Sleeve Print | 2.5" x 11" to 3" x 11" | Long-sleeve shirts, hoodie arms | Forearm or bicep |
| Hat / Beanie | 4.5" W x 2.5" H | Caps, beanies, headwear | Front panel |
This chart is a great starting point, but always remember to measure your specific garment and trust your eyes!
Sizing for Youth and Smaller Garments
When you’re printing on smaller items, you absolutely have to scale your designs down to keep things looking right. Slapping an 11-inch adult transfer on a toddler tee would not only look ridiculous, but the print would feel stiff and be super uncomfortable for the child.
- Youth T-Shirts (Ages 6-12): A full front design should be somewhere around 7 to 9 inches wide.
- Toddler Tees (Ages 2-5): Keep these even smaller, around 5 to 6 inches wide.
- Infant Onesies (0-24 months): For this tiny canvas, a 3 to 4-inch wide graphic is usually perfect.
- Hats & Beanies: Transfers for headwear are in their own little world. They're typically 2 to 3 inches tall and up to 4.5 inches wide to fit on the front panel.
Getting these common sizes down is the first step. The next is learning how to arrange multiple designs on a single sheet to get the most bang for your buck. You can learn all about maximizing your material in our guide on using DTF transfer sheets that are ready to press. Mastering this will help you cut down on waste and seriously lower your cost per print.
A Visual Guide to Transfer Placement
Getting the DTF transfer size right is half the battle. But where you actually place it on the garment? That’s what separates the pros from the amateurs. A perfectly sized design can look completely off if it’s too high, too low, or just a little crooked.
Let's walk through a repeatable system for getting your placement right, so you can press with confidence and get consistent, fantastic results every single time.
Think of placement as the final, critical step. The right spot makes the design look flattering and intentional when someone wears it. A classic, go-to trick for standard adult t-shirts is the "three-finger rule." Just lay three fingers flat (your index, middle, and ring) right below the bottom of the collar. The top of your transfer should start right there, which lands it perfectly on the upper chest.
Here’s a visual map to help you see the most common placements in action.
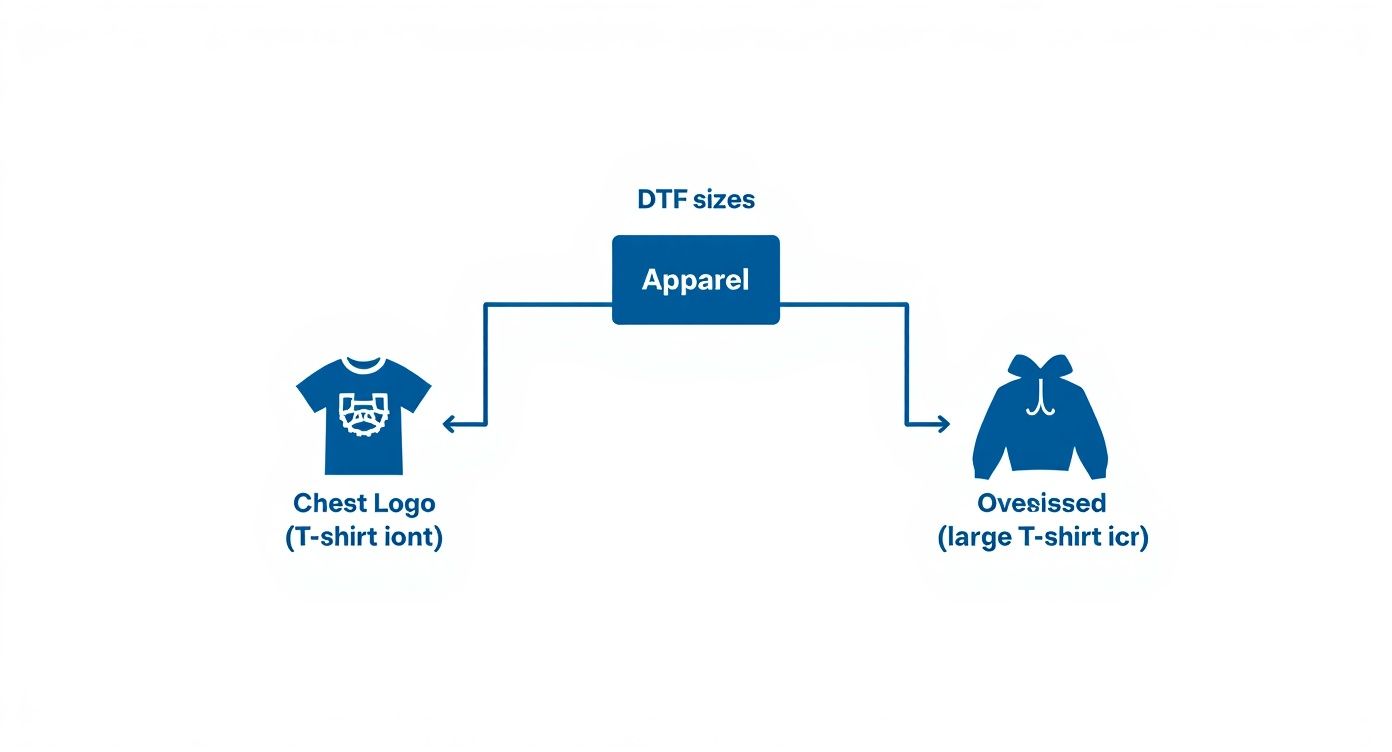
As you can see, different DTF sizes are meant for specific spots—from a small chest logo on a tee to a big, bold graphic on a hoodie.
Positioning Guidelines for T-Shirts
T-shirts are the bread and butter for most of us, so getting this placement down is a core skill.
- Left Chest Logo: Picture an invisible vertical line running down from the middle of the shoulder seam and a horizontal line coming straight across from the armpit. Place your logo right where they meet. This simple trick keeps it from creeping into the armpit or getting too close to the center.
- Full Front Graphic: For most adult sizes (S-XL), a good starting point is about 2-3 inches down from the bottom of the collar. You’ll always want to center it horizontally between the sleeves.
- Back Graphic: For a large design on the back, you’ll want to start it about 4 inches down from the collar. Any higher, and it can look like the design is awkwardly climbing up the person's neck.
Hoodie and Long-Sleeve Placement Tips
Hoodies and long-sleeves have their own unique quirks and prime real estate for designs.
The real secret to professional-looking apparel is consistency. It pays to create a simple template or a set of measurements for each type of garment you sell. This one step will make a massive difference in the quality of your finished products.
With hoodies, the front pocket seam is your main guide. Your design should sit comfortably above it, usually starting 2-3 inches from the neckline, just like on a t-shirt. The big thing to avoid is letting your design touch that pocket seam—it can cause an uneven press and make the graphic look warped.
Sleeve prints are all about alignment. For a classic forearm design on a long-sleeve, have someone bend their elbow. The graphic should run right down the center of the forearm, usually starting 1-2 inches up from the cuff. This makes sure it looks straight and is visible whether the arm is bent or relaxed. For bicep prints, just center the design between the shoulder and elbow seams.
By following these visual cues and simple rules, you can stop guessing and start producing gear that looks expertly crafted, every single time.
Getting Your Artwork Print-Ready
You can have the perfect placement and the right size picked out, but without a great digital file, you'll never get a great print. Let's shift gears from the physical transfer to the digital artwork itself. Getting your designs prepped correctly is your number one defense against fuzzy prints, murky colors, and other frustrating surprises.
Think of your digital file as the blueprint for your shirt. If the blueprint is flawed—say, it's low-resolution or in the wrong format—the final product is going to show it. The two things you absolutely have to nail are resolution and file format.
The Nitty-Gritty: Resolution and File Format
For a sharp, professional print, your artwork needs to be 300 DPI (Dots Per Inch) at the exact size you want it to print. This isn't just a suggestion; it's the gold standard for high-quality apparel printing. That 72 DPI image you grabbed from a website might look okay on your monitor, but it will turn into a pixelated, blurry mess on a t-shirt.
Pro Tip: Always, always start your design in a 300 DPI canvas. You can't just stretch a low-res image bigger and hope for the best—it simply doesn't work that way. This is probably the single most important rule for getting clean, crisp prints.
If you're working with a design that's too small, understanding image upscaling techniques can be a lifesaver, but starting with a high-quality file is always the best bet.
Also, you have to save your file with a transparent background. A DTF printer prints exactly what it sees. If your file has a white box behind your design, that white box is getting printed right onto your transfer. The best file formats for the job are PNG, AI, and PDF because they all support transparency.
Vector vs. Raster: What You Really Need to Know
Knowing the difference between vector and raster files will save you so many headaches down the road. It’s pretty simple once you get the hang of it.
- Raster Images (think PNG, JPG): These are built from tiny little squares called pixels, kind of like a digital mosaic. The problem is, they are stuck at a specific resolution. If you try to make them bigger, you're just stretching the pixels, which leads to that dreaded blurry, blocky look.
- Vector Images (think AI, SVG, EPS): These are made from mathematical paths, lines, and curves. The best analogy is a rubber band—you can stretch it to any size you want, and it stays perfectly smooth. A vector logo can be scaled from a tiny pocket print to the side of a bus with zero loss in quality.
For this reason, designing in a vector-based program like Adobe Illustrator is always the best way to go. It gives you complete freedom to resize your designs for any DTF transfer size you need without ever sacrificing quality.
This focus on quality is a huge reason the DTF industry is booming. Market research is forecasting the Direct to Film Printing Market will hit roughly USD 4.15 billion by 2032. A big slice of that pie, the Cold Peel Film segment, is expected to top USD 2.15 billion as more and more businesses demand top-notch, reliable materials. You can dig into these market projections over at KBV Research.
Advanced Sizing Strategies That Boost Your Profits
Getting the hang of standard DTF transfer sizes is a great first step. But the real magic happens when you turn that knowledge into a business strategy that actually makes you more money.
Smart sizing isn't just about making a t-shirt look good; it's about making your entire operation more efficient and profitable. This means thinking like a manufacturer and squeezing every last bit of value out of every inch of transfer film you buy.
The most powerful way to do this is with gang sheeting. Let’s say you get an order for 10 adult shirts, 10 youth shirts, and 10 hats. Instead of buying three different transfer sets, you’d arrange all 30 designs onto a single, large sheet of film. That’s gang sheeting in a nutshell, and it’s a game-changer for cutting waste and dropping your cost per print.
Building an Efficient Gang Sheet
Think of building a gang sheet like a game of Tetris. Your goal is to fit as many designs as possible onto one sheet, leaving as little blank space as you can.
For instance, on a single 22" x 60" roll, you could easily fit a mixed order by placing:
- Ten 11-inch adult logos
- Ten 8-inch youth logos
- Ten 4-inch hat logos
By nesting the smaller designs around the larger ones, you consolidate everything. You pay for the film once, not three times. That efficiency goes straight to your bottom line, boosting your profit margin on every single item. If you want to explore more ways to save money, check out our guide on how to reduce production costs.
Sizing as an Upsell Opportunity
Beyond just saving money, being flexible with your sizing opens up new ways to make money. When you offer a variety of DTF transfer sizes, you can serve a bigger audience and create some pretty sweet upselling opportunities.
Think about it. Could you add a matching pocket logo to that full-front design? What about a sleeve print on that hoodie? These little add-ons can make a big difference.
Offering a small, branded add-on like a neck tag or sleeve logo for a couple of extra dollars can significantly boost your average order value over time. It’s a simple upsell that customers often appreciate for the added custom touch.
This kind of strategic thinking is crucial. The market for textile transfer paper was valued at USD 3.3 billion in 2025 and is expected to climb to USD 5.8 billion by 2035. More specifically, the DTF transfer film market is projected to grow from USD 1.2 billion in 2024 to USD 2.85 billion by 2033, according to market analysis from ResearchIntelo.com. By using techniques like gang sheeting and smart upselling, you put your business in a great position to grab a piece of that growth.
Common Questions About DTF Transfer Sizing
Even with charts and guides, real-world questions always pop up when you're about to press a new order. Let's walk through some of the most common sizing questions to get rid of any confusion and get you printing with confidence.
Do I Need Different Sizes for S, M, L, and XL Shirts?
This is easily the number one question we hear, and the short answer is: probably not. For the bulk of adult unisex tees from Small all the way up to XL, sticking with one standard transfer size is the smartest, most cost-effective way to go.
A full-front design that’s around 10-11 inches wide is a fantastic "one-size-fits-most" solution. Sure, the graphic will look a little bigger on a small and a bit smaller on an XL, but the proportions hold up surprisingly well across that core size range. This simple trick saves you the massive headache and expense of ordering multiple transfer sizes for just one design.
Now, when you’re dealing with bigger size jumps, that’s when you need to start scaling. For plus sizes like 2XL and up, bumping the width to 12 inches or more helps keep the design from looking lost on the shirt. The same goes for the little stuff—youth and toddler apparel will definitely need their own scaled-down transfers to look right.
What Is the Largest Possible DTF Transfer Size?
The biggest single transfer you can get is really limited by one thing: the width of the film roll the printer uses. The industry standard for most commercial DTF printers is a 24-inch wide roll.
After accounting for a small margin on the edges, this gives you a maximum printable width of about 22-23 inches. The length is a different story. Since the film comes on a continuous roll, you can print transfers that are several feet long. This opens up some cool possibilities:
- Creating huge, oversized graphics for the back of a jacket or hoodie.
- Printing long strips of fabric for all-over patterns.
- Ganging up dozens of smaller logos onto one massive sheet for an incredibly efficient print run.
How Can I Preview How My Design Will Look?
Want to avoid that sinking feeling when a transfer is way too big or small? Make a paper mockup. It’s the oldest trick in the book for a reason. Before you hit "order," just print your design on regular paper at the exact size you plan to use. You might need to tape a couple of sheets together for bigger graphics, but it's worth it.
Lay that paper template right on the shirt. This quick, zero-cost reality check shows you exactly how the design will sit and scale on the actual garment. It's a simple step that can save you from a costly mistake and make sure the final product is perfect.
What Resolution Should My Artwork Be for a Large Transfer?
This rule is a big one, and it applies to every single print, regardless of size: your artwork needs to be 300 DPI (Dots Per Inch) at the final print dimensions. Think of this as the non-negotiable standard for professional quality.
Trying to blow up a low-resolution image (like a 72 DPI file you grabbed from the web) to fit a large transfer is a recipe for disaster. The result will be blurry, pixelated, and just plain unprofessional. A printer can only be as good as the file you give it.
Always, always start your design on a 300 DPI canvas. The even better option? Work with vector files like AI, SVG, or EPS. Vector graphics are made from mathematical equations, not pixels, which means you can scale them to the size of a billboard with zero loss in quality. They guarantee a crisp, sharp print every single time.
At Cobra DTF, our goal is to make getting the perfect transfer easy. Whether you need standard sizes or want to build a custom gang sheet, our high-quality, USA-made transfers are vibrant, durable, and ready to press. To get your next project started with fast, reliable shipping, check out our DTF transfer options.