
Choosing Printers for Heat Transfer Paper A Complete Guide
The best printer for heat transfer paper isn't a one-size-fits-all answer. It really comes down to what you want to create. For those rich, detailed designs with a soft touch that work on any color fabric, an inkjet printer loaded with quality pigment ink is the hands-down winner. But if you’re chasing speed and sheer durability on light-colored items, a laser printer often pulls ahead.
Finding Your Ideal Heat Transfer Printer
Picking the right printer is your first big decision on the path to making custom apparel. It’s less about finding the single "best" printer on the market and more about matching the machine to your specific business goals, the products you want to make, and your creative style. You wouldn't use a sledgehammer to hang a picture frame, right? Same principle.
Your choice really hinges on a few key things: the kinds of fabrics you plan to use, how complex your designs are, how many shirts you need to print, and, of course, your budget. Each type of printer comes with its own set of pros and cons that directly affect how your final product looks, feels, and holds up over time. Getting this right from the start saves you a ton of headaches and money down the road.
This decision tree can help you see which path makes the most sense based on what matters most to you—quality, speed, or maybe even outsourcing the whole printing part.
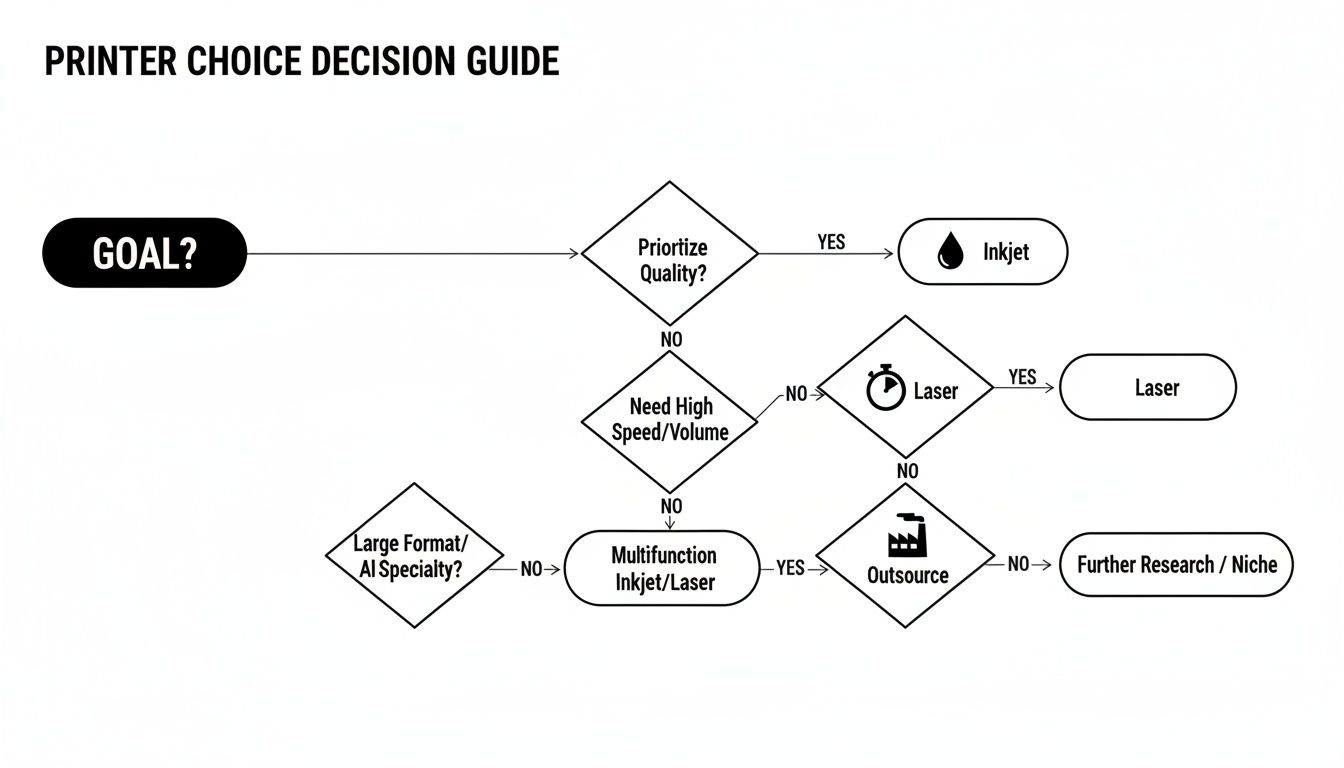
As you can see, the flowchart points to inkjet printers for top-tier, full-color designs, while laser printers are often the workhorses for high-speed, durable graphics.
The Three Main Paths for Your Business
To make this choice even clearer, let's look at the three main routes you can take. Each one is built for a different kind of business, from the hands-on creator to the entrepreneur ready to scale.
Here's a quick side-by-side to help you weigh your options at a glance.
Quick Guide to Printer Technologies
| Technology | Best For | Key Advantage | Main Limitation |
|---|---|---|---|
| Inkjet | Photorealistic prints, vibrant colors, soft feel on all fabrics | Incredible versatility and color accuracy | Slower print speeds; requires specific pigment inks for best results |
| Laser | High-volume text/graphics on light garments, durability | Speed, efficiency, and wash-fastness | Stiffer feel on fabric; less ideal for complex photos on darks |
| DTF Transfers | Outsourcing professional quality without equipment investment | Consistent, top-tier results; no maintenance or learning curve | Per-print cost is higher than DIY; reliant on a third-party supplier |
This table lays out the core trade-offs, helping you quickly identify which technology aligns with your immediate needs and long-term vision.
- The Inkjet Path: This is the way to go if you’re all about photorealistic quality and eye-popping colors. Using pigment inks, inkjets produce soft, flexible transfers that look amazing on both light and dark fabrics, giving you incredible creative freedom.
- The Laser Path: If your main game is cranking out bold text and graphics on light-colored apparel with a focus on durability, a laser printer is a serious contender. The toner fuses into a tough print that can take a beating in the wash.
- The Hassle-Free Alternative: But what if you could get professional-grade results without ever touching a printer? That’s where ordering ready-made Direct-to-Film (DTF) transfers changes the game.
By letting a specialist like Cobra DTF handle your printing, you get access to industry-leading technology and perfectly consistent, vibrant transfers without the steep learning curve or upfront cost. It’s a smart move that lets you focus on what you do best: designing and growing your business.
This approach lets you sidestep the headaches of printer maintenance, ink clogs, and finding the right paper. For a lot of small businesses and growing brands, it's simply the fastest way to get a professional product to market. To see how these methods stack up against other options, check out our guide on the best machine for printing t-shirts. Next, we’ll dive deeper into the tech behind each of these choices.
Understanding Your Printer Technology Options
Choosing the right printer for heat transfer paper is a lot like picking the right tool for a painting job. Are you creating a detailed portrait that needs the fine strokes of a paintbrush? Or are you making a bold graphic that needs the clean, sharp lines of a stencil? Each technology—inkjet, laser, and Direct-to-Film (DTF)—has its own way of getting an image onto a garment.
This decision isn't just about technology; it's about the final look, feel, and durability of your work. Getting a handle on how each one works takes the guesswork out of the equation and puts you in control, letting you match the right process to your creative vision.
Let's break down the main players.
The Inkjet Method: For Detail and Vibrant Color
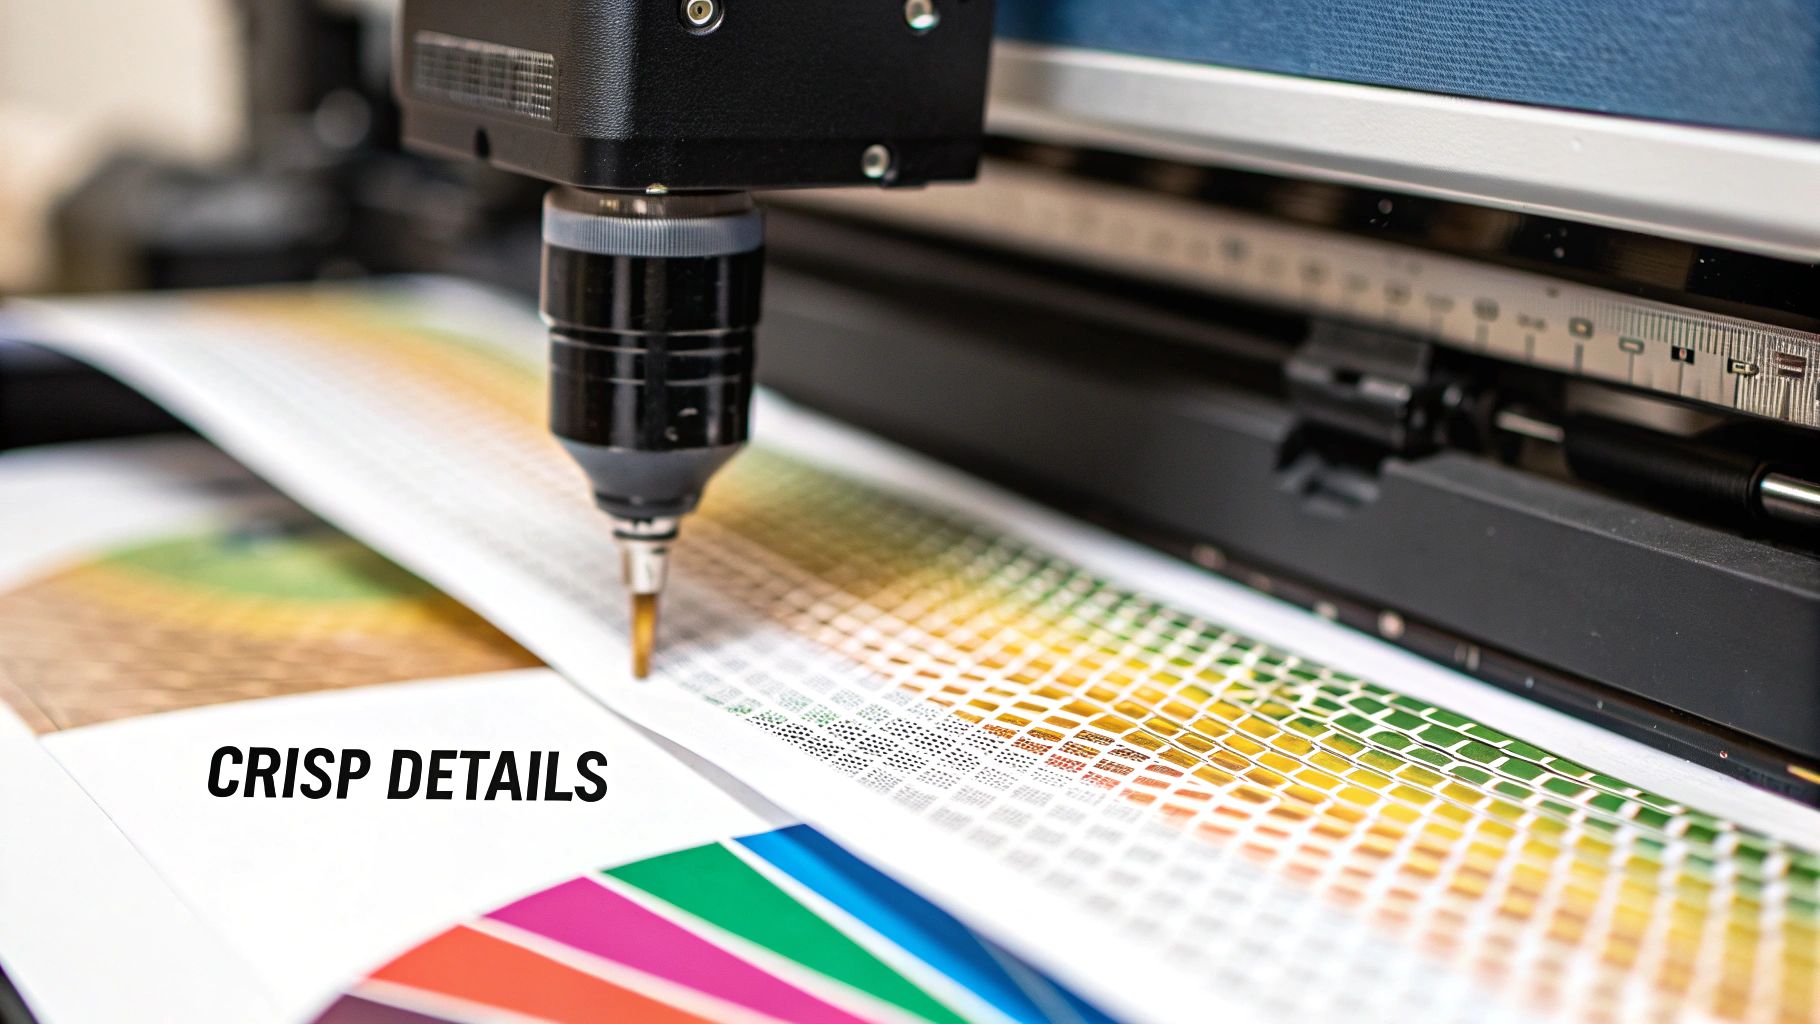
Think of an inkjet printer as a meticulous airbrush artist. It uses a sophisticated printhead to spray thousands of microscopic ink droplets onto the heat transfer paper. This method gives you incredible detail and beautiful color blending, making it the go-to choice for photorealistic images and complex graphics with smooth gradients.
The real secret to making inkjet transfers last is using the right ink. You need to use pigment-based inks, not the standard dye-based inks that come with most home printers. Pigment particles are like tiny bits of solid color suspended in liquid; they sit on top of the fabric's fibers instead of soaking in. The result? A transfer that stands up to sunlight and washing without fading away.
- Best For: High-detail, full-color designs on both light and dark fabrics.
- Analogy: An airbrush artist carefully layering colors for a vibrant, detailed mural.
- Result: A soft, flexible design that feels like it's part of the fabric.
The Laser Method: Built for Speed and Durability
If the inkjet is the artist, the laser printer is the workhorse production press. Instead of liquid ink, it uses a super-fine powder called toner. A laser "draws" your design onto a charged drum, which picks up the toner. That toner is then transferred to your paper and fused onto it with heat.
This process is perfect for creating designs with sharp, crisp lines and solid blocks of color, like logos and text. Laser transfers are famous for their durability—they can handle countless washes without cracking or fading, especially on light-colored cotton and polyester blends.
The trade-off for all that speed and toughness is often the feel. Laser transfers can sometimes feel a bit thicker or stiffer on a shirt compared to an inkjet print, and they might not capture the subtle nuances of a photograph quite as well.
To get a full picture of printing, it's helpful to know about different printer technology options, such as thermal printers, which are essential tools in industries like e-commerce. While not used for apparel, understanding the broader landscape gives you context. This isn't just a hobbyist craft; heat transfer is big business. In fact, the global heat transfer printing market hit USD 4,214.8 million in 2024 and is expected to climb to USD 6,625.4 million by 2030.
A Quick Word on Sublimation
You've probably heard of sublimation printing, too. It’s another form of heat transfer, but it works in a completely different way. Sublimation uses special inks that turn into a gas under heat, permanently dyeing the fibers of polyester fabrics. The prints are incredibly vibrant and have absolutely no feel, but it only works on light-colored polyester.
Curious to learn more? We have a whole guide that explains what sublimation printing is in detail.
Here’s the key difference to remember: inkjet and laser transfers create a layer on top of the fabric. Sublimation dyes the fabric itself. That's why inkjet and laser are so versatile for cotton and other natural fibers, which are the bread and butter of the custom apparel world.
Key Printer Features for Flawless Transfers
Picking the right type of printer is just the starting line. The real magic—or mishap—happens in the details. The specific features of your printer are what will make or break the quality of your final products.
Think of it like buying a car. Two cars might both be sedans, but engine size, suspension, and tire quality determine how it actually performs on the road. The same goes for printers. Getting these specs right is what separates amateur work from professional-grade apparel that’s sharp, vibrant, and built to last.
Let's break down the technical must-haves your printer needs to deliver perfect results, every single time.
Decoding Print Resolution for Sharp Graphics
Print resolution is all about Dots Per Inch (DPI). This number tells you exactly how many microscopic dots of ink a printer can squeeze into a one-inch line. More dots mean a sharper, more detailed image. It's that simple.
Imagine you're painting a mural. A low DPI is like using a big, clunky roller—you'll get the job done, but forget about fine lines or crisp edges. A high DPI is like having a set of fine-tipped brushes, letting you create stunning detail that holds up even when you're looking at it up close.
For heat transfer work, consider a minimum resolution of 1200x600 DPI your entry ticket. But if you want to produce photorealistic images or intricate graphics that pop, you really should be aiming for 4800x1200 DPI or higher. The difference is night and day.
The Critical Choice: Pigment vs. Dye Inks
This is probably the single most important decision you'll make when it comes to ink. Your standard, everyday office printer almost certainly uses dye-based inks. These inks are like food coloring in water—they soak right into the paper fibers to create color.
The problem is, they do the exact same thing on a t-shirt. Dye-based inks are water-soluble, which means they fade quickly in sunlight and can bleed or wash out entirely after just a few laundry cycles. That’s a surefire way to get unhappy customers.
For any kind of durable, sellable apparel, pigment-based inks are non-negotiable.
- Pigment Inks: These are more like microscopic flecks of solid color suspended in a liquid. Think of them as tiny, high-quality paint particles.
- How They Work: Instead of soaking in, pigment particles bond to the surface of the fabric. This creates a layer of color that is incredibly durable, water-resistant, and holds up against UV fading.
- The Result: Your designs stay sharp and vibrant, wash after wash.
This is exactly why so many pros dedicate a specific inkjet printer (often an Epson EcoTank or a capable Canon model) just for their heat transfer work, ensuring it’s only ever running with pigment inks. For a deeper dive into the printing process, check out our guide on how to print on transfer paper.
Mastering Media Handling for Jam-Free Printing
Finally, you have to think about how the printer actually feeds the paper. Heat transfer paper isn't like your flimsy copy paper; it's thicker, heavier, and more rigid. A printer with a standard front-loading tray just wasn't designed for this.
Those front trays force the paper to make a tight U-turn to get to the print heads, which is a recipe for jams, misfeeds, and wasted materials when you're using heavy stock.
Always look for a printer with a rear paper feed tray. This gives the transfer paper a much straighter, gentler path through the printer. It drastically reduces the risk of jamming and ensures your expensive transfer sheets feed through smoothly every time. A straight paper path is a must-have for a frustration-free workflow.
Building Your Heat Transfer Workflow
Getting a great printer is a huge first step, but it's really just one piece of the puzzle. To create professional-quality custom apparel, you need a repeatable process—a workflow that reliably turns a digital file into a product you can be proud of. Mastering this workflow is what separates the hobbyists from the pros.
Think of it this way: your printer is the engine. It’s got the power, but you still need a steering wheel, pedals, and a transmission to actually get anywhere. This section is all about the rest of the machinery—the software that controls your color, the heat press that makes it permanent, and the little techniques that make all the difference.
Color Management and RIP Software
Ever printed a picture that looked incredible on your screen, only to have it come out of the printer looking dull, washed-out, or just… wrong? That's a classic color management headache. The problem is that every device, from your monitor to your printer, speaks a slightly different "color language."
This is where Raster Image Processor (RIP) software becomes your best friend. A RIP is essentially a master translator for color. It takes your design file and converts it into a precise set of instructions the printer can understand perfectly. That way, the Fiery Red you picked on your monitor is the exact same Fiery Red that ends up on the transfer sheet.
While you don't absolutely need it to get started, RIP software gives you incredible control over ink levels, color profiles (like ICC profiles), and the white ink layers crucial for printing on dark fabrics. It's the secret to getting dead-on color accuracy and consistency, print after print.
For anyone serious about turning this into a business, investing in a good RIP is a game-changer. It elevates your work from "pretty good" to truly professional.
Mastering Your Heat Press Settings
The heat press is where the real magic happens. It’s not just about cranking up the heat; it’s a delicate dance between three key elements. Nailing this trio is non-negotiable if you want a transfer that looks great and lasts.
- Temperature: This is the heat needed to activate the adhesive on your transfer paper and fuse the ink into the fabric. Too low, and it just won't stick right. Too high, and you can scorch the shirt or ruin the design.
- Time: This is how long you press the garment. It has to be just long enough for a complete bond. Too short, and the edges will peel. Too long, and the colors can yellow or even burn.
- Pressure: This is the force the press applies. It needs to be firm and perfectly even across the entire design. Uneven pressure is a surefire way to get peeling corners and patchy, faded spots.
These settings are never one-size-fits-all. A 100% cotton t-shirt needs a completely different recipe than a polyester hoodie. Always, always start with the manufacturer's recommendations for your specific transfer paper and then do your own test presses to fine-tune it. This whole thermal printing market, which includes the printers and presses we rely on, was valued at an impressive USD 43.61 billion in 2025 and is only getting bigger. You can check out more stats on this growing industry at mordorintelligence.com.
From Theory to Flawless Execution
Knowing the concepts is one thing, but putting them into practice is what counts. Here are a few practical tips I’ve learned over the years that will save you a ton of frustration and wasted materials.
- Always Pre-Press Your Garment: Before you even think about placing your transfer, press the blank shirt for 5-10 seconds. This little step removes hidden moisture and any wrinkles, giving you a perfectly flat, dry surface for the transfer to stick to. It makes a huge difference.
- Understand Hot vs. Cold Peel: Your transfer paper will specify whether it's a hot or cold peel. Hot peel means you rip the backing off immediately after opening the press, which usually leaves a softer finish. Cold peel means you have to let it cool down completely before removing the backing, often resulting in a glossier, more vibrant look. Do the wrong one, and you've just ruined a shirt.
- Use a Teflon Sheet: A simple Teflon sheet or even a sheet of parchment paper placed over your transfer is cheap insurance. It protects your garment from direct contact with the hot platen and stops any stray ink from messing up your press. Don't skip this.
Is the Best Printer for Heat Transfer Paper... No Printer at All?
We've just walked through the entire process of setting up an in-house printing operation, from picking the right machine to wrestling with software. It’s a lot to take in. But what if the smartest move you could make is to skip buying a printer altogether?
While the dream of DIY creative control is appealing, the reality is often a grind. It’s a world of high upfront costs for equipment, surprise repair bills, and the sheer waste of ink and paper that comes with getting your settings just right. And we haven't even mentioned the single biggest headache for anyone with an inkjet printer: the dreaded clogged printhead. One bad clog can shut down your entire business for days.
This is where you have a choice. You can become a part-time printer technician, or you can focus on what actually makes you money—designing, marketing, and selling your products. Opting for ready-made Direct-to-Film (DTF) transfers lets you do just that.
Forget the Headaches, Get Professional Quality Now
Ordering pre-made transfers is less about giving up and more about leveling up. It's a strategic decision to bypass the entire learning curve and operational mess of printing in-house. Think about it: you get access to industrial-grade printing technology without spending a single dime on a machine.
From your very first order, you get consistent, vibrant, professional-grade prints. There’s no trial-and-error, no wasted materials, and no late nights spent trying to figure out why your colors look wrong. You just upload your design and get a perfect, ready-to-press transfer delivered to your door.
This isn't about cutting corners; it's about getting premium results without the operational drag. It puts you on the same level as the big players, letting you offer customers the same high-quality, durable prints they produce.
This is a massive and growing industry for a reason. The global market for the technology behind these professional transfers hit $47.37 billion in 2023 and is expected to climb to $70.39 billion by 2032. As you can see in market reports on sites like Zion Market Research, the demand is huge because the results are undeniable. Companies like Cobra DTF invest in this advanced equipment so you don't have to.
The Real-World Benefits of Outsourcing Your Printing
Choosing ready-made DTF transfers isn't about losing control. It's about gaining focus, efficiency, and the freedom to grow your business faster. Here’s what that looks like in practice.
- Zero Upfront Investment: Forget dropping thousands of dollars on a professional printer, RIP software, and a heat press. You can start selling top-tier custom apparel with almost no initial cash outlay for printing gear.
- Costs You Can Actually Predict: When you print yourself, your cost per item is a moving target. It changes with ink consumption, botched prints, and unexpected maintenance. With ready-made transfers, you know the exact cost of every print, every time. Pricing for profit becomes simple.
- Scale Up (or Down) Instantly: Got a one-off custom order for a single shirt? No problem. Suddenly land a corporate gig for 500 hoodies? Easy. Outsourcing means you can handle any order volume without worrying if your machine can keep up.
- Focus on What Matters: Your true value is in your designs and your brand, not your ability to unclog a printhead. Every hour spent fiddling with a printer is an hour you’re not designing new products, talking to customers, or making sales.
By partnering with a dedicated DTF supplier like Cobra DTF, you're essentially putting their expertise and industrial machinery to work for your brand. You get reliable, beautiful, and durable transfers every time, letting you build a reputation for quality without the headaches that sink so many small businesses. It's simply a smarter path to building a successful apparel company.
Troubleshooting Common Printing Problems
Sooner or later, every printing setup hits a snag. It's just part of the process. But instead of getting frustrated and wasting expensive paper and ink, it helps to have a game plan for the most common issues that crop up with heat transfer paper.
Let's walk through a few of the biggest headaches, figure out what's really going on, and get you back to printing flawlessly.
Why Are My Colors Faded After Pressing?
This one is incredibly common. You pull a beautiful, vibrant print off your printer, but the second you press it onto a shirt, it looks dull, washed-out, and lifeless. What gives?
The Likely Causes:
- Not Enough Pressure: This is the prime suspect, almost every time. If your heat press isn't clamped down firmly enough, the ink just can't physically bond with the fabric's fibers.
- Wrong Ink for the Job: If you're using the standard dye-based ink that came with your office printer, you're going to have a bad time. These inks are not designed for fabric and will always look faded and bleed when washed. You absolutely need pigment ink.
- Temperature Is Too Low: Heat is the magic ingredient that activates the transfer paper's coating. Without enough of it, you get a weak, partial transfer.
The Solution: Crank up the pressure on your heat press to a firm, even setting. You want to see the texture of the fabric slightly embedded in the paper after you peel it. Confirm you're running pigment inks and that your heat press is set to the paper manufacturer’s sweet spot—usually somewhere between 350-375°F. A quick test press on a scrap piece of fabric can save you a world of hurt.
Why Is My Design Cracking or Peeling After Washing?
There's nothing worse than creating a perfect-looking shirt, only to have the customer send you a picture of it cracking and peeling after a single wash. This isn't a sign of bad ink or paper; it's almost always a flaw in the application process.
Key Insight: Durability isn't just about the ink; it's about a perfect fusion between the transfer and the fabric. Cracking is a clear sign that this bond was incomplete from the start.
The Likely Causes:
- Not Enough Dwell Time: The transfer simply didn't spend enough time under the heat and pressure. The bond needs a few extra seconds to fully cure and become one with the garment.
- Peeling Hot vs. Cold: Every transfer paper has its own rules. If you peel a "cold peel" paper while it's still scorching hot, you're yanking the design away before it has a chance to set. The same goes for leaving a "hot peel" paper to cool down.
The Solution: Try adding another 5-10 seconds to your press time. More importantly, read the instructions that came with your paper! Make sure you are following the specific hot peel or cold peel directions to the letter. A great pro-tip is to always pre-press your shirt for a few seconds to wick out any moisture, which helps the transfer grab on much more securely.
Got Questions? We've Got Answers.
Jumping into the world of heat transfer printing can feel like there's a lot to learn. Let's tackle some of the most common questions people have so you can move forward with confidence.
Can I Just Use My Regular Home Printer?
Technically, yes, but for anything you plan to sell, the answer is a hard no. Here’s why: your standard home inkjet printer almost certainly uses dye-based inks. These inks are water-soluble, which is a disaster for t-shirts. One wash, and you'll see your design bleed, fade, or disappear entirely.
If you're serious about creating apparel that lasts, you absolutely need a printer that runs on pigment-based inks. Pigment inks are made of tiny, solid particles that grab onto the fabric fibers and don't let go. This gives your prints incredible durability against washing and fading from sunlight—the kind of quality customers expect.
What’s the Real Difference Between Paper for Light and Dark Shirts?
It all comes down to the background of the paper itself. Think of it this way:
-
Paper for Light Fabrics: This paper has a clear background. When you press it, only the ink gets transferred. Any part of your design that's white or empty will just be the color of the shirt itself. It’s simple and effective for white, ash grey, or pastel garments.
-
Paper for Dark Fabrics: This type has an opaque, solid white background layer. Your design prints on top of this white base. This is crucial because it acts like a primer, ensuring your colors look bright and vibrant instead of getting lost in the dark fabric. This is also why you often need to trim your designs carefully—otherwise, you'll end up with a white box around your graphic.
Don't even think about using paper for lights on a dark shirt. Your design will look dull and almost invisible. That white base layer on dark-fabric paper isn't optional; it's what makes the whole process work.
Is It Cheaper to Print My Own Transfers or Just Buy Them?
Printing your own transfers can feel cheaper upfront, but you have to look at the whole picture. The initial cost of a good printer, special pigment inks, quality paper, and RIP software can easily run into thousands of dollars.
But it doesn't stop there. You also have to factor in the cost of maintenance, wasted paper and ink during your trial-and-error phase, and—most importantly—your time. Troubleshooting printer issues and color problems can eat up hours you could be spending on growing your business.
For most small businesses and anyone just starting out, buying ready-made DTF transfers is often the smarter financial move. You skip the massive initial investment and the maintenance headaches, get professional-grade quality from day one, and can scale up as much as you want without buying more equipment.
Ready to skip the headaches and get perfect, vibrant transfers every time? Trust Cobra DTF for professional, USA-made DTF transfers that ship fast and deliver incredible results. Explore our options at https://cobradtf.com.