
What Is Sublimation Printing Explained
Sublimation printing is a fascinating way to get a full-color, vibrant design onto a specific type of material. Using a special ink, heat, and pressure, the process actually infuses the design into the item itself.
This technique creates an incredibly durable, high-quality finish. Because the ink becomes a permanent part of the substrate, the image won't crack, peel, or fade over time, making it a go-to method for custom products that need to last.
The Science Behind Sublimation Printing
So, how does a photograph seem to magically become part of a coffee mug? Or how does a complex design permanently dye the fibers of a shirt? It all comes down to a unique chemical process that gives sublimation its name. At its heart, it's a slick bit of science where solid ink turns directly into a gas, skipping the liquid stage entirely.
A great way to picture this is to think about dry ice. When you leave it out, it doesn't melt into a puddle of water; it just vanishes into a cloud of vapor. That’s sublimation in a nutshell, and the ink used in this printing process behaves the same way.
First, your design is printed onto a special kind of transfer paper. This paper is then placed on your blank item (like a polyester t-shirt or a polymer-coated mug) and put into a heat press. The combination of high heat and firm pressure triggers the magic: the solid ink on the paper vaporizes.
This gaseous ink then penetrates the surface of the item. Since sublimation inks are designed to bond with polymers, as the item cools, the ink solidifies and becomes permanently locked into the material's fibers or its special coating.
The result is completely different from a design that's printed on top of a surface, like you'd get with screen printing or a vinyl decal. With sublimation, the ink becomes a part of the surface itself, leaving a smooth, untouchable finish with amazing detail and color.
To give you a clearer picture, here's a quick rundown of what makes a sublimated product stand out.
Key Characteristics of a Sublimated Product
| Characteristic | Description |
|---|---|
| Smooth to the Touch | Because the ink is infused into the substrate, not layered on top, you can't feel the design at all. |
| Vibrant, Full Color | The process allows for millions of colors, producing photorealistic and highly detailed images. |
| Permanent & Durable | The design is scratch-resistant and will not crack, peel, or wash away, even after many uses. |
| Breathable Fabric | On apparel, the process doesn't clog the fabric's pores, so it remains breathable and lightweight. |
These qualities are what make sublimation such a popular choice for everything from performance sportswear to personalized gifts.
A Quick Look at Its History
This clever process isn't exactly new. The foundations for modern dye sublimation were laid way back in 1957 when a French researcher, Noël de Plasse, discovered that certain dyes could go straight from a solid to a gas. This breakthrough was first used to create decorative ceramics and has evolved significantly since then.
The transfer paper is the unsung hero of this entire operation. It acts as the temporary home for the ink before it makes its gaseous journey. In fact, understanding how transfer paper works is crucial to getting great results with almost any heat-based printing. This paper is specially designed to release the ink cleanly under heat, ensuring your design moves perfectly from the paper into the final product.
A Step-by-Step Guide to the Sublimation Process
Okay, so we've covered the science behind sublimation. Now, let's get our hands dirty and walk through how you actually do it. While the chemistry sounds complex, the day-to-day workflow is surprisingly straightforward once you get the hang of it. Think of it as a simple, repeatable recipe.
The whole thing boils down to four main stages: creating your design, printing it onto special paper, getting your blank item ready, and finally, applying the heat that makes the magic happen. Each step builds on the last, so getting one part wrong can affect the final result. But don't worry—follow these steps, and you'll sidestep the common mistakes that trip up beginners.
This infographic gives you a great visual of that core transformation, showing the ink going from a solid on paper to a gas that becomes part of the final product.
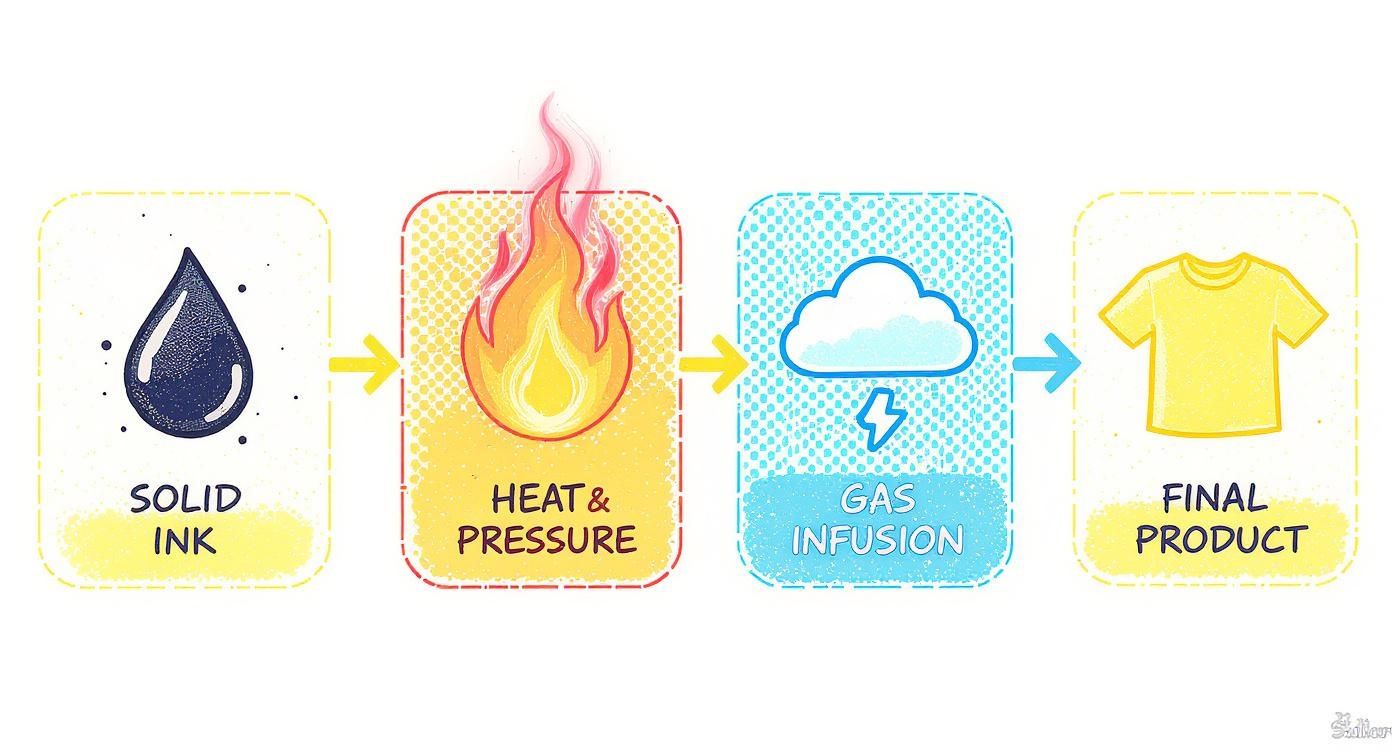
As you can see, it’s all about using heat and pressure to make the ink bond into the material’s fibers, not just sit on top like a sticker.
Stage 1: Design and Print
Everything starts on the screen with your digital artwork. For sublimation to really pop, your design needs to be sharp. We're talking a high-resolution file, with 300 DPI (dots per inch) being the gold standard. If you start with a low-quality, pixelated image, you’ll get a blurry, pixelated print. No amount of fancy equipment can fix a bad source file.
Once your design looks good, you print it out—but not on just any paper. You'll need to use special sublimation transfer paper loaded into a printer that’s filled with sublimation ink. This is a dedicated setup; your regular home office printer won't work here.
Here’s a crucial tip: you must mirror your image before printing. The design gets printed in reverse so that when you press it onto your item, it faces the correct way. It’s a simple checkbox in your software—usually labeled "mirror image" or "flip horizontal"—but forgetting it is a classic rookie mistake.
Stage 2: Prepare Your Substrate
In the printing world, the blank item you're decorating—be it a mug, t-shirt, or keychain—is called a substrate. Prepping it properly is a small step that makes a huge difference in the final quality.
First, clean the surface meticulously. If you're working with something hard like a ceramic mug, a quick wipe with an alcohol swab gets rid of any dust or fingerprints. For fabrics, grab a lint roller and go over the surface thoroughly to pick up any stray fibers or dust.
Why is this so important? During the heat press stage, any tiny speck of lint or dust left on the substrate will absorb the ink and turn into a permanent, ugly blue or black dot on your finished product. It's one of the most frustrating (and avoidable) errors.
For apparel, it's also a great idea to "pre-press" the garment for about 5-10 seconds. Just place it in the heat press and close it briefly. This irons out wrinkles and gets rid of any lingering moisture, giving you a perfectly flat, dry canvas for your design.
Stage 3: Secure and Align the Transfer
Now it's time to marry your design to your substrate. Carefully place the printed transfer paper face-down onto your item. Take a moment to get the alignment just right—make sure it's centered and straight.
Once it's positioned perfectly, you need to lock it in place with heat-resistant tape. This special tape is designed to handle the intense heat of the press without melting, peeling, or leaving behind any sticky gunk. Taping the paper down prevents it from wiggling around, which can cause a blurry, smeared effect known as "ghosting."
Seriously, don't even think about using regular office tape. It will melt instantly, ruining both your item and potentially your heat press.
Stage 4: Apply Heat and Pressure
This is where the transformation happens. You’ll place your item, with the transfer paper taped on, into a heat press. The press delivers the three key ingredients needed to trigger sublimation:
- Temperature: Usually somewhere between 380°F and 400°F (190°C to 205°C).
- Time: This can be anywhere from 45 seconds for a shirt to several minutes for a thick ceramic tile.
- Pressure: You need firm, even pressure to ensure the transfer paper makes perfect contact with the substrate.
These settings are not one-size-fits-all. A polyester shirt needs a different time and temperature than a metal sign. Always check the recommendations from the manufacturer of your blank substrate—they've done the testing for you.
When the timer beeps, open the press, carefully remove your item (it will be very hot!), and peel back the paper. You'll be left with a vibrant, permanent design infused directly into the surface.
Your Essential Sublimation Printing Toolkit
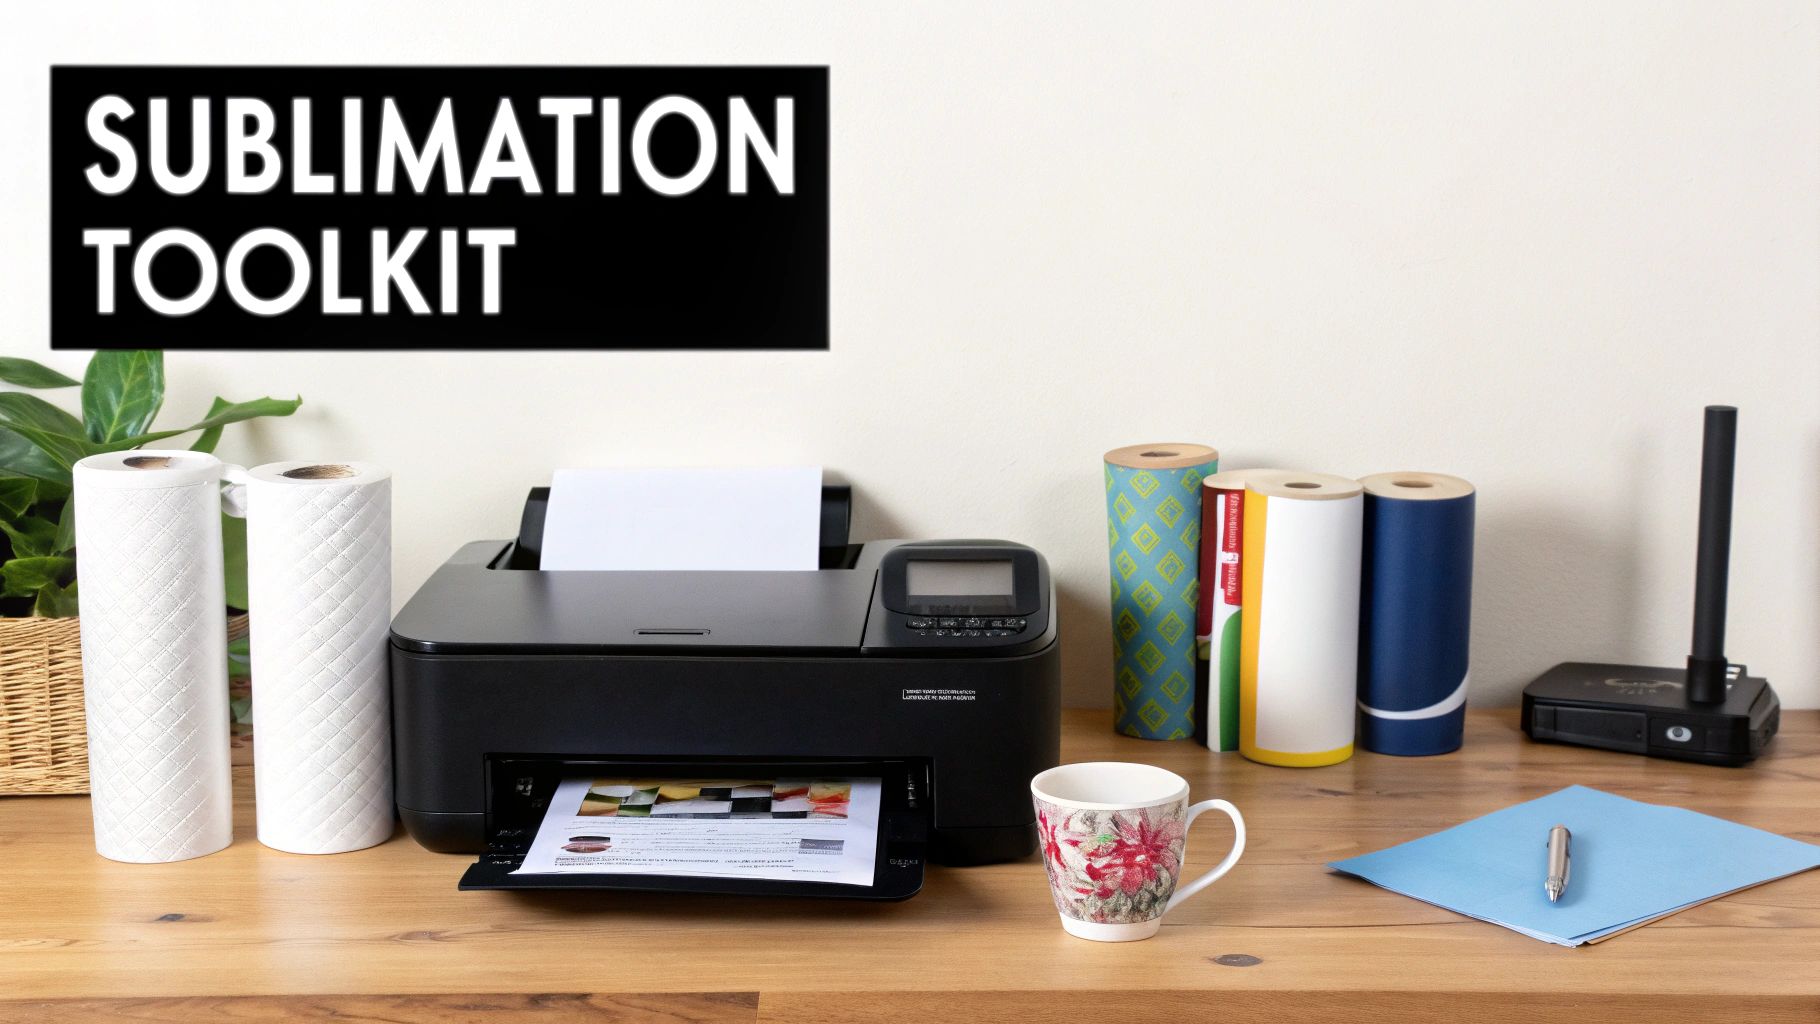
Jumping into sublimation is exciting, but your success really boils down to having the right gear from the get-go. Assembling your toolkit is like prepping ingredients for a favorite recipe—each item has a specific, vital role to play in getting that perfect result. It's not just about the printer; it's a complete system where every piece has to work in harmony to create those jaw-dropping, permanent designs.
Think of it like this: your printer and ink create the potential, but it's your heat press that actually brings it to life. Let’s walk through the essential equipment you'll need, from the big machines down to the small-but-mighty accessories that guarantee a flawless finish.
The Core Machines
At the heart of any sublimation setup are two absolute workhorses: a dedicated printer and a quality heat press. These are your non-negotiables and will be the biggest part of your initial investment.
-
Sublimation Printer: You can’t just grab any old desktop printer for this job. You need a dedicated sublimation printer, like an Epson SureColor F170, or a standard inkjet printer that has been specifically converted for sublimation use. These printers are built to handle the unique properties of sublimation inks.
-
Heat Press: This is where the magic really happens. A heat press delivers the high, consistent temperature and even pressure needed to turn the solid ink into a gas that infuses your material. The type of press you choose depends entirely on what you want to make. A flat press is your go-to for t-shirts and signs, while specialized mug or tumbler presses are shaped for drinkware.
A reliable heat press is a cornerstone for almost any kind of apparel decoration, making it a fantastic and versatile investment. To see how it fits into other methods, check out our guide on heat transfer shirt printing.
Inks and Papers
The supplies you run through your machines are just as critical as the hardware itself. Using the wrong ink or paper is a surefire way to end up with faded colors, blotchy prints, and a lot of frustration.
Sublimation Ink is special. It’s chemically designed to go from a solid to a gas when heated, which is what allows it to permanently bond with polymer-coated materials. If you try to use standard inkjet ink, it will just sit on top of the paper and make a mess.
Sublimation Transfer Paper is also engineered for one job. It has a special coating that holds the ink droplets perfectly but releases them cleanly as a gas under heat. Regular copy paper, on the other hand, just soaks up the ink and won't let it go, resulting in a blurry, dull mess.
Remember: The quality of your prints is a direct reflection of the quality of your supplies. Skimping on ink or paper might save a few bucks upfront, but it'll cost you more in wasted materials and headaches down the road.
Essential Accessories and Software
The "big two" machines get all the glory, but a handful of smaller tools and the right software are the unsung heroes of a professional sublimation setup. Without them, you'll be fighting with alignment issues, stray marks, and inconsistent results.
Here’s a quick shopping list of the must-have accessories:
- Heat-Resistant Tape: This stuff is a lifesaver. It withstands temperatures up to 400°F (205°C) and holds your transfer paper securely in place, preventing the dreaded "ghosting" effect that causes blurry edges.
- Protective Paper (Butcher Paper): Always place a sheet of this above and below your item in the press. It protects your heat press platen from stray ink and stops any color from bleeding through onto your equipment.
- Lint Roller: This is non-negotiable for fabrics. A quick roll removes tiny fibers you can't even see, which would otherwise turn into noticeable blue or black specks on your final design.
- Design Software: You’ll need a program like Adobe Photoshop, Affinity Designer, or Silhouette Studio to create your graphics and, most importantly, mirror them before printing.
- Specialized Jigs: When you’re sublimating uniquely shaped items like phone cases, you need tools for precision. For example, a good phone case mold or jig ensures your design is perfectly centered and wrapped every single time.
Choosing the Right Materials for Sublimation
The incredible results you get with sublimation all boil down to one thing: using the right materials. This isn't like screen printing, where ink sits on top of a surface. Sublimation is a chemical process, a true fusion of ink and material.
At the heart of this process is polyester. The magic happens because sublimation ink is engineered to bond exclusively with polyester polymers. When you apply heat, the pores of the polyester open up, allowing the vaporized ink to seep in. As it cools, those pores close, locking the design inside the material forever.
This is exactly why you can't sublimate on 100% cotton. Being a natural fiber, cotton simply doesn’t have the right polymer structure for the ink to grab onto. Try it, and you'll end up with a faint, muddy-looking design that will likely wash away in the first laundry cycle.
The Polyester Rule for Fabrics
When you're printing on apparel, the golden rule is straightforward: the more polyester, the better the print.
A 100% polyester shirt will give you those jaw-droppingly vibrant, photorealistic results that sublimation is famous for. The colors pop, and every detail is crisp and sharp.
You can, however, print on polyester blends. Just know that there's a trade-off. A shirt made of 50% polyester and 50% cotton will only accept the ink into half of its fibers. The result is a faded, "vintage" or "heathered" look. This can be a great aesthetic if it’s what you’re going for, but it won’t give you that bright, bold finish.
For the best results, stick with fabrics that have at least a 65% polyester count. Anything lower will look significantly washed out and might not live up to your quality standards.
The strong bond between sublimation and polyester is no accident. The development of this printing method is tied directly to the invention of synthetic fibers. After British scientists first patented the polymer for modern polyester back in 1941, the stage was set for new printing possibilities. By the late 1980s, this powerful combination made sublimation the go-to method for creating durable and vibrant sportswear.
Want to learn more about the differences between these two fabric giants? Check out our in-depth guide on cotton vs polyester.
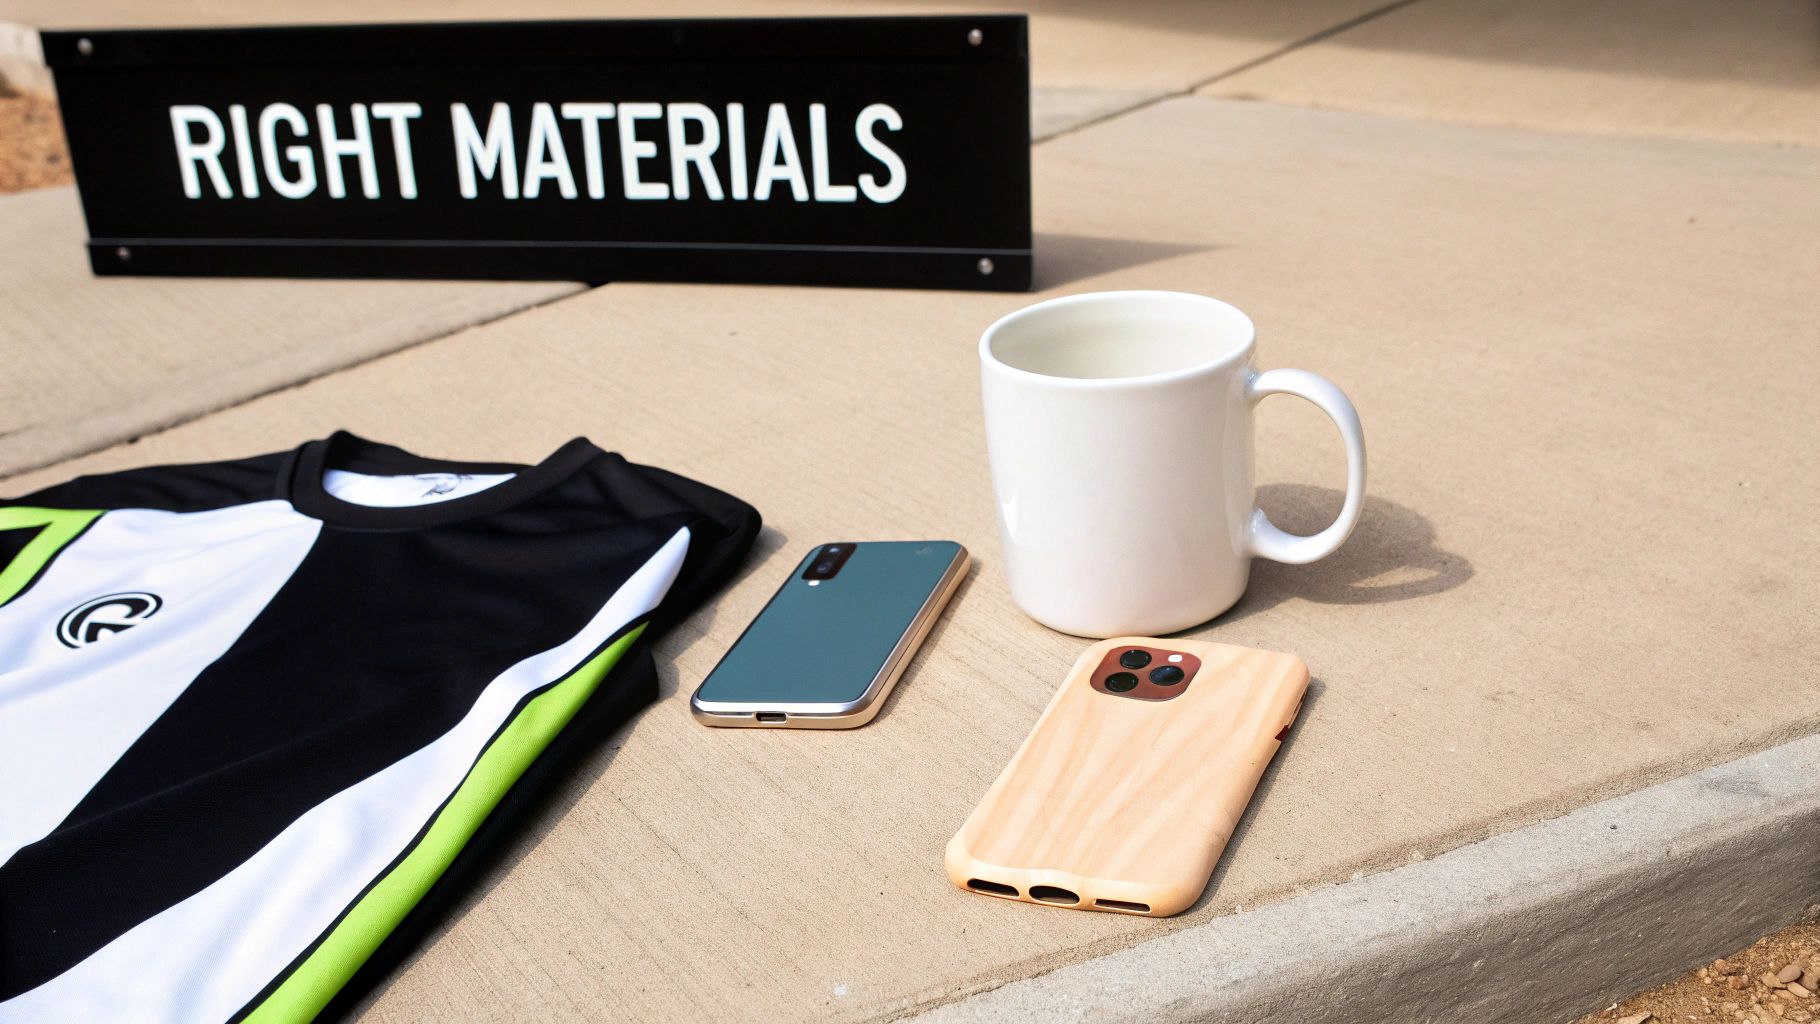
Beyond Apparel: Hard Surface Substrates
The world of sublimation printing goes way beyond t-shirts. Thanks to special polymer coatings, you can transfer your designs onto a massive range of hard-surface items, often called "substrates" or "blanks."
These products come from the manufacturer with a special polyester-based coating already applied, making them ready for your heat press right out of the box. This opens up a whole world of products you can customize.
Some of the most popular items include:
- Drinkware: Ceramic mugs, stainless steel tumblers, and water bottles are huge sellers, especially for personalized gifts.
- Home Decor: You can create custom coasters, photo slates, metal wall art, and even decorative tiles.
- Tech Accessories: Phone cases, mousepads, and laptop sleeves are perfect canvases for sublimation.
- Signage and Awards: Aluminum sheets and award plaques can be sublimated for a high-quality, professional finish that lasts.
The most important thing to remember is that you can't just pick up any old mug from a department store and expect it to work. You have to use items specifically sold as "sublimation-ready" or "for sublimation." Without that special coating, the ink has nothing to bond with, and your transfer will fail.
Sublimation Compared to Other Printing Methods
To really get a feel for what makes sublimation printing special, it helps to see how it stacks up against the other big names in custom printing. Each method has its own sweet spot—its own set of pros, cons, and perfect use cases. The right choice for you really boils down to what you’re trying to create, the materials you're working with, and your budget.
Think about decorating a t-shirt. With sublimation, the ink literally becomes part of the fabric's fibers. You can't feel the design at all. Run your hand over it, and it feels just like the original material. Methods like HTV or screen printing, on the other hand, place a layer of material on top of the fabric. It works, but you can definitely feel a different texture where the design is.
Sublimation vs. Direct to Film (DTF)
Direct to Film (DTF) is a serious contender and often the go-to alternative when sublimation isn't an option—especially for cotton or dark-colored fabrics. In DTF, you print a design onto a special film and then use a heat press to transfer it onto the item. Unlike sublimation's infusion process, a DTF print sits on the surface, creating a soft, flexible layer that’s surprisingly durable.
- Material Versatility: DTF is the clear winner here. It works beautifully on cotton, polyester, blends, and both light and dark colors. Sublimation is much pickier, demanding light-colored polyester or polymer-coated surfaces.
- Feel & Breathability: Because the ink becomes one with the fabric, sublimation has zero feel and doesn't affect breathability. A DTF print adds a very thin, smooth layer on top.
- Color Vibrancy: Honestly, both methods are fantastic for producing vibrant, full-color, photo-quality images.
Sublimation vs. Screen Printing
Screen printing is the old-school workhorse of the industry, and for good reason. It’s unbeatable for large runs of simple designs. The process involves pushing ink through a mesh stencil (the "screen") onto the surface. The catch is that every single color in your design needs its own dedicated screen, which makes the setup process for complex, multi-color designs both time-consuming and expensive.
But if you need a one-color logo on 500 shirts, screen printing is almost always the more economical choice. It’s helpful to compare sublimation not just to apparel methods but also to traditional high-volume techniques like offset printing for paper, which also thrives on large quantities.
Sublimation is the star for one-off custom pieces or small batches with intricate, full-color graphics. Screen printing is the undisputed king of high-volume orders with just a few colors.
Sublimation vs. Heat Transfer Vinyl (HTV)
Often the starting point for crafters and small shops, Heat Transfer Vinyl (HTV) is all about cutting designs from colored vinyl sheets and pressing them onto fabric. It’s perfect for names and numbers on team jerseys or simple, bold graphics.
The big limitation with HTV is that it just can't handle photos or complex, multi-color artwork gracefully. Every color has to be cut out and layered by hand, which quickly becomes a nightmare for anything detailed. Sublimation, however, prints unlimited colors, shades, and gradients all in one go, giving you total creative freedom. HTV is great for simple shapes on cotton, but sublimation is the undisputed champ for permanent, photorealistic images on polyester.
Choosing the Right Method: A Head-to-Head Comparison
Feeling a little overwhelmed by the options? Don't worry, that's normal. Each printing method shines in different scenarios. This table breaks it all down, putting them side-by-side so you can see exactly which one aligns with your project goals.
Sublimation vs DTF vs Screen Printing vs HTV
| Feature | Sublimation Printing | DTF Printing | Screen Printing | HTV (Heat Transfer Vinyl) |
|---|---|---|---|---|
| Best For | Full-color photos, complex designs on polyester | All fabric types, including darks & cotton | Large batches (50+) with simple, limited-color designs | Simple text, logos, and shapes on small orders |
| Fabric Compatibility | Light-colored polyester or polymer-coated items | Cotton, polyester, blends, leather, nylon | Most fabrics, but ink may vary by material | Cotton, polyester, blends |
| Feel of Design | Zero feel, ink is infused into the fabric | Soft, flexible layer on top of the fabric | A distinct, sometimes thick, layer of ink | A tangible layer of vinyl on the surface |
| Durability | Extremely high; permanent, won't crack or peel | Very high; flexible and wash-resistant | High, but can crack or fade over time | Good, but can peel or crack with improper care |
| Color Capability | Unlimited colors, gradients, and photorealism | Unlimited colors and photorealism | Limited colors (each requires a new screen) | Limited to available vinyl colors; layering is tough |
| Setup Cost/Effort | Low; ideal for one-offs and small runs | Moderate; requires film and powder application | High; creating screens is time-consuming & costly | Low; great for single custom items |
Ultimately, there's no single "best" printing method—only the best one for your specific job. If you're creating a one-of-a-kind polyester jersey with a team photo, sublimation is your answer. But for 200 black cotton tees with a white logo, screen printing is the way to go. Use this guide to match your project's needs to the right technique.
Got Questions? Here Are the Answers
Once you get past the basic "how-to," the real questions start popping up. This is where the practical side of sublimation kicks in, and knowing the answers can save you a ton of time, money, and frustration. Think of these as the unwritten rules of the game.
Let's dive into the most common head-scratchers that trip up newcomers. Getting these down isn't about limiting your creativity—it's about learning the boundaries so you can work smarter, not harder.
Why Won’t Sublimation Work on 100% Cotton?
This is easily the number one question everyone asks. The answer is all about chemistry. Sublimation ink isn't just sitting on top of the fabric; it's designed to form a molecular bond with polyester polymers. When you heat it up, the pores of the polyester fibers literally open, the ink turns into a gas and goes inside, and as it cools, the pores close, trapping the color permanently.
Cotton just doesn't have that magic ingredient. As a natural fiber, it lacks the polymer structure for the ink to grab onto. If you try to press a sublimation transfer onto a 100% cotton tee, you'll get a faint, washed-out mess that will all but disappear after the first wash.
Why Can't I Print on Black or Dark-Colored Shirts?
This is the other big "rule" you have to know. Sublimation ink is transparent, which means it adds color rather than covers it up. A good analogy is using a highlighter on paper—it tints the paper but doesn't hide what's underneath.
Because of this, there is no white sublimation ink. You can't print a light design onto a dark shirt because the shirt's color will always show through. Trying to print yellow on a blue shirt? You’ll get a weird greenish color. Printing anything on a black shirt? You won't see a thing. For colors that truly pop, you need a white or very light-colored canvas.
Can I Actually Make Money with Sublimation?
You bet. The power to create vibrant, permanent, full-color designs on demand is a game-changer for anyone starting a custom products business. You can make one-of-a-kind personalized items without the messy, time-consuming setup that comes with something like screen printing.
The real secret to making a profit is to find a niche. Don't just sell "mugs." Sell mugs for dog lovers, or create custom tumblers for the local high school's sports teams. A focused audience is much easier to sell to.
The market for personalized stuff is huge and only getting bigger. The global dye sublimation printing industry is on a serious upward trend, fueled by everything from custom apparel and corporate swag to unique home decor. This isn't just a hobbyist craft; it's a legitimate manufacturing method, and you can learn more about how the industry has developed.
At Cobra DTF, we're all about giving you the right tools for the job. While sublimation is fantastic for polyester, our Direct-to-Film transfers give you the freedom to print on any color and any fabric—including that tricky 100% cotton. Check out our premium, USA-made DTF transfers and see the difference for yourself.