
How to use transfer paper on t shirts: A quick guide for perfect prints
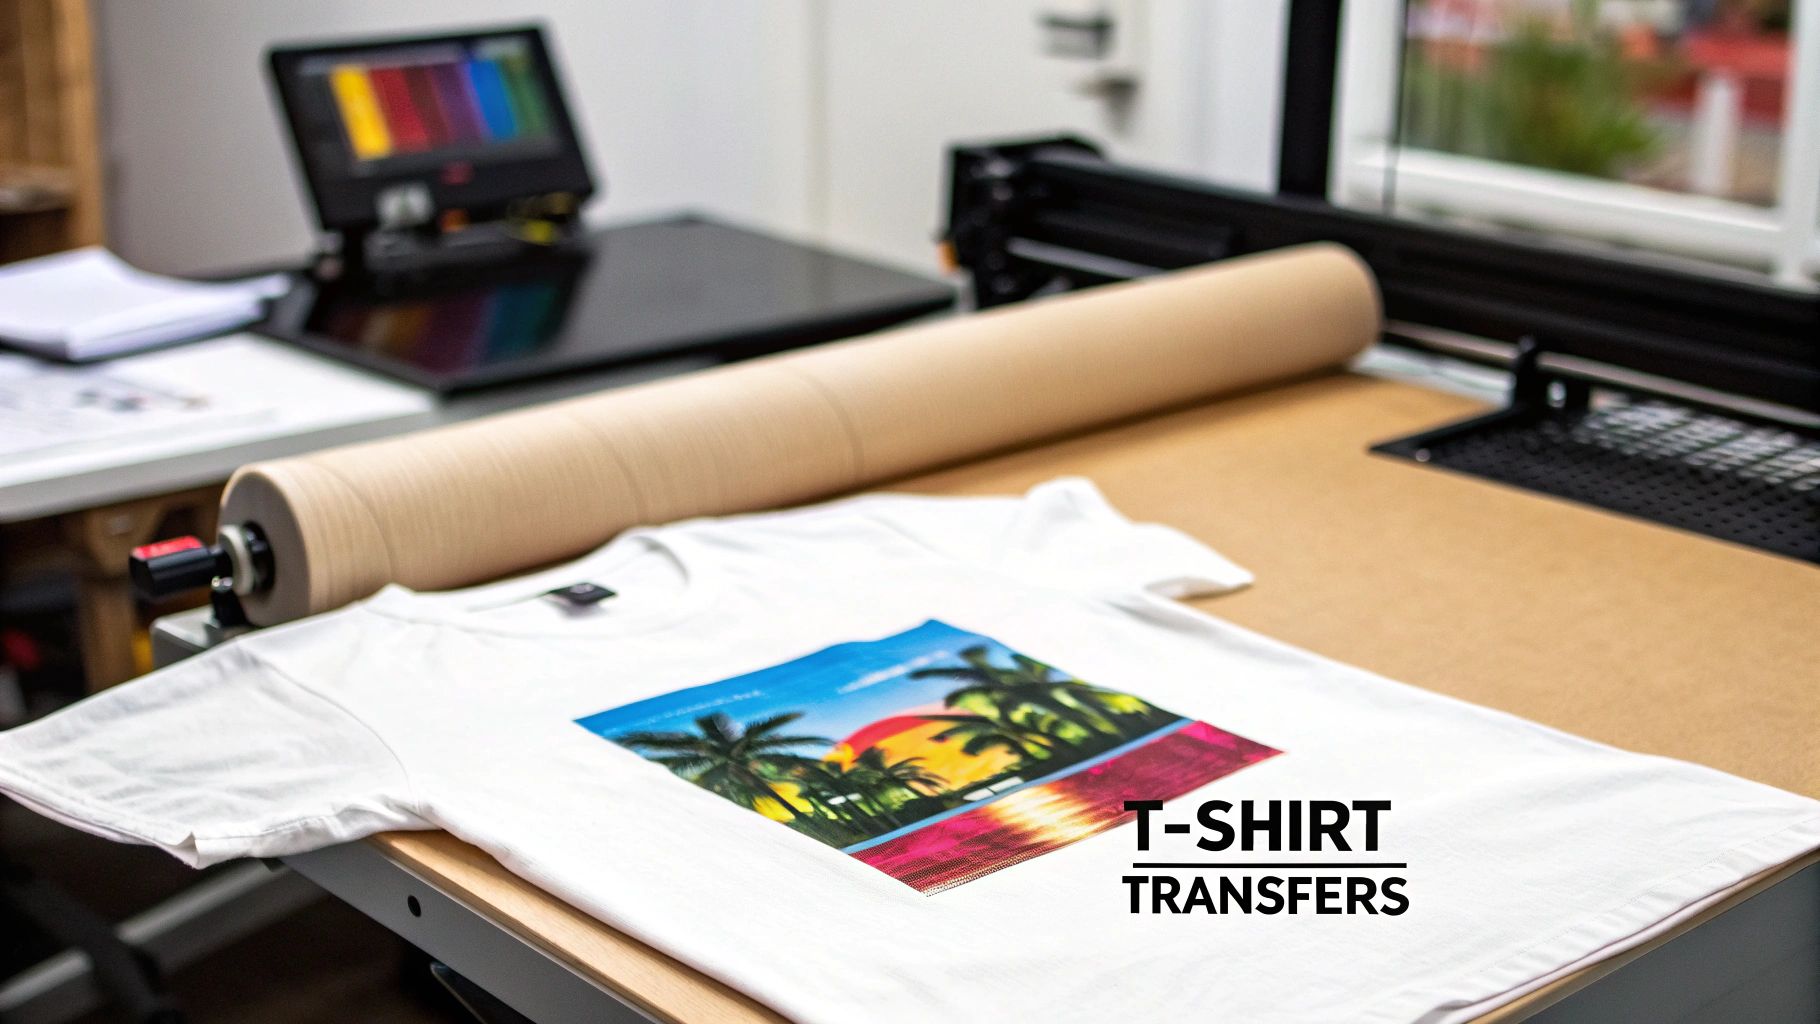
So, you're ready to transform plain t-shirts into custom-printed apparel that really stands out. The magic happens when you take a design printed on specialty transfer paper—like a Direct-to-Film (DTF) transfer—and use a heat press to bond it perfectly to the fabric. Getting the technique right is what separates an amateur-looking shirt from a professional, durable product.
Mastering the Art of T-Shirt Transfers
Let's dive into how to use transfer paper on t-shirts, but we're going to skip the generic advice. This is a practical, no-fluff tutorial for small businesses, e-commerce brands, and any creator who wants to produce top-tier apparel with confidence and consistency.
We'll be putting a spotlight on Direct-to-Film (DTF) transfers, and for good reason. It's a newer method that blows older technologies out of the water when it comes to durability and color pop. If you want to create products that look incredible and hold up wash after wash, understanding the ins and outs of DTF is essential.
Why This Skill Matters More Than Ever
Custom apparel isn't just a trend; it's a massive market, and now is the perfect time to hone your skills. The global market for direct-to-film printing—the tech behind these awesome transfers—hit an incredible USD 2,720 million in 2024. This boom is almost entirely fueled by the demand for custom t-shirts, which is a huge green light for creators like you.
This guide is your roadmap. We'll walk through everything from prepping the garment correctly to dialing in the perfect heat press settings. We'll also touch on why having a solid, US-based supplier like Cobra DTF in your corner can make a world of difference for your quality and turnaround times. For a deeper dive into the basics, our guide on https://cobradtf.com/blogs/guides/what-is-transfer-paper has you covered.
The goal here isn't just to follow steps. It's to understand why each step matters. That's the knowledge that will empower you to troubleshoot on the fly and create custom shirts that truly dominate a crowded market.
What You'll Learn in This Guide
Forget theory; this is all about practical, real-world advice you can put to use today. We'll get into:
- The crucial differences between the most common types of transfer paper.
- Why prepping your garment is the one step you should never, ever skip.
- How to get perfectly consistent results from your heat press, every single time.
A great way to get inspired is to look at how the pros do it. Check out these professional t-shirts with branded logos to see the kind of quality and detail you can achieve with the right technique.
Okay, let's get pressing.
Setting Up Your Workspace for Flawless Transfers

A great t-shirt transfer doesn't start when you power on the heat press. It starts with your setup. Getting your space organized is the first real step toward getting consistent, professional-looking results. Think of it as your command center—everything you need should be clean, prepped, and within reach.
First things first, you need a solid, heat-resistant surface for your press. A wobbly table is a recipe for a bad press because it can mess with your pressure and ruin the transfer. You also want enough space to lay out your shirts flat and organize your transfers without feeling cramped.
Assembling Your Essential Toolkit
Beyond the press itself, a few simple accessories will make your life a lot easier and your prints much better. These aren't just extras; they solve real problems that can pop up and wreck an otherwise perfect design.
- Teflon Sheet: This is your press's best friend. You place this non-stick sheet between the hot platen and your transfer to protect the press from any ink or glue that might seep through. It keeps your gear clean for the next job.
- Parchment Paper: This is what I use for the final press after peeling the film. It gives the design a nice, soft matte finish by diffusing the heat, helping the ink settle into the fabric instead of sitting on top with a glossy sheen.
- Heat Press Pillows: If you're pressing anything with seams, collars, or zippers, you need these. These foam-filled pillows go inside the shirt to raise the print area, ensuring the platen makes direct, even contact with your design.
Having these tools ready to go means you won't be scrambling in the middle of a press. A little prep work here is what separates the pros from the hobbyists.
The Critical Pre-Pressing Step
If you only remember one thing from this guide, make it this: always pre-press your garment. I can't stress this enough. T-shirts, especially cotton ones, are like sponges—they soak up moisture from the air, even if they feel dry.
When you hit that shirt with high heat, all that hidden moisture turns to steam and pushes up against your transfer. This is the number one reason transfers fail to stick properly or start peeling after the first wash.
A quick 5-10 second press before you even lay down the design makes all the difference. It gets rid of moisture and irons out any wrinkles, giving you a perfectly flat, dry canvas for the transfer adhesive to grab onto.
Pre-pressing is non-negotiable. It's the single most effective thing you can do to prevent the vast majority of common transfer failures before they ever happen.
Understanding Your Fabric
The shirt's material completely changes the game. Different fabrics react to heat differently, and you have to adjust your settings to avoid ruining the garment.
| Fabric Type | Heat Reaction & Considerations |
|---|---|
| 100% Cotton | Soaks up moisture and can shrink. It needs a good pre-press. The upside is it handles heat really well, making it perfect for DTF transfers. |
| Polyester | This synthetic can scorch or even melt if you get it too hot. You'll want to use slightly lower temperatures and shorter press times. |
| Poly/Cotton Blends | A great middle ground. You get the soft feel of cotton with the durability of polyester. They're generally easy to work with, but yes, you still need to pre-press them. |
Knowing your fabric helps you dial in the right temperature and time from the get-go, which we'll get into next. This basic knowledge is key to figuring out how to use transfer paper on t shirts for any type of apparel you throw at it.
Your Guide to a Perfect Heat Press Application
This is where the magic happens. All that prep work comes down to this moment on the heat press, where a great design transforms into a durable, sellable product. Precision is everything here. Getting the right mix of temperature, time, and pressure is what permanently fuses your DTF transfer into the fabric, giving you that professional-grade finish.
Let's walk through the entire process, step-by-step. Forget the guesswork and costly trial-and-error that eats up your inventory. We'll give you the exact settings that have worked for us time and time again.
Dialing in Your Heat Press Settings
Every press has its own personality, but the fundamentals for DTF transfers are pretty universal. The goal is simple: melt the adhesive on the back of the film just enough so it grabs onto the garment's fibers for good.
For most of your standard cotton and poly-cotton blends, these are the go-to settings:
- Temperature: Start in the 300-320°F (149-160°C) range. This is the sweet spot that activates the DTF adhesive without scorching the shirt.
- Time: A 10-15 second press is all you need. That's plenty of time for the heat to work its way through the transfer and create a solid bond.
- Pressure: You're aiming for medium-firm pressure. When you lock it down, you should feel some solid resistance, but you shouldn't have to wrestle the machine to get it closed.
I see this all the time with beginners: they think more pressure is always better. But cranking the pressure way up can actually cause the adhesive to ooze out from behind the design, leaving you with a weak bond and a shiny, ugly outline. The real key is firm, even contact across the entire graphic.
If you're just getting started and still figuring out what machine to buy, we put together a complete guide on the best heat press for beginners to help you find one that fits your space and budget.
Nailing the Placement Every Time
A perfectly pressed design that's crooked is just as bad as a botched press. Learning how to place designs consistently is a skill that really separates the pros from the hobbyists. While you can use rulers and guides, eventually, you want to train your eye to see what looks right.
A good rule of thumb for a standard front graphic on an adult tee is to place the top of the design about 3 to 4 inches down from the collar. For a smaller, left-chest logo, I like to line it up with the armpit seam and about 4 inches over from the center line.
For consistent, professional results, especially in a production environment, many shops swear by using a dedicated garment press like the Singer Intelligent Steam Press, which delivers perfectly even heat and pressure without fail.
The Two-Press Method for Maximum Durability
Want to know the secret to a print that feels incredibly soft and lasts wash after wash? It's the two-press method. It's not complicated—it just involves an initial press to apply the transfer, and a quick finishing press to lock it all in.
The Initial Press
First things first, always pre-press your blank shirt for 5-10 seconds. This gets rid of any sneaky moisture or wrinkles that could ruin your application. Now, carefully lay down your DTF transfer, double-checking that it's straight. Cover it with a Teflon sheet or a piece of parchment paper and press it with your settings (say, 315°F for 12 seconds).
The Peel: Hot Peel vs. Cold Peel
When that timer beeps, pop open the press. This next move is crucial. DTF transfers are designed as either hot peel or cold peel, and you have to know which one you're working with.
- Hot Peel: Just like it sounds, you'll peel the clear film carrier away immediately while the shirt is still hot on the press. This generally gives you a softer, more matte-looking finish.
- Cold Peel: You have to wait. Let the shirt and transfer cool down completely to the touch before you even think about peeling. The result is often a bit glossier.
Whichever type you have, peel the film back smoothly at a low, flat angle. If you see any part of the design lifting up with the film, stop right there. Don't rip it! Just lay it back down, close the press for another 5 seconds, and try peeling again.
The Finishing Press
This is the final touch that truly makes a difference. Once you've removed the film and your design is sitting on the shirt, cover it with a sheet of parchment paper and press it one more time for 5-10 seconds.
This second press does something amazing—it helps melt the ink into the fibers of the shirt, instead of just sitting on top. The result is a much softer feel and a print that's practically bulletproof in the wash. This is your secret weapon for making shirts that people will love to wear.
How to Solve Common Transfer Problems
Even when you follow the instructions to the letter, things can go wrong. It’s incredibly frustrating when a design won’t stick, the corners peel up, or the colors look washed out, especially when you're working with your last blank shirt. But don't worry—most of these issues are surprisingly easy to fix once you know what to look for.
Let's walk through the problems you're most likely to run into and the simple, actionable solutions to get you back to creating perfect shirts. From my experience, almost every transfer failure boils down to one of three things: temperature, time, or pressure. Get those three dialed in, and you're golden.
This visual guide breaks down the core heat press workflow into its three essential stages: placing, pressing, and peeling.
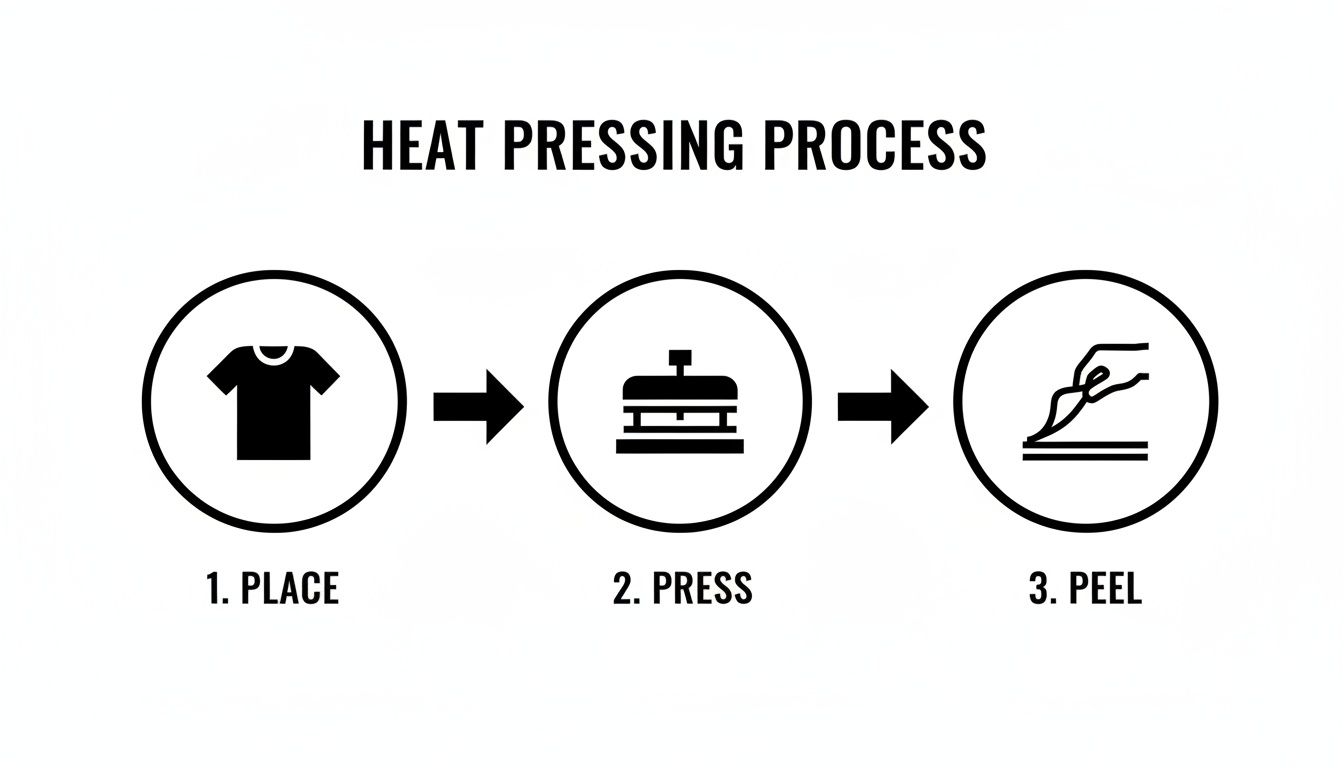
Mastering each of these simple steps is the foundation for avoiding most of the common issues we're about to cover.
My Design Is Not Sticking at All
This is probably the most common (and disheartening) problem. You open the press, start to peel, and the entire design lifts right off with the film. Before you throw the shirt across the room, let's check the usual suspects.
-
The Cause: Nine times out of ten, this is a pressure problem. If the pressure is too light, the heat press platen simply can't push the adhesive into the fabric fibers with enough force to create a strong bond. It could also be a temperature issue—if your press isn't hot enough, the adhesive won't activate properly.
-
The Fix: First, crank up your pressure to a medium-firm setting. You should feel some real resistance when you lock the handle down. Next, grab an infrared temperature gun and verify your platen's temperature. A press's display can be off by as much as 15-20°F, which is more than enough to cause a total application failure.
The Corners of My Design Are Peeling Up
You peel back the film, and the design looks perfect... at first. Then you spot it: the sharp corners or thin lines of your graphic are lifting ever so slightly. This is a classic sign of an uneven press, and it’s a problem that will only get worse after the first wash.
This issue almost always happens when you press over thick seams, collars, or zippers without the right setup. The platen hits the high spots (like a collar seam) and bridges over the lower areas, preventing the transfer from getting the direct, even contact it needs.
Pro Tip: Heat press pillows are your best friend here. By sliding a pillow inside the shirt, you instantly raise the printing area so it's higher than any seams. This simple trick forces the platen to make direct, even contact with the entire design, solving the peeling corner problem for good.
My Colors Look Dull or Faded
If your bright, vibrant design comes out looking muted and disappointing, the culprit is almost always too much heat. Applying excessive heat for too long can literally "cook" the inks, scorching them and draining their saturation. This is especially common with polyester fabrics, which are far more sensitive to high temperatures.
To fix this, start by dropping your temperature by 10-15°F and shaving a few seconds off your press time. You'd be surprised what a small adjustment can do for color vibrancy. Also, make sure you're using high-quality transfers; cheap, low-grade inks are notorious for fading under heat. For more details on the printing side of things, check out our guide on heat transfer paper printing.
I See a Faint Box Outline on the Shirt
Ever peeled a transfer and noticed a subtle, shiny box on your shirt that perfectly matches the shape of the carrier sheet? This "ghost" box is caused by the edge of the transfer paper pressing into the fabric fibers. It's usually a sign that your pressure is cranked up too high, especially on heat-sensitive materials like polyester or tri-blends.
Here’s a quick checklist to make that boxy outline disappear:
- Reduce Pressure: Back the pressure off a bit. You need enough force to adhere the design, but not so much that you're embossing the fabric itself.
- Trim Your Transfer: Get your scissors out and trim as close to the edges of your design as you can before pressing. Less carrier sheet means less area to leave an impression.
- Use a Pillow: A heat press pillow can help here, too, by focusing the pressure directly on the design area instead of across the entire sheet.
By systematically troubleshooting these common issues, you'll be able to fine-tune your process and achieve flawless, professional results every single time.
Making Your Prints Last: Wash & Care Instructions
Once that heat press pops open, you're not quite done. Getting the design onto the shirt is half the battle; the other half is making sure it stays there, looking great wash after wash. Proper care is what separates a one-wash-wonder from a long-lasting, professional-quality garment.
These instructions are your secret weapon for durability. Seriously, consider printing them on a small care card to tuck into every order. It's a small touch that shows you care about quality and helps your customers keep their new favorite shirt in top condition.
The First 24 Hours: Let It Cure
This is non-negotiable. After pressing, the ink and adhesive need to fully cure and permanently bond with the fabric. That means the garment has to sit, untouched, for a full 24 hours before it even thinks about seeing the inside of a washing machine.
Washing a shirt too early is the fastest way to ruin your hard work. The shock of the water and agitation can cause the design to crack or peel before it's even had a chance to set. Just tell your customers to let it hang out in a cool, dry spot for a day. This simple waiting game makes all the difference.
Washing and Drying for Longevity
When it's finally time for a wash, a few gentle practices will keep the print looking vibrant for years. The name of the game is minimizing heat and friction.
- Turn it Inside Out: This is the golden rule of printed apparel. Turning the shirt inside out prevents the design from rubbing against other clothes, zippers, and buttons, which can cause it to wear down.
- Go with Cold Water: Always use a cold wash cycle. Hot water is the enemy of a heat transfer; it can reactivate the adhesive and weaken its bond to the fabric.
- Use a Mild Detergent: Stick to basic, mild detergents. Avoid harsh chemicals, bleach, and especially fabric softeners, as they can degrade the ink and adhesive over time.
- Air Dry if You Can: High heat from a tumble dryer is incredibly harsh on prints. For the absolute best results, hang the shirt up to air dry. If you must use a dryer, be sure to use the lowest heat or a no-heat tumble setting.
Warning: Never iron directly on the printed area. If the shirt is wrinkly, turn it completely inside out and use a low heat setting, carefully avoiding the design.
Today's DTF transfers are remarkably tough. They outperform old-school transfer papers by 40% in wash durability, holding their color and integrity for the long haul. A properly applied and cared-for DTF print can easily handle over 60 washes and stretch up to 300% without cracking. It's this incredible resilience that's making the technology a go-to for anyone serious about custom apparel.
To see how these durable prints are shaping what's next in apparel, check out the future of custom fashion and advanced DTF transfer sheets on dtfsheet.com.
Your T-Shirt Transfer Questions, Answered
Even with the best guide, some questions always pop up when you're in the middle of a project. Getting these little details right is what separates an okay shirt from a great one, so let's clear up a few of the most common things people ask.
I've put together the questions I hear most often from both newcomers and seasoned pros. Think of this as your quick-reference guide to solving those nagging issues and getting a handle on the lingo.
Can I Just Use a Regular Iron Instead of a Heat Press?
This is, without a doubt, the number one question. For professional-grade DTF transfers, the answer is a hard no—a heat press is non-negotiable. While your home iron might work for some old-school craft paper, it just doesn't have what it takes for modern transfers.
An iron falls short on three key things:
- Inconsistent Heat: Irons have hot and cold spots across their surface. This means one part of your design might stick perfectly while another part barely even tacks down.
- Uneven Pressure: You simply can't generate the even, consistent 40-60 PSI (pounds per square inch) of pressure needed by hand. That pressure is what forces the adhesive into the fabric fibers for a permanent bond.
- No Accurate Timer: Trying to count in your head is a recipe for disaster. You'll either under-cure the adhesive or, worse, scorch the design and the shirt.
If you're serious about making shirts that look professional and are built to last, investing in a heat press is the single best move you can make. It's not an accessory; it's the main event.
A heat press isn't a luxury; it's the fundamental tool for quality work. It takes the guesswork out of the equation and is the only way to guarantee the consistent heat, time, and pressure your transfers need to survive.
Why Did My Transfer Crack After Just One Wash?
It’s a gut-wrenching feeling to pull a shirt from the laundry only to see your beautiful design cracked and peeling. But don't blame the transfer just yet! This is almost always a simple application issue, which is great news because it means you can fix it on your next press.
Cracking usually boils down to one of three culprits:
- Not Enough Pressure: This is the big one. If the pressure is too light, the adhesive sits on top of the fabric instead of being driven deep into the weave. Without that anchor, it has no chance of holding on.
- Wrong Temperature or Time: If your press is too cool, the adhesive never gets to melt and activate properly. If it's too hot or on for too long, you can literally cook the ink, making it brittle and prone to cracking.
- Skipping the Second Press: That final 5-10 second press after you've peeled the film isn't an optional step. This is what truly cures the ink and locks the design into the garment, giving it the stretch and durability to handle wear and tear.
What's the Difference Between Hot Peel and Cold Peel?
This terminology sounds technical, but it’s just about when you remove the clear carrier film after pressing. It's a characteristic built into the transfer itself, so you don't get to choose—you just need to follow the instructions for the specific product you bought.
- Hot Peel: You rip that film off immediately after the press opens while the shirt is still steaming hot. This technique tends to leave a softer, more matte finish as the ink settles right into the fabric's texture.
- Cold Peel: You have to be patient and let the garment cool down completely to room temperature before you even think about touching the film. Peeling a cold peel transfer while it's still warm will pull the design right off. This method often gives the design a slightly smoother, glossier look.
Always, always check the instructions that came with your DTF transfers to know if you're working with a hot or cold peel.
How Do I Get Rid of That Faint Box Outline on the Shirt?
Ah, the dreaded press box. That faint, shiny rectangle you see around your design is from the edge of the transfer sheet pressing into the fabric. It’s most obvious on dark colors and heat-sensitive fabrics like polyester.
To avoid it, start by checking your pressure. You want it firm, not so tight you're crushing the life out of the shirt. Next, a heat press pillow is your best friend here. Sliding one inside the shirt raises the print area, ensuring the press only makes solid contact with your design, leaving the empty edges of the film untouched. Finally, a simple trick is to trim the transfer sheet as close to the design as possible before you press. Less film means less of a box to worry about.
Ready to skip the headaches and start with transfers designed for vibrant, lasting results from the get-go? Cobra DTF offers premium, USA-made DTF transfers that deliver consistent quality, press after press.