

Your Essential Heat Press Temperature Guide
If you're just getting started, the best all-around setting for standard heat transfer vinyl (HTV) on a cotton shirt is 305-320°F (150-160°C) for 10-15 seconds with medium pressure. This is the sweet spot that gives you a solid, lasting bond without risking damage to either the fabric or your design.
Your Starting Point for Perfect Heat Press Settings
Welcome to your essential guide for heat press settings. Trying to nail down the right combination can feel like cracking a secret code at first, but I promise it's much simpler than it looks. True success comes down to a perfect balance of three key ingredients—what I like to call the "Golden Triangle" of heat pressing.
Get a handle on this trio, and you're on your way to achieving those professional, peel-proof results you're after, every single time.
Here's the breakdown of what you need to master:
- Temperature: This is all about getting the heat just right to activate the adhesive on the back of your vinyl. Too cool, and it won't stick properly. Too hot, and you risk scorching the shirt or even melting your design.
- Time: We often call this "dwell time," and it's simply how long you apply the heat and pressure. It needs to be just long enough for that adhesive to melt and properly grab onto the fabric's fibers.
- Pressure: This is the force your press applies. It's what ensures every last bit of the adhesive makes solid contact with the garment. Without even, consistent pressure, you'll end up with a design that peels at the edges.
Quick Reference Heat Press Settings
Think of the numbers in this table as your proven starting points, not rigid rules. Every heat press runs a little differently, and variations in vinyl brands and garments can change the recipe slightly. That's why I always recommend doing a small test press on a scrap piece first.
This cheat sheet will get you right in the ballpark for most common projects, taking the guesswork out of the equation and helping you press with confidence from the get-go.
| Material / Vinyl Type | Temperature Range (°F / °C) | Time (Seconds) | Pressure |
|---|---|---|---|
| Cotton & Cotton Blends | 320-350° F (160-176° C) | 10-15 | Medium to Firm |
| 100% Polyester | 270-305° F (132-150° C) | 8-12 | Light to Medium |
| Standard HTV (Smooth) | 305-320° F (150-160° C) | 10-15 | Medium |
| Glitter HTV | 320-330° F (160-165° C) | 15-20 | Firm |
| Sublimation (Polyester) | 385-400° F (195-205° C) | 45-60 | Light to Medium |
After a few projects, you'll start to develop a feel for how these settings work together, allowing you to fine-tune them for flawless results on any material.
A Pro Tip to Remember: Time, temperature, and pressure are all connected. If you need to lower the temperature for a delicate fabric, you might have to increase the pressing time by a few seconds to make sure you still get a good bond.
Following a reliable heat press temperature guide is the key to ensuring your designs look great and last a long time. For instance, a basic smooth HTV usually calls for 305°F (150°C) for about 10 to 15 seconds.
But something more textured, like flocked HTV, needs more oomph to set the thicker adhesive—typically a higher temperature of 320°F (160°C) and a longer press time of 15 to 20 seconds. If you're interested in a deeper dive, you can learn more about how precise settings impact different materials and improve the durability of your designs.
Why the Right Temperature Is Everything
Ever create a killer design, press it onto a shirt, and feel that rush of pride... only to watch it peel off after one trip through the laundry? It's beyond frustrating, but the reason it happens is usually pretty simple. The real secret to getting a transfer that lasts is understanding what's going on at a microscopic level when you lower that press.
Think of it like baking. If you pull a cake out of the oven too soon, you get a soupy mess. Leave it in too long, and you've got a charred brick. Heat pressing is the same deal—it’s all about nailing the recipe of temperature, time, and pressure to get that perfect, durable finish.
Following a heat press temperature guide isn't just about plugging in numbers. You're actually kicking off a specific chemical reaction. The back of your heat transfer vinyl (HTV) or DTF transfer is coated with a special, heat-activated adhesive. It just sits there at room temperature, but the moment you introduce the right amount of heat, everything changes.
The Science of a Solid Bond
So what’s really happening under the hood of your press? As the hot platen makes contact, that solid adhesive starts to melt and flow. This is the magic moment. The pressure you’ve set then physically pushes that liquified adhesive deep into the nooks and crannies of the fabric's weave.
Once the timer goes off and the garment starts to cool, the adhesive turns solid again. But now, it’s not just sitting on top of the shirt; it's mechanically locked into the fibers, creating countless little anchor points. This physical grip is what makes for a truly permanent bond that can handle being stretched, washed, and worn over and over.
The Key Takeaway: The right temperature melts the adhesive just enough to flow into the fabric. The right pressure forces it in deep, and the right amount of time gives it a chance to set properly, creating a bond that actually lasts.
It’s all a delicate dance. Not enough heat, and the adhesive never fully liquefies. It might feel stuck at first, but it's really just resting on the surface, destined to peel away.
The Problem with Too Much Heat
Cranking up the heat to be "safe" is a classic beginner mistake, but it can cause a whole new set of problems. Too much heat can wreck both your design and the garment itself, which is a quick way to lose money and time.
Here’s what you're risking when you go too hot:
- Scorching the Fabric: Natural fibers like cotton will literally burn. Synthetics are even trickier; polyester can melt or get a permanent, ugly sheen. This is a huge issue with white or light-colored polyester, which can start to yellow at temperatures over 300-320°F.
- Damaging the Adhesive: You can actually cook the glue, destroying its ability to bond and causing it to fail down the road.
- Melting the Transfer: The vinyl or film itself can melt, shrink, or warp if the temperature is too high, completely ruining the look of your design.
Getting a handle on this science takes you from simply following a chart to truly understanding your craft. When a press goes wrong, you can diagnose the issue like a pro. Was it not hot enough to melt the glue, or so hot that I scorched the poly? This knowledge is what separates the guessers from the experts, giving you the confidence to troubleshoot any project that comes your way.
Mastering Temperatures for Every Fabric Type
Think of fabrics like different types of wood. You wouldn't use a blowtorch on a delicate piece of balsa wood, and you wouldn't use a tiny flame to join two thick oak beams. In the same way, you can't treat cotton and nylon identically under a heat press. Each material has its own personality—a specific threshold for heat, a unique reaction to pressure, and its own ideal timing for a perfect bond.
Trying to use a one-size-fits-all approach is the fastest way to ruin your work. You'll end up with scorched shirts, melted designs, or transfers that peel off after the first wash. The real secret is moving beyond just following a chart and starting to understand why each fabric needs what it needs. This section will break down the essential settings for the most common—and some of the trickiest—materials you'll run into.
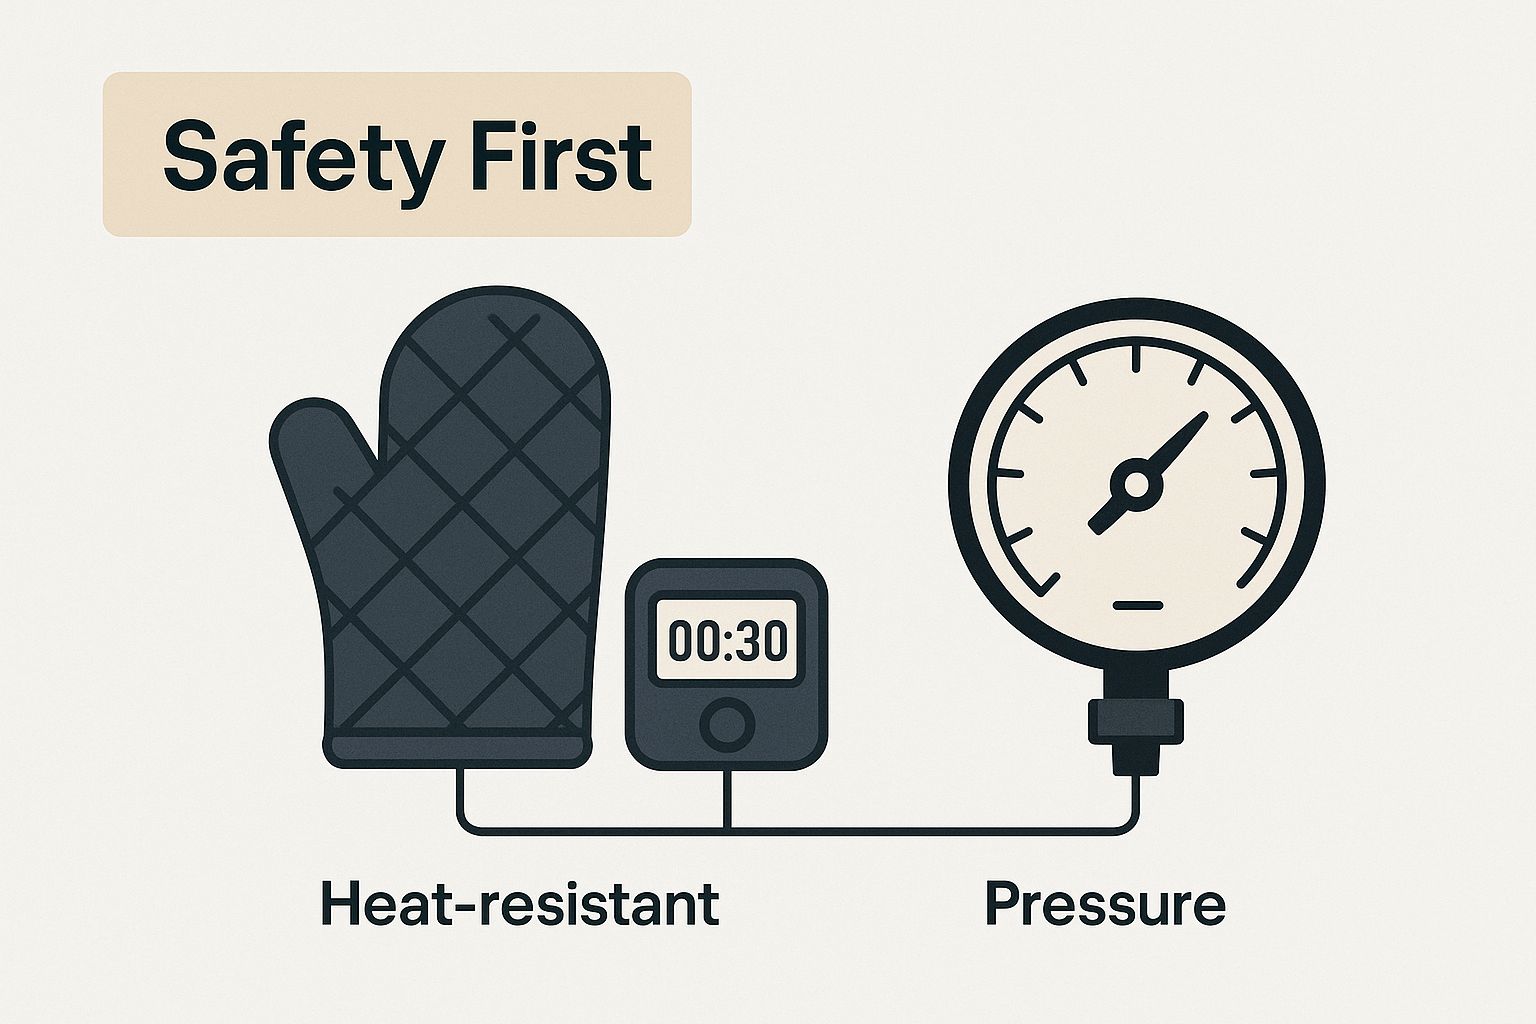
This image highlights the "big three" you'll always be managing: time, temperature, and pressure. Getting these right is the foundation of every single successful press.
The Workhorse Fabric: Cotton
Cotton is the best friend of anyone new to heat pressing. It’s forgiving, widely available, and its natural fibers are incredibly resilient. They can handle higher temperatures without the risk of melting you get with synthetic materials, which allows the transfer's adhesive to form a deep, lasting bond.
For 100% cotton, you’ll want to set your press in the 320°F to 360°F (160°C to 180°C) range. A press time of around 30 seconds with high pressure is the sweet spot. The firm pressure is key here; it physically pushes the melted adhesive deep into the fabric's weave, creating a strong mechanical lock that stands up to wash after wash.
The Delicate Nature of Polyester
Pressing on polyester is where your precision and technique really start to matter. Unlike cotton, polyester is a plastic-based fiber, which means it can melt or scorch if the temperature gets too high. Push it past its heat threshold (usually around 300°F), and you'll be left with a permanent shiny press mark or, even worse, discolored fabric.
The other big headache with polyester is dye migration. This is when the heat from the press turns the fabric dye into a gas, which then seeps into your transfer and stains it. It's the reason a crisp white design can come out looking pink or light gray on a red polyester shirt.
To get it right with polyester, you need a completely different game plan:
- Lower the Heat: Keep your press between 270°F and 305°F (132°C to 150°C).
- Shorten the Time: A quick press of just 8 to 12 seconds is all you need.
- Ease Up on the Pressure: Medium to light pressure is plenty and helps avoid those dreaded press marks.
Pro Tip: A Teflon sheet or a non-stick cover sheet is non-negotiable when pressing polyester. It acts as a buffer, distributing heat more evenly and providing an essential layer of protection against scorching.
Polyester definitely requires more care, but mastering it is a huge step forward. For a deeper dive into how these two core fabrics stack up, check out our guide comparing cotton vs. polyester.
Navigating Cotton and Polyester Blends
Blended fabrics, like the classic 50/50 cotton/poly, give you the best of both worlds: the softness of cotton and the durability and wrinkle resistance of polyester. When pressing them, however, you have to play by the rules of the most sensitive fiber in the mix—which is always the polyester.
If you use high-heat cotton settings on a 50/50 blend, you’ll scorch the polyester fibers and risk dye migration. So, the rule is simple: treat a blend as if it were 100% polyester.
- Temperature: A moderate 300°F to 320°F (150°C to 160°C) works perfectly.
- Time: Keep the dwell time to 10 to 15 seconds.
- Pressure: Stick with medium pressure to get a solid bond without harming the synthetic fibers.
This balanced recipe ensures the adhesive activates properly without putting the garment at risk, giving you a beautiful and durable print every time.
Comprehensive Fabric Heat Press Settings Chart
To make things easier, we've compiled this quick-reference chart. It's a great starting point, but always remember that every heat press and every garment can be slightly different. A quick test press is always a smart move.
| Fabric Type | Temperature Range (°F / °C) | Time (Seconds) | Pressure Level | Important Notes |
|---|---|---|---|---|
| 100% Cotton | 320°F - 360°F / 160°C - 180°C | 30 | High | Very forgiving. Ensure even, firm pressure for a durable bond. |
| 100% Polyester | 270°F - 305°F / 132°C - 150°C | 8 - 12 | Light to Medium | Prone to scorching and dye migration. Use a cover sheet. |
| 50/50 Cotton/Poly Blends | 300°F - 320°F / 150°C - 160°C | 10 - 15 | Medium | Treat like 100% polyester to avoid damaging synthetic fibers. |
| Tri-Blends | 280°F - 300°F / 138°C - 150°C | 10 - 15 | Light to Medium | Defer to the most sensitive fiber (often rayon or polyester). |
| Nylon | 280°F - 300°F / 138°C - 150°C | 8 - 10 | Light to Medium | Very low melting point. Test on a hidden area first. |
| Spandex / Lycra | 260°F - 280°F / 127°C - 138°C | 8 - 12 | Light | Use low heat to preserve elasticity. Use stretchable vinyl. |
| Canvas | 320°F - 350°F / 160°C - 177°C | 20 - 30 | High | Similar to cotton but may require more pressure due to texture. |
| Leather | 290°F - 310°F / 143°C - 154°C | 10 - 15 | Medium | Use a cover sheet to prevent direct contact and shiny spots. |
This chart is your roadmap to success. By following these guidelines, you'll be well on your way to producing professional-quality results on a wide variety of materials.
Tackling Tricky Synthetics Like Nylon and Spandex
Working with advanced synthetics like nylon and spandex can feel intimidating at first, but they're totally manageable once you know their quirks. These materials are extremely sensitive to heat and require a much gentler approach.
Nylon: While known for its strength, nylon has a very low melting point. A little too much heat, and you've instantly ruined the garment.
- Temperature: Stay in a low range of 280°F to 300°F (138°C to 150°C).
- Time: A very short press of around 8 to 10 seconds is all it takes.
- Pressure: Light to medium pressure is best.
Spandex/Lycra: The whole point of spandex is its incredible stretch. Too much heat will kill that elasticity, leaving the fabric limp and warped. It's also crucial that you use a transfer material specifically designed to stretch with the fabric.
- Temperature: Go as low as you can, typically around 260°F to 280°F (127°C to 138°C).
- Time: A quick press of 8 to 12 seconds will do the job.
- Pressure: Use very light pressure to avoid flattening the fibers and creating marks.
For both nylon and spandex, testing is not optional—it's essential. Always do a test press on a hidden seam or a scrap piece before you commit to the final design. This one small step can save you from a very costly and irreversible mistake.
Matching Your Settings to Different Transfer Types
The fabric you're pressing onto is only half the equation. The other, equally crucial half is the transfer material itself. Every type of heat transfer vinyl (HTV) or film has its own unique chemical recipe, and each one needs a specific combination of heat, time, and pressure to stick perfectly.
Trying to use the same settings for glitter vinyl that you'd use for a stretchy athletic vinyl is a surefire way to get frustrating results.
Think of it like cooking. You wouldn't fry chicken in a delicate olive oil because the high heat would just burn it. You’d grab an oil with a higher smoke point. In the same way, every transfer material has a sweet spot—an activation point you need to hit just right. Let's break down the go-to settings for the most common materials so you can get professional results every time.
Standard Smooth Heat Transfer Vinyl
This is the dependable workhorse of the HTV world. It's usually the first material people learn with, and for good reason—it's known for its smooth feel and consistent results. The adhesive on standard HTV is made to activate and cure without needing crazy-high temperatures.
For most brands, your starting point will be:
- Temperature: 305°F to 320°F (150°C to 160°C)
- Time: 10 to 15 seconds
- Pressure: Medium
These settings are strong enough to get a great bond on cotton and poly-blends without being so harsh that they scorch the garment.
Glitter and Metallic HTV
Who doesn't love a little sparkle? Glitter and metallic vinyls add that eye-catching pop, but they play by a different set of rules. The glitter particles and metallic flakes make the material much thicker and more textured. You need to dial up the heat and pressure to melt the adhesive properly and push it through that dense layer into the fabric.
If you use standard settings here, the adhesive won't fully activate, and you'll end up with a weak bond that starts peeling at the edges after the first wash.
- Temperature: 320°F to 330°F (160°C to 165°C)
- Time: 15 to 20 seconds
- Pressure: Firm
Don't cut corners on the extra time and firm pressure. They're what ensures the heat can penetrate all the way through the vinyl to the adhesive hiding underneath.
Key Insight: Thicker, textured materials like glitter act like insulators. They slow down the heat transfer process, which is why you need a longer dwell time and higher temperature to make sure the adhesive on the back gets hot enough to melt and bond correctly.
Flock HTV
Flock HTV gives you that awesome soft, fuzzy texture that feels a lot like suede. That texture comes from tiny fibers embedded in the material, which—just like glitter—adds thickness. Because of this, it needs a little more heat and time than standard vinyl to get a solid, lasting bond.
- Temperature: 320°F (160°C)
- Time: 15 to 20 seconds
- Pressure: Medium
Stick to these settings, and you'll get a durable application that keeps its signature soft feel, wash after wash.
Stretch HTV
Made for performance wear and anything with spandex or Lycra, stretch HTV is built to flex and move right along with the fabric. Its best feature is its incredible elasticity. To protect that stretchiness, you have to use lower temperatures. Too much heat will literally cook the elasticity out of the vinyl, causing it to crack or warp as soon as the fabric is pulled.
- Temperature: 260°F to 280°F (127°C to 138°C)
- Time: 8 to 12 seconds
- Pressure: Light to Medium
The name of the game here is using just enough heat to activate the adhesive without wrecking the material's ability to stretch. Always go easy on the pressure, too—a light touch helps avoid leaving those dreaded press marks on delicate, heat-sensitive fabrics.
Direct-to-Film (DTF) Transfers
DTF has completely changed the game, making it possible to press full-color, photorealistic designs that feel incredibly soft and flexible. These transfers start as ink printed onto a special film, which then gets coated with a powdered adhesive. When you press it, that adhesive melts and fuses the ink directly to the garment.
If you want vibrant, ready-to-press designs without the weeding, looking into custom DTF transfers is a great way to elevate your projects.
The ideal settings can vary a bit depending on the specific film and powder used, but this is a solid starting point:
- Temperature: 300°F to 325°F (150°C to 163°C)
- Time: 10 to 15 seconds
- Pressure: Medium to Firm
After you nail the press, there's one last critical step: knowing when to peel the carrier sheet.
Hot, Warm, and Cold Peel Explained
The "peel" instruction on your vinyl is just as important as the temperature. It tells you the ideal temperature of the carrier sheet when you pull it off. Getting this wrong can ruin a perfect press in a split second.
- Hot Peel: Pull the carrier sheet off immediately after the press opens, while it's still piping hot. This is for materials where the adhesive sets instantly.
- Warm Peel: Wait just a few seconds (5-10) after pressing for things to cool down slightly. This gives the adhesive a moment to grab on but before it fully hardens.
- Cold Peel: You absolutely must wait until the garment and transfer are completely cool to the touch before peeling. This is common for specialty materials like metallics or DTF, where the adhesive needs to fully solidify to ensure every last detail—especially those tiny, fine lines—stays on the shirt.
Always, always check the manufacturer's instructions for your specific material. Peeling a cold-peel vinyl when it's still hot will almost certainly lift the design right off the shirt, and you'll be back at square one.
How to Troubleshoot Common Heat Press Issues
Even when you follow a heat press temperature guide to the letter, things can still go sideways. There's nothing more frustrating than seeing a design peel after the first wash, finding a scorch mark on a new shirt, or pulling a cracked graphic off the press.
The good news? Almost every single heat press problem comes down to one of the big three: time, temperature, or pressure.
Think of yourself as a detective. When something goes wrong, your first job is to figure out which of those three culprits is to blame. Once you learn to spot the symptoms, you can pinpoint the root cause in seconds and apply the right fix. It'll save you a ton of time, materials, and headaches.
Why Is My Vinyl Peeling or Lifting After Washing?
This is probably the most common (and heartbreaking) issue for anyone starting out. The shirt looks perfect right off the press, but then the design's edges start lifting and peeling after a single wash.
Nine times out of ten, the cause is not enough pressure. The heat might have been right, and it probably melted the adhesive, but without enough force, that adhesive never really got pushed into the fabric's fibers. It's just sitting on top. Think of it like trying to glue two boards together without using clamps—the bond is weak and destined to fail.
Here’s how to fix it:
- Crank Up the Pressure: Adjust your press to a firmer setting. A great way to test this is the "paper trick." Clamp a small piece of paper in each of the four corners of your press. If you can easily pull any of them out, your pressure is way too light.
- Verify Your Temperature: Your press's display might be lying to you. Grab an infrared heat gun and check the platen's actual surface temperature. If it's running cooler than it says, the adhesive isn't melting completely.
- Always Pre-Press: Before you even think about placing your transfer, press the empty garment for 3-5 seconds. This simple step steams out any hidden moisture and flattens wrinkles, both of which can ruin a good application.
What Causes Scorch Marks or Yellowing on Shirts?
You lift the handle and there it is: a faint, yellowish box around your design. This is a classic scorch mark, and it happens most often on white or light-colored polyester shirts. This points to one obvious villain: too much heat.
Polyester and other synthetic fabrics are, at their core, a type of plastic. They just can't handle high temperatures. Go even a little bit over their limit, and you can permanently singe the fibers, leaving that ugly discoloration behind.
Pro Tip: Scorching is almost always a heat problem. You have to respect what the fabric can handle and dial your temperature back to match.
Here’s how to keep your garments pristine:
- Lower the Temp: For polyester, you really want to stay in that 270-305°F sweet spot.
- Shorten the Dwell Time: Press for the minimum time recommended for your transfer. Don't add "a few extra seconds for good measure."
- Use a Protective Cover: A Teflon sheet or even a piece of parchment paper is a lifesaver. It acts as a buffer, spreading the heat more evenly and protecting the fabric from direct contact with the hot platen.
My Design Looks Cracked or Faded
What if your design looks cracked, wrinkled, or faded the moment you peel the carrier sheet? This is the complete opposite of the peeling issue. It usually means you've overdone it with too much heat, too much pressure, or too much time.
You've essentially cooked the transfer to death. All that excessive heat and pressure doesn't just activate the adhesive; it can make the vinyl itself brittle, causing it to crack and lose its vibrancy. If you want to dive deeper into how different materials react under the press, this guide on heat transfer shirt printing is a great resource.
The fix is simple: dial everything back. Try lowering your temperature by 10-15 degrees, easing up on the pressure, and shortening your press time. A gentler touch is all it takes to get a solid bond without destroying the design itself.
Think Beyond the T-Shirt
So, you've gotten the hang of pressing on fabrics. That's a huge step, but don't stop there! Your heat press isn't just a one-trick pony for t-shirts. A whole universe of customization opens up once you start exploring hard surfaces—things like ceramics, metal, wood, and even hats. This is where you can really let your creativity run wild and turn your setup into a full-fledged production house.
Of course, moving from a soft, porous t-shirt to a rigid, solid mug isn't a simple jump. The fundamental trio of time, temperature, and pressure still rules the game, but the settings themselves are a different beast entirely. These materials need a lot more heat, and often more time, to get that design to stick permanently.
Gearing Up for Hard Surfaces
The biggest change you'll notice when pressing something like a ceramic mug or a metal sign is the sheer amount of heat involved, especially if you're doing sublimation. This process literally turns solid ink into a gas that becomes part of the item's surface, and that chemical reaction demands intense, even heat to pull it off.
Thankfully, heat press technology has come a long way. There are now specialized presses for just about everything. Ceramics, for example, often need to get up to around 385°F with a much longer press time to make sure the ink fully infuses into the polymer coating. If you want to dive deeper, this heat press material guide shows just how much the tech has evolved beyond basic fabric pressing.
To get started with these unique items, you'll need a few extra tools in your arsenal:
- Specialty Platens & Attachments: Your flat press isn't going to wrap around a mug or a cap. You'll need attachments like cylindrical mug wraps or curved hat platens that hug the item's shape for perfect, even pressure.
- Sublimation Paper & Inks: This isn't your standard heat transfer vinyl. Sublimation uses special inks designed to vaporize under heat, creating vibrant, permanent images that won't peel or crack.
- Protective Gear: Seriously, we're talking about temperatures pushing 400°F. A good pair of heat-resistant gloves is non-negotiable when handling items fresh off the press.
Temperature Settings for Non-Fabric Items
Think of these numbers as your starting line, not the finish line. Always double-check the recommendations from the manufacturer of your blank items, because coatings and materials can differ slightly.
| Item Type | Temperature Range (°F / °C) | Time (Seconds) | Pressure | Key Tips |
|---|---|---|---|---|
| Ceramic Mugs | 385-400°F / 196-204°C | 180-240 | Firm | Use a mug press or a silicone wrap to ensure full contact. |
| Metal Plates | 380-400°F / 193-204°C | 60-80 | Medium | Give it a quick pre-press to zap any moisture and flatten it. |
| Wood/MDF | 360-380°F / 182-193°C | 70-90 | Medium | The wood's natural grain can show through, so do a test piece first! |
| Caps/Hats | 320-340°F / 160-171°C | 15-25 | Firm | You'll need a dedicated hat press with a curved platen for this. |
Here's the Golden Rule: Most hard goods made for sublimation have a special polymer coating. This coating is what the ink actually bonds with. If you grab an old mug from your cupboard or a piece of metal from the hardware store, the transfer will be a complete flop. Always, always use blanks specifically sold for sublimation.
Once you start exploring these materials, you'll see your product line explode. You can go from making just shirts to creating personalized photo mugs, custom metal signs, branded hats, and unique wooden art pieces.
Your Heat Press Questions Answered
When you're getting started with a heat press, or even if you've been at it for a while, a few questions always seem to pop up. It's totally normal. Getting the hang of the perfect time, temperature, and pressure combination for different materials can be a bit of a learning curve.
Let's walk through some of the most common questions we get. Think of this as your go-to cheat sheet for solving those head-scratching moments and getting your projects back on track.
How Do I Know What Pressure to Use?
This is probably the trickiest part because "light," "medium," and "firm" pressure feel different on every machine. If you're using a manual press, it really comes down to feel. A good benchmark for "medium" pressure is being able to close and lock the handle with some solid effort, but without having to throw your whole body into it.
A classic trick is the dollar bill test. Place a dollar bill at each of the four corners of your platen and clamp it down. Try to pull the bills out. If they slide out with no resistance, your pressure is way too light. If you can't budge them at all, you've got firm pressure.
For automatic or pneumatic presses, your best bet is to check the manufacturer's guide for their specific PSI (pounds per square inch) settings.
As a general rule, standard HTV on a cotton t-shirt loves firm pressure. You're really trying to push that adhesive deep into the fabric's weave. But for delicate materials or stretchy vinyl, you'll want to back off to a lighter pressure to avoid leaving a big ugly press box on the garment.
Can I Use a Home Iron Instead of a Heat Press?
Look, I get it. A heat press is an investment. While you can technically stick some types of vinyl on a shirt with a home iron, I strongly recommend against it for anything you want to last.
A heat press is designed to do two things an iron just can't: deliver consistent, even heat across the entire design and apply uniform, measurable pressure. Your home iron has hot and cold spots, and "pressure" is just you guessing and leaning on it. This almost always leads to designs that start peeling up after just one or two washes. If you're serious about your craft or running a business, a heat press is non-negotiable.
Why Is My White Polyester Shirt Turning Yellow?
Ah, the dreaded yellow scorch mark. This is a classic sign of too much heat. Polyester is essentially a type of plastic, and when it gets too hot, the fibers literally begin to melt or singe. This causes that permanent yellowish tint.
This usually happens when your temperature creeps above the 300-320°F range.
To avoid scorching your poly garments, always drop your temperature. Most modern vinyl and transfers designed for polyester work beautifully in the 270-305°F range. You should also shorten your press time and always use a protective cover sheet, like a Teflon sheet. It creates a small but crucial buffer between the hot metal and your delicate fabric.
For vibrant, durable, and easy-to-apply designs that work perfectly with these guidelines, trust Cobra DTF. Explore our USA-made, ready-to-press transfers and see the difference in your projects. Get your custom DTF transfers today