

Deep V Neck T Shirts for Ladies: A Buyer’s Guide
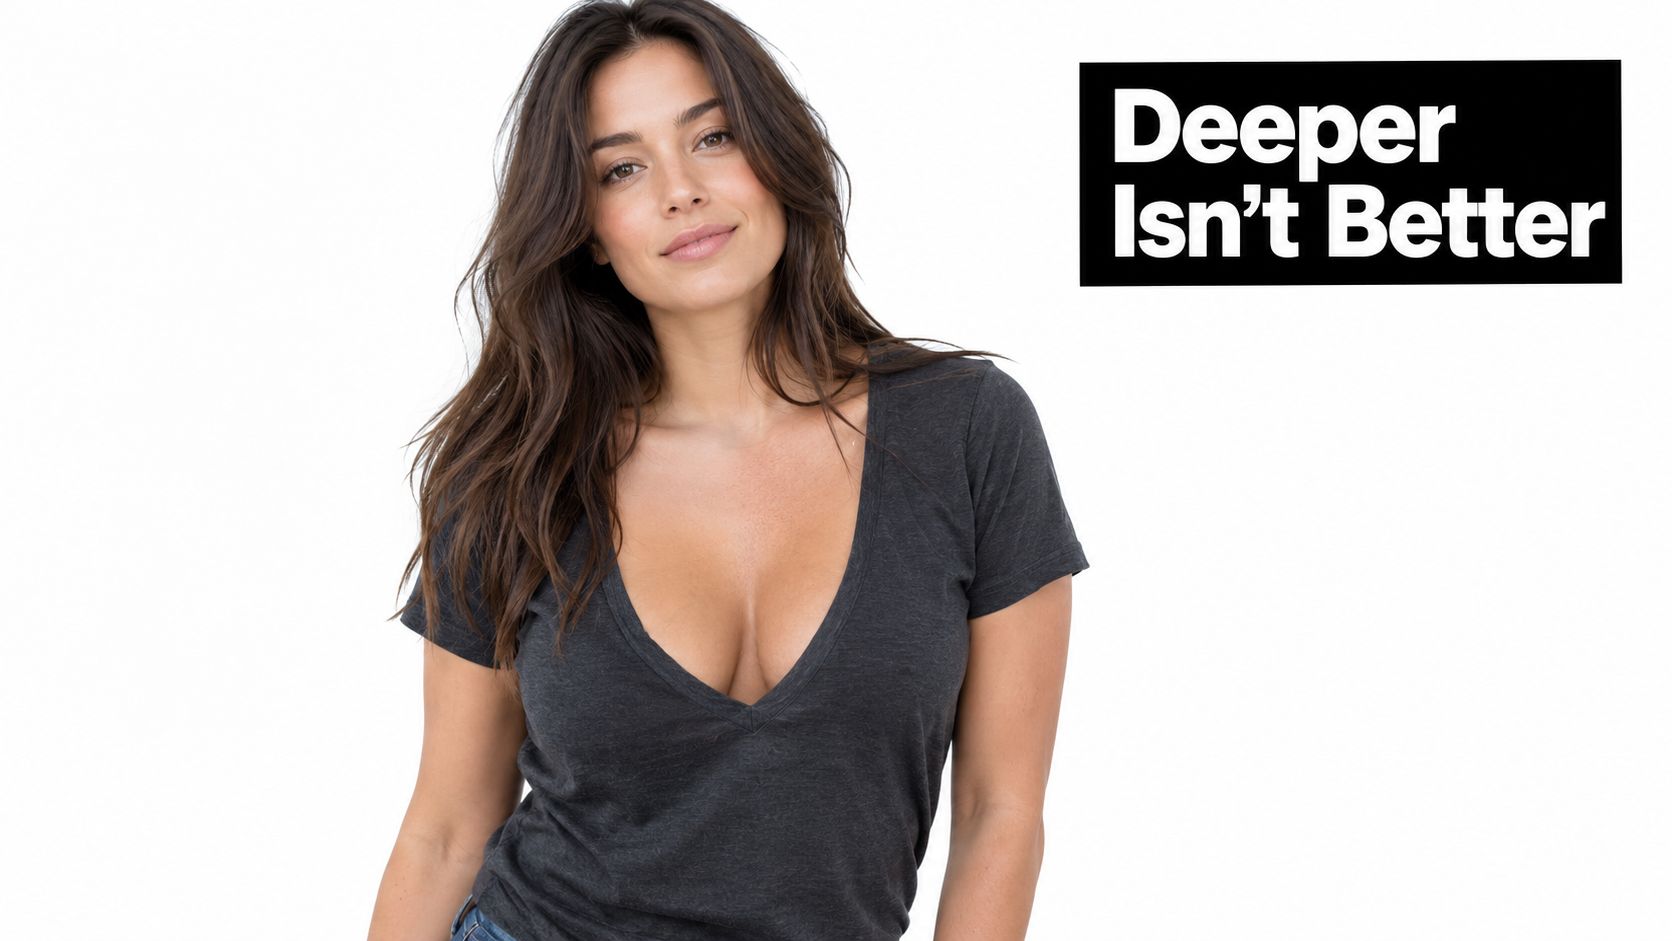
The usual advice about deep V-neck tees is too simple: choose a deeper opening for a more flattering silhouette, then add a graphic. Depth alone isn't a buying specification. For shop owners and designers sourcing deep V neck T shirts for ladies, the better question is whether the neckline delivers the intended coverage, holds its shape, and leaves usable space for decoration.
Why Deep V Depth Needs a Closer Look
A deeper V isn't automatically more flattering, more comfortable, or easier to print. My buying recommendation is to treat neckline depth as a fit variable, not a selling point that improves whenever the opening gets lower.
That distinction matters when you're approving boutique stock or a custom-apparel blank. A shirt can look convincing in a carefully posed photograph and still fail your intended customer's everyday requirements.
| Buying priority | What to request | What should decide approval |
|---|---|---|
| Everyday versatility | Neckline measurements and a wearable sample | Coverage that suits the intended customer |
| Fashion-led styling | Front and side views on a wearer | An intentionally approved silhouette |
| Custom decoration | An actual blank for placement testing | Artwork that fits without crowding the opening |
| Layered outfits | A sample with the planned inner or outer layer | A coordinated result without constant adjustment |
Use these as purchasing criteria, not universal rankings. A deliberately plunging boutique tee and a dependable staff shirt have different jobs, so they shouldn't share an approval standard.
Buy for a defined use
Before comparing suppliers, write down who'll wear the shirt, where they'll wear it, and whether decoration is essential. Use a guide to shirt neckline styles to distinguish the intended cut from neighboring options rather than accepting every open neckline as equivalent.
For a boutique assortment, it's also useful to compare tee-shaped silhouettes beyond ordinary jersey blanks. You can find this silk V-neck top from Cedar & Lily Clothier as a separate styling reference, without assuming that it shares a printable tee's construction or decoration requirements.
Buyer's rule: Approve the shirt for its intended wearer and use before approving it for its product photograph.
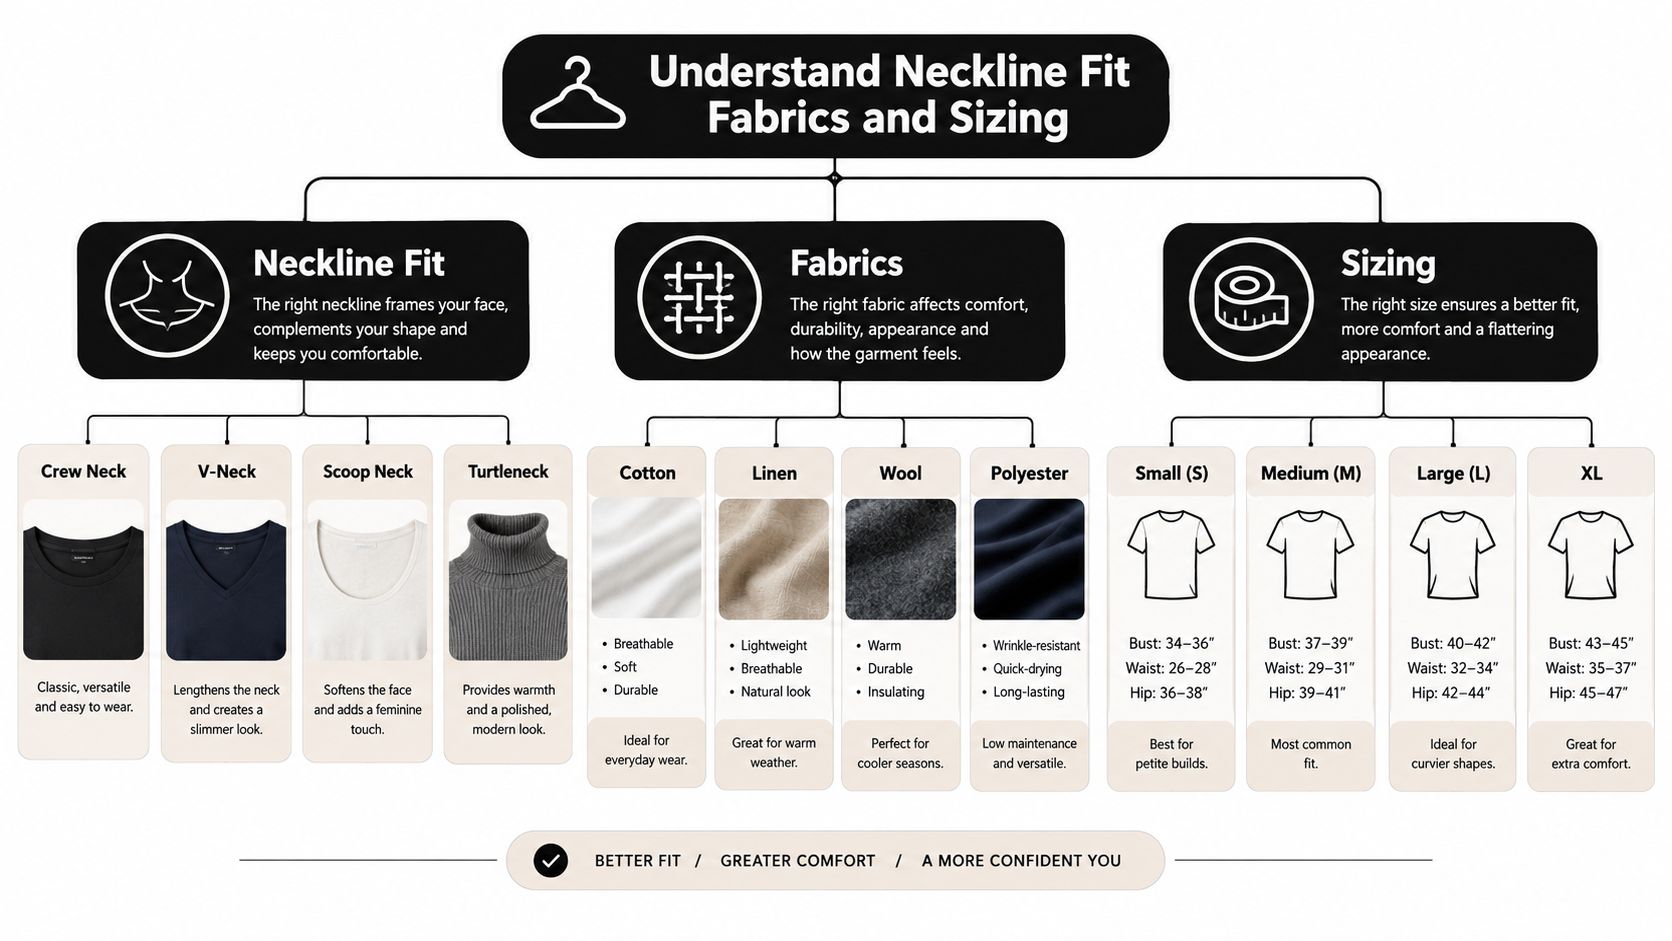
Understand Neckline Fit Fabrics and Sizing
A V-neck consists of diagonal lines extending from the shoulders and meeting on the chest, with an opening that can range from modest to plunging. Contemporary deep versions expose more upper chest and create a longer-looking visual line toward the torso, as described in the definition of a V-neck.
That describes the shape, but it doesn't tell you whether a particular garment meets your buying requirements. For that, you need a consistent vocabulary and a supplier who can translate product adjectives into specifications.
Read the neckline as a specification
Ask the supplier to identify the measurement landmarks on a diagram. Don't accept a neck-depth figure without knowing where the measurement begins, where it ends, and whether it was taken on a flat, unstretched garment.
Use the following terms in your sample request:
- Front neck drop: Request the vertical distance from the back-neck base to the lowest point of the V, with the landmarks shown.
- Neckline width: Ask the supplier to mark the endpoints used for the opening's width.
- V-point position: Record where the lowest point sits on the wearer relative to the bust.
- Shoulder stability: Observe whether the shirt stays in its intended position during the fitting.
- Garment ease: Establish whether the body is intended to fit closely, skim the torso, or hang loosely.
Keep neckline measurements separate from body measurements. A size chart describing chest width and body length isn't a substitute for a neckline specification, and a larger nominal size isn't automatically the correct route to a more wearable opening.
Separate fabric description from fit approval
Ask for fabric weight, composition, stretch information, and collar construction alongside the garment chart. Then inspect the sample for opacity and drape instead of assuming those qualities from a fiber name.
For example, do not approve a light-colored shirt for unlayered wear just because the supplier describes the material as premium. Check it with the intended undergarment and under the lighting conditions relevant to your shop photography and customer use.
My preferred sample record puts the garment specification beside fitting observations. That lets your team distinguish a pattern issue from a fabric preference and gives the supplier something actionable when you request a revision.
Compare Deep V Styles for Different Fits
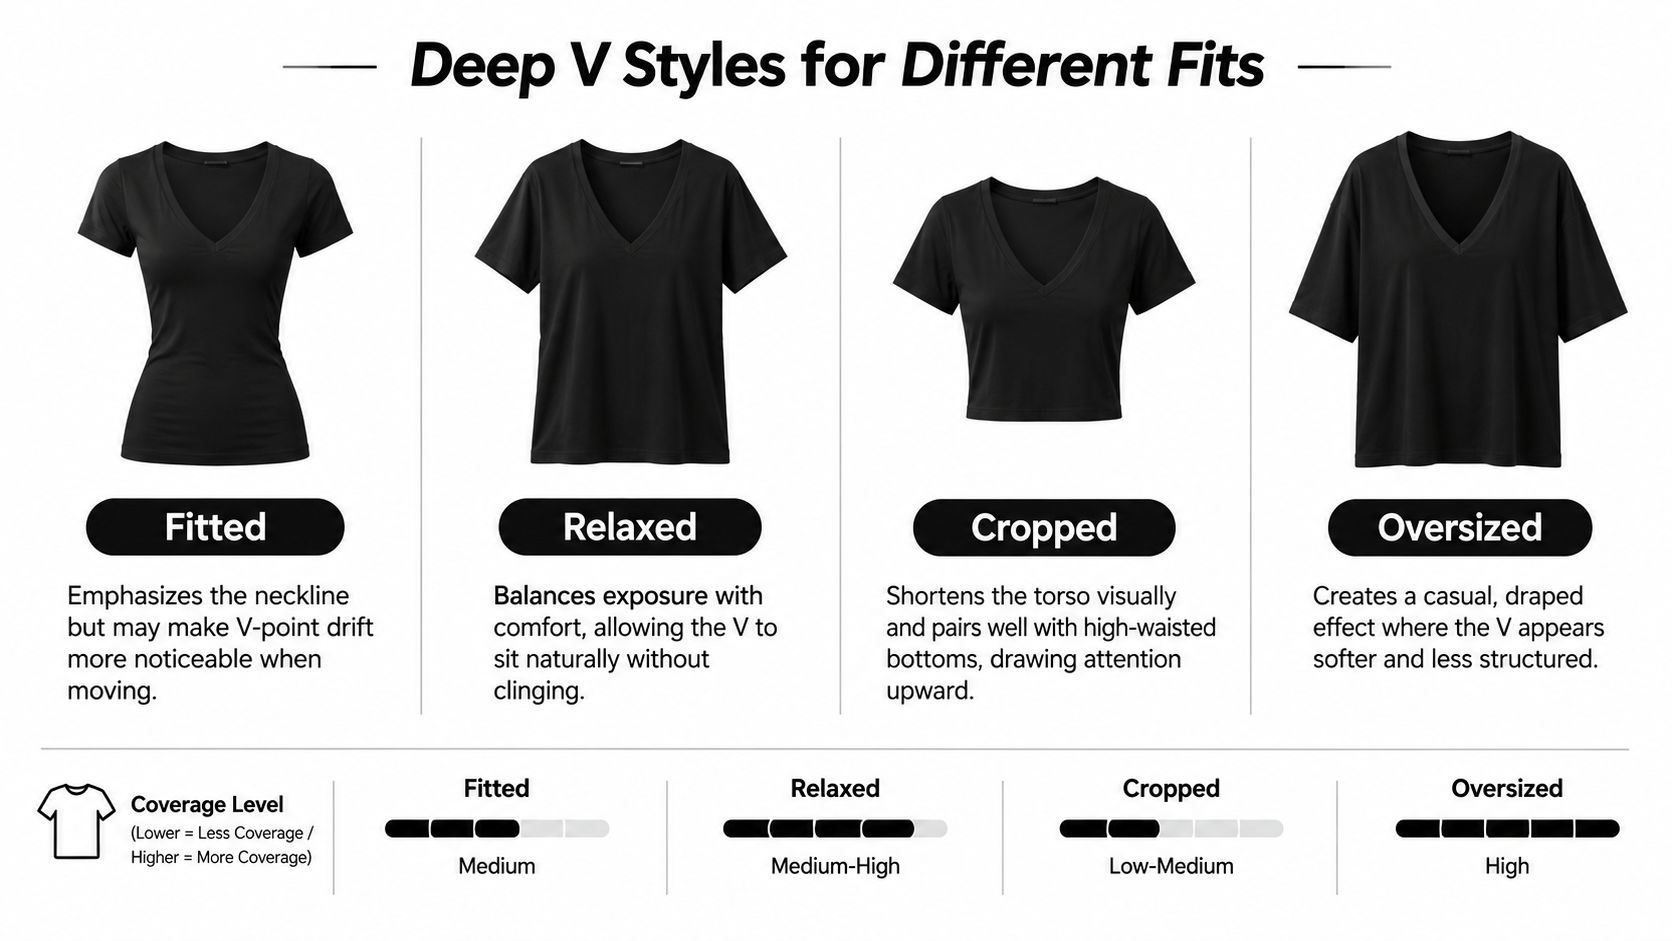
Fitted, relaxed, cropped, and oversized describe different buying decisions, not a progression from less to more coverage. A cropped shirt can also be fitted or relaxed, so record body length separately from body ease when comparing samples.
Front neck drop and width need to be evaluated together, and the same drop can look substantially different across fitted, relaxed, and oversized garments. The measurement-led deep V guide also emphasizes checking the garment on a moving wearer rather than relying on a hanger.
Match the cut to the customer's priorities
For a fitted tee, I'd make neckline alignment a strict approval criterion. Ask the wearer to move naturally and note whether the opening stays where the designer intended, rather than accepting a close fit just because it produces a sharp product image.
A relaxed cut is my starting point for customers who want room through the torso without committing to an oversized look. Compare it with the fitted sample on the same wearer, but don't assume that extra body fabric guarantees a better neckline.
For cropped styles, approve the shirt with the intended bottoms. High-waisted trousers or skirts are useful styling options to test, but check the actual hem relationship while sitting and reaching rather than judging the outfit only while standing.
An oversized tee needs a deliberate shoulder and side-seam review. I'd reject a sample that requires repeated repositioning unless an intentionally shifting, off-shoulder look is part of the collection and clearly described to customers.
- Petite use cases: Check whether the neckline and hem sit where the design intends. Don't solve every proportion issue by choosing a smaller size.
- Standard-length use cases: Approve tucked and untucked options separately if you plan to show both in product photography.
- Tall use cases: Request a suitable body-length option rather than assuming that increasing overall size will solve the length requirement.
Make movement part of the fitting
Have the wearer stand, sit, bend, and reach. Photograph the front and side positions, and ask whether they feel the need to hold or adjust the opening.
A shirt that needs constant correction during a fitting isn't ready for an everyday-wear claim.
Treat the infographic's coverage comparisons as visual prompts, not guarantees. The actual garment and wearer must determine approval, especially when you're selling across a range of bust shapes and proportions.
For e-commerce, publish the sample's neckline measurements alongside clear fit photography. Give customers evidence they can compare with a garment they already own, not just another subjective description of how deep the V looks.
Evaluate Fabric Weight Stretch and Collar Quality
A soft hand feel won't compensate for an unstable collar. For deep V tees, I'd inspect the neckline before getting attached to the fabric, color, or wholesale presentation.
The V point concentrates seam and stretch stress. A production specification should therefore record front neck drop, V width, symmetry, and finished rib or binding width, while an incoming check should include a horizontal stretch-and-release test for visible waviness or permanent opening, according to Fexwear's neckline construction guidance.
Compare materials through sample checks
Use weight categories to organize your sampling, not to declare a winner before handling the garments. A lighter fashion tee and a more structured everyday blank deserve different acceptance criteria.
| Fabric direction | What I'd inspect first | Purchase trade-off to resolve |
|---|---|---|
| Light, drapey knit | Opacity, neckline behavior, decorated hand feel | Whether the desired softness suits the intended coverage |
| Medium-weight everyday knit | Comfort, recovery, surface appearance | Whether it balances casual wear with the planned print |
| Heavier, structured knit | Drape on the wearer and comfort under layers | Whether the structure suits the collection's styling |
Don't turn a weight preference into a composition rule. Use the T-shirt materials guide to frame supplier questions, then approve the specific knit you'll receive.
Compare decorated and undecorated samples by touch as well as appearance. If the design changes how the front hangs or feels, that belongs in the purchase decision rather than becoming a surprise after production.
Inspect the collar as a finished component
Lighter 1×1 rib generally provides more flexibility, while wider, heavier rib structures generally provide stronger shape retention, as noted in the construction guidance above. Neither characteristic excuses poor finishing, and stronger retention isn't automatically the right visual choice for a delicate, draped style.
Inspect both sides of the V point, not just the outside face. My sample review includes the following checks:
- Symmetry: Lay the garment flat and compare the neckline's sides without pulling them into alignment.
- Recovery: Stretch the opening horizontally, release it, and check that it returns promptly.
- Seam finish: Look for visible puckering, loose stitching, and an uneven meeting point.
- Binding consistency: Compare the finished width around the opening and against the approved sample.
Keep a signed-off reference garment for incoming inspections. When a later delivery looks different, your team should be comparing it with an approved physical standard, not relying on someone's memory of a soft, well-fitting sample.
I wouldn't waive an obvious collar defect because the shirt will be printed. Decoration is a separate process, not a repair for neckline construction.
Select Deep V Tees for DTF Decoration
Choose the blank and the artwork placement together. Don't buy the shirt first and assume your existing crew-neck graphic can move downward until it clears the opening.
Start by marking the usable front area on the actual sample. Keep the collar, binding, and V opening distinct from the proposed decoration zone, then assess that zone on a wearer.
Build an approval sample before a production layout
Use a paper placement template or another removable mockup to compare artwork positions before decorating. Review the shirt from the front and side, and check the composition with the wearer's normal posture.
For blank-selection questions, consult the guide to choosing shirts for DTF, then confirm the transfer supplier's current application and care instructions. Don't improvise temperature, pressure, timing, or peel requirements from a different transfer product.
Deep V DTF Placement Checklist
| Decision area | What to verify | Why it matters |
|---|---|---|
| Neckline clearance | Artwork doesn't overlap the opening or binding | Confirms the design fits the available area |
| Visual alignment | Placement looks intentional on the wearer | Flat alignment alone isn't approval |
| Text and detail | Fine elements remain readable at the proposed scale | Resizing must preserve the design's purpose |
| Graphic proportions | Lower-front artwork suits the hem and torso length | Keeps the composition appropriate to the blank |
| Application | Current supplier instructions suit the selected garment | Establishes the process to test |
| Finished sample | Appearance and comfort meet your requirements | Gives the production team a physical reference |
Pay particular attention to high-contrast borders and fine text during the fitting. I'd compare alternate positions rather than assume a technically centered layout is the most convincing visual choice.
For a large lower-front graphic, assess the shirt tucked and untucked if both are intended uses. Don't approve a composition that depends on a styling choice your product description never mentions.
Arrange artwork after placement approval
The DTF Transfers Gangsheet Builder from Cobra DTF supports high-resolution uploads, live layout preview, design duplication and resizing, flexible sheet lengths, and fast checkout. It's an option for arranging approved artwork, not a substitute for testing that artwork on the shirt.

Record the approved artwork size and placement reference for each garment variation. Do not reuse a placement across different cuts unless your team has checked the result.
Match Deep V Tees to Real Wear Scenarios
Consider a boutique buyer choosing a tee for customers who want to wear it without an extra layer. I'd have that buyer approve coverage and opacity in the intended outfit, not with an emergency camisole added halfway through the fitting.
For practical styling, evaluate unlayered wear, camisole-or-tank layering, and blazer-or-cardigan layering as separate configurations. Neckline recovery, shoulder stability, fabric weight, and V-point placement are relevant to that review, alongside the V-neck styling context from ASOS.
Approve the outfit customers will actually wear
For an unlayered casual tee, ask the wearer to use the undergarment they expect to wear with it. Check the edges of that undergarment and the overall appearance without treating visibility as wrong; the question is whether it matches the product's intended presentation.
With a camisole or tank underneath, decide whether the inner neckline is meant to show. If it is, photograph that combination clearly and make the styling choice look deliberate rather than incidental.
A blazer or cardigan deserves its own fitting. Check the outfit with the outer layer open and closed where applicable, and confirm that the tee still looks intentional when the wearer removes it.
- Work apparel: Obtain dress-code approval before committing to the blank. Don't ask the print team to resolve a coverage disagreement after purchasing.
- Event merchandise: Test the shirt against the wearer's likely tasks, including reaching across a counter or bending to collect supplies.
- Boutique collections: Decide whether the tee is sold as a standalone piece or presented as part of a layered look.
Give customers useful styling choices
For a fashion-focused assortment, I'd consider offering a more covered alternate neckline rather than insisting every customer adapt to the deepest cut. That's a clearer choice than using the same vague fit language across visibly different garments.
Merchandising advice: If a layer is necessary to achieve the photographed coverage, show it and describe it.
Keep the rest of the outfit purposeful. Test necklaces, waistlines, and outer layers without requiring all of them to draw attention to the opening; a successful outfit doesn't need the neckline to be its only feature.
Choose the Best Deep V T Shirt
My recommendation isn't a universal winning shirt. Choose a shallow or moderate V for an adaptable everyday basic, a deeper cut for a fashion-led collection with intentionally approved coverage, and a narrower, stabilized shape when dependable coverage matters more than maximum exposure.
For custom apparel, the winning sample must satisfy both the garment buyer and the print team. A blank shouldn't pass merely because it's attractive undecorated, and an attractive graphic shouldn't excuse a shirt that fails the intended use.
Make laundering part of supplier approval
Use standardized procedures where they're relevant to your quality program. ASTM D6321's machine-washable T-shirt evaluation procedures include color change, staining, dimensional change after home laundering, non-chlorine-bleach resistance, and garment skew or twist.
Treat those as distinct checks, not a single pass-or-fail impression that the shirt still looks acceptable. Record the laundering conditions so your team can compare samples consistently and discuss failures with the supplier.
Test printed and unprinted samples through repeated washing. Compare neckline dimensions, shoulder width, body length, and print appearance against the original records, then decide whether any change affects wearability or the approved composition.
Avoid treating a benchmark from another fabric category as a universal purchasing tolerance. Agree on the relevant requirements with the supplier and, where necessary, a qualified testing provider before approving bulk stock.
Sign off against a concise buying record
Your final approval should answer practical questions rather than repeat marketing descriptions:
- Fit: Does the sample deliver the intended silhouette on representative wearers?
- Movement: Can wearers complete the expected activities without unwanted adjustment?
- Construction: Does the neckline match the approved finish and recovery requirements?
- Wash performance: Do the recorded results meet your agreed acceptance criteria?
- Decoration: Does the finished artwork retain its intended clearance and appearance?
- Use: Is the garment suitable for the way you'll describe, photograph, and sell it?
Keep the approved sample, measurement sheet, fitting photographs, and print reference together. That package gives purchasing, production, and customer-facing staff a shared definition of the product.
Don't place a bulk order while unresolved fit questions remain. Request the revision, test it, and approve the finished result rather than buying on the promise that production will be better.
Cobra DTF offers custom DTF transfers and an online gang-sheet workflow for uploading, resizing, duplicating, and arranging artwork. Once you've approved your deep V blank and placement sample, visit Cobra DTF to arrange your production artwork and order transfers for the tested design.