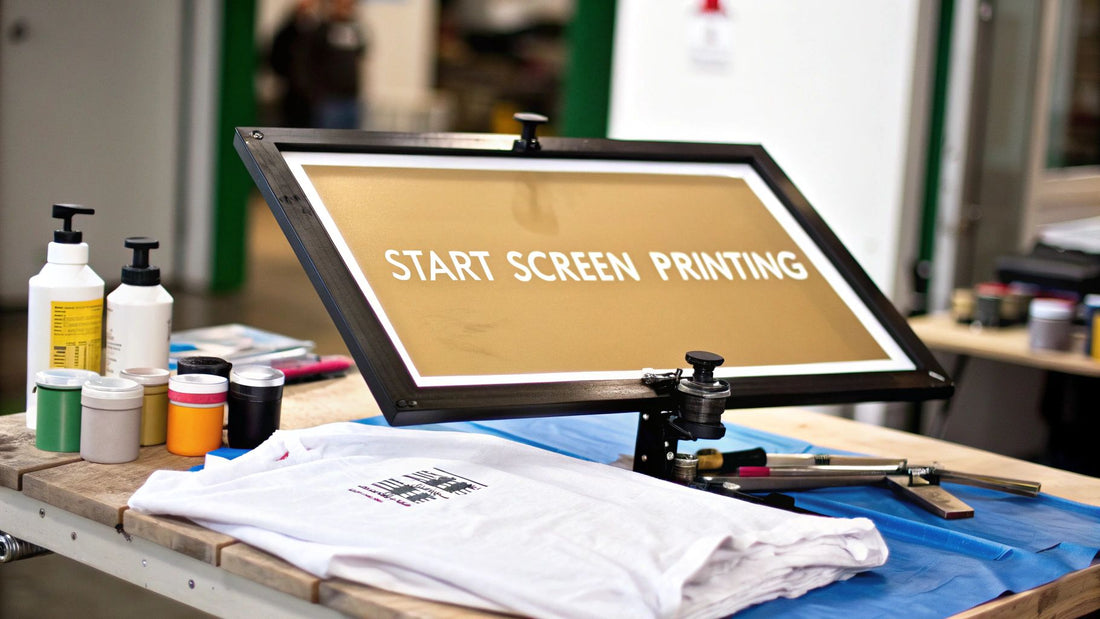
How to Start Screen Printing at Home
Before you can pull that first print, you've got to have the right gear. At its core, screen printing boils down to just four things: a screen, a squeegee, emulsion, and ink. Everything else is built around this foundation. Get these four right, and you're ready to start.
Gathering Your Screen Printing Essentials
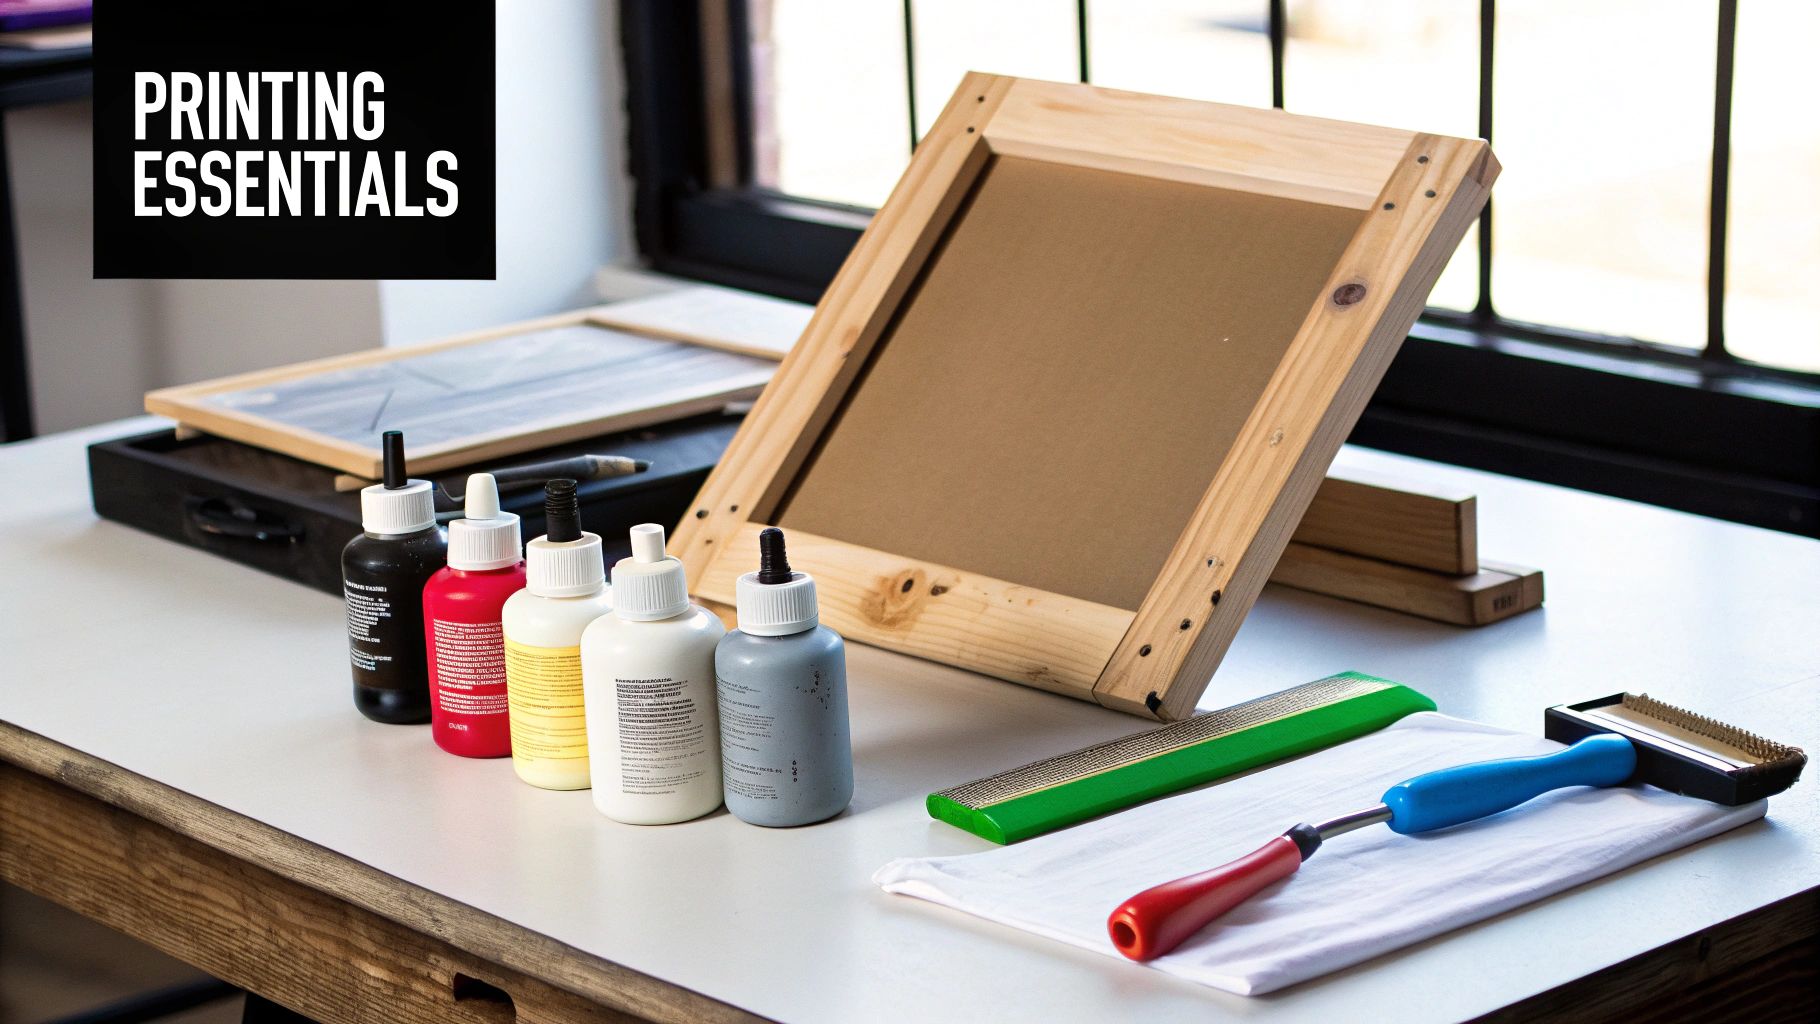
Walking into the world of screen printing feels a lot like being a kid in a candy store—exciting, but a little overwhelming. The big question everyone asks first is: should I buy an all-in-one starter kit or piece my setup together myself? Honestly, there’s no wrong answer. It really comes down to your budget and how deep you plan to dive into the craft.
Starter kits are a fantastic way to just get going. They take all the guesswork out of the equation by bundling everything you need to start printing immediately. This is usually the cheapest way to test the waters without forgetting something critical.
On the other hand, buying your gear individually gives you control. You can pick a better squeegee from the get-go or choose specific ink colors you're actually excited about. It might cost a bit more upfront, but you’ll build a more capable, higher-quality toolkit that grows with you.
Your First Screen Printing Shopping List
To make it easier, here's a look at what you’ll need, comparing what you typically find in a basic kit versus what I'd recommend picking up separately if you have the budget.
| Item | What It Does | Common Kit Version | Recommended Standalone Pick |
|---|---|---|---|
| Screen | Holds your stencil. | A small, low-mesh wooden screen. | An aluminum 110 or 156 mesh screen (around 20"x24"). It's more durable and won't warp. |
| Squeegee | Pushes ink through the screen. | A basic, often soft, squeegee. | A 70-durometer blade squeegee. It’s the perfect all-rounder for t-shirt printing. |
| Photo Emulsion | The light-sensitive goo that creates your stencil. | A small tub of dual-cure emulsion that requires mixing. | A quart of pre-sensitized emulsion. It’s ready to use right out of the container—way less hassle. |
| Ink | The color you print with. | Tiny sample pots of basic water-based ink. | A quart of white plastisol ink. It's the most versatile color and plastisol is much more forgiving for beginners. |
This checklist covers the absolute must-haves. As you get more experienced, you'll naturally start adding things like a scoop coater for emulsion, a better exposure light, and different chemicals, but this is all you need to pull your first successful print.
Screens and Squeegees: The Foundation of Your Setup
Let’s talk screens. This is arguably the most important piece of equipment you'll buy. The first choice you'll make is the frame material: wood or aluminum. Wooden frames are cheap and totally fine for starting out, but they have a tendency to warp after a bunch of wash cycles. Aluminum frames are a serious upgrade—they stay perfectly flat, are easier to clean, and will last for years.
Then there’s mesh count, which is just the number of threads per inch. It dictates how much ink gets through to your shirt.
- 110 Mesh Count: This is your workhorse for t-shirts. It lays down a nice, thick layer of ink, which is perfect for bold designs and getting bright colors on dark fabric.
- 156 Mesh Count: A great all-around mesh. It holds more detail than a 110 but still lets enough ink through for most standard t-shirt jobs.
- 230 Mesh Count: You won't need this right away. This is for super fine detail, think printing on paper or using really thin, water-based inks.
Your squeegee is the tool that makes the magic happen, pushing ink through that mesh stencil. The key here is the hardness of the rubber blade, measured in durometers. For printing on t-shirts, a medium 70-durometer squeegee is the industry standard and the perfect place to start.
Inks and Emulsion Explained
The chemicals can seem intimidating, but they're pretty straightforward. You really only need two to start: photo emulsion and ink.
Photo emulsion is a light-sensitive liquid that you coat your screen with. You place your design (printed on a transparency) on the coated screen and expose it to UV light. The emulsion hardens everywhere the light hits it, but the black parts of your design block the light. Those unexposed areas stay soft and wash out with water, creating your stencil. My advice? Get a pre-sensitized emulsion so you don’t have to worry about mixing chemicals.
When it comes to ink, you’ll likely start with one of two types:
- Plastisol Ink: This is what most professional t-shirt shops use. It’s thick, vibrant, and incredibly user-friendly because it won’t dry in your screen while you're working. The only catch is it needs heat to cure—about 320°F (160°C)—to become permanent and washable.
- Water-Based Ink: This ink is more eco-friendly and gives prints a much softer feel because it soaks into the fabric fibers. The downside is that it can air-dry right in your screen, which can clog your design mid-print and cause a real headache for a beginner.
Choosing the right ink often comes down to the garment itself. Understanding how different inks interact with fabrics is a huge part of the craft. You can learn more about finding the best t-shirt fabric material to make sure your prints come out looking great.
And if you're wondering if this is a good skill to pick up, consider this: the global screen printing market is expected to hit around $15.15 billion by 2032. That growth is being driven by people just like you who want unique, personalized apparel. It’s a craft with real demand.
Creating a Functional Home Workspace
Where you print is just as important as how you print. Your environment has a huge impact on the quality and consistency of your work. You don't need a massive, professional studio, but dedicating a specific area—a spare room, a corner of the garage, even a big closet—will save you from messy mistakes and make the whole process run smoother.
The secret is to think like a small-scale assembly line. You need to create three distinct zones to manage your workflow cleanly and safely: a place for screen prep, a place for washing up, and a place for the main event—printing. Getting this organized from the get-go will prevent so many headaches down the road.
The Three Essential Zones
The real key to a manageable home setup is splitting your space by function. Each zone has its own needs for light, water, and ventilation, which are critical for both your safety and for getting a great print.
- The Dark Zone: This spot has to be 100% light-safe, meaning absolutely no UV light can sneak in. This is where you'll coat your screens with light-sensitive emulsion and expose your artwork. Even a tiny bit of sunlight can ruin a screen before you even get started.
- The Wet Zone: You'll need access to water for rinsing out your stencils after exposure and for cleaning ink and emulsion off your screens later. This area is going to get messy, so make sure it's away from anything that can't handle a splash.
- The Dry Zone: This is your main production floor. It’s where the magic happens—printing and curing. It needs to be clean, well-lit (with non-UV light), and organized.
This infographic gives a great visual breakdown of how these three zones flow together in a home screen printing setup.
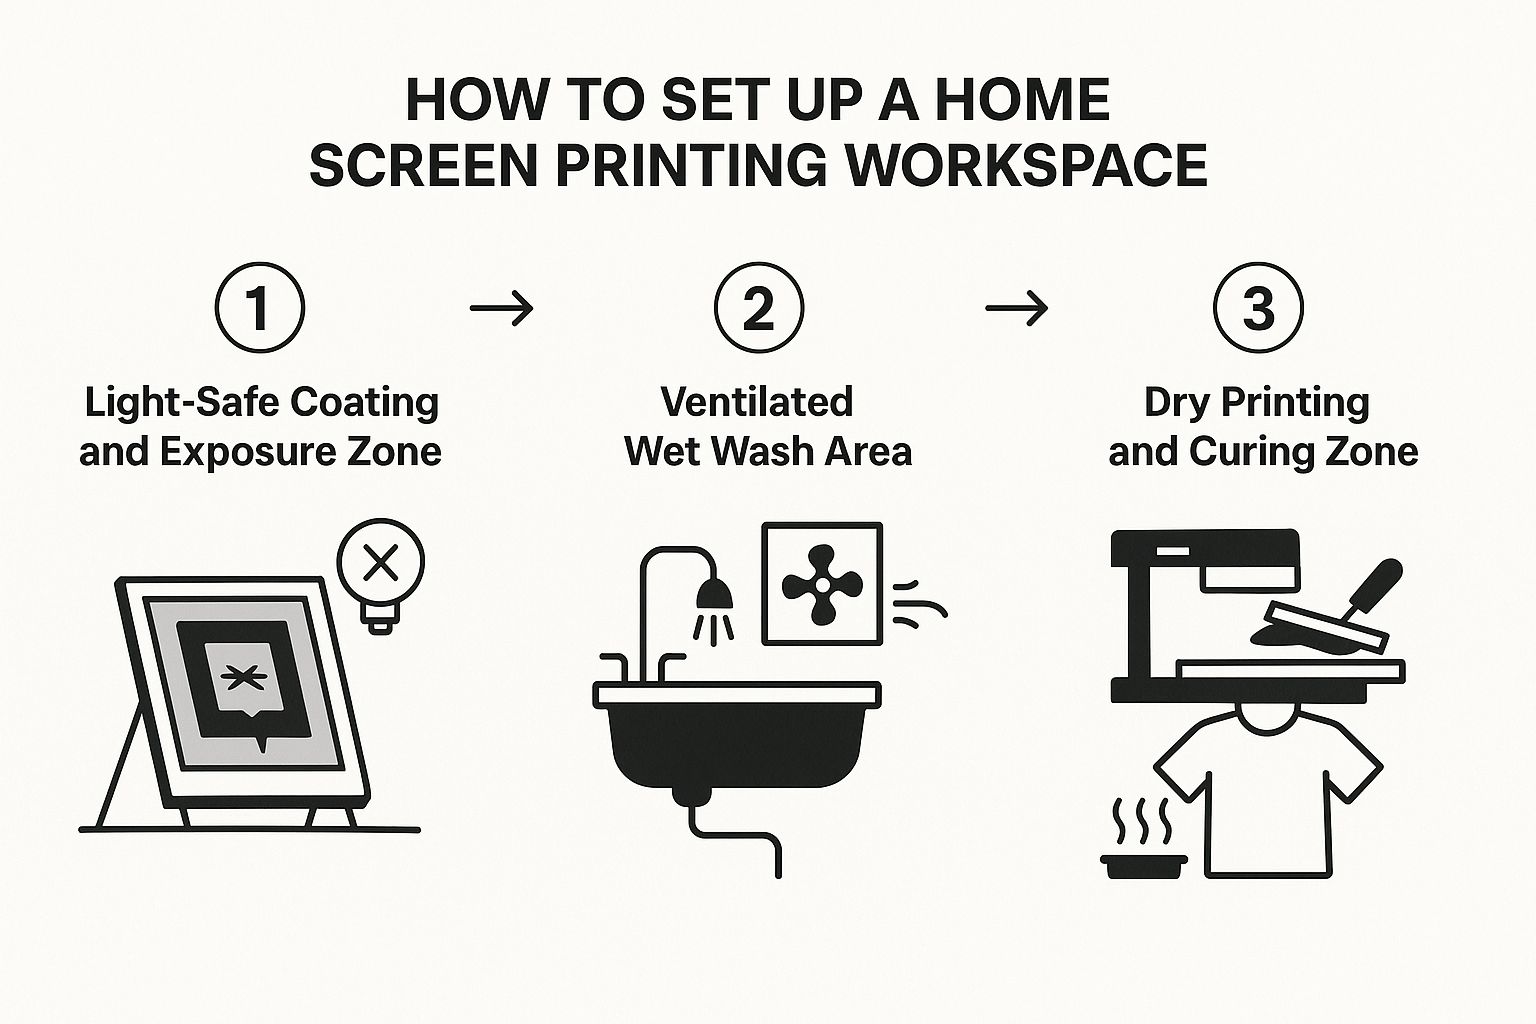
Thinking about the journey from the light-safe coating area, to the wet washout station, and finally to the dry printing table helps you map out your space logically.
Setting Up Your Dark Zone
Your dark zone is probably the most critical part of the whole operation. It needs to be completely sealed off from UV light. That means covering any windows with blackout curtains or, in a pinch, a couple of layers of heavy-duty black trash bags. You're aiming for an environment as dark as an old-school photography darkroom.
You'll also need a yellow "safe light" bulb. These bulbs give off a wavelength of light that won't expose your photo emulsion, so you can actually see what you're doing while you coat your screens. And remember, keep this space as dry and dust-free as possible to avoid little imperfections ruining your stencil.
A classic rookie mistake is underestimating just how sensitive photo emulsion is. A few seconds of sunlight hitting a coated screen is more than enough to harden it, making it impossible to wash out your design. Always, always handle your coated screens in your light-safe zone.
Equipping Your Wet and Dry Zones
The wet zone is for all the messy stuff. A big utility sink is perfect, but a bathtub or shower with a detachable sprayer works just as well. The most important thing here is good water pressure—you need it to blast out your stencil properly after exposure. I highly recommend putting a mesh trap over the drain to catch all the gunk from emulsion and ink to prevent some serious plumbing bills.
Ventilation is non-negotiable, especially when you're working with screen printing chemicals. Crack a window and stick a box fan in it, pointing outwards. This will pull fumes away from you and out of your workspace. This is crucial for both the wet zone, where you might use screen-opening chemicals, and the dry zone, where ink fumes can get pretty strong.
Finally, your dry zone is command central. A solid, sturdy workbench is the foundation here; our guide on selecting a heavy-duty workshop bench can help you pick a good one. You'll also want good overhead lighting (again, no UV bulbs!) and some shelves or a cart to keep your inks, squeegees, and blank shirts organized and within easy reach. Trust me, a clean printing station is a happy printing station.
From Digital Design to Physical Stencil

This is where the magic really starts to happen. You're about to take an idea on your computer and turn it into a physical tool that can crank out real, sellable products. We'll walk through this entire pre-press journey, breaking down the technical steps that often trip up beginners.
It all begins with your artwork. Your design has to be converted into a "film positive," which is just a fancy way of saying a stencil printed on a transparency. The key is to get a completely opaque black image on a perfectly clear background. Any light that sneaks through the black parts of your design will ruin your stencil later on.
After you've got the digital file ready, it never hurts to look for some good shirt design inspiration to make sure your vision is locked in. A great idea is the bedrock of a great print.
Preparing and Coating Your Screen
With your design ready to go, the screen is your next focus. Before you do anything else, it has to be spotless and totally degreased. Seriously, even the oils from your fingertips can keep the emulsion from sticking correctly, so a good scrub with a dedicated screen degreaser isn't just a suggestion—it's a must.
Once it’s completely dry, you’ll head into your light-safe darkroom to apply the photo emulsion. Getting this right is a skill that definitely takes some practice.
You'll use a tool called a scoop coater, which is basically a metal trough designed to lay down a perfect layer of emulsion. Your goal is a thin, consistent coat on both sides of the screen mesh.
- The Technique: Hold your screen upright and rest the edge of the scoop coater against the very bottom of the mesh. Tilt it just enough for the emulsion to flow and make contact with the screen.
- The Motion: In one smooth, confident motion, pull the coater all the way up the screen. You want to keep firm, even pressure the whole time. You should hear a satisfying little "zip" sound as the mesh fills up.
- The Result: Flip the screen around and repeat on the other side. A perfect coat looks glassy and even, without any drips, streaks, or thick spots.
After coating, the screen needs to dry completely in the dark, with the t-shirt side facing down. A common rookie mistake is rushing this part, which leaves you with a soft stencil that will fall apart when you try to wash it out.
Mastering Screen Exposure
Exposure is the moment of truth. This is where you blast the screen with UV light to harden the emulsion everywhere except where your design is blocking it. You don't need a professional-grade unit to get started; a simple 500-watt halogen work light or a dedicated UV bulb from the hardware store can work just fine.
The setup is pretty straightforward. You place your film positive on the glass of your exposure unit, then lay your dry, coated screen on top of it (t-shirt side down). Finally, you put something flat and heavy on top to press the film and screen together tightly. Then, you flip the switch.
So, how long do you leave the light on? That’s the million-dollar question.
Every single setup is different. Your emulsion type, the power of your bulb, and how far away the light is from the screen all change your ideal exposure time. The only real way to nail it is to run an exposure test.
It's simple. Use a piece of cardboard to cover most of your screen. Expose the screen in two-minute increments, sliding the cardboard to reveal a new section each time. When you wash it out, you'll see a range of results, and one of them will be perfect. This little test will save you from countless hours of frustration and wasted screens.
The Final Washout and Reveal
Right after the timer goes off, get that screen to your washout booth or sink. At first, it'll look like nothing happened. Gently spray both sides with cool water to get the emulsion wet, and then just let it sit for about a minute.
This brief soak allows the unexposed emulsion—the part protected by your black artwork—to soften up. Now, using a sprayer with decent pressure, start washing out the design from the t-shirt side of the screen. You’ll see your stencil appear like magic.
Once the design is totally clear and the edges look sharp, give both sides a final rinse. It’s a good idea to hold it up to a light to check for any leftover emulsion scum or residue in the open areas of the mesh. A clean stencil is absolutely critical for a clean print.
Let the screen dry completely, and you're officially ready to print. You’ve successfully created the physical version of your digital design.
While this traditional process is the foundation of screen printing, it's worth noting that other options exist. If you find this part of the process tedious, our guide to other t-shirt printing techniques can show you different methods for getting your designs onto apparel.
Mastering the Art of the Squeegee Pull
Alright, you've got a perfectly exposed screen in your hands. This is the moment of truth—the most satisfying part of the whole process where you finally lay down some ink. This is where your design makes the leap from a digital file to a real, tangible thing. The key here isn't brute force; it's all about technique and a little finesse.
First things first, get your station set up properly. Whether you're working with a single-color press or just some hinge clamps bolted to a table, a good setup is non-negotiable. You’ll need to get your t-shirt or whatever you're printing on perfectly smooth over the platen (that's the printing board). Any wrinkles or movement will ruin your print before you even start.
Then comes registration. That's just a fancy word for making sure your screen is lined up exactly where you want the design to land on the shirt. For a single-color job like this, it’s pretty straightforward. Just place your screen down, get the alignment right, and clamp it down tight.
The Two-Stroke Printing Method
The actual printing motion is a kind of two-step dance. It’s not just about jamming ink through the screen; it's about loading the stencil correctly and then transferring the ink with precision. Getting the flood stroke and print stroke down will instantly level up your prints.
The first move is the flood stroke. You'll lift the screen just a hair off the garment (this is called off-contact). Pour a solid line of ink across the top of your design, right inside the screen. Now, with very light pressure, pull the squeegee toward you, gently gliding the ink over your entire design. This fills the open mesh with ink but doesn't actually print it on the shirt yet.
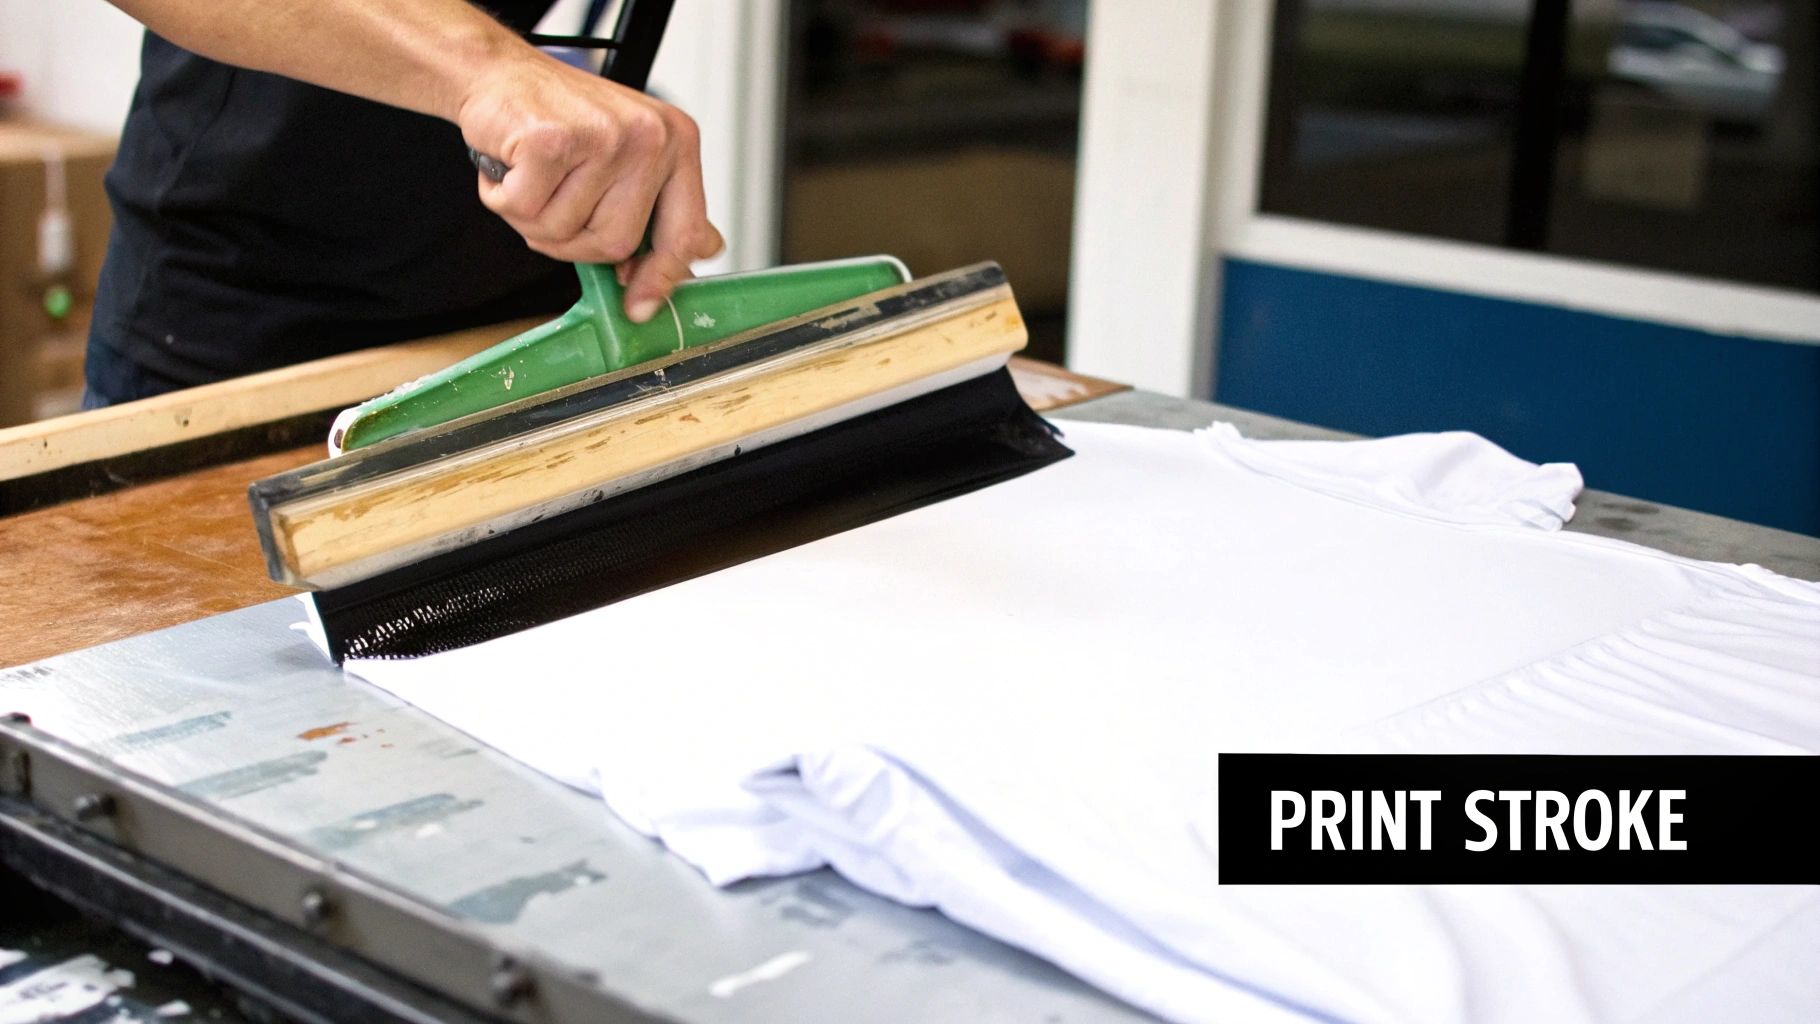
Next up is the print stroke. Lower the screen so it's sitting right on your t-shirt. Holding your squeegee at a pretty sharp angle, apply firm, even pressure and push it away from you in one smooth, confident motion. This action shears the ink cleanly off the mesh and deposits it right onto the fabric.
Nailing Your Squeegee Technique
The secret to a great print really comes down to three things: angle, pressure, and speed. When you get these three working together, you get that crisp, professional look instead of a blurry mess.
- Angle: The sweet spot for your squeegee is usually between 70 and 75 degrees. A more vertical angle deposits less ink, which is great for fine details. A lower, more slanted angle lays down a thicker coat of ink, which you'll want for printing bold designs on dark shirts.
- Pressure: You need to push down hard enough to make clean contact across the whole design. A good rule of thumb is to see the squeegee blade flex just a little as it clears the ink from the screen. If your pressure is all over the place, you'll get faded spots and ugly, uneven coverage.
- Speed: A steady, moderate pace is your best friend here. If you go too fast, you risk a thin, incomplete print. Go too slow, and you'll get ink bleed, which blurs the sharp edges of your design. Find a comfortable rhythm and just stick with it.
One of the best tips I ever got was to "listen" to the print. A clean print stroke makes a distinct "zip" sound as the squeegee moves across the mesh. If you don't hear that, you probably aren't using enough pressure or your angle is off.
Troubleshooting Common Printing Problems
Even when you think you've done everything right, things can go wrong. The good news is that most common issues have simple fixes you can apply on the fly. Learning how to start screen printing is really about learning how to troubleshoot.
Here are a few common headaches and how to solve them:
| Problem | Likely Cause | How to Fix It |
|---|---|---|
| Ink Bleeding | You're pushing too much ink through the mesh. | Increase your squeegee angle (make it more upright), ease up on the pressure a bit, or use a higher mesh count screen next time. |
| Blurry Edges | The screen or shirt is shifting during the print. | Make sure your shirt is stuck down firmly to the platen with a light tack spray. Double-check that your screen clamps are cranked down tight. |
| Uneven or Faded Print | Your pressure is inconsistent or you didn't flood the screen properly. | Be sure to flood the entire stencil before your print stroke. Keep your shoulders square to the screen and focus on applying steady pressure from start to finish. |
Don't get discouraged if your first few prints aren't gallery-worthy. Every single shirt is a learning experience. Pay attention to how small tweaks in your angle, pressure, and speed change the final result. After a bit of practice, the muscle memory will kick in, and you'll be pulling perfect prints without even thinking about it.
Don't Skip the Finish Line: Curing and Cleanup
Pulling that perfect print feels amazing, but don't celebrate just yet. You've got two crucial steps left that make the difference between a t-shirt that lasts one wash and one that lasts for years: curing the ink and cleaning your screen.
Think of it this way: an uncured design is just sitting on top of the fabric. The first time it hits the laundry, it will crack, fade, and wash away. Proper curing creates a permanent chemical bond between the ink and the fibers, making your hard work durable and professional.
Locking in Your Design with Heat
For most plastisol inks, the magic number is right around 320°F (160°C). The key is that the entire layer of ink has to hit this temperature to fully cure, not just the surface. While big shops have giant conveyor dryers, you can get a rock-solid cure at home with the right tools and a bit of patience.
- Heat Gun: This is the go-to for most beginners. Keep the gun moving in small, even circles about 2-3 inches from the shirt to avoid scorching the fabric or the ink. It usually takes about 40-60 seconds per section, but you need to be methodical to cover the whole design.
- Household Iron: No heat gun? An iron can work in a pinch. Set it to its highest heat setting (and make sure the steam is off!), lay a sheet of parchment paper over the print, and press down firmly. Keep the iron moving for 2-3 minutes.
- Flash Dryer: If you find yourself getting serious about screen printing, a flash dryer is a fantastic investment. It bathes the print in consistent, even heat, which takes a lot of the guesswork out of the process and gives you a much more reliable cure.
So, how do you know it's actually cured? The stretch test. Give the fabric a gentle pull. If the ink cracks or splits, it needs more heat. A fully cured print will stretch right along with the shirt. This finishing step is non-negotiable in the professional world. The global screen printing market, which was valued at about $10.8 billion in 2025, is built on delivering quality products that last. To get a better sense of the industry, you can check out more screen printing operations insights from Kentley Insights.
The Art of Reclaiming Your Screen
Once your prints are cured and cooling, it's time to tackle the cleanup. Cleaning your screen properly—a process called reclaiming—doesn't just get you ready for the next job; it protects your investment and makes your screens last for years.
First things first, scrape every last bit of excess ink off the screen with a spatula and put it back in the tub. Waste not, want not! Then, grab a rag and a screen-safe cleaner like a press wash (or even mineral spirits) to wipe off the remaining ink residue. The goal is to get the screen as ink-free as possible before you even think about adding water.
Now, it’s time to head to your washout booth or utility sink to deal with the emulsion.
Emulsion remover is no joke—it's a powerful chemical. Always wear gloves and safety glasses, and make sure your space is well-ventilated. A little prep goes a long way in keeping you safe.
Spray the emulsion remover on both sides of the screen, making sure to get even coverage. Let it sit and work its magic for about 30 seconds, but whatever you do, don't let it dry on the screen. You'll see the stencil start to soften and break down. Now, hit it with a high-pressure stream of water from a pressure washer or a good hose nozzle.
The emulsion will literally seem to melt away, leaving you with a perfectly clean mesh. Once it's completely dry, that screen is a blank canvas, ready for a fresh coat of emulsion and your next great idea.
The permanence and feel of a screen print are what set it apart. To see how this entire process stacks up against another popular method, take a look at our guide comparing silk screen printing vs heat transfer.
A Few Questions You're Probably Asking
As you get your hands dirty with screen printing, a few questions are bound to come up. Let's tackle some of the most common ones that every new printer faces once they move past the basics.
What's the Single Biggest Mistake I Can Make?
Hands down, it’s messing up your screen exposure. It’s a classic rookie error that can derail a project before you've even mixed your ink.
If you underexpose the screen, the emulsion stays soft and your design will literally wash down the drain when you rinse it out. But if you overexpose it, the emulsion gets baked on so hard that you can’t blast the design out, no matter how hard you try. It's a frustrating spot to be in.
There's only one way to nail this every time: run an exposure test. Seriously, don't skip this. Test small shapes at different exposure times to find that sweet spot for your specific light, your emulsion, and your setup.
Can I Really Print Multiple Colors at Home?
Absolutely, but you'll need a healthy dose of patience. The trick to multi-color work is using a separate screen for each and every color in your design.
The real challenge is registration—making sure each color layer lines up perfectly. Pro shops have presses with fancy micro-registration knobs to dial this in, but you can definitely pull it off at home. Here’s how:
- Use registration marks: Add small crosses or targets to the same corners of each film positive.
- Align them on the platen: Use those marks to line up each screen perfectly before you pull the ink for that layer.
It’s a simple trick that makes a world of difference when you’re trying to get those colors to sit just right.
Should I Start with Plastisol or Water-Based Ink?
For anyone just starting out with fabric printing, I almost always recommend plastisol ink. It's oil-based, opaque, and—most importantly—it won’t dry out in your screen while you're figuring things out. The catch is that you have to heat-cure it to make it permanent, usually at around 320°F (160°C).
Water-based ink gives you that super-soft feel because it soaks right into the fabric, and it's easier on the environment. The big problem for beginners, though, is that it air-dries. It can clog up your screen right in the middle of a print run, which is a surefire way to get frustrated. Get comfortable with plastisol first, and once you have your process down, then you can start experimenting with water-based options.
At Cobra DTF, we love the craft of screen printing, but we also know when a different tool is right for the job. For those complex, full-color designs that need to be done fast, our Direct-to-Film transfers made right here in the USA are a game-changer. See how they can help you produce incredible prints with less setup.