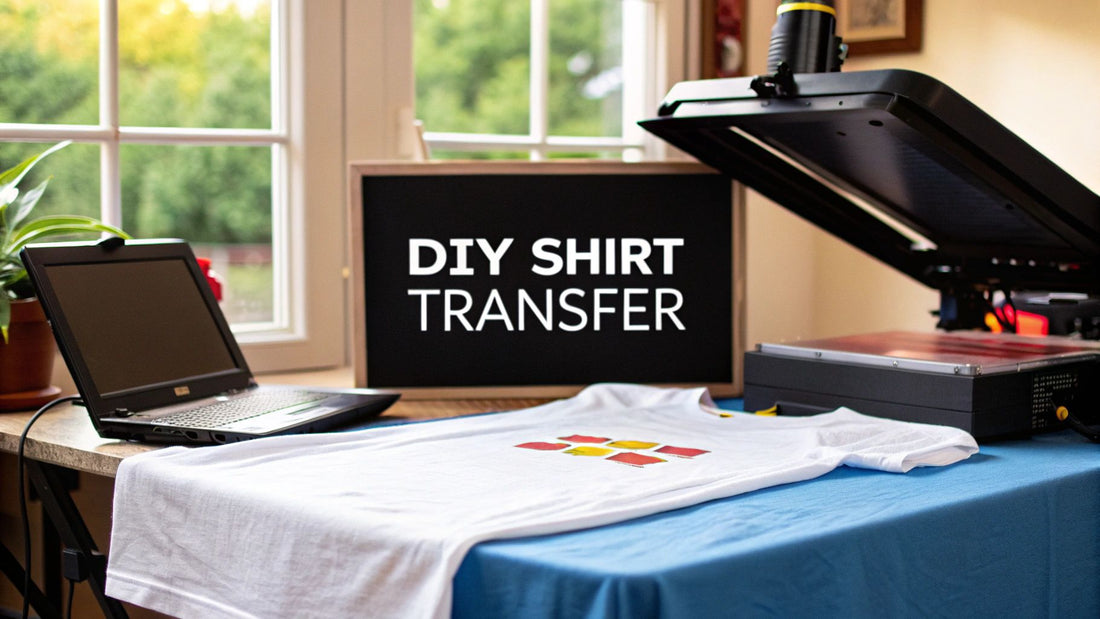
How to Make a Shirt Transfer at Home
So, you want to make your own custom t-shirts? It's a fantastic way to bring your creative ideas to life. At its core, the process is pretty straightforward: you print a design onto special transfer paper, cut it out, and then use heat to press it onto a shirt.
The real magic, though, is in the details—using the right paper for your printer, remembering to mirror your design, and applying just the right amount of heat and pressure. Get those steps right, and you'll end up with a durable, professional-looking shirt you'll be proud to wear.
Your Guide to Professional Shirt Transfers
Welcome to the world of custom apparel! This guide is designed to cut through the confusion and show you just how accessible creating personalized t-shirts really is. We'll walk you through the entire journey, from picking your design to that final, satisfying moment you peel back the transfer paper. My goal here is to give you a clear roadmap, helping you build confidence and sidestep those common mistakes that trip up so many beginners.
Understanding Your Options
Before you jump in, it's a good idea to get familiar with the different paths you can take. Every transfer method has its own strengths, and the best one for you really depends on what you're trying to create. Some techniques are perfect for putting full-color photos on polyester, while others are much better suited for simple, bold graphics on a classic cotton tee.
The custom t-shirt market is absolutely booming. It was valued at around USD 6.46 billion in 2024 and is expected to soar to USD 15.89 billion by 2033. This massive growth is happening because technologies like heat transfers have made high-quality customization easier and more affordable for everyone. If you're curious, you can learn more about the growth of the custom apparel market and what's trending.
Key Takeaway: The single most important decision you'll make is choosing the right transfer method from the get-go. This choice impacts everything that follows: the materials you'll need, how the design feels on the shirt, and how well it holds up in the wash.
To help you figure out where to start, I've put together a quick comparison of the most popular transfer methods below. Think of it as your launchpad for creating amazing, long-lasting custom shirts—whether they're for you, as a gift, or even for a small business.
Shirt Transfer Methods at a Glance
This table offers a quick comparison of the most popular DIY shirt transfer methods to help you choose the right one for your project's needs.
| Method | Best For | Pros | Cons |
|---|---|---|---|
| Inkjet Transfers | Full-color designs on light cotton fabrics. | Inexpensive and accessible; great for photos and detailed graphics. | Can feel stiff; may crack over time if not cared for properly. |
| Laser Transfers | Bold text and graphics on light or dark fabrics. | More durable than inkjet; no ink bleeding issues. | Requires a laser printer; can be more expensive. |
| Sublimation | Vibrant, all-over prints on 100% polyester fabric. | The ink becomes part of the fabric; extremely durable and won't fade. | Does not work on cotton or dark-colored fabrics. |
| Heat Transfer Vinyl (HTV) | Simple, solid-color graphics, logos, and text. | Very durable and available in many finishes (glitter, metallic). | Not suitable for multi-color, complex designs; requires a cutting machine. |
Each of these methods can produce fantastic results, but knowing which one aligns with your specific vision is the first step toward a successful project. Consider your design, your fabric, and your budget, and you'll be well on your way.
Getting Your Gear in Order: Tools and Materials You'll Need
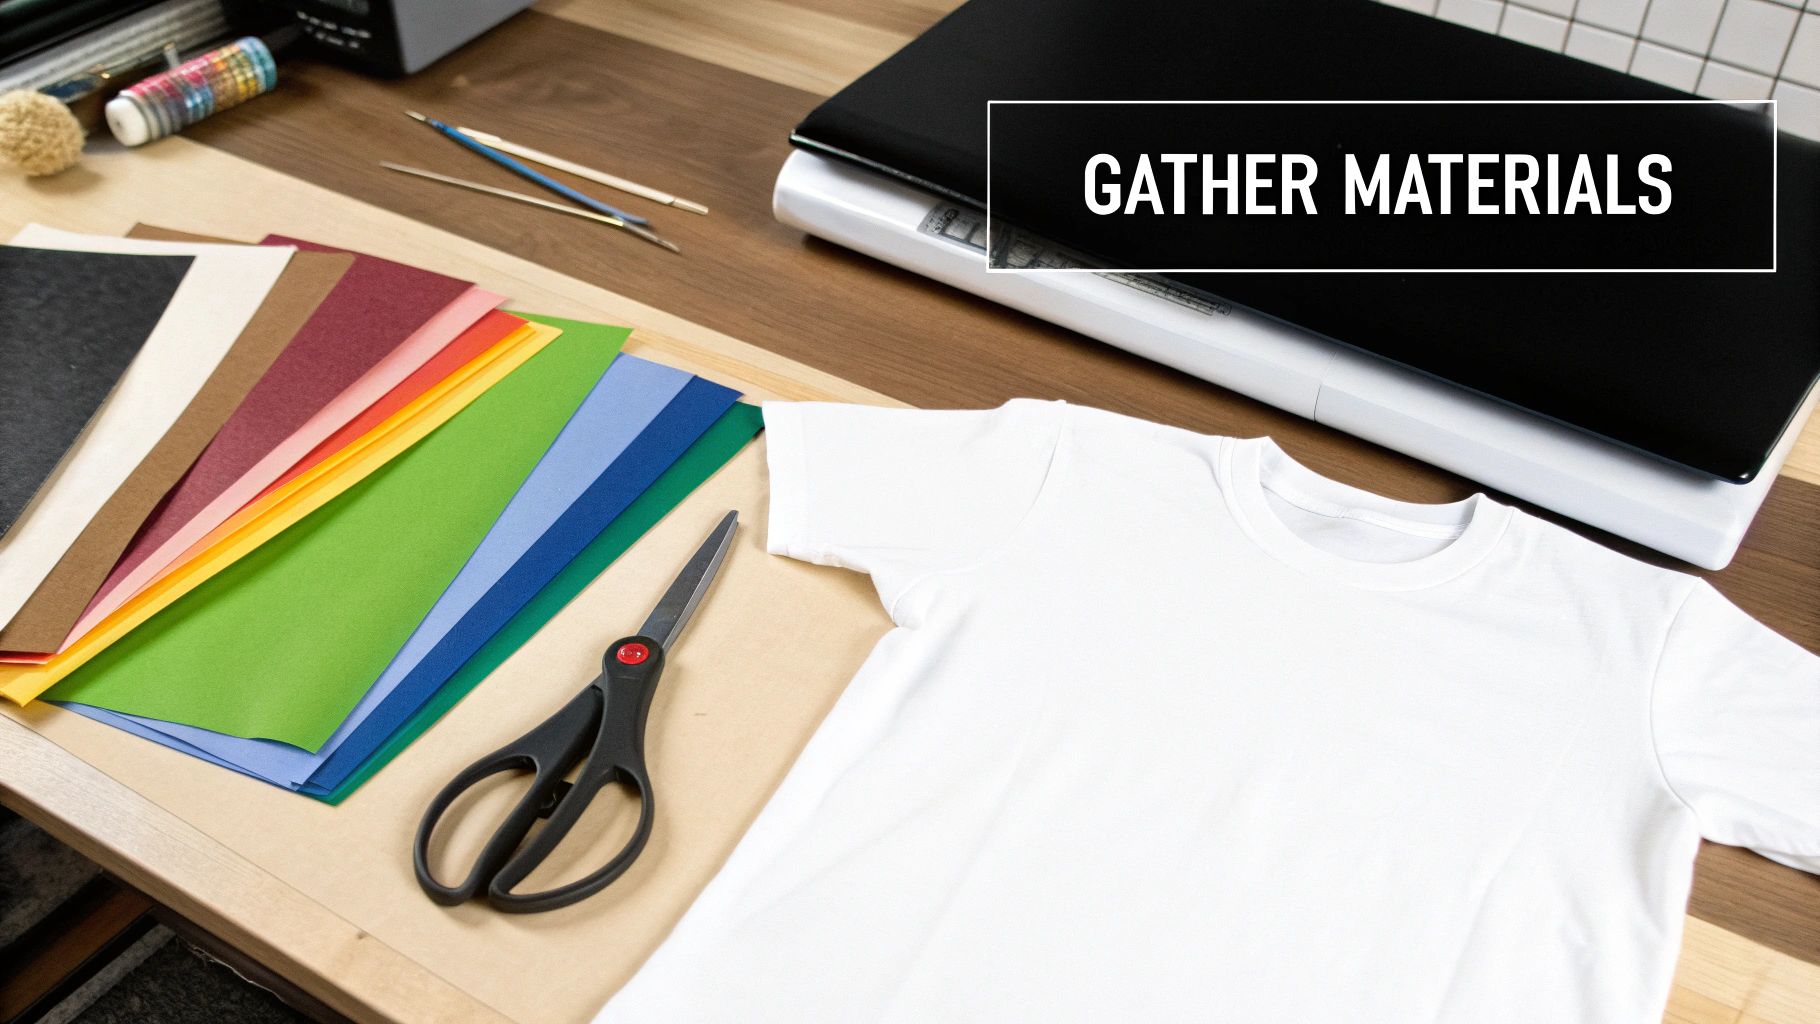
Before you can bring that awesome design to life, you've got to gather your tools. Having everything you need laid out and ready to go is the secret to a smooth, headache-free printing session. Think of it like your mise en place in cooking—get the prep work right, and the final product will be so much better.
The absolute heart of this operation is your transfer paper. This isn't just regular printer paper; it’s a specialty item with a unique coating designed to grab ink and then release it onto fabric under heat. The most important thing here is to match the paper to your printer. If you've got an inkjet, you need inkjet transfer paper. Got a laser printer? You'll need the laser-specific version.
Trying to use the wrong kind is a fast track to disappointment. You'll end up with a faded design, poor adhesion, or worse—a melted, gummy mess that can ruin your shirt and potentially damage your printer. If you want to get into the nitty-gritty of the science behind it, our guide on how transfer paper works is a great resource.
The Shirt: Choosing Your Canvas
The fabric you press onto is just as crucial as the transfer itself. From my experience, you’ll get the most vibrant and long-lasting results with 100% cotton shirts. High-content cotton-poly blends work well too. Cotton fibers are fantastic at grabbing onto the transfer's polymer film, which is what gives you that sharp, durable finish.
You can definitely try a 50/50 blend, but just know that synthetic fibers like polyester don't play as nicely with traditional transfer paper. The result can look a bit washed out right from the first press. For garments that are mostly or all polyester, you’d really want to look into a different process, like sublimation printing.
Applying Heat: The Press vs. The Iron
Now for the magic—applying heat and pressure. You have two main routes you can go here.
- The Heat Press: This is the tool of the pros, and for good reason. A heat press delivers perfectly even heat and consistent pressure across the entire transfer. You dial in the exact temperature and time, taking all the guesswork out of the equation. This consistency is what gives you a professional-grade transfer that won't peel or crack after a few washes.
- The Home Iron: For beginners or if you're just making a single shirt for fun, a home iron is a perfectly fine starting point. The big challenge is maintaining even heat and pressure by hand. You have to press down hard and keep the iron moving so you don't create hot spots that scorch the shirt or cold spots where the design won't stick.
My Two Cents: If you're using a regular iron, do yourself a favor and ditch the ironing board. The padding is built to absorb heat and pressure—the exact opposite of what you need for a good transfer. A sturdy table with a heat-resistant mat or a folded towel underneath works much, much better.
A Few More Things for a Pro Finish
Beyond the big-ticket items, a couple of smaller tools will make a huge difference in your results and keep your workspace safe.
Cutting It Out
For a simple design like a circle or a square, a sharp pair of scissors or a craft knife is all you need. But if you're working with a more complex design with lots of intricate edges, a cutting machine like a Cricut or Silhouette is a total game-changer. They deliver clean, precise cuts that are nearly impossible to get right by hand.
Don't Forget These Accessories
These small items are easy to overlook but are absolutely essential.
- Weeding Tools: If you’re working with heat transfer vinyl (HTV) instead of printed paper, these little hooked tools are a must-have for picking away all the excess vinyl around your design.
- Parchment Paper or a Teflon Sheet: This is non-negotiable. Always place a sheet between the heat source and your transfer. It protects your design from scorching and stops any stray ink from getting all over your heat press or iron.
- Heat-Resistant Surface: A proper heat press mat or even a thick towel protects your table from heat damage while giving you a firm foundation for applying solid pressure.
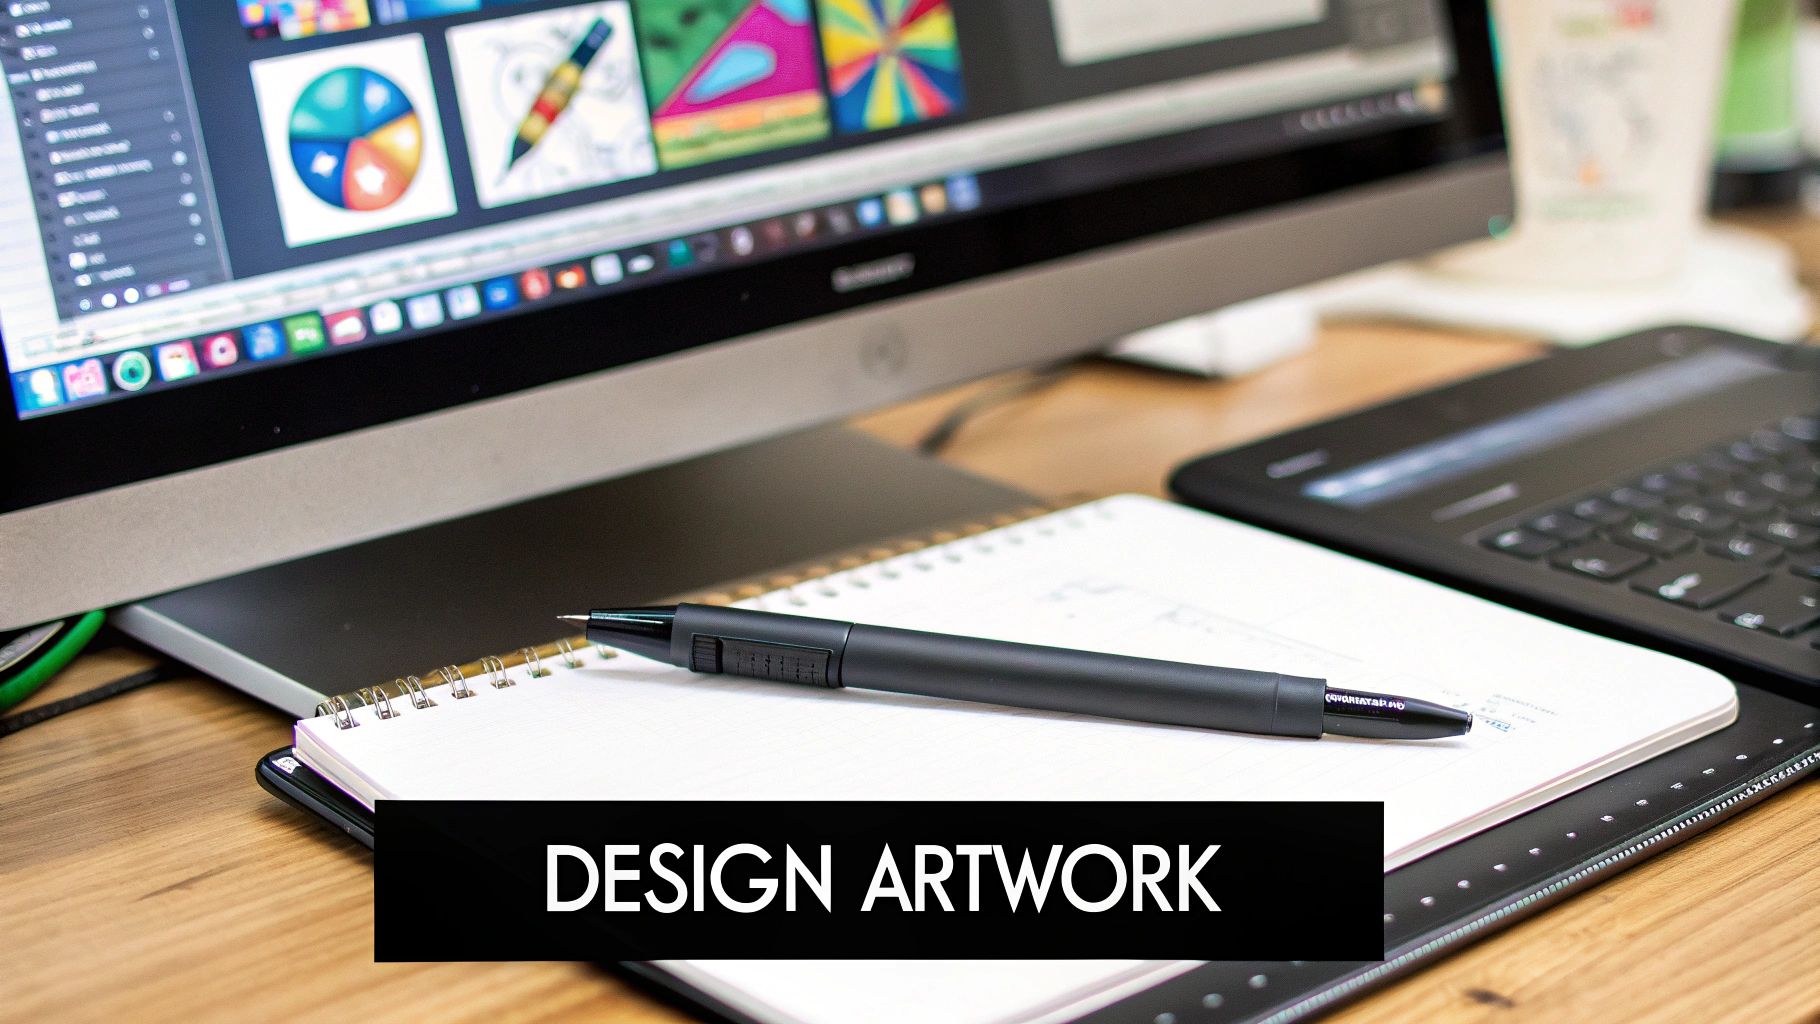
Designing and Preparing Your Artwork
A killer DTF transfer is made long before you ever power on your heat press. It all starts on your computer, where your idea first comes to life. Honestly, this design and prep phase is the most important part of the whole process—if you mess something up here, there’s no fixing it later on the shirt.
A lot of people get excited and rush this part, and they almost always end up with a blurry, pixelated, or backward design. We’re going to take our time and get this right, so your digital file is absolutely perfect for printing.
Choosing Your Design Software
First things first, you need to pick your creative tool. The good news is you don’t have to be a graphic design pro with a subscription to the most expensive software out there. There are fantastic options for every budget and skill level.
- For Beginners and Quick Projects: Tools like Canva have been a total game-changer. It’s got a super intuitive drag-and-drop interface, plus a mountain of templates and graphics. You can genuinely whip up a great-looking design in minutes, even with zero experience.
- For Aspiring Designers: Ready for a bit more creative freedom? A program like Procreate (if you have an iPad) or Affinity Designer is your best bet. They offer more advanced features like vector tools and layers for a one-time price, which is a huge plus.
- For the Pros: The undisputed champs in the professional space are still Adobe Illustrator and Photoshop. Illustrator is vector-based, which is perfect for logos and text because you can scale them up or down without losing a drop of quality. Photoshop is your go-to for photos and highly detailed, pixel-based artwork.
To give you an idea, here’s a peek at the Canva interface. It’s a popular starting point for a reason—it just makes sense.
As you can see, the tools are laid out in a way that lets you build a professional-looking, print-ready file without a steep learning curve.
The Non-Negotiables of a Transfer-Ready File
Once you're in your software of choice, there are a few technical rules you absolutely can't ignore. Getting these details right is what separates a sharp, vibrant print from a fuzzy, amateur-looking one.
Resolution is Everything
Your image’s resolution, measured in DPI (dots per inch), dictates how clear your print will be. For any fabric printing, you need to work at 300 DPI. Don't even think about using a 72 DPI image you pulled from a website; it’ll look horribly pixelated on a shirt. The best practice is to set your canvas to 300 DPI from the very beginning.
File Type Matters
For DTF transfers, the gold standard is the PNG (Portable Network Graphics) file format. Why? Because it supports a transparent background. This is huge. It means only your actual design gets printed—not the design inside a clunky white box. When you save, always make sure you’ve selected the option for a transparent background.
The Most Common Beginner Mistake: Mirroring Your Design
Okay, listen up, because this next step is so simple yet it trips up almost every single person when they're starting out. You must mirror your image before you print it. That means flipping it horizontally.
Think about it: the transfer film goes face-down on the shirt. For the design to read correctly after you press it, it has to be a mirror image on the film. If you forget this step, all your hard work is for nothing—any text or logo will be backward on the final shirt. It’s a gut-wrenching mistake, and an easy one to avoid.
Crucial Tip: Every design program has a "Flip Horizontal" or "Mirror" command. It's usually hiding in an "Edit," "Object," or "Transform" menu. Make this the very last thing you do before you print. Check it. Then check it again.
A Practical Walkthrough
Let's put all this into action. Say we have a logo for a fictional coffee shop, "The Daily Grind," and we want to press it onto a medium t-shirt.
- Open in Software: We’d start by opening our logo file in a program like Affinity Designer. The very first thing we do is check the canvas settings to confirm it’s at 300 DPI.
- Knock Out the Background: The original logo file has a solid white background. We’d use the selection tools to isolate the logo itself and just delete the background, leaving it transparent.
- Get the Sizing Right: For a standard chest graphic on a medium shirt, a width of about 9 to 10.5 inches is a good target. We'll resize our design to fit those dimensions, being careful not to stretch or distort it.
-
Export as a PNG: We head to
File > Exportand choose PNG from the list of formats. We double-check that the "Transparent Background" box is ticked before hitting save. - The Final Flip: Just before sending it to the printer, we open that final PNG. We find the transform tools and select "Flip Horizontal." On our screen, the text "The Daily Grind" now looks completely backward. Perfect.
And that’s it. Our digital file is now perfectly prepped. It’s high-resolution, has a clean transparent background, and is mirrored for a flawless press. This file is ready to become a great-looking shirt.
The Printing and Pressing Process
This is where it all comes together. All that time you spent tweaking your design is about to pay off as you turn a digital file into a real, wearable piece of art. The printing and pressing stage is where the magic happens, but it’s also where a tiny mistake can ruin the whole project. Let’s walk through it, step-by-step, so you can nail both the print and the press every single time.
With the global T-shirt market sitting at around USD 169.1 billion and an estimated 2 billion tees sold every year, the appetite for custom apparel is huge. This process is your ticket in. Get this part right, and you'll know exactly how to make a shirt transfer that looks like it came from a pro.
Nailing the Perfect Print
Before you even think about firing up the heat press, you need a flawless print. The quality of that printed transfer directly dictates how your final shirt will look. A smudgy or faded print will only ever give you a smudgy, faded shirt.
First things first: loading the transfer paper. This sounds almost too simple to mention, but it’s a classic rookie mistake. Every printer is different, and you have to know which side of the paper it prints on. The easiest way to figure this out? Just grab a regular piece of paper, mark an 'X' on one side, load it, and print something. See if the ink lands on the 'X' side or the blank side. Now you know.
Transfer paper has a dedicated printing side (it’s usually matte and feels a bit soft) and a backing (which is often glossy or has a logo grid). Once you’ve done your 'X' test, you’ll be able to load your transfer paper correctly every time, making sure your design ends up on the film, not the useless backing.
This infographic lays out the pre-press checklist you need for a perfect result.
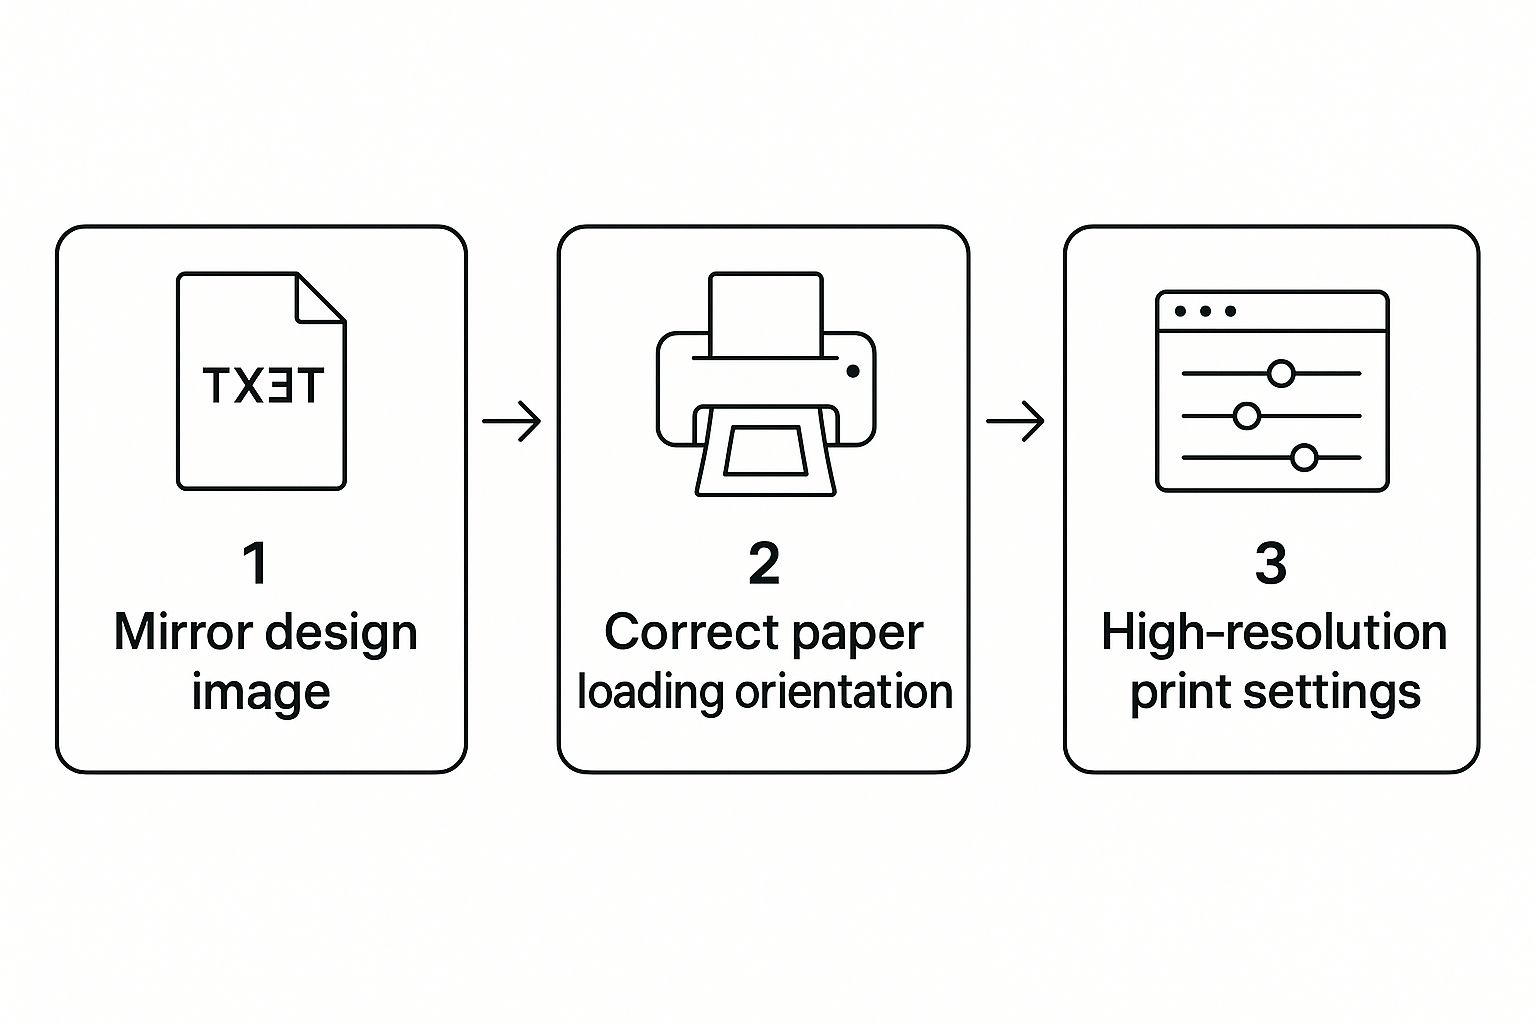
As you can see, getting a great print really boils down to three key actions: mirroring your design, getting the paper loaded the right way, and choosing high-quality print settings.
Next, you need to dig into your printer’s settings. Never just hit "Print" and cross your fingers.
- Paper Type: Look for an option like "T-Shirt Transfer," "Photo Paper Matte," or "Premium Paper." This tells your printer to lay down more ink with greater precision.
- Print Quality: Always, always slide that quality setting to the max. It might be called "Best," "High," or "Photo," but whatever it is, you want it. This ensures your colors are rich and your details are sharp.
Once it's printed, the single most important thing you can do is let the ink dry completely. I can't stress this enough. Touching the ink while it’s still wet is the #1 cause of smudges and fingerprints. Give it at least 15-20 minutes to sit untouched—maybe even longer if you're in a humid environment.
Applying Heat and Pressure
With a perfectly printed (and perfectly dry) transfer in hand, it's time to bring the heat. Whether you’re working with a home iron or a dedicated heat press, the winning formula is always the same: temperature, time, and pressure. Getting this trio right is the secret to a durable transfer that won’t peel or crack after the first wash.
If you're just getting started, our complete guide offers more details on how to print on transfer paper for different methods.
Using a Home Iron
You can absolutely get good results with a standard household iron, but you have to be deliberate about it. The biggest challenge is applying firm, even pressure across the entire design.
- Prep Your Surface: Ditch the ironing board—its padding is your enemy because it absorbs heat and pressure. Find a sturdy, waist-high surface like a countertop or solid table. Lay down a heat-resistant mat or a folded towel to protect it.
- Preheat and Prep the Shirt: Crank your iron to its highest setting (usually "Cotton" or "Linen") and, critically, make sure the steam is off. Give your shirt a quick 5-10 second press to knock out any wrinkles and steam out any moisture.
- Position and Press: Place the transfer design-down onto the shirt. Cover it with the parchment paper or Teflon sheet that came with it. Now, press down hard. I mean really press—use your body weight, not just your arm strength. Start in one corner and hold for about 20-30 seconds, then move to an adjacent section, slightly overlapping the area you just pressed. Work your way across the entire design until you’ve covered every inch at least twice.
My Personal Tip: The edges and corners are always the first places to start peeling. To combat this, I always give them an extra 10-15 seconds of focused pressure with the very tip of the iron. It’s a small step that makes a huge difference in durability.
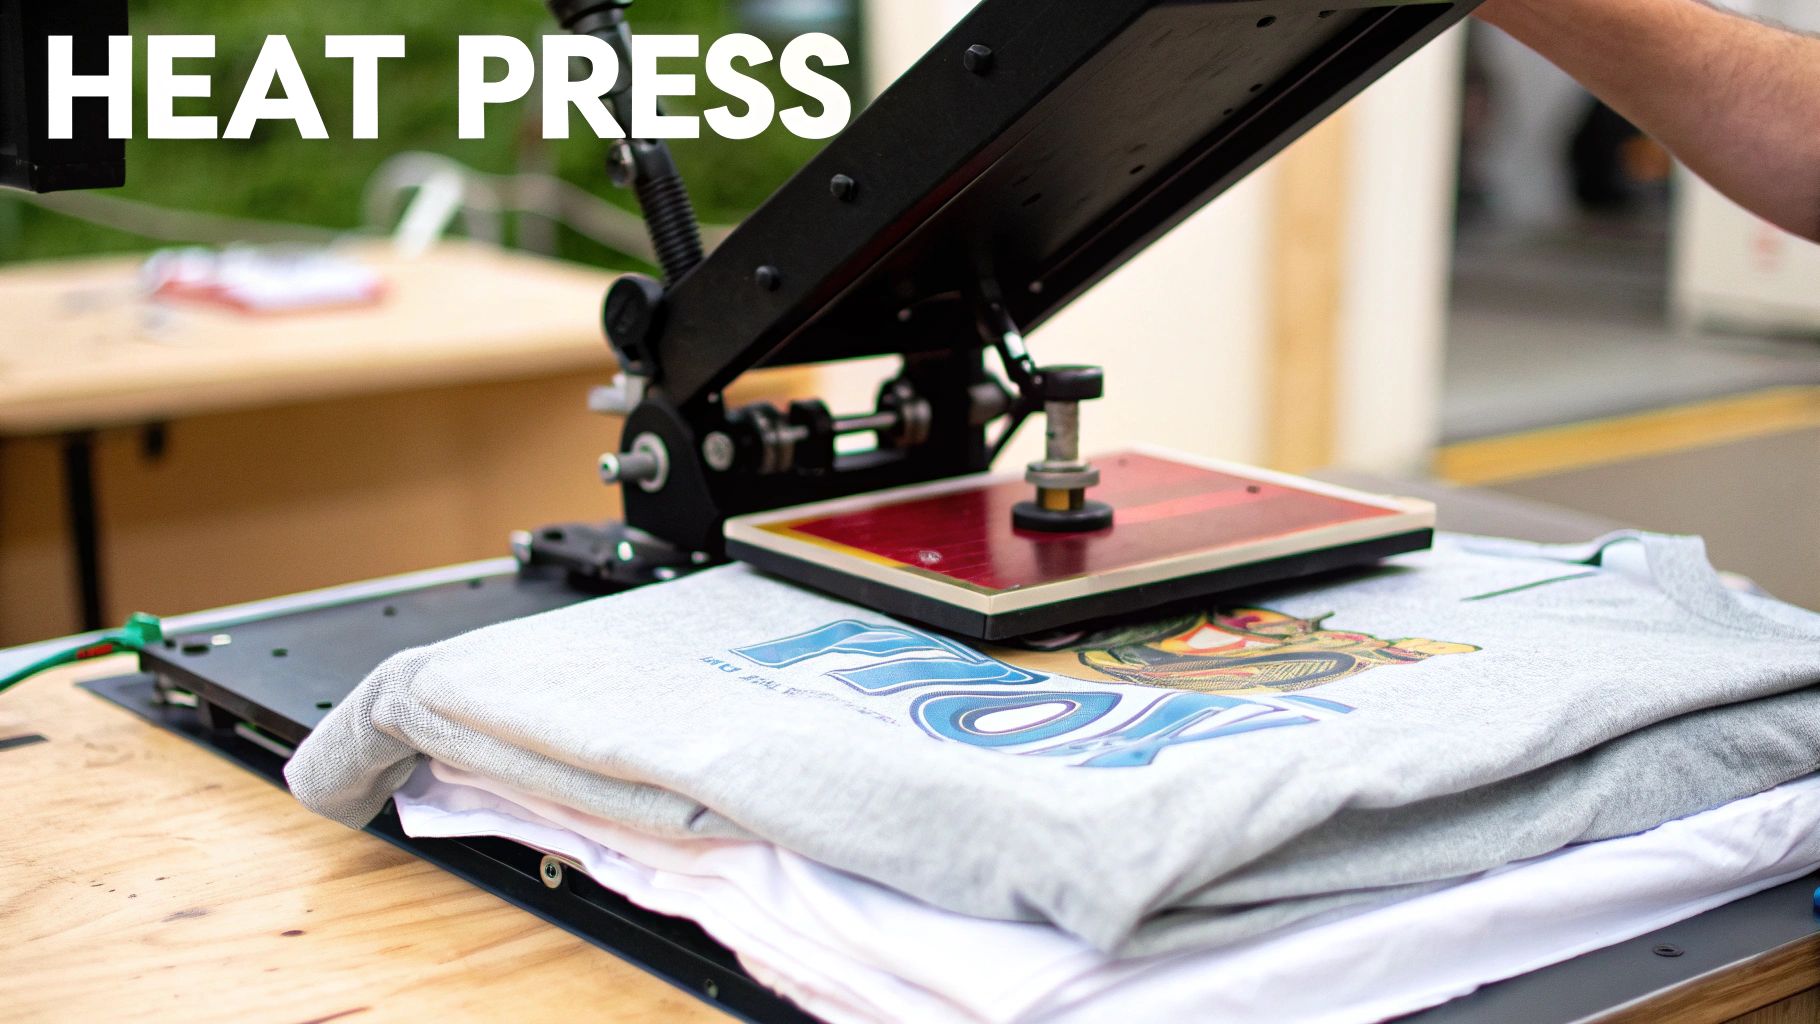
Using a Heat Press
A heat press is a total game-changer because it takes all the guesswork out of the equation. It delivers precise temperature and perfectly even pressure, which is exactly why the pros use them.
- Dial in Your Settings: Your transfer paper manufacturer will provide recommended settings for temperature and time. Always start there. A common range is somewhere between 350-375°F (177-190°C) for 15-20 seconds.
- Set the Pressure: You're aiming for medium to firm pressure. A good rule of thumb is that the press should be a little tough to close and lock. If it clamps shut too easily, you don't have enough pressure.
- The Pressing Process: Just like with an iron, always pre-press the shirt for 5-10 seconds to get a flat, moisture-free canvas. Then, position your transfer, cover it with a Teflon sheet, and lock it down. The machine does the rest.
Once that timer beeps, the transfer is officially bonded to the shirt. The very next move—peeling off the backing—depends entirely on whether you're working with a hot or cold peel transfer. We’ll get into that in the next section on finishing touches.
Finishing Touches and Aftercare for Longevity
You’ve pressed your design, and the hard part is over. Believe it or not, the next sixty seconds are probably the most important part of the entire process. These final moves are what separate a clean, professional finish from a frustrating mistake and ensure your shirt thrives for years, not just a few washes.
The moment your heat press timer dings, your next action depends entirely on the type of DTF film you're using. This is where you'll hear two critical terms: hot peel and cold peel. Getting this right is everything.
The Great Peel Debate: Hot vs. Cold
Think of this as the final release of your design onto its new fabric home. The timing and temperature at this moment dictate how cleanly the ink separates from the film.
-
Hot Peel: Just like it sounds, you peel the film off immediately after the heat press opens, while the shirt and transfer are still piping hot. This technique usually gives the print a softer, more flexible feel. The ink stretches ever so slightly as you peel, allowing it to settle deeper into the fabric's fibers. For this, you need to be quick, confident, and smooth.
-
Cold Peel: With this method, patience is your best friend. After pressing, you need to take the shirt off the press and let it cool down completely. I mean completely—cool to the touch—before you even think about peeling that film. A cold peel often produces a slightly glossier, more vibrant finish because the ink has had a chance to fully solidify before the film is removed.
So, which one do you choose? It’s not really a choice. The golden rule is to always follow the manufacturer's instructions for your specific DTF film. Trying to cold peel a hot-peel film (or vice-versa) is a surefire way to ruin your work, leaving you with a torn, patchy mess.
Executing the Perfect Peel
Whether you're dealing with a hot or cold peel, the technique is the same. I've found the best way is to start at one corner and pull the film away from the fabric in a smooth, continuous motion at a low angle. Don't just yank it straight up, as that can lift the edges of your design. A steady, diagonal peel almost always works best.
Pro Tip: If you start a hot peel and see parts of the design lifting up with the film, stop right there. Lay the parchment paper back over it and give it another press for 5-10 seconds. This usually happens when there wasn't enough pressure or time, and a quick re-press can almost always save it.
The 24-Hour Curing Rule
Once the film is off, the shirt looks ready to go, but the transfer's adhesive is still curing. The single most important thing you can do for its lifespan is to just leave it alone. Don't wash it, don't stretch it, and don't even fold it for at least 24 hours.
This waiting period gives the polymer in the transfer time to fully cross-link and bond with the fabric fibers. It's what creates that durable, crack-resistant finish we're all after. Throwing it in the wash too early is the number one reason I see homemade shirts fade or peel after their first trip through the laundry.
Long-Term Care for Maximum Durability
You put in the effort to make a great shirt, so let's make sure it lasts. A little bit of care in the laundry room can easily double or triple the life of your custom apparel. The name of the game is being gentle.
Here are the non-negotiables for washing your custom-printed shirts:
- Turn It Inside Out: This is the easiest and most effective trick in the book. It protects the printed surface from getting roughed up by other clothes and the inside of the washing machine.
- Wash with Cold Water: Hot water is the arch-nemesis of custom prints. It can soften the adhesive and cause colors to fade way too fast. Always, always use a cold cycle.
- Use a Mild Detergent: Harsh detergents and especially chlorine bleach will wage war on the pigments in your transfer. Stick to a gentle, color-safe detergent.
- Skip the Fabric Softener: Fabric softeners work by coating fibers with chemicals, and these same chemicals can break down the transfer's bond over time, leading to peeling and cracking. Just skip it.
When it comes to drying, your best move is to hang dry the shirt. The intense, prolonged heat of a machine dryer is brutal on transfers. If you absolutely have to use a machine, tumble dry on the lowest heat setting you have and pull the shirt out while it's still just a little damp, letting it air dry the rest of the way. Following these simple steps is the real secret to making a shirt that looks amazing for wash after wash.
Troubleshooting Common Transfer Problems
Even with the most careful prep, you're bound to run into a stubborn transfer now and then. It happens to everyone. Don't let it get you down; most of these issues are easy fixes and, honestly, they're how you really learn the craft. Think of this as your field guide for figuring out what went wrong and how to make it right.
A classic first-timer problem is a design that looks faded or washed out the second you peel the film away. If the colors just don't pop like they did on your screen, the issue is almost always low temperature or not enough pressure. The ink needs a specific combination of heat and force to properly bond with the fabric, and if either is lacking, you get a dull, lifeless print.
Then there's the dreaded peeling edge. The middle of your design looks fantastic, but the corners and sides start lifting, especially after a wash. This is a dead giveaway of uneven heat, a common struggle when you're working with a standard home iron instead of a dedicated heat press.
Fixing Faded and Peeling Designs
When you're dealing with dull colors or peeling edges, your first stop should be your heat press settings. Start with the recommended settings for your transfer film, but think of them as a starting point, not a strict rule. Sometimes, just bumping the temperature up a few degrees or adding an extra five seconds of press time can completely change the outcome.
If you're using a home iron, the name of the game is pressure. Consistent, heavy pressure.
- Use your body weight. Don't be shy—lean into it to make sure the heat is applied evenly across the entire design.
- Give the edges extra love. Spend a few extra seconds pressing down specifically on the perimeter of your transfer.
- Steam is the enemy. Make absolutely certain the steam function on your iron is switched OFF. Steam will ruin the transfer adhesive.
Here's a pro tip that will save you a ton of frustration: always do a test press. Use a small scrap from your transfer sheet and press it onto a piece of old fabric. This little five-minute test lets you perfect your settings before you ever touch your final garment.
Why Is My Transfer Cracking?
Seeing your beautiful design crack after the first wash is a real heartbreaker, but it’s also one of the most preventable issues. Cracking is almost always a sign that the transfer didn't fully cure and bond with the fabric. It's essentially sitting on top of the fibers instead of becoming part of them, so when the shirt stretches, the ink breaks apart.
The main culprits are—you guessed it—not enough heat or pressure during the press. Another common mistake is rushing the final step; you absolutely have to let the shirt cure for a full 24 hours before it goes anywhere near a washing machine. For a more detailed look at application techniques that build durability, check out our guide on heat transfer shirt printing.
To avoid cracking, make sure you're pressing on a solid, flat surface. A flimsy ironing board just won't cut it. You need a sturdy table or countertop to get the pressure right. If you're still seeing cracks, try increasing your press time in small increments. A perfectly cured transfer should feel smooth and flexible, almost like it was printed directly onto the shirt itself.
Got Questions? We've Got Answers
Even with the best guide in hand, you’re bound to have a few questions as you get the hang of making shirt transfers. It’s all part of the process. Below are some of the most common things people ask, along with practical answers to help you get great results.
What’s the Best Fabric for Shirt Transfers?
When you're working with standard heat transfer paper, 100% cotton is your best friend. The natural fibers grab onto the transfer's adhesive like nothing else, giving you a bright, long-lasting print. Cotton-poly blends with a high cotton content, like a 60/40 mix, are also a solid choice.
Where you'll run into trouble is with 100% polyester or other synthetics. Standard transfers just won't stick properly, leaving you with a faded, patchy mess. If you're set on using polyester, you'll want to look into a different method entirely, like sublimation, where the ink actually becomes part of the fabric itself.
Can I Just Use My Regular Home Printer?
Yep, you absolutely can. That's the beauty of this whole method! The key isn't a special printer, but using the right kind of transfer paper designed for the machine you already own.
- For Inkjet Printers: You'll need inkjet-specific transfer paper.
- For Laser Printers: Make sure you grab paper made for laser printers.
Mixing them up is a classic rookie mistake, and it can cause real problems. Inkjet paper in a laser printer might just melt and wreck your machine, while laser paper in an inkjet will give you a blurry design that never sets. Always check the package.
The Takeaway: Your printer is probably fine. The magic is in the paper. Getting that match right is half the battle.
How Can I Stop My Design from Cracking and Peeling?
This is almost always a problem with the pressing step itself. If a transfer is cracking or peeling off, it means the adhesive never fully bonded with the fabric fibers. The usual suspects are not enough heat, not enough pressure, or not pressing for long enough.
To get it right, make sure you're working on a hard, flat surface—an ironing board is too soft and will absorb all your pressure. You need to lean into it and apply firm, even pressure over the entire design, especially the edges. If you're using a heat press, follow the time and temperature settings from the paper manufacturer to the letter.
And one last tip: give the adhesive time to cure. Wait at least 24 hours before you even think about washing that shirt.
Why Do My Colors Look So Faded on the Shirt?
Seeing a beautiful design on paper turn out dull on the shirt is frustrating, but it's usually an easy fix. First, dive into your printer settings. You should always be printing on the "High Quality" or "Best" setting to make sure enough ink is being put on the paper.
The other big factor is the shirt color. Transfers will always pop the most on a crisp white shirt. When you press onto a colored fabric, the shirt's dye can show through and wash out your design's colors. If you want to print on dark garments, you need to use opaque transfer paper. It’s specifically made for darks and lays down a white base layer under your art so the colors stay true.
Ready to create stunning, professional-quality custom apparel without the hassle? At Cobra DTF, we specialize in high-quality, American-made DTF transfers that deliver vibrant, fade-resistant results every time. Get same-day shipping and the best prices on the market. Start your project today at cobradtf.com.