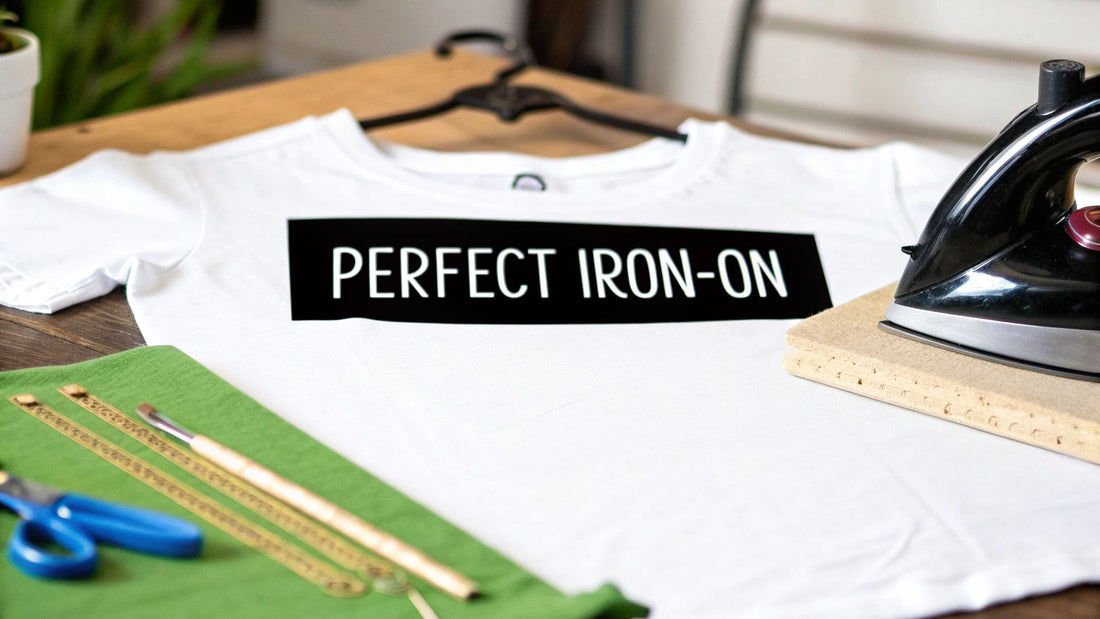
How to Iron On Transfers for Flawless DIY Designs
Applying an iron-on transfer is all about using a hot iron to press the design onto your garment. Sounds simple, right? The real secret, though, is using a firm, flat surface (your ironing board won't cut it) and applying consistent heat and pressure. Get that right, and you'll create a bond that lasts.
Setting the Stage for a Perfect Transfer
Before you even think about plugging in your iron, let's talk about prep work. Honestly, the foundation you lay here will determine about 90% of your project's success. The decisions you make now—from the shirt you choose to the surface you work on—are what separate a sharp, professional-looking design from a peeling, cracked disaster down the road. This isn't just about ticking boxes; it's about understanding why each part of the setup is so crucial.
It’s no surprise that personalizing apparel has exploded in popularity. The global market for iron-on transfer sheets hit over USD 1.21 billion in 2024, and it's on track to climb past USD 2 billion by 2033. That huge number just shows how many people are getting into this and creating amazing custom gear.
Choose Your Fabric Wisely
Think of your garment as the canvas for your art, and trust me, not all canvases are created equal. If you want the most reliable, long-lasting results, stick with 100% cotton or blends that are mostly cotton. These natural fibers are champs at handling the high heat needed for a solid bond, giving the transfer adhesive a stable surface to grab onto.
Synthetics like polyester or rayon? They're a bit more challenging. Their melting points are much lower, so they can easily scorch or even warp under a hot iron. It's not impossible to use them, but you have to be careful—lower temperatures and shorter press times are a must, which can sometimes mean the design isn't quite as durable. For a deeper dive into how different materials behave, take a look at our guide on the best t-shirt fabric material: https://cobradtf.com/blogs/guides/t-shirt-fabric-material.
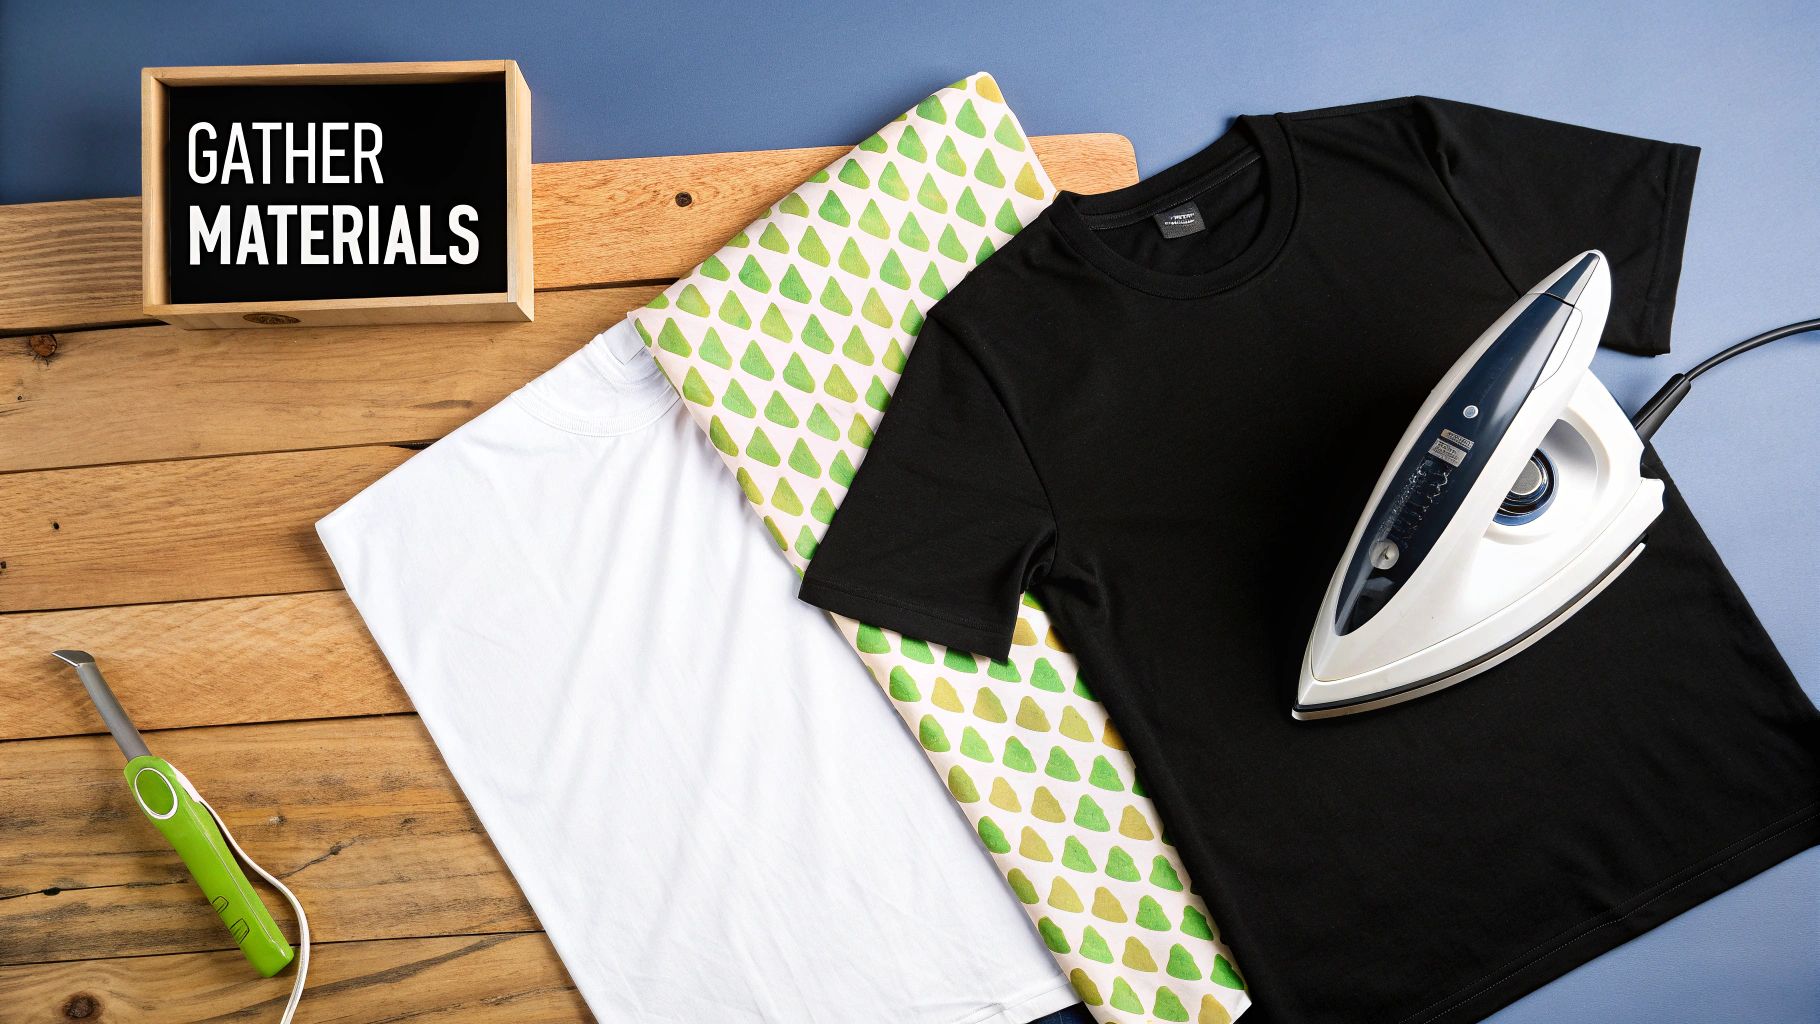
Your Essential Iron-On Project Toolkit
Gather these key items before you start to ensure a smooth and successful transfer process from beginning to end.
| Item | Why It's Critical |
|---|---|
| Garment | Your canvas. High-cotton content is best for heat and durability. |
| Household Iron | The heat source. Make sure it's clean and can reach the required temperature. |
| DTF Transfer | The design itself. Handle with care to avoid smudges or damage. |
| Teflon Sheet or Pillowcase | Protects both your surface and your garment from direct, scorching heat. |
| Hard, Flat Surface | A table or countertop provides the firm support needed for even pressure. |
| Scissors | For trimming the transfer sheet close to the design. |
Having everything within arm's reach before you begin makes the entire process feel less chaotic and much more professional.
The Critical Pre-Wash Step
This one is non-negotiable: always wash and dry your garment before applying a transfer. Brand-new fabrics are often coated with sizing agents or other chemicals from the manufacturing process. These invisible residues can act as a barrier, preventing the transfer's adhesive from properly melting into the fibers.
Pro Tip From Experience: Skipping the pre-wash is the most common mistake I see beginners make. It's not just about removing chemicals; it also pre-shrinks the fabric. This prevents your awesome design from wrinkling, cracking, or distorting after its first real wash.
Ditch the Ironing Board for Good
Seriously. Your standard ironing board is your worst enemy for this job. Its padded, mesh top is specifically designed to let heat and steam escape, which is great for wrinkles but terrible for transfers. It also flexes under pressure, which means you'll never get the even, firm application you need.
Instead, set up a proper pressing station. It's easy:
- Find a sturdy, heat-resistant surface. A solid wood table, a kitchen countertop, or even a clean spot on the floor works perfectly.
- Protect that surface. Lay down a Teflon sheet or a clean, folded cotton pillowcase. This creates a heat-proof barrier and a smooth workspace.
This solid foundation is the key to ensuring every single inch of your design gets the direct heat and firm, even pressure required to bond with the fabric permanently.
Getting the Heat and Pressure Just Right
Alright, your workspace is ready. Now we get to the part that truly makes or breaks your design: getting the heat and pressure perfect. This is where the magic happens, creating that permanent bond between the transfer and the fabric. It’s also, frankly, the easiest place to mess things up.
Think of it like cooking a steak. Too little heat and it’s raw; too much and you’ve got a charred mess. The same logic applies here. The right temperature melts the DTF adhesive just enough to fuse with the fabric fibers, without scorching the garment or damaging the design.
Finding That Sweet Spot: Temperature Settings
Most home irons don't give you a precise temperature readout. Instead, you'll see settings like "Cotton," "Linen," or just a numbered dial. For most DTF projects on cotton or poly-cotton blends, the Cotton setting is usually your best bet. This generally falls into the 320-340°F (160-170°C) range, which is the ideal target for these transfers.
But remember, not all fabrics can take the heat. You have to adjust your approach based on what you're working with.
- Cotton & Blends: These fabrics are tough. Go ahead and use that high cotton setting and apply some good, firm pressure.
- Polyester & Synthetics: Be careful here. Synthetics can melt. Start on a lower heat setting and only increase it if you absolutely have to. Always, always use a protective sheet between the iron and the transfer film.
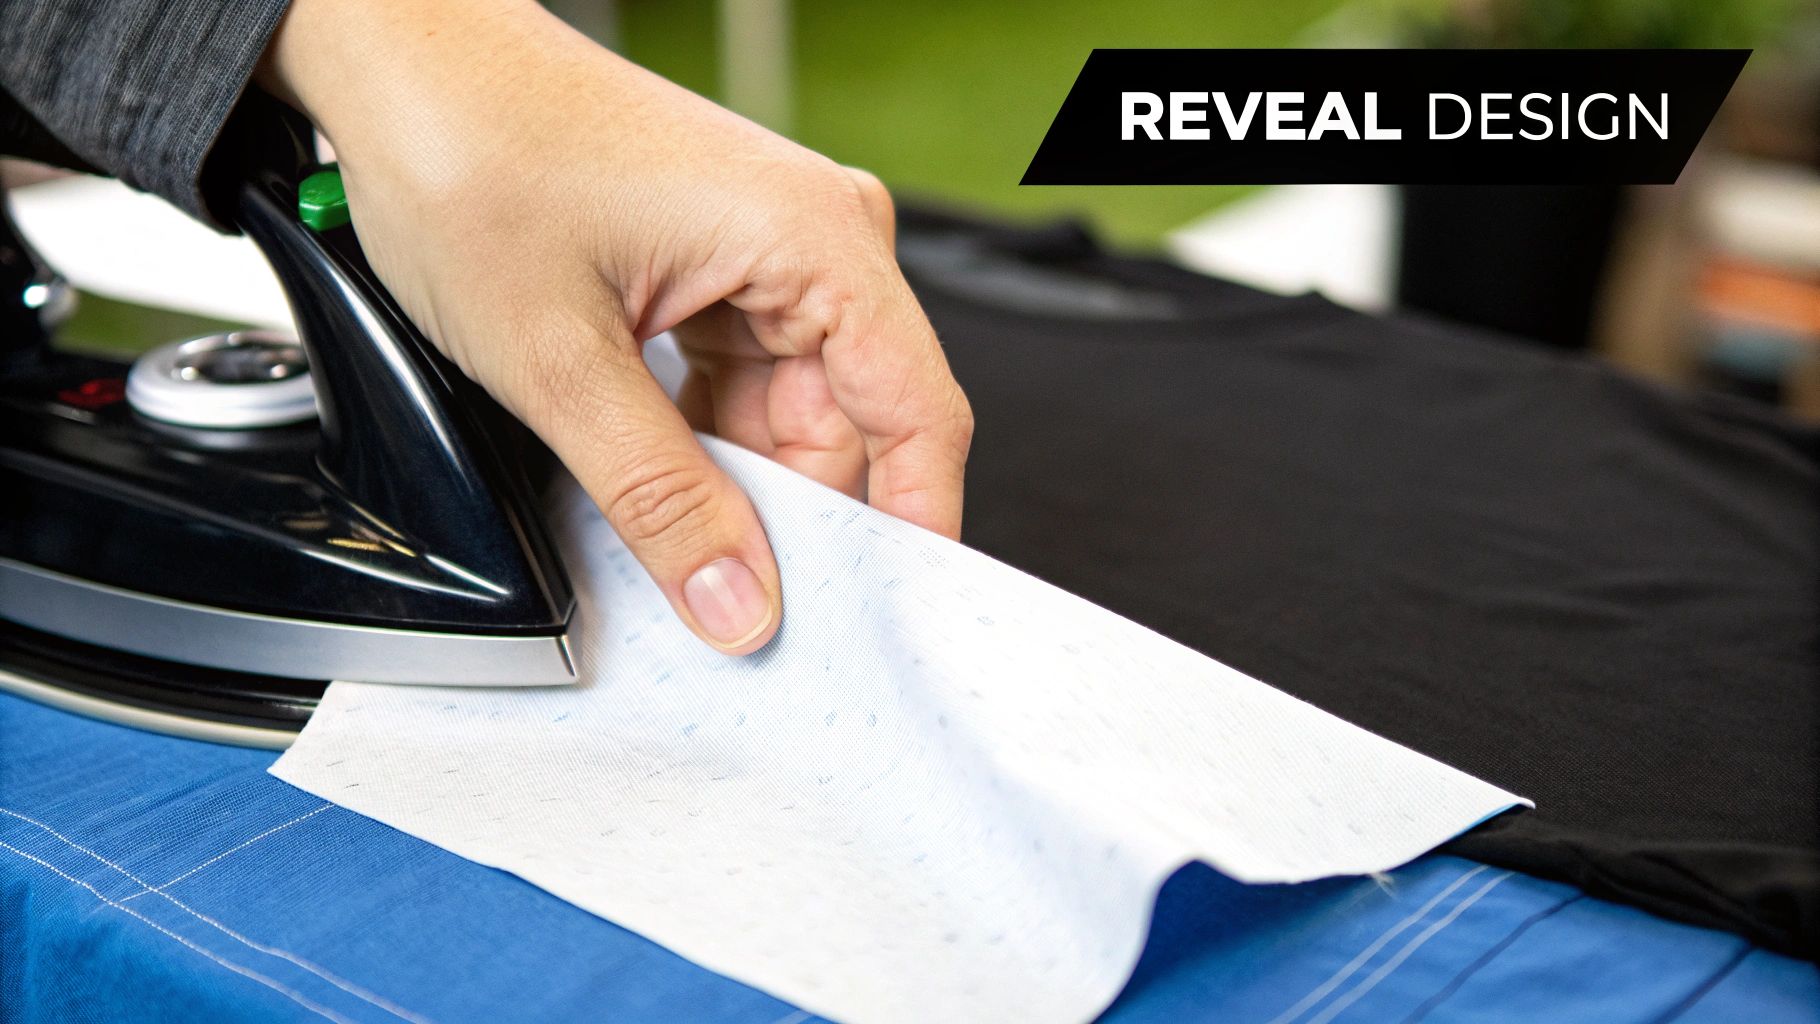
Before you even think about placing the transfer, pre-heat the garment itself. Just press the iron on the application area for about 10-15 seconds. This is a non-negotiable step for two reasons: it gets rid of any last-minute wrinkles, and more importantly, it zaps any hidden moisture out of the fabric. A bone-dry surface is crucial for the adhesive to grab hold properly.
Here’s a quick visual of the prep process.
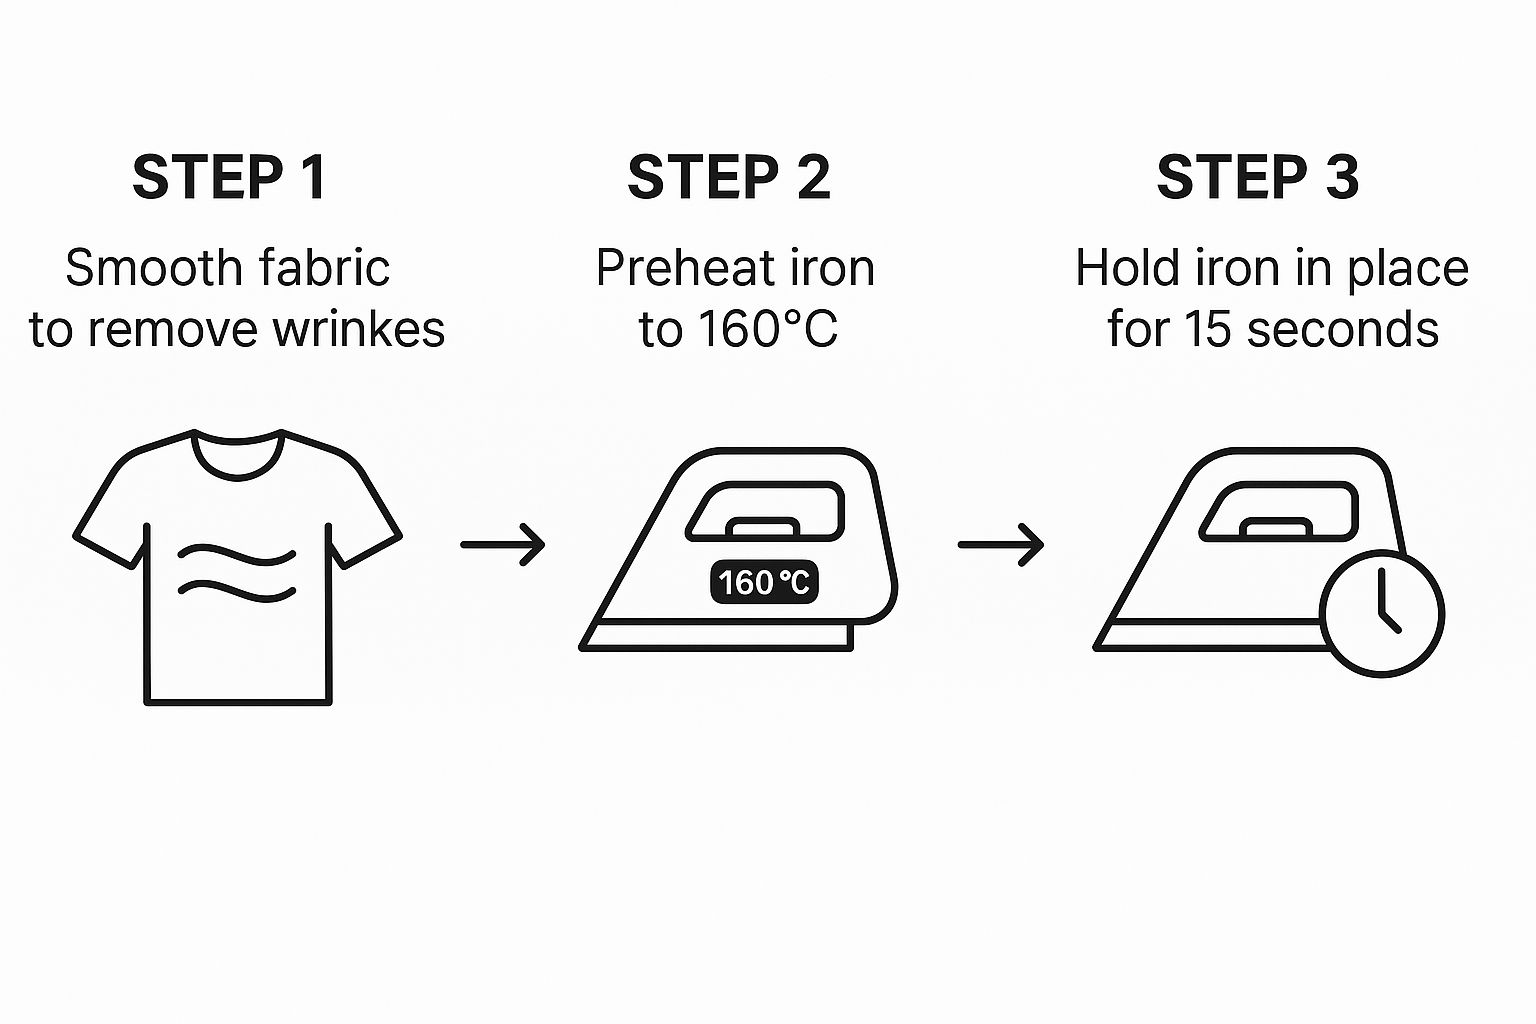
Getting this prep work right sets you up for a transfer that adheres evenly and stays put for the long haul.
The Art of Applying Pressure
Heat is only half the equation. Consistent pressure is the other, and this is why that sturdy ironing surface is so important. Don't be shy—use your body weight to your advantage. Lean into the iron to apply firm and even pressure over the entire design area.
A huge rookie mistake is to slide the iron around like you're normally ironing a shirt. Don't do it! Sliding can smear the ink and lead to a patchy, weak bond. The correct technique is to press and hold.
If your transfer is bigger than the plate of your iron, you'll need to work in sections.
- Press in Sections: Treat the design like a grid. Press one section for the full recommended time, then lift the iron completely before moving to the next.
- Overlap a Little: As you move to the next section, make sure you overlap the area you just pressed by about half an inch. This prevents any cold spots along the seams.
- Hit the Edges: The edges and corners are the most vulnerable spots for peeling later on. Give them some extra attention and pressure to make sure they're locked down tight.
Applying even pressure is often the biggest hurdle for beginners. Imagine you're trying to leave a perfect handprint in wet cement—you need to press down firmly and evenly without wiggling. It’s the same concept for ensuring the adhesive melts uniformly into the fabric weave.
Nailing these basics is key, and if you want to dive deeper, our complete guide to heat transfer shirt printing explores everything from pro-level equipment to different material quirks. Following these steps will help you create custom gear that not only looks amazing off the press but also survives plenty of trips through the washer.
The Art of Peeling and Curing Your Design
Your design is finally on the fabric, and it looks fantastic. It’s so tempting to call it a day, but these next few moments are every bit as critical as the press itself. How you peel that transfer film can make or break all your hard work.
This isn’t just a matter of ripping off a piece of plastic. It’s a delicate process that demands you know exactly what kind of transfer you're working with. Getting the timing and technique right here is what separates an amateur-looking shirt from a truly professional-quality custom garment.
Hot Peel vs. Cold Peel: The Critical Difference
The single most important piece of information you need right now is your transfer type. Are you working with a hot peel, warm peel, or cold peel transfer? This detail dictates the exact moment you should remove the backing film. Acting at the wrong temperature is a recipe for disaster.
- Hot Peel: Just like it sounds, you peel the film immediately after lifting the iron, while the design is still piping hot. It’s a quick, satisfying process that often leaves a softer, more integrated feel on the fabric.
- Warm Peel: This is the middle ground. You’ll want to wait about 5-10 seconds for the design to cool slightly but remain warm to the touch before you start peeling.
- Cold Peel: This one requires the most patience. You absolutely must wait until both the transfer and the garment are completely cool before touching the film. If you try to peel a cold peel transfer while it's still warm, you're almost guaranteed to lift the design right off the fabric.
Always, always check the instructions that came with your DTF transfers. If they don't specify the peel type, your safest bet is to treat it as a cold peel. Guessing is the fastest way to pull up corners and ruin a perfectly good press.
Peeling at the wrong time has very visible consequences. If you peel a cold peel transfer while it's hot, you'll see the design stretch, warp, or come right off with the film. On the other hand, waiting too long on some hot peel transfers can make the film surprisingly difficult to remove and might even affect the final texture.
Mastering the Perfect Peel Technique
Once you know when to peel, how you do it is just as important. You need a steady hand for this. Don't just grab a corner and yank it straight up—that puts vertical stress on the fresh adhesive and is a great way to pull up the edges of your design.
The best method is to peel at a low, sharp angle. Keep the film as close to the garment as you can, essentially rolling it back over itself. This creates a shearing force that cleanly separates the film from the design without disturbing its bond with the fabric. The key is a smooth, consistent motion. No jerking!
The Curing Process: Don't Skip This Step
The film is off and it looks perfect. But you're not quite done yet. The adhesive needs time to fully cure and lock itself into the fabric fibers. This final chemical process is what makes the design a permanent part of the garment, giving it the durability to withstand stretching, wear, and washing.
Most transfers need at least 24 hours to cure completely. During this time, you have to resist the urge to wear, stretch, or wash the item. Just lay it flat somewhere cool and dry and let it be.
Once it's cured, it's ready for its first wash. To give your design the longest life possible, stick to these simple rules:
- Turn It Inside Out: Always wash the garment inside out. This protects the design from rubbing against other clothes and the washing machine drum.
- Use Cold Water: Hot water is the enemy of transfer adhesives. Stick to cold or cool cycles to keep the bond strong.
- Tumble Dry Low: High heat can soften the adhesive and cause cracking or peeling over time. Use a low heat setting on your dryer or, even better, just hang it up to air dry.
Following these simple curing and washing steps will keep your custom design looking vibrant and crack-free for dozens of washes to come.
Troubleshooting Common Iron-On Problems
Even when you do everything right, sometimes things just don't go as planned. An edge might lift, a color looks a little dull, or a design cracks after its first trip through the wash. This is where a little bit of know-how can save your project from ending up in the back of the closet. Don’t worry—most of these common iron-on issues are fixable.
Most of the time, the problem comes down to one of three things: heat, pressure, or time. If one of these is even slightly off, it can throw off the whole result. The trick is figuring out which one is the culprit so you can apply the right fix without accidentally making it worse.
Peeling Edges and Lifting Corners
This is the one I see most often. You go to peel the carrier film away, and a corner of your design decides it wants to come along for the ride. The cause is almost always a lack of consistent heat and pressure right on that spot. The adhesive just didn't get hot enough to properly melt into the fabric's fibers.
Luckily, this is one of the simplest problems to solve.
- Cover the design. Always place your Teflon sheet or a thin piece of cotton fabric back over the transfer to protect it.
- Re-press the problem area. Use just the tip or edge of your iron and apply firm, direct pressure only on the lifted spot for about 5-10 seconds.
- Let it cool and check your work. Wait until it's completely cool before you check if the edge has stuck down. You might need to repeat it, but be careful not to overcook the rest of the design.
Think of it like spot-treating a stain. You're performing delicate surgery on one small area, not re-pressing the entire graphic. This targeted approach prevents the rest of your design from getting too much heat and potentially getting damaged.
Cracking and Fading After Washing
It’s a gut-punch moment: you pull your awesome new shirt out of the dryer, and the design is cracked or faded. This almost always points back to a problem with the initial press. If the transfer didn't get enough even pressure, the ink and adhesive didn't sink deep enough into the fabric's weave, leaving it exposed and vulnerable during a wash cycle.
The demand for custom apparel has exploded, and the quality of materials has gotten way better. The heat transfer paper market was valued at around USD 550 million in 2023 and is projected to nearly double by 2033, thanks to big improvements in digital printing technology. You can read more about the growth of the heat transfer paper market.
Once cracking has happened, you can't really reverse it. But you can often stop it from getting worse. Cover the design with your Teflon sheet and press the entire graphic again, firmly, for about 10 seconds. This can help reseal any weak spots and give it a bit more life. For a deeper dive into the materials themselves, check out our guide on how to use transfer paper.
Quick Fixes for Common Iron-On Issues
Sometimes you just need a quick diagnosis. Use this table to figure out what went wrong and how to save your project.
| The Problem | What Likely Went Wrong | How to Fix It |
|---|---|---|
| Edges are lifting or peeling | Not enough focused heat or pressure in that specific spot. The iron's surface might have been uneven. | Cover with a Teflon sheet and use the tip of the iron to re-press only the lifted area for 5-10 seconds with firm pressure. |
| Design cracks after washing | The initial press lacked enough overall pressure, so the adhesive didn't fully bond with the fabric. | Cover and re-press the entire design for 10 seconds to reseal it. To prevent this, always use a hard, flat surface. |
| Colors look dull or faded | The iron temperature was too low, or you didn't press for long enough. | You can sometimes brighten it by re-pressing at the correct temperature, but this is best avoided by pre-testing. |
| The transfer feels stiff or plasticky | Too much heat. The iron was set too high, melting the transfer material excessively. | Unfortunately, this is hard to fix. Let it cool completely. Sometimes it softens after a wash, but prevention is key. |
Remember, these fixes are for minor mistakes. The best approach is always careful application from the start.
When a Design Is Truly Unfixable
Let’s be real for a moment: some mistakes are permanent. If you’ve ironed a design on completely crooked or put it in the wrong place, there isn't a magic eraser. Trying to remove a fully cured DTF transfer usually leaves behind a sticky residue or a faint "ghost" of the image.
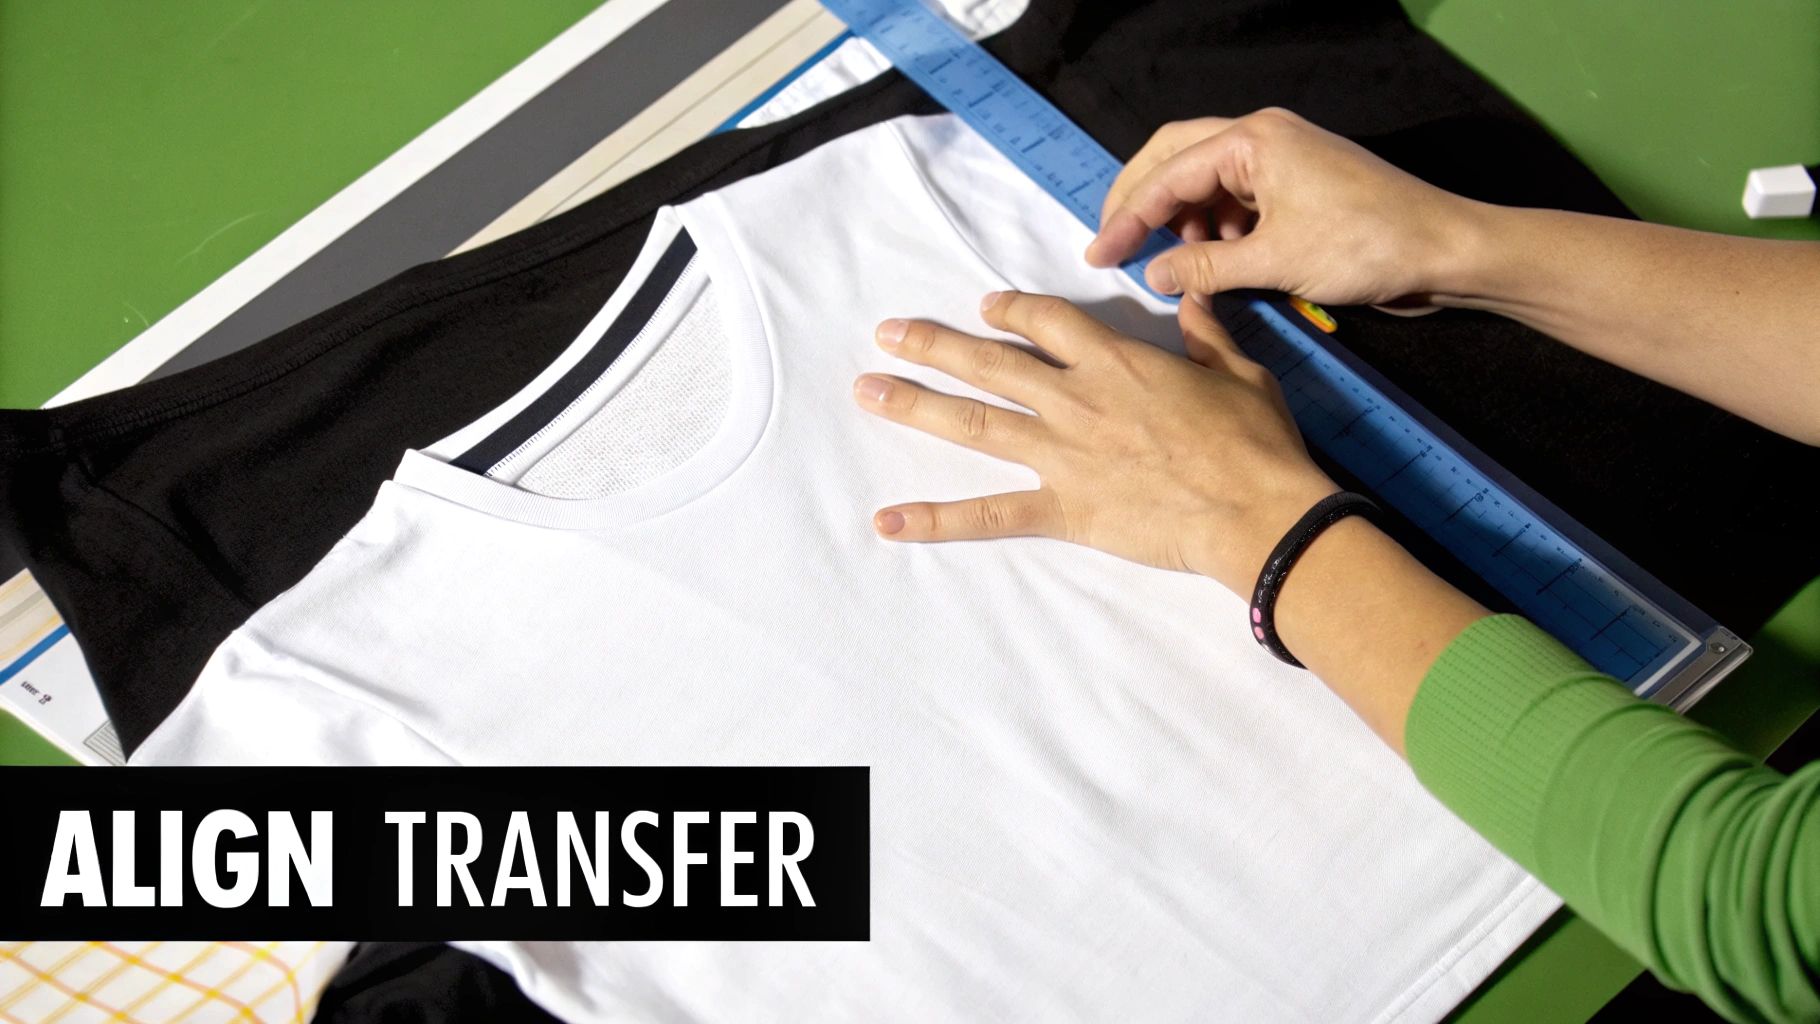
In those cases, the best you can do is learn from the mistake and start fresh on a new garment. My best advice? Always, always double-check your placement before the iron makes contact. A few extra seconds of measuring can save you a whole lot of frustration.
Creative Ideas Beyond the Basic T-Shirt
After you've nailed pressing a simple, single-color design onto a cotton tee, the real fun begins. Now you can start moving beyond the basics to create pieces that are truly one-of-a-kind. This is where you get to play with layering different colors, textures, and finishes to build designs with incredible depth and personality.
Learning how to iron on transfers in multiple layers completely changes the game. Imagine a solid base color with a shimmering foil accent or a pop of glitter on top. The secret lies in careful planning and a specific pressing technique to make sure every layer sticks without wrecking the ones you've already applied.
Mastering the Art of Layering
Here's the thing about layering: you can't just press one transfer on top of another. Every time you press, you're blasting the layers underneath with more heat, which can over-cure or even melt them if you're not careful. The trick is to use super short press times for your bottom and middle layers—just enough to get them to tack down.
Here’s how I approach multi-layered designs:
- Tack the Base Layer: Start with your bottom layer. Press it for just 2-3 seconds. This is a quick "tack" that just gets it to stick to the fabric so you can peel the carrier sheet away.
- Add the Next Layers: Position your next layer and repeat that quick tack press. Keep doing this for every layer until you get to the very last one.
- Do the Final Press: Once your top layer is in place, cover the whole design with a Teflon sheet or parchment paper. Now, press it for the full recommended time, usually around 10-15 seconds. This final, longer press cures all the layers together and locks everything in.
Always work from the bottom layer up. A crucial tip I learned the hard way: specialty materials like glitter, foil, or puff vinyl should almost always be your top layer. They just don't stick well on top of other vinyls and can get ruined by being pressed repeatedly.
Applying Transfers to New Surfaces
Don't limit your creativity to t-shirts! With a few tweaks to your technique, you can put iron-on transfers on all sorts of cool stuff. For anyone looking to expand their product line, iron-on transfers are perfect to customize handmade goods.
Let's look at a few popular non-clothing items:
- Canvas Tote Bags: Canvas has a slightly rough texture that gives the transfer something to really grip onto. The key here is to stuff a Teflon pillow or a folded towel inside the bag. This creates a firm, flat surface for even pressure.
- Hats and Caps: That curve is your biggest challenge. A small pressing pillow or even a rolled-up towel tucked firmly inside the cap will give you the rounded, solid surface you need to get a good application.
- Wood Slices and Plaques: You can absolutely iron onto wood! Just make sure the wood is unfinished, sanded smooth, and clean. You'll need to crank up the heat and apply very firm pressure to melt the adhesive right into the wood grain.
The market for custom items like these is huge. The heat transfer vinyl market, a close cousin to iron-on transfers, was valued at roughly USD 2.5 billion in 2022 and is projected to keep climbing. This boom is fueled by new materials that can be applied to more surfaces and at lower temperatures, opening up a world of creative possibilities.
Got Questions About Iron-On Transfers? I've Got Answers.
Even with the best instructions, you're bound to have a few questions once you start working. That's totally normal. I've put together this little FAQ to tackle the most common issues I see people run into, pulling from real questions to give you straight-up, practical advice.
Can I Use a Heat Press Instead of an Iron?
Yes, absolutely! In fact, if you're serious about this, a heat press is the way to go. The biggest struggle with a regular household iron is keeping the heat and pressure consistent. It's just not what they're built for.
A heat press nails both of these. It gives you a perfectly even temperature across the entire design and clamps down with uniform pressure that you just can't match by hand. If you find yourself making shirts regularly, or you're thinking about starting a small business, a heat press is probably the single best investment you can make for quality and speed.
My Two Cents: An iron is fine for getting started or for a one-off project. But for a transfer that really lasts and looks professional, nothing beats the consistent heat and pressure from a dedicated heat press.
Why Does My Transfer for Dark Shirts Feel Stiff?
That's a great question, and it's something a lot of people notice. It actually feels that way on purpose. Transfers designed for dark fabrics have an extra layer of white ink underneath the design, called an underbase.
Think of it like a coat of primer on a dark wall before you paint a bright color. This white layer stops the dark fabric from peeking through and making your design look muddy. The trade-off is that this extra ink layer adds a bit of thickness, which can make it feel stiffer than transfers for light-colored shirts.
A couple of tricks can help soften it up:
- Quality Matters: Better quality transfers usually use more flexible inks that feel much softer on the shirt.
- Give it a Gentle Stretch: Right after you peel the carrier film and while the shirt is still a bit warm, give the fabric a light, gentle tug. This helps break in the ink a little and makes it feel more a part of the fabric.
Can I Iron On Polyester or a Poly-Blend?
You can, but you have to be careful. Synthetics like polyester have a much lower melting point than cotton, and the high heat needed for many transfers can scorch or even melt the fabric if you're not paying attention.
If you're working with polyester or a blend, here’s how to do it safely:
- Always Test First: Find a hidden spot on the garment, like an inside seam, and press the hot iron there for a few seconds. You need to see how the fabric is going to react before you touch the front of it.
- Lower Your Heat: Start on a medium setting. You can always nudge it up if you need to, but you can't undo a scorch mark.
- Use a Protective Sheet: This is non-negotiable. Never let the hot iron plate touch the transfer film or the fabric directly. A Teflon sheet or even a piece of parchment paper is a must.
- Press in Short Bursts: Instead of one long 15-second press, try pressing in shorter intervals of 5-7 seconds. This gives the fabric a chance to cool down a bit and prevents it from overheating.
Ready to create amazing custom apparel with transfers that are bright, tough, and a breeze to apply? Cobra DTF makes top-notch, USA-made DTF transfers that ship out fast and give you incredible results every time.
Check out our high-quality DTF transfers and take your projects to the next level!