

How Does Transfer Paper Work A Complete Guide
At its most basic level, you can think of transfer paper as a high-tech temporary tattoo for fabric. It's a simple but brilliant idea: a design gets printed onto a specially coated sheet, and then a combination of heat and pressure permanently lifts that design off the paper and onto your item, whether it's a t-shirt, a hat, or a tote bag.
The secret is a heat-activated coating on the paper that releases the ink at just the right moment, bonding it directly to the new surface.
The Magic Behind Your Favorite Custom T-Shirt
Ever wondered how that intricate, full-color graphic made its way onto your favorite band tee or custom mug? More often than not, the answer is transfer paper. It’s the essential link that turns a digital file on a screen into a tangible product you can hold and wear.
The whole process is a neat little dance between chemistry and physics, but you don't need a science degree to get it. The transfer paper simply acts as a temporary vehicle for your design. Its special coating is engineered to hold the ink on its surface—just long enough to get it where it needs to go.
To really get a feel for how this works, it helps to break the process down into its essential parts. Every successful transfer relies on four key elements working together perfectly.
The Four Key Elements of the Transfer Process
| Component | Role in the Process | Why It's Critical |
|---|---|---|
| Coated Paper | The temporary carrier for the ink. | The special coating prevents ink from soaking in and is designed to release it cleanly under heat. |
| Ink/Toner | The actual design medium. | Must be compatible with the paper to produce vibrant colors and ensure a complete transfer without smudging. |
| Heat | The catalyst for the reaction. | At temperatures between 380-400°F, heat softens the paper's coating and "activates" the ink for release. |
| Pressure | The bonding agent. | Firm, even pressure physically embeds the released ink and adhesive into the fabric's fibers for a durable finish. |
These four elements are the foundation of a massive industry. The global heat transfer paper market was valued at around $523.2 million back in 2022 and is only expected to keep growing, all thanks to the booming demand for personalized products. It just goes to show how a straightforward scientific process can fuel a vibrant creative economy.
The real magic happens when heat and pressure combine. Heat releases the ink, while pressure ensures it has nowhere to go but into the fabric, creating a bond that's meant to last.
Of course, making awesome custom gear involves more than just mastering the transfer process. As you create your designs, it’s vital to understand the legal side of things, like how to avoid copyright infringement. Making sure your artwork is original or properly licensed is a crucial step that protects both you and your business.
Understanding the Anatomy of Transfer Paper
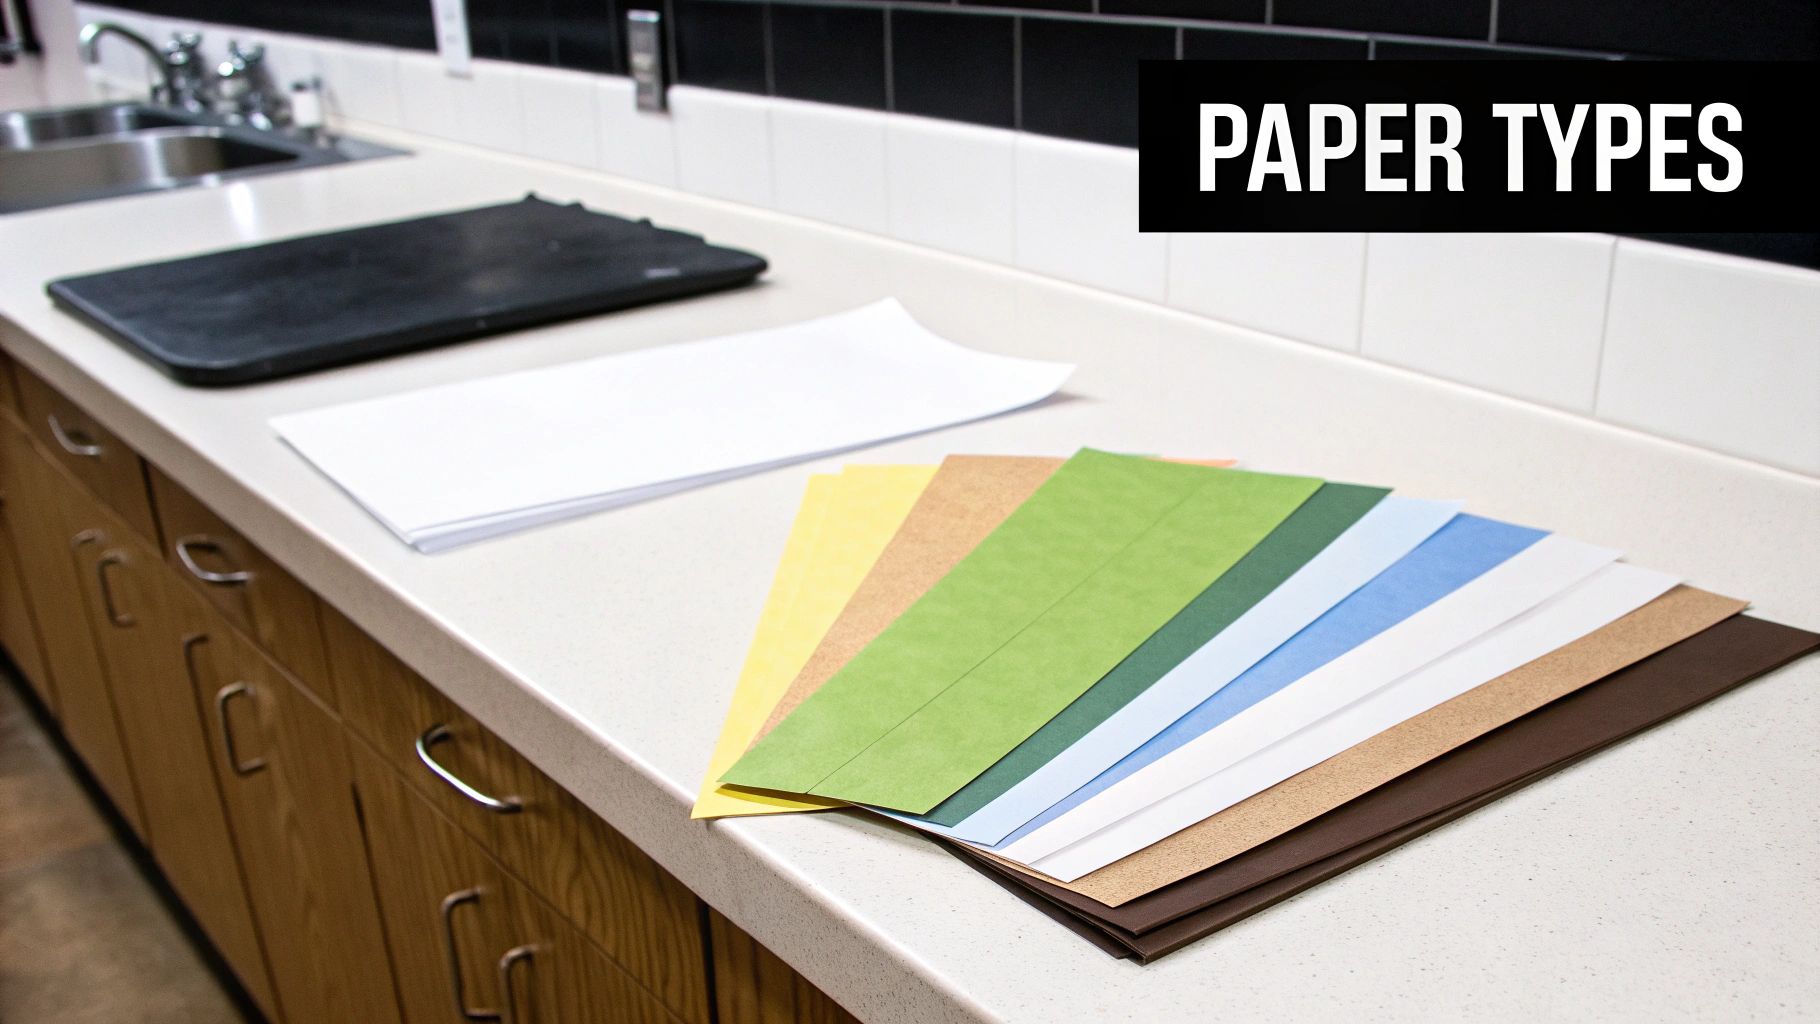
To really get how transfer paper works, you have to look past the printed design and see what it’s actually made of. Not all transfer papers are the same; each one is engineered for a specific job and a specific type of printer. Think of it like a precisely layered sandwich, where every ingredient is crucial for the final taste.
At its heart, transfer paper has three core parts that have to work together perfectly: a base layer, a release coating, and a polymer film that gets sticky with heat. Each layer has a distinct job—holding the ink, letting it go cleanly, and then locking it onto the fabric for good.
Getting a handle on this basic anatomy is the key to picking the right paper for your project and getting that professional, durable finish you're after. Let's peel back those layers and see what’s inside.
The Foundation: Base Paper and Release Coating
First up is the base paper. This is the backbone of the whole sheet, giving it structure and stability. It's not just glorified copy paper; it’s built to take the intense heat from a press without curling up or scorching. Its main purpose is to be a tough, dependable carrier for everything else.
Right on top of that base sits the layer that does the real magic: the release coating. This microscopic layer is the unsung hero of the whole process. It's designed to stop the printer ink from soaking into the paper fibers, which would cause the colors to bleed and look fuzzy.
Instead, this coating holds the ink right on the surface, keeping your design sharp and vibrant. When the heat hits, this layer is engineered to let go of that ink at just the right moment, ensuring a clean, complete transfer to your garment.
The Bonding Agent: The Polymer Film
The final, and most active, layer is the heat-activated polymer film. This is the special adhesive that actually fuses your design to the fabric. When it's cool, it's just a stable, solid film. But once it goes under the heat press, it completely changes.
You can think of it as a microscopic layer of hot-melt glue spread across your design. The heat liquefies the polymer just enough for it to flow into the tiny gaps between the fabric's fibers. As it cools down, it hardens again, creating a strong mechanical bond that locks the ink permanently into the material. This is what makes the final design tough enough to survive the washing machine.
The polymer film is the bridge connecting the paper to the fabric. It doesn't just sit on top of the surface; it integrates with the fibers, making the design a real part of the garment.
Light vs. Dark Fabrics: A Tale of Two Papers
One of the biggest distinctions you'll run into with transfer paper is the difference between sheets made for light-colored fabrics and those for dark ones. It all comes down to what that polymer film layer is made of.
- For Light Fabrics: The polymer film is completely transparent. Because the fabric underneath is light, your ink colors will show up just fine on their own.
- For Dark Fabrics: The film has an opaque white base mixed into it. This is absolutely critical. If you tried printing colors directly onto a black or navy shirt, they'd look muddy or disappear completely. This white layer acts like a primer on a wall, giving your colored inks a bright canvas to sit on so they pop.
This one difference completely changes how you set up your artwork. For light fabrics, you have to print your image mirrored. But for dark fabrics, you print it normally, since the whole opaque sheet gets applied.
Comparing Transfer Paper for Light vs Dark Fabrics
Choosing the right paper is the first step to a successful print. This table breaks down the key differences between the two main types so you can see why they aren't interchangeable.
| Feature | Paper for Light Fabrics | Paper for Dark Fabrics |
|---|---|---|
| Polymer Film | Transparent, allowing fabric color to show through. | Opaque white, creating a solid base for colors. |
| Printing Method | Image must be printed in reverse (mirrored). | Image is printed normally (not mirrored). |
| Final Feel | Softer, as ink bonds directly with fabric. | Slightly thicker feel due to the opaque layer. |
| Application | Typically placed face-down onto the garment. | Backing is peeled first; placed face-up on garment. |
As you can see, the construction of the paper dictates everything from how you print your design to how it feels on the final product. Using the wrong one can lead to faded colors, a stiff feel, or a design that peels right off.
How Heat and Pressure Create a Permanent Bond
So, you've got your design printed on transfer paper. Now for the magic. This is where a little bit of science—specifically, heat and pressure—turns that print into a permanent part of your garment. It's the moment of truth for any transfer.
Think of it like trying to get butter to soak into a piece of toast. A cold pat of butter just sits on top, right? But apply a little heat, and it melts right in. The heat press does something similar, warming up the polymer layer on the transfer paper and telling the ink it's time to move.
Once that ink is primed and ready, pressure steps in to finish the job. It's the force that physically pushes the now-liquefied ink and adhesive deep into the fabric's weave. This is what creates a truly durable bond, ensuring the design doesn't just sit on the surface, waiting to peel off. It becomes one with the shirt.
This image breaks down exactly how heat and pressure work together to get the design off the paper and onto the fabric for good.
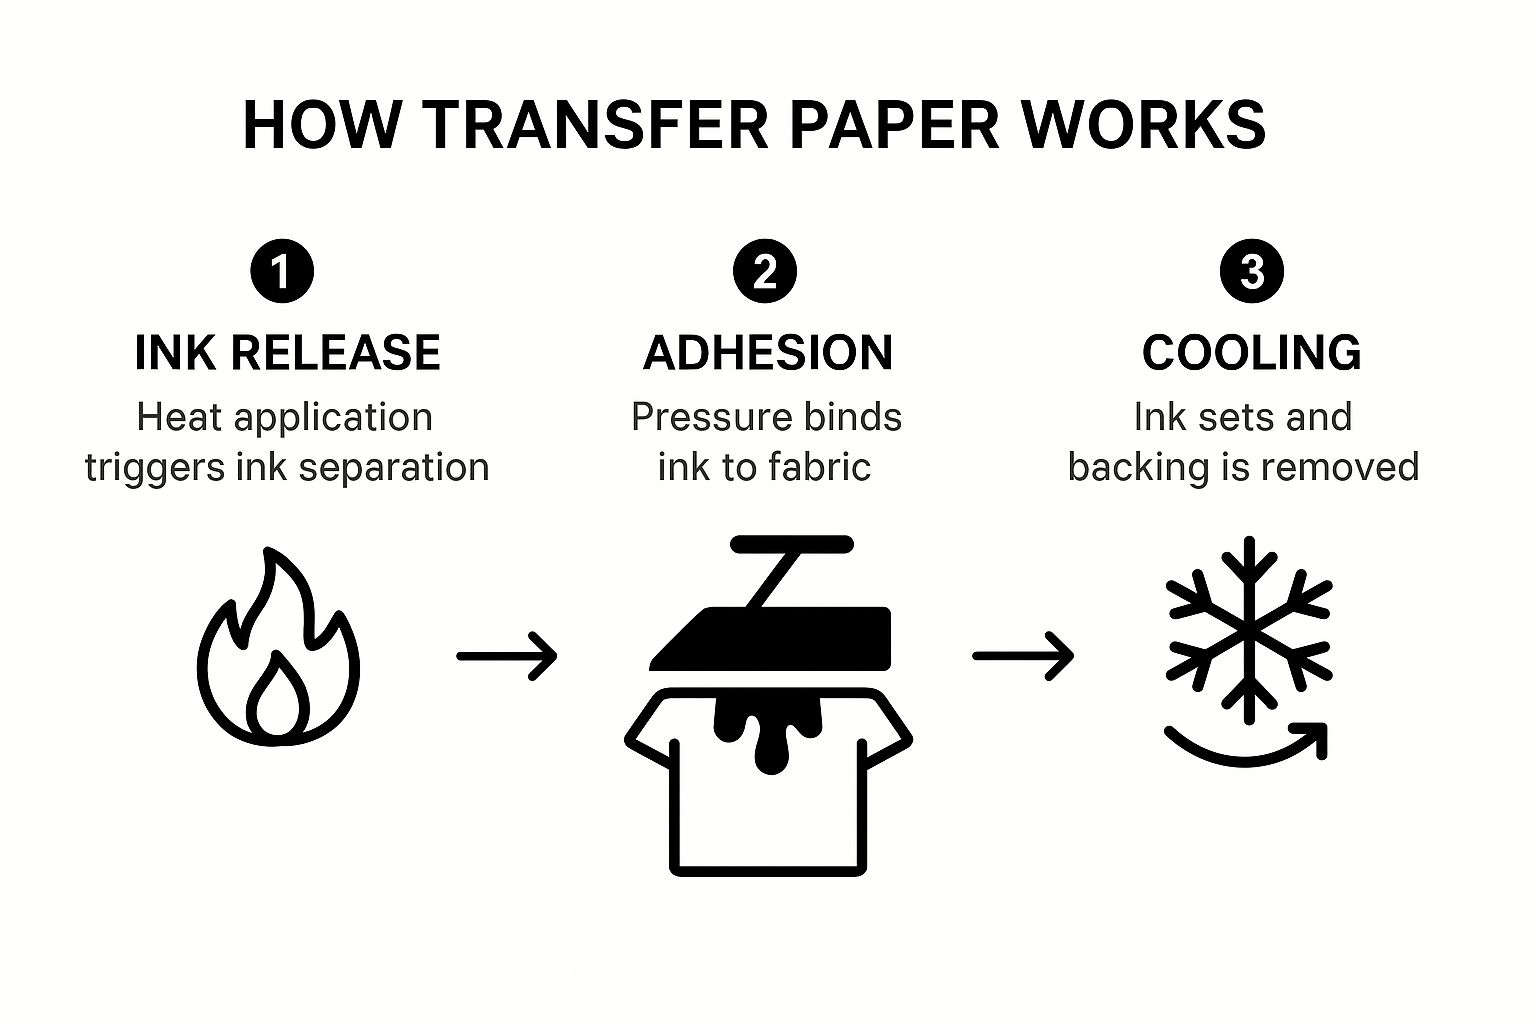
As you can see, heat releases the ink, pressure bonds it to the fibers, and the final cooling step locks it all in place.
Finding the Temperature Sweet Spot
Every transfer paper and fabric has its own ideal temperature. This isn't just a suggestion—getting it wrong is probably the number one reason transfers fail. You need enough heat to activate the polymer and release the ink, but not so much that you scorch the fabric or ruin the design.
Here’s a quick cheat sheet for common materials:
- Cotton & Blends: These are tough and can handle the heat. You’ll typically be working in the 350–385°F (177–196°C) range. Most standard inkjet and laser papers are designed for this.
- Polyester & Synthetics: Be careful here. These fabrics are sensitive and can melt. A much lower temperature range of around 270–300°F (132–149°C) is usually the safe zone.
- Sublimation: This is a completely different animal. Used only on polyester or specially coated items, sublimation requires serious heat—around 400°F (204°C)—to turn the solid dye into a gas that permanently infuses the material.
Getting these temperatures right is the foundation of the entire heat transfer market. It was valued at $1.6 billion in 2025 and is expected to hit $2.27 billion by 2034, all because this precise chemical reaction creates durable, high-quality products.
Why You Can't Skimp on Pressure
Heat gets all the attention, but consistent pressure is the unsung hero of a good transfer. You can try using a home iron, but you'll quickly find it's almost impossible to apply even pressure across the entire design. That's why professionals use a heat press.
When your pressure is uneven, you get predictable (and frustrating) results:
- Patchy, Faded Spots: Any area that didn't get enough muscle behind it won't bond properly, leaving the design looking weak and washed out.
- Cracking and Peeling: Without enough force to drive the adhesive into the fabric, the design just sits on the surface. It might look okay at first, but it will almost certainly crack and peel after a wash or two.
The secret to a flawless, store-bought finish is a heat press. It clamps down with perfectly even pressure, guaranteeing every single inch of your design bonds with the exact same force. This is what separates a DIY-looking shirt from a professional one.
It’s this powerful combination—the right heat for the right amount of time, paired with unwavering pressure—that makes a transfer permanent. For anyone looking to get that professional quality without the guesswork, ready-to-press graphics are a fantastic solution. If that sounds interesting, you should check out our guide on custom DTF transfers ready to press.
Once you truly understand how heat and pressure work together, you're no longer just following instructions. You're in control. You can troubleshoot problems, experiment with different materials, and perfect your craft because you know what's happening at a molecular level.
Choosing the Right Printer for Your Project
The journey your design takes from a digital file to a piece of wearable art hinges on one critical choice: the printer. It’s the very first step, and it sets the stage for everything that follows. The printer you use changes how the transfer paper does its job, affecting the cost, the vibrancy of the colors, and even how the final design feels on the shirt.
This isn't just about getting ink onto paper. It’s about matching the right technology to your specific goal. Inkjet, laser, and sublimation printers all interact with transfer paper's special coatings in completely different ways. Knowing these differences is crucial, whether you're a hobbyist making a one-off gift or a small business pumping out an order.
Inkjet Printers: A Great Starting Point
For most people dipping their toes into custom apparel, inkjet printers are the go-to. They are affordable, easy to find, and perfect for small-scale projects. Inkjets work by spraying incredibly fine droplets of liquid ink onto the transfer paper’s absorbent coating, which excels at blending colors to produce photorealistic images with smooth gradients.
The process is refreshingly simple. You print your design on special inkjet transfer paper, then use a heat press to transfer the image. The ink sits on the paper's polymer layer and moves over to the garment as a single, cohesive film. This makes inkjets a fantastic and versatile choice for cotton and poly-blend fabrics.
Think of an inkjet printer like a painter with an ultra-fine airbrush. It layers colors meticulously to create stunning depth and detail, making it ideal for those complex, colorful graphics.
Of course, the printer is only as good as the file it's given. To get the best results, you need to start with a high-resolution source image. Learning how to improve image quality with AI tools can be a game-changer for making your designs look truly professional.
Laser Printers: Speed and Durability
Laser printers play a completely different ballgame. Instead of liquid ink, they use a fine powder called toner. Inside the printer, a laser "draws" your image onto a charged drum, and the toner particles cling to that pattern. Hot rollers then fuse this toner onto the transfer paper's surface, creating a solid layer.
When you heat-press this onto a shirt, the fused toner bonds directly with the fabric. The result is often a more durable and wash-resistant finish compared to some inkjet transfers. On top of that, laser printers are fast—really fast. This makes them the obvious choice for larger batches and commercial runs where time is money.
Sublimation Printers: The Infusion Method
Now, this is where the magic really happens. Sublimation doesn't just stick a design on top of a garment; it permanently infuses the ink into the fabric fibers. It’s a fascinating process that uses special solid dyes. When heated to around 400°F, these dyes skip the liquid phase and turn straight into a gas.
This gas permeates the polyester fibers of the garment (a quick note: sublimation only works on polyester or poly-coated items). As it cools, the gas solidifies, becoming a permanent part of the material itself. You get a transfer with absolutely zero feel, breathtaking vibrancy, and unmatched durability that will never crack, peel, or fade.
- Inkjet: Best for photorealism, color blending, and low startup costs.
- Laser: Ideal for high speed, impressive durability, and larger production volume.
- Sublimation: The ultimate choice for permanence and vibrancy, but only on polyester fabrics.
Each of these methods is a unique path to a finished product. If you're exploring even more advanced options for your business, it’s vital to understand where these technologies fit in the bigger picture. For a deeper dive, check out our guide comparing https://cobradtf.com/blogs/guides/dtf-vs-dtg-printing. Making the right choice here is the first step toward amazing results.
Exploring the Power of DTF Transfers
While old-school transfer papers certainly paved the way, Direct-to-Film (DTF) technology has completely changed the game for custom apparel. This method takes the basic concept of a heat transfer and elevates it into a highly refined, versatile, and seriously powerful process. It’s not just another option; for many pros, it's a huge leap forward.
DTF sidesteps some of the biggest headaches that came with older methods. For starters, it works on almost any fabric you can think of—cotton, polyester, blends, even leather—which is a major advantage over sublimation. And unlike those heavy transfer papers for dark shirts, DTF doesn't need a thick, rubbery background layer, giving you a much softer and more flexible feel.
The whole thing is a unique three-part dance between ink, adhesive, and heat.
The DTF Printing and Curing Process
A DTF transfer starts its life on a specialized printer that lays the design onto a clear PET film. The secret sauce is how the ink is applied: a layer of white ink goes down first, with the colored inks printed right on top. This is the key to making sure the design pops with vibrant, solid color on any garment, light or dark.
With the ink still wet, the film moves on to the most crucial step: applying the adhesive. The print is coated with a fine thermoplastic polyurethane (TPU) adhesive powder. This powder is designed to stick only to the wet ink, perfectly outlining the design.
You can think of it like making breaded chicken. The wet ink is like the egg wash, and the adhesive powder is the breading. The breading only sticks where the egg wash is, creating a perfect coating. The same thing happens here—the powder becomes the bonding agent, but only where it's needed.
Finally, the powder-coated film passes through a curing oven or under a heat press. The heat melts the powder, fusing it into a smooth, even film over the ink. What comes out is a self-contained, press-ready graphic. The ink and adhesive are now one unit, all set for application. If you want to dive deeper, you can explore our complete guide on what direct-to-film printing is and how it works.
Benefits That Set DTF Apart
The real magic of DTF becomes obvious once you press that transfer onto a shirt. The results are tough to match with other methods, which is why it’s become the go-to for anyone serious about high-quality custom apparel.
Three benefits really make it stand out:
- Amazing Stretchability: The fused ink and adhesive layer is incredibly flexible. When you stretch the fabric, the DTF transfer stretches right along with it without cracking or peeling. This makes it perfect for athletic wear and stretchy knits.
- Soft Hand Feel: Because there's no bulky carrier sheet left behind, the finished design feels much softer and lighter. It almost feels like it's part of the fabric itself, not just sitting on top.
- Superior Durability: The bond created by that TPU adhesive is no joke. DTF transfers are known for their fantastic wash-fastness, holding up against fading and peeling through dozens of wash cycles. In many cases, the print will outlast the garment it's on.
This blend of versatility, great feel, and durability is exactly why DTF has taken the industry by storm. It solves problems that have plagued decorators for years and delivers a top-tier product that both creators and their customers absolutely love.
Common Transfer Paper Mistakes to Sidestep
Knowing how transfer paper works in theory is one thing, but getting it right in practice? That's a whole different ballgame. I've seen even experienced pros make simple mistakes that can totally wreck a project, waste expensive materials, and lead to some serious frustration.
Getting a flawless, professional-looking transfer every time really comes down to avoiding a few common slip-ups. Let's walk through the big ones so you can dodge them from the get-go.
1. Forgetting to Mirror Your Image
This is the classic, number-one mistake, especially when you're working with paper for light-colored fabrics. Think about it: this paper goes face-down onto the shirt. If you don't print a mirror image of your design, everything—especially text—will be backward when you press it.
It's a gut-wrenching moment to peel back the paper and see your perfectly good t-shirt ruined by reversed lettering. Before you hit that print button, always, always dig into your printer settings and look for the "mirror image," "reverse print," or "t-shirt transfer" option. One click saves the entire job.
2. Using the Wrong Paper for Your Printer
Not all transfer papers are made the same. Inkjet and laser printers are fundamentally different machines, and the paper for each is engineered specifically for how they work. Mixing them up is asking for trouble.
- Inkjet Paper in a Laser Printer: This is a big no-no. A laser printer gets incredibly hot, and it will literally melt the coating on inkjet paper right onto its internal parts. We're talking about potentially frying the fuser unit, which is an expensive fix.
- Laser Paper in an Inkjet Printer: While this won't break your printer, the design will look terrible. Inkjet ink is a liquid that needs to soak into a special coating. Laser paper doesn't have that coating, so the ink will just sit on top, resulting in a blurry, smudged mess that won't last.
The fix is simple: always match your paper to your printer. The package will clearly say inkjet or laser. Don't skip this step.
3. Applying Uneven Heat and Pressure
I get it, a household iron is right there and seems easy enough. But it's also the single biggest reason transfers fail. Irons have hot spots and cold spots, and it’s basically impossible to apply the kind of firm, even pressure needed for a good transfer.
This is exactly why you see designs with edges peeling up, faded patches in the middle, or cracks appearing after just one wash.
If you're serious about getting good results, a heat press is a non-negotiable tool. It provides perfectly even heat and pressure across the entire design, which is what you need to properly melt the adhesive film and bond it permanently to the fabric fibers. It’s the difference between a homemade craft and a professional product.
4. Peeling at the Wrong Time (Hot Peel vs. Cold Peel)
Last but not least, you have to know if your paper is a "hot peel" or a "cold peel." This tiny detail determines the exact moment you should pull the backing paper off after pressing, and getting it wrong can ruin the whole thing.
- Hot Peel: Just like it sounds, you peel the backing off immediately, while the shirt is still smoking hot on the press. If you wait, the cooling design can stick back to the paper and pull away from the shirt.
- Cold Peel: You have to be patient with this one. You need to let the shirt and the transfer cool down completely before you even think about touching the backing. Peel it while it's still warm, and you'll likely pull up chunks of the design with it.
Always read the instructions that came with your specific paper. The manufacturer will tell you exactly what to do for a clean, perfect release.
Your Top Questions About Transfer Paper, Answered
Even when you feel like you've got the basics down, a few practical questions always pop up. Let's tackle some of the most common ones we hear so you can get started on your projects with confidence.
Can I Get Away With Using a Household Iron Instead of a Heat Press?
You technically can, but a real heat press is a game-changer for a reason. An iron just doesn't deliver even, consistent heat, which is why you often see faded spots or sections that don't stick well. Plus, it's nearly impossible to apply the kind of firm, even pressure needed to create a bond that lasts.
If an iron is your only option, make sure the steam is off and set it to the highest heat your fabric can safely take. Press down hard on a solid, heat-resistant surface (not an ironing board!) and keep the iron moving to spread the heat and avoid scorching.
How Long Will My Design Actually Last?
This all comes down to a few key things: the quality of your transfer paper and ink, how well you applied it, and how the garment is laundered. A top-notch transfer, applied correctly with a heat press, can easily go through 25-50 washes before you see any major fading or wear.
To get the most life out of your design, always turn the garment inside out before washing. Use cold water and a mild detergent. Hang it to dry or tumble dry on the lowest possible heat setting. And whatever you do, steer clear of bleach and fabric softeners—they're the fastest way to break down the transfer's adhesive.
Help! My Design Cracked After Just One Wash. What Happened?
Cracking and peeling are almost always caused by an application problem, not a bad transfer. When this happens, it usually boils down to one of three things: not enough heat, not enough pressure, or not enough time. If any of these are off, the transfer's adhesive simply can't melt properly and fuse into the fabric's fibers.
The bottom line is the bond wasn't strong enough. Go back and double-check your heat press settings. Make sure the temperature is right for your specific paper and that you’re clamping it down with firm, even pressure for the full recommended time.
What’s the Difference Between Hot Peel and Cold Peel?
This one's simple—it just tells you when to peel the paper backing off after you've pressed the design. It's crucial to follow the instructions that came with your paper, as they're designed for a specific release process.
- Hot Peel: You peel the backing away immediately while everything is still hot. This usually leaves the design with a softer feel and a more matte finish.
- Cold Peel: You have to wait for the garment to cool down completely before you touch the backing. This method tends to produce a glossier, more vibrant look.
Ready to create stunning, durable custom apparel without the common pitfalls? Cobra DTF offers premium, USA-made Direct-to-Film transfers that guarantee vibrant colors and a professional finish every time. Explore our ready-to-press solutions and see the difference for yourself.