
A Practical Guide to Heat Press Settings for Perfect Transfers
If you want a flawless DTF transfer, getting your heat press settings right is everything. It all comes down to a perfect balance of three things: temperature, time, and pressure. These three work together to fuse your design to the fabric permanently. Nail this trifecta, and you’ll get those clean, professional results you're after, every single time.
Understanding the Fundamentals of Heat Press Settings
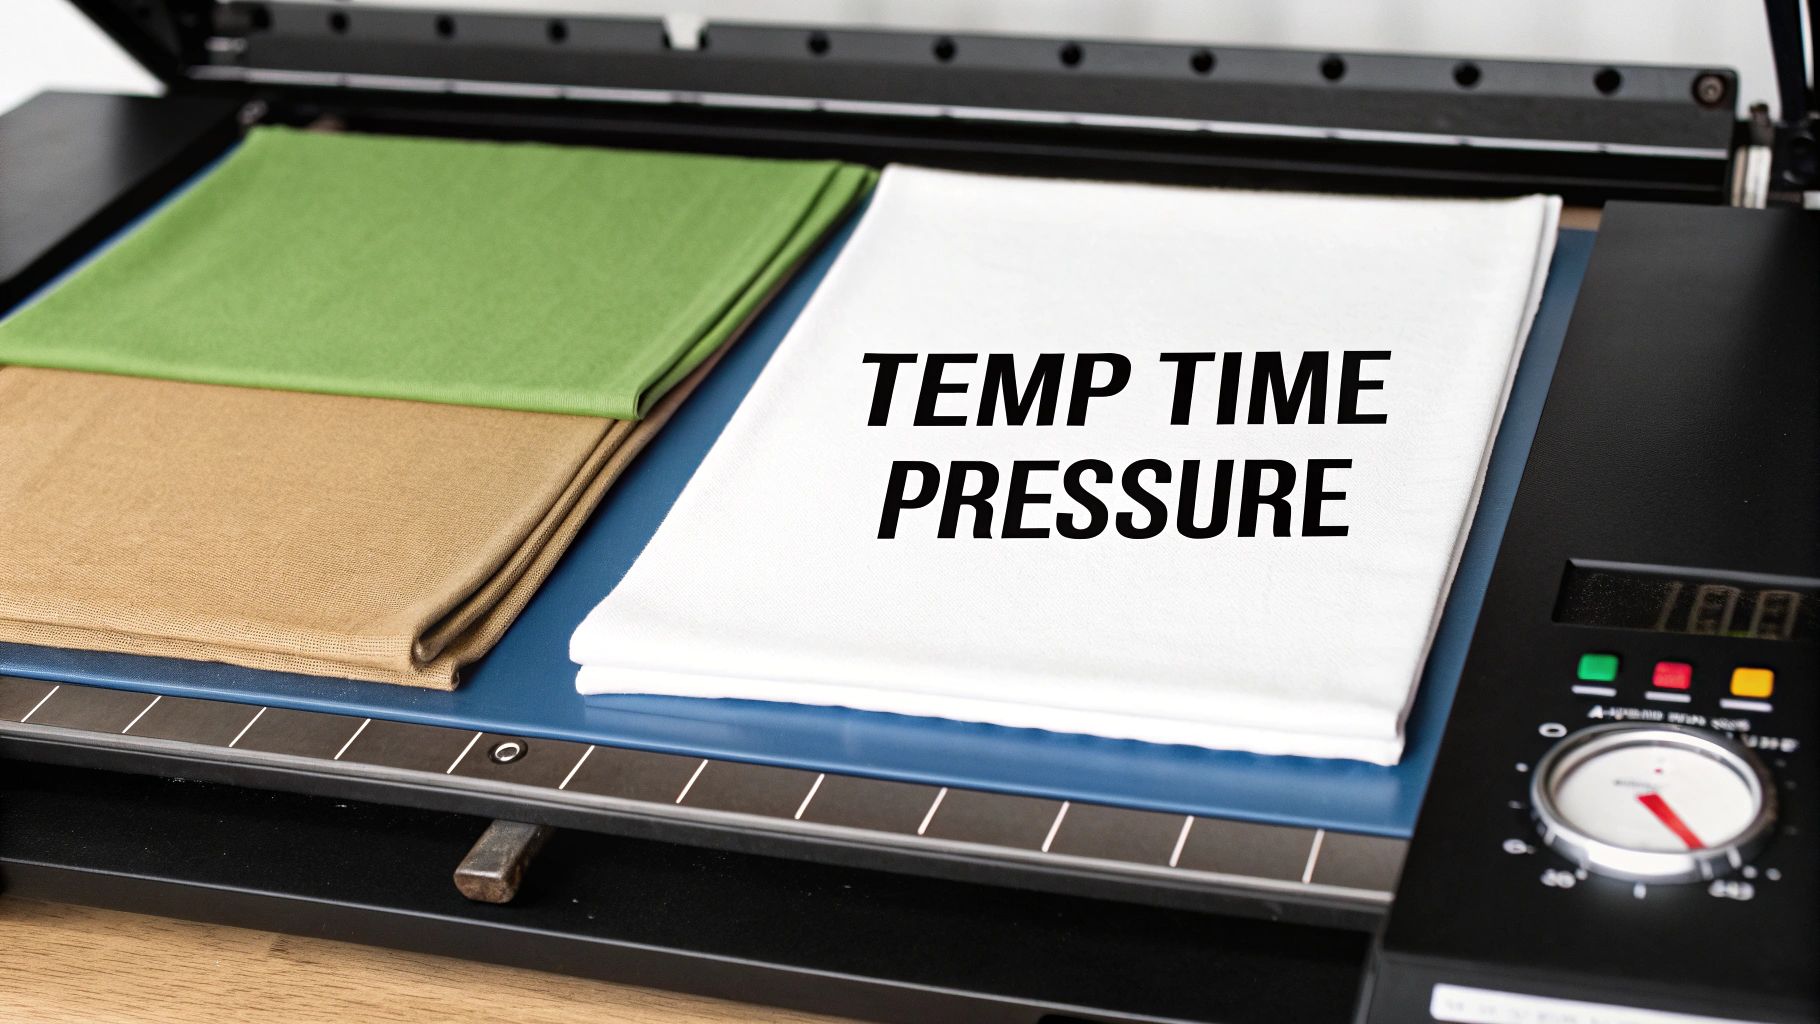
I always tell people to think of temperature, time, and pressure as the three legs of a stool. If one is off, the whole thing falls apart. When you understand how they interact, you can move beyond just following a chart and start troubleshooting issues like a pro.
This is the foundational knowledge that lets you adapt to different fabrics and situations, ensuring every single transfer is vibrant, durable, and perfectly bonded to the garment.
The Role of Temperature
Temperature is what wakes up the adhesive on the back of your DTF transfer. You need enough heat to melt that adhesive so it can sink into the fabric's fibers, but going too hot is a recipe for disaster.
Every fabric is different. Here’s a quick rundown of what I mean:
- Cotton: This stuff is tough. As a natural fiber, it can handle higher temps, usually somewhere in the 300-320°F range. You need that heat to get the adhesive to really embed itself.
- Polyester: Be careful here. Polyester is a synthetic, and it's sensitive to heat. If you go much past its sweet spot of 275-290°F, the fabric can melt or you'll get "dye migration"—that's when the garment's dye turns into a gas and stains your beautiful white design.
- Blends (50/50, Tri-blends): These fabrics are a balancing act. You have to find a happy medium that works for all the fiber types in the shirt without damaging any of them.
Key Takeaway: The goal isn't just to melt the adhesive. It's to melt it without scorching the garment. Always start with the recommended settings for the specific fabric you're working with and test if you're unsure.
Why Dwell Time Matters
The amount of time your press is closed is what we call "dwell time." This is the window where the magic happens—when the heat and pressure work together to let that melted adhesive grab onto the fabric fibers.
If your press time is too short, the adhesive never gets a chance to fully liquefy and bond. The result? A transfer that starts peeling up after the first wash. On the flip side, pressing for too long can burn both the shirt and the transfer, leaving the ink brittle and prone to cracking. For most DTF on cotton, we’re looking at a press time of 10 to 15 seconds. That’s usually the sweet spot.
The Importance of Pressure
Pressure is what physically forces the melted adhesive deep into the garment's weave. This creates a strong mechanical bond that can stand up to stretching, washing, and daily wear. Without the right pressure, the transfer just sits on the surface and won't last.
Most DTF transfers call for medium to firm pressure. This ensures the design truly becomes part of the garment, instead of feeling like a stiff sticker just sitting on top.
Just as important is even pressure. Things like seams, zippers, or collars can create uneven surfaces, leading to weak spots where the transfer doesn't adhere properly. This is exactly why using tools like a pressing pillow or having a solid pre-press routine is so crucial for a professional finish.
The Ultimate DTF Heat Press Settings Chart

Alright, let's get down to the numbers you actually need for a perfect press. This isn't just a generic list; these are the field-tested settings we rely on every day for our own Cobra DTF transfers. Think of this as your go-to cheat sheet for creating custom apparel that not only looks great but lasts.
We've organized the ideal heat press settings based on the most common fabrics you'll encounter. Whether you're pressing a classic cotton tee, a tricky polyester performance shirt, or a soft tri-blend, this chart is your starting point for getting it right the first time.
What the Numbers Really Mean
Before we jump into the chart, let's quickly break down what each setting does. Temperature and time are pretty straightforward, but pressure and peel method can make or break your final product.
- Pressure: For DTF, you’re almost always looking for medium to firm pressure. This is what ensures the adhesive fully melts and works its way into the fabric fibers, giving you that long-lasting bond we're all after.
- Peel Method: This is all about when you remove the transfer film. A "hot peel" happens immediately after pressing, while a "cold peel" means waiting until the garment has cooled down completely.
Most pros will tell you that solid DTF results start with medium-to-firm pressure, somewhere around 40 PSI or higher. Paired with a temperature of 310°F for about 13 seconds, this combination ensures the adhesive melts properly and bonds securely to the fabric. As a general industry rule, light pressure is 25-30 PSI, medium is 32-38 PSI, and firm is anything 40 PSI or above.
Recommended Heat Press Settings by Fabric Type
Here is our quick-reference guide with the ideal settings for our DTF transfers on the most common fabrics. This table will get you started, but for a more detailed breakdown, you can always check out our complete guide on DTF transfer heat press settings.
| Fabric Type | Temperature (°F) | Time (Seconds) | Pressure | Peel Method |
|---|---|---|---|---|
| 100% Cotton | 300-320°F | 10-15 | Medium-Firm | Hot or Cold |
| 100% Polyester | 275-290°F | 8-12 | Medium | Hot or Cold |
| 50/50 Blends | 280-300°F | 10-12 | Medium | Hot or Cold |
| Tri-Blends | 275-290°F | 8-12 | Medium | Cold Peel |
These settings are your roadmap to consistent, high-quality results.
A Few Practical Tips
While this chart is a fantastic starting point, it's important to remember that every heat press has its own quirks. Your machine might run a few degrees hotter or colder than what the digital display says.
I always recommend doing a test press on a scrap piece of the same fabric or in a hidden spot on the garment. It's a small step that can save you from ruining a perfectly good shirt and helps confirm your settings are dialed in for that specific job.
Fabric color also plays a role. Dark polyester garments, for example, are notorious for dye migration, where the fabric's dye can "bleed" into your transfer. To avoid this, stick to the lower end of the temperature range—around 275-280°F—for those fabrics.
Hot Peel vs. Cold Peel: When to Use Each
Our transfers are designed to work with both hot and cold peeling, which is a huge advantage. So, how do you decide which method to use?
- Hot Peel: This is my go-to for speed and efficiency, especially when I'm knocking out a large order. Peeling the film while it's still hot leaves a slightly softer, more matte finish that feels like it’s part of the fabric. It’s perfect for most cotton and 50/50 blend jobs.
- Cold Peel: This method is your secret weapon for designs with fine lines, tiny text, or intricate details. Letting the transfer cool completely gives the adhesive extra time to set, ensuring every last bit of your design stays put. It's also what I recommend for more delicate materials like tri-blends.
Ultimately, the best choice often comes down to personal preference and the specific design you're pressing. Don't be afraid to experiment with both to see which finish you like best for your products.
A Proven Workflow for a Perfect Press Every Time
Getting the right heat press settings is just the starting point. The real magic—and what separates the pros from the amateurs—is a solid, repeatable workflow. This is what turns those numbers on your display into a flawless final product that’s durable, soft to the touch, and perfectly bonded to the fabric.
Think of it less as a rigid set of steps and more as a rhythm you get into. Once you dial in this process, you'll find yourself working faster, making fewer mistakes, and putting out consistently higher-quality apparel.
The Non-Negotiable Pre-Press
Let's talk about the one thing everyone is tempted to skip: the pre-press. Seriously, don't skip it. Garments, especially natural fibers like cotton, are like little sponges. They soak up moisture from the air, and that hidden water is the arch-nemesis of a good DTF transfer.
When you bring the heat, that moisture flashes into steam. That steam gets in the way, preventing the DTF adhesive from properly grabbing onto the fabric fibers. The result? Weak adhesion and a transfer that starts peeling after the first wash.
A quick pre-press is the simple fix.
- Action: Just place your garment on the press and lower the platen for about 5-10 seconds.
- Purpose: This quick hit of heat forces out any trapped moisture and knocks out any wrinkles, leaving you with a perfectly flat, dry canvas to work on.
You’ll often see a little puff of steam escape—that’s your proof that you just dodged a bullet. This simple move is your best defense against adhesion problems down the line.
Nailing the Placement and Alignment
With the garment prepped, it's time to position your transfer. Sure, you can eyeball it on a one-off job, but for consistent, professional results, you need a better system. Nothing screams "amateur" faster than a crooked graphic.
A couple of simple tools can make this part of the process dead-on accurate:
- T-Shirt Rulers: These are guides that help you find the shirt's centerline and place the design a consistent distance from the collar every single time.
- Laser Alignment Systems: If you're running a higher volume shop, these systems are a game-changer. They project crosshairs right onto the garment, making perfect placement quick and foolproof.
Once your transfer is where you want it, use a couple of small pieces of heat-resistant tape to lock it down. This is especially crucial if you're using a clamshell press, where the up-and-down motion can sometimes shift the transfer and cause a blurry, "ghosted" image. The tape makes sure it stays put.
Pro Tip: I like to fold my transfer lightly in half to create a faint crease down the middle. I then line that crease up with the shirt's center tag or the middle of the collar. It's a low-tech but incredibly effective trick for getting the design perfectly centered.
The Main Event: The First Press and Peel
Alright, your garment is prepped and the transfer is secured. You're ready for the main press. This is where your carefully chosen temperature, time, and pressure settings get to do their job.
Lock down the press and let the timer do its thing. Once it beeps, you've hit a critical moment: the peel. This is what really defines the final texture and finish of your print. As we've covered, our Cobra DTF transfers give you the flexibility of both hot and cold peels.
- Hot Peel: This means you pull the carrier film off immediately after the press opens, while everything is still hot. It's fast, efficient, and leaves a soft, matte finish that feels like it’s part of the fabric.
- Cold Peel: For this method, you let the garment and transfer cool down completely before removing the film. This is the way to go for designs with very fine lines or tiny, intricate details, as it gives the adhesive more time to set up.
Whichever you choose, peel the film back in a smooth, low, and even motion. Don't rip it off like a band-aid—a steady, confident pull gives you the cleanest release.
Securing Durability with the Second Press
The design is on the shirt, but you're not done yet. This final step, often called a finishing press, is what gives a DTF transfer its signature soft-hand feel and locks in its durability for the long haul. Skipping it is a common rookie mistake that can leave the print feeling plasticky and make it more likely to crack over time.
Here’s all you have to do:
- After peeling the film, place a protective sheet over the exposed design. A Teflon sheet or even a piece of parchment paper works great.
- Press the garment again for another 5-10 seconds at the same temperature and pressure you used before.
- This second press melts the ink just enough to push it deeper into the fabric's weave, smoothing out the surface for a professional, retail-quality finish.
This quick step dramatically improves how well the print washes and stretches. It transforms the design from something sitting on the shirt to something that feels like it’s a part of it. For a closer look at these techniques, check out our comprehensive DTF press instructions for more tips and visual guides. Following this workflow ensures every transfer not only looks great right off the press but also stands up to whatever life throws at it.
Getting Ahead of Common Heat Press Problems
Even with the perfect settings, sometimes things just go wrong. It happens to the best of us. The trick isn't avoiding every single hiccup—it's knowing how to read the signs and fix the problem fast, without sacrificing a pile of good shirts and expensive transfers in the process.
Let’s walk through the most common headaches you’ll run into with DTF and how to solve them. Think of this as your go-to field guide for troubleshooting on the fly.
This simple workflow visualizes the path to a perfect press, from preparation and pressing to the final finish.
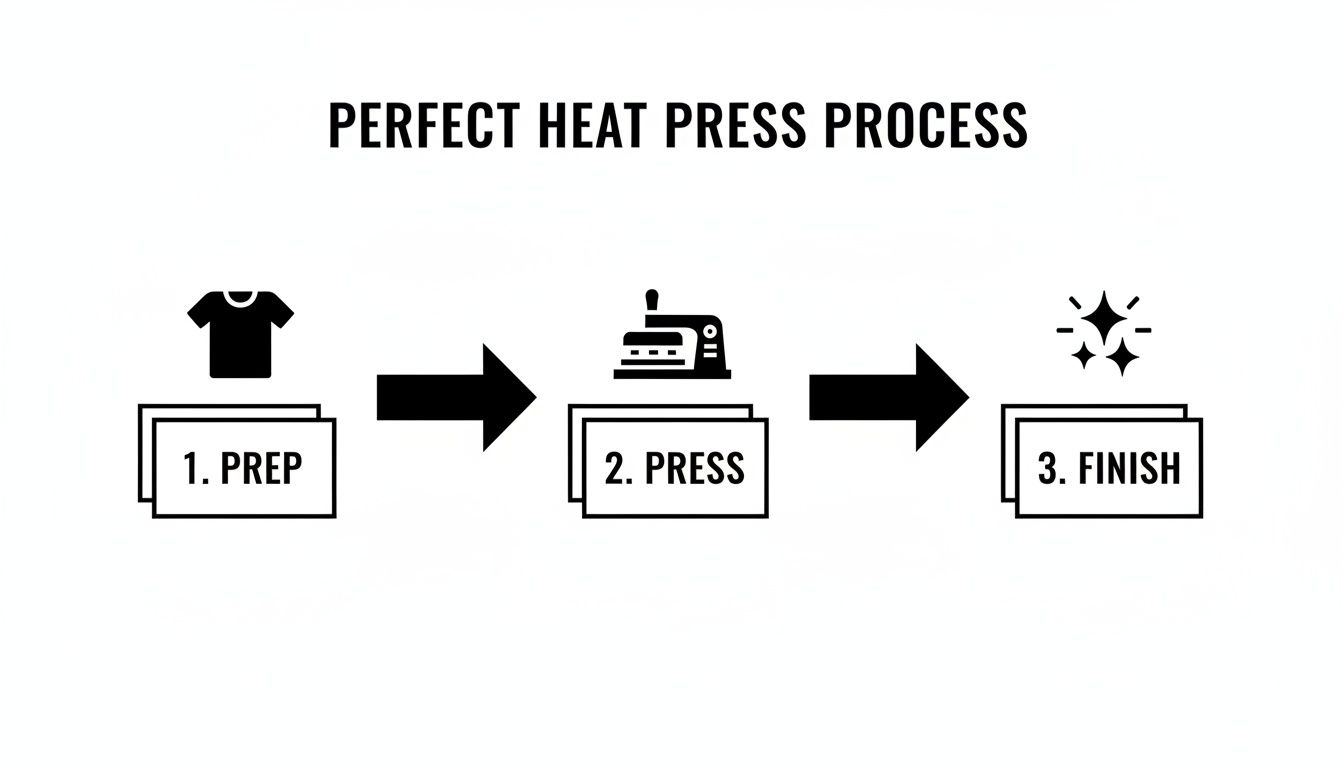
Honestly, just sticking to these three core stages—prep, press, and finish—will prevent most of these issues before they even start.
The Transfer Isn’t Sticking to the Shirt
This is, by far, the most frequent frustration. You peel back the film, and bits of the design (or the whole thing) are left clinging to it instead of the fabric. It's maddening, but the fix is usually pretty straightforward.
What's likely happening?
- Not Enough Pressure: The adhesive on the transfer needs to be physically forced into the fabric's fibers. If your pressure is too light, you’re just laying it on top, not creating a real bond.
- Moisture is the Enemy: Cotton and blends are like sponges; they pull moisture right out of the air. If you don't pre-press the garment for at least 5-10 seconds, that trapped moisture turns into steam under the heat, blocking the adhesive from ever reaching the fabric.
- Pesky Fabric Coatings: Some shirts, especially performance wear, come from the factory with an invisible coating to resist stains or water. This coating will also resist your transfer adhesive.
How to fix it:
First, crank up the pressure. You should have to use some muscle to lock down the handle of your press. Next, always pre-press the garment to get rid of wrinkles and any sneaky moisture. If you’re still having trouble, the fabric might have a coating. A quick wash and dry cycle before you press can often strip it away.
Ghosting and Blurry Edges
"Ghosting" creates that fuzzy, out-of-focus shadow around your design's edges. It’s caused by the transfer film shifting, even just a tiny bit, as the heat press opens or closes. The result is a slight double-image that ruins an otherwise perfect print.
This problem is a classic, especially with clamshell or auto-open presses. That "pop" as the press releases can be just enough to jiggle the film. A single millimeter of movement is all it takes.
The solution here is all about prevention. Grab a couple of small pieces of heat-resistant tape and use them to anchor the corners of the transfer to the shirt. This locks it down completely, ensuring it stays put from the moment you close the press to the final peel.
Cracking and Peeling After a Wash
Nothing stings more than a customer sending you a picture of a design that’s falling apart after one wash. This is almost always a sign that the transfer never fully cured and bonded with the fabric in the first place.
The usual suspects:
- You Skipped the Second Press: The final press, sometimes called a post-press, is not optional. This step is what melts the ink into the fabric weave, giving it the flexibility and durability to survive the washing machine.
- Your Settings Are Off: If your temperature is too low or your press time is too short, the adhesive simply doesn't get hot enough for long enough to properly cure.
- Uneven Pressure is a Killer: Trying to press over a thick seam, collar, or zipper creates pockets of low pressure where the transfer barely makes contact with the shirt.
To get prints that last, you absolutely have to do a second press for 5-10 seconds with a protective sheet over the design. Always double-check your settings against a trusted chart for that specific fabric. When you have to press over an uneven surface, use a pressing pillow—it helps distribute pressure evenly across the entire design.
Sometimes, troubleshooting involves looking beyond the press itself. For industrial applications with unique environmental challenges, specialized solutions like heat-resistant equipment enclosures can play a role. But for most print shops, focusing on these core techniques will ensure your prints last as long as the garment itself.
Don't let your heat press be a one-trick pony. While it's a champion for t-shirts, thinking of it as just an apparel machine is leaving money on the table. It's a surprisingly versatile piece of equipment that can open up a whole new world of custom products, turning your shop into a go-to for all things personalized. The best part? You can do it all with the gear you already have.
The secret is knowing that pressing a hard, non-porous item is a completely different game than pressing a soft, flexible fabric. We're stepping into the realm of sublimation, where heat and pressure turn solid ink into a gas that permanently dyes the surface of the item.
Adapting Your Settings For Hard Substrates
When you move from a cotton blend shirt to a ceramic mug or a metal sign, your entire process needs a rethink. These materials, which we call substrates in the industry, handle heat in a totally different way than textiles do.
Here are the big adjustments you'll be making:
- Higher Temperatures: Most hard goods need a lot more heat to get the sublimation process going. You'll often find yourself working in the 360-425°F range.
- Longer Dwell Times: Forget the quick 10-second presses you use for DTF. These items need to bake. We're talking dwell times that can easily go over 100 seconds to let the ink fully transfer and set.
- Consistent, Medium Pressure: While DTF loves firm pressure to bond the adhesive, most hard surface sublimation works best with a steady, even medium pressure.
As you explore these new product types, don't forget that unique designs are what will make them sell. If you're looking for fresh ideas to stay ahead of the curve, you can find inspiration using innovative tools like an AI shirt generator for custom designs to create artwork that truly stands out.
The biggest mental shift is this: you're not just melting glue onto fabric anymore. You are causing a chemical reaction that infuses dye directly into the item's special coating. The result is a permanent, vibrant image that won't scratch off.
Getting this concept right is everything. For example, stainless steel tumblers are a huge seller. They usually need about 40 PSI (medium pressure), a temperature between 360°F to 385°F, and a press time that can push past 100 seconds. On the other hand, an aluminum photo panel might use a similar medium pressure of 35 PSI, but it requires a much hotter press at 400°F to 425°F for only 45 to 60 seconds. It just goes to show that every substrate has its own unique recipe for success.
Heat Press Settings for Common Substrates
Once you start looking, you'll see opportunities for custom products everywhere. The table below offers a good starting point for some of the most popular items people press beyond standard apparel. Think of these as a baseline—always test with your own equipment and substrates!
| Substrate | Press Type | Temperature (°F) | Time (Seconds) | Pressure |
|---|---|---|---|---|
| Stainless Steel Tumblers | Tumbler/Mug Press | 360-385°F | 100-120 | Medium (~40 PSI) |
| Ceramic Mugs | Mug Press | 380-400°F | 180-240 | Medium-Firm |
| Aluminum Photo Panels | Flat Press | 400-425°F | 45-60 | Medium (~35 PSI) |
| Ceramic Tiles | Flat Press | 385-400°F | 240-300 | Medium |
| Polyester Mouse Pads | Flat Press | 380-400°F | 45-60 | Light-Medium |
Remember, these are just guidelines. The brand of the blank, the type of paper, and even the humidity in your shop can affect the final outcome. Always have a few extra blanks on hand for testing before you start a big order.
Branching Out Your Product Line
After you nail the basics, you'll start seeing potential everywhere. With the right attachments like mug or hat platens, you can move beyond flat items and start customizing all sorts of uniquely shaped goods.
A few popular non-apparel items to consider:
- Drinkware: Tumblers, coffee mugs, and water bottles are evergreen top-sellers.
- Home Decor: Think ceramic tiles for backsplashes, custom slate coasters, and vibrant aluminum photo prints.
- Office & Tech: Personalized mouse pads and custom phone cases are easy, high-margin additions.
Even headwear opens up a new avenue. While hats are technically apparel, their stiff structure and curved surfaces make them a challenge more akin to a hard good. They require special platens and a refined technique to get right. For a complete walkthrough, be sure to check out our detailed guide on how to heat transfer on hats.
Every new product you master is one more reason for a customer to walk through your door instead of a competitor's.
Your Heat Press Questions Answered
We get tons of great, practical questions from people using our transfers every day. It's one thing to have a settings chart handy, but it's a whole other ball game when you run into the little quirks that pop up mid-project. This is where we get into the nitty-gritty to help you dial in your technique and press with total confidence.
Let's jump into some of the most common issues we see and get you some solid, actionable answers.
How Do I Know If My Heat Press Pressure Is Correct?
This is easily the number one question, and for good reason—most presses don't have a handy digital PSI gauge. You really have to learn to go by feel. A fantastic little trick I've relied on for years is the "dollar bill test."
Here’s how you do it:
- Tuck a dollar bill under each of the four corners of your top platen.
- Lock the press down like you normally would.
- Now, try to pull each bill out. If they slide right out with no effort, your pressure is way too light.
For the medium-firm pressure that DTF needs, you should feel some serious resistance when you tug on those bills. The handle should take a bit of muscle to lock down, but you shouldn't have to hang off it with your full body weight. It's all about finding that sweet spot where you have even, firm contact across the entire design.
Should I Use a Teflon Sheet or Parchment Paper for DTF?
Yes, but the key is knowing when. For that first press, the clear carrier film on your transfer is already doing the job of protecting the ink from the hot platen. You're all set there.
However, for that crucial second press (the post-press or finishing press), you absolutely must cover the design. This is where a Teflon sheet or even a simple piece of parchment paper is non-negotiable. This barrier does two things: it stops any ink from smearing onto your platen and helps give the final print a smooth, professional matte finish.
Key Takeaway: Never, ever let an exposed DTF transfer touch your hot platen directly.
Why Are My Colors Fading or Changing After Pressing?
This problem almost always comes down to two culprits: your temperature settings or the fabric itself. If your press is too hot, especially on polyester or poly-blends, you can trigger something called dye migration. This is when the dye in the fabric heats up, turns into a gas, and actually stains your transfer ink from behind. It's why a bright white print can look dull or discolored on a red poly shirt.
To avoid this, always stick to the recommended heat press settings for your fabric. For 100% polyester, that means staying on the lower end of the temperature range, typically around 275-290°F.
If you're seeing this problem on cotton garments, your press might have hot spots. An infrared temperature gun is a surprisingly affordable and invaluable tool for checking if the heat is truly even across your platen. Sometimes that digital readout isn't telling you the whole story.
Remember, the material you're pressing dictates the settings. For example, some high-temperature heat transfer vinyls are applied at 155°C with medium pressure for a quick 3-5 seconds, followed by a cold peel. In contrast, certain low-temp vinyls might need 130°C for a longer 10-15 seconds and a warm peel. That 25°C difference is huge and can easily lead to wasted material if you mix them up. You can find more detailed info on this by checking out these heat transfer vinyl settings at TheMagicTouch.com.
Ready to get vibrant, durable prints without all the guesswork? The team at Cobra DTF provides premium, USA-made DTF transfers with clear, tested instructions to ensure you get professional results on every single press. Explore our high-quality DTF transfers today!