

The Ultimate Guide to Perfect Prints with DTF White Ink
In the world of Direct-to-Film printing, DTF white ink is the game-changer that lets you put brilliant, full-color designs on any garment, no matter how dark. It’s a lot like the primer a painter rolls onto a dark wall before adding color. Without that solid white base, your colors would just sink into the fabric, looking dull, faded, and nothing like what you designed on screen.
Why White Ink Is the Unsung Hero of DTF Printing
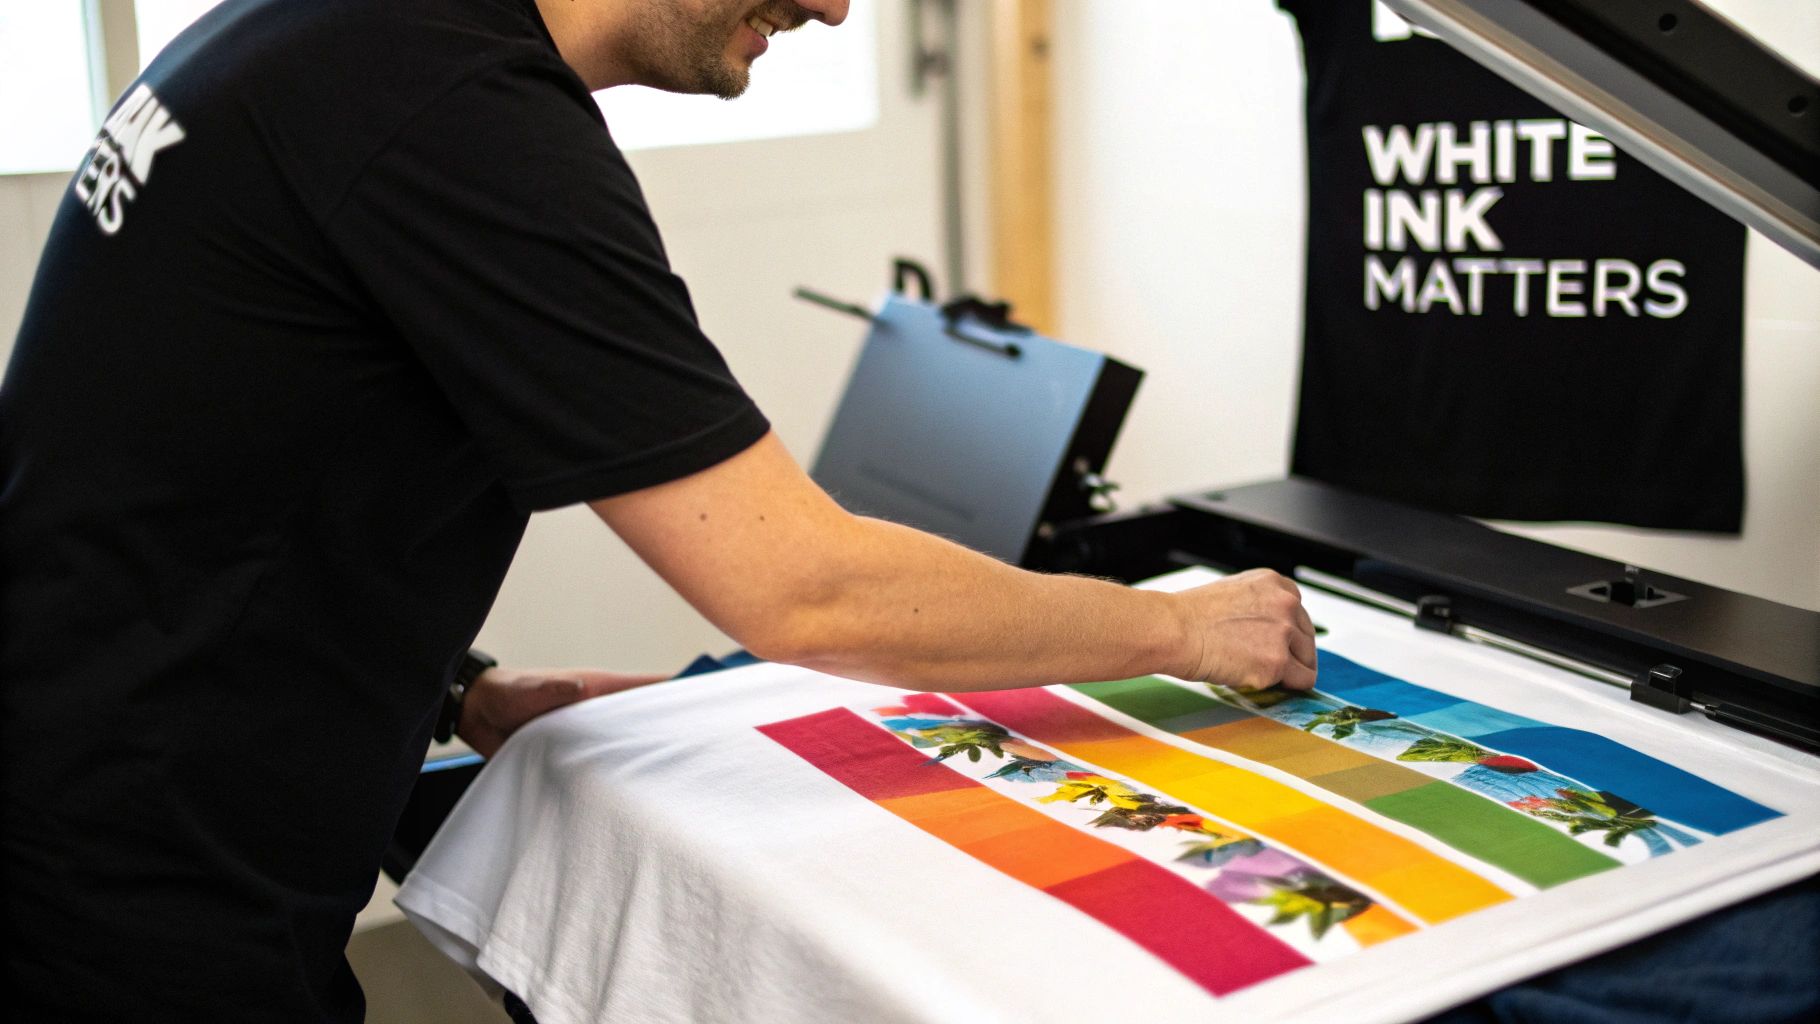
The DTF process is pretty straightforward: you print a design onto a special film, then use heat to transfer it to your apparel. While the CMYK (Cyan, Magenta, Yellow, and Black) inks handle all the colors, the white ink has a much more critical job. It's the secret sauce that makes your graphics pop just as much on a black hoodie as they do on a plain white tee.
Imagine trying to print a bright yellow sun directly onto a blue shirt. The result? A muddy, greenish blob. The fabric's color would completely overpower the design. DTF white ink lays down an opaque barrier first, completely blocking out the garment's color and creating a pure white canvas for the CMYK inks to do their thing.
The Foundation of Vibrancy and Durability
The quality of this white layer dictates the quality of the final product. A top-tier, pigment-rich white ink—like the kind we use for Cobra DTF transfers—gives you incredible opacity. This means you get a solid, bright foundation in fewer passes, which saves you ink, time, and money.
This underbase is absolutely essential for any custom apparel business serious about quality. Its importance is clear across the industry; the global DTF ink market is projected to hit $1.709 billion by 2025, and white ink makes up a huge slice of that pie. For a typical full-color print on a dark shirt, white ink can easily account for 30-40% of the total ink used. You can learn more about the DTF ink market on marketreportanalytics.com.
Key Takeaway: DTF white ink isn't just another color. It's the critical foundation that guarantees your designs have accurate color, incredible vibrancy, and sharp contrast on any garment that isn't pure white.
More Than Just an Underbase
But it doesn't stop at brightness. The white ink also plays a massive role in the transfer's durability. It acts as a bonding agent, helping the color inks adhere properly to the adhesive powder that’s applied right before heat pressing. A well-made DTF white ink creates a final print that is not only beautiful but also flexible and tough enough to withstand stretching, cracking, and countless wash cycles.
This is why your ink source matters so much. When you choose a US-based supplier like Cobra DTF, you’re getting consistent, high-quality materials you can depend on, without worrying about international shipping delays or unexpected tariffs. That reliability is the bedrock of a successful printing business, leading to better products, happier customers, and a healthier bottom line.
How White Ink Creates the Perfect Canvas for Color
To really get why DTF white ink is such a game-changer, you have to understand the two critical jobs it performs in every single print. It’s not just a passive layer; it’s an active foundation that makes your colors pop and keeps your final product looking sharp and professional. These two roles are creating the "underbase" and the "choke."
Think of the underbase like a painter's primer. You wouldn't paint a bright color directly onto a dark wall without priming it first, right? The primer stops the dark wall color from bleeding through and making your new paint look muddy. DTF white ink acts as that exact primer for your garments.
When printing on a black, blue, or any dark-colored shirt, the process is a bit counter-intuitive. Your printer first puts down the color (CMYK) layer onto the film. Right after, it prints a perfectly aligned layer of white ink directly on top of the colors. When you heat press the transfer, that order is flipped, and the white ink becomes the solid foundation between the fabric and your design.
The Underbase: A Solid Foundation for Brilliance
This foundational layer is what makes DTF so incredibly versatile. It creates a physical barrier, blocking the shirt's color from showing through your design. This is how you get a bright, fiery red to look like a fiery red on a black shirt, instead of a dull maroon. Without a solid, opaque underbase, your prints would look washed-out and cheap.
This is where the quality of your white ink becomes non-negotiable. A low-quality ink might be thin or watery, forcing you to lay down multiple passes to get a decent white. That’s a waste of ink, time, and money. A premium ink with a high pigment load, like the USA-made ink we use for our Cobra DTF transfers, lays down a brilliant, solid white foundation in one clean pass.
This process is the secret sauce that allows for stunning detail and vibrancy on almost any fabric you can think of, from 100% cotton to tricky polyester blends. It creates a smooth, perfect canvas for the colors to sit on, bringing your digital art to life with amazing accuracy.
The Choke Layer: Your Secret to Clean Edges
The second, more subtle job of white ink is just as crucial. Your RIP software—the brain that translates your design file into instructions for the printer—performs a clever little trick called a "choke." It intentionally prints the white underbase just a tiny bit smaller than the color layer.
Imagine your design is a perfect circle. The RIP software will tell the printer to lay down the color layer as a full circle. But then it will "choke" the white layer, pulling its edges inward by just a few pixels, making it a slightly smaller circle.
Why is this so important? This tiny adjustment creates a safety buffer. It prevents any slivers of white ink from peeking out around the edges of your design after it's pressed. The result is a crisp, clean outline with no distracting white halo effect.
This meticulous control is what separates a professional-grade print from an amateur one. Even a microscopic misalignment during printing or pressing could ruin the look, but the choke ensures your final product looks sharp and intentional every time.
Here's how these two functions come together in the printing process:
- Step 1: The Color Layer: First, your printer lays down the CMYK inks onto the DTF film, printing a mirror image of your design.
- Step 2: The White Ink Layer: Immediately after, it prints the "choked" white underbase directly on top of the color layer.
- Step 3: The Final Transfer: When you press the design onto the garment, the white ink bonds to the fabric as a solid base. The perfectly aligned color layer sits on top, displaying the final, vibrant image.
Once you understand these two functions, it's easy to see why the quality of your DTF white ink is absolutely critical. It’s not just about being white. It’s about delivering superior opacity for a bulletproof underbase and having the perfect consistency to hold a precise edge for the choke. This dual performance is the magic behind every brilliant, durable, and sellable DTF print.
Mastering Your Printer Settings for Flawless White Ink
This is where the rubber meets the road. Moving from theory to practice is how you’ll gain real control over your prints. Nailing your settings in the printer and your RIP software is what separates a wasted transfer from a perfect one. Think of your RIP as the crucial translator between your digital design file and the physical printer, telling it exactly how much dtf white ink to put down and where.
Two settings, in particular, are make-or-break: white ink density and choke. Get these right, and your prints will be vibrant, durable, and have those perfectly clean edges every time. It’s a bit of a balancing act, but it’s absolutely essential for producing professional-grade work.
Dialing In White Ink Density
White ink density—you might also see it called percentage or quantity—is simply how much white ink gets laid down for the underbase. A higher percentage means a thicker, more opaque layer. Now, you might think "more is always better," but that’s a common trap that can cause more headaches than it solves.
Too much ink creates a transfer that feels thick, almost like a sheet of rubber, and it's far more likely to crack after a few washes. Over-inking also drives up your costs and can mess with the curing process, sometimes leaving an oily finish because the ink can't properly bond with the adhesive powder. On the flip side, using too little ink results in a weak, semi-transparent underbase, which lets the shirt's color show through and wash out your design.
The sweet spot is using just enough white ink to build a solid foundation without going overboard. For the vast majority of jobs, a density setting between 60% and 80% is the perfect starting point. This gives you fantastic coverage while keeping that soft, flexible feel that customers love.
Pro Tip: Always, and I mean always, run a small test print when you’re working with a new fabric or a design with super fine details. A quick 5-minute test can save you from ruining an expensive hoodie and a big sheet of film.
Perfecting the Choke for Crisp Edges
As we covered earlier, the choke setting is what pulls that white underbase in just a tiny bit from the edges of your color layer. This is the secret to a sharp, professional finish, preventing any of that annoying white "halo" from peeking out around your design. Your RIP software measures this in pixels, and trust me, even a one-pixel adjustment makes a world of difference.
The ideal choke setting really depends on your design's complexity and the garment itself. A great place to start for most prints is a choke of 1 to 3 pixels.
- For bold, simple designs with solid shapes, a smaller choke of 1-2 pixels is usually all you need.
- For intricate designs with fine lines or delicate text, a slightly larger choke of 2-3 pixels gives you a better safety margin to prevent any white from showing.
Getting this setting just right is one of the hallmarks of a top-notch print shop. It’s an attention to detail that doesn’t go unnoticed and speaks volumes about the quality of your work.
Recommended White Ink Settings for Common Fabrics
Every fabric is a little different; they all absorb ink and react to heat in their own way. A smooth, 100% cotton t-shirt isn't going to behave the same as a textured polyester-blend hoodie. To get you started, here’s a quick reference guide for some of the most common materials you'll be printing on.
| Fabric Type | Fabric Color | Recommended White Ink Density | Suggested Choke Setting (pixels) |
|---|---|---|---|
| 100% Cotton | Dark (Black, Navy) | 75% - 85% | 2 - 3 px |
| 100% Cotton | Medium (Red, Blue) | 65% - 75% | 1 - 2 px |
| 50/50 Cotton/Poly Blend | Dark (Black, Navy) | 70% - 80% | 2 - 3 px |
| 100% Polyester | Dark (Black, Navy) | 60% - 70% | 2 - 4 px |
Think of this table as your starting lineup, not the final word. Your specific printer, ink, and film combination might need a few small tweaks to get things perfect. By taking the time to methodically adjust and test your density and choke, you'll master the application of your dtf white ink, leading to incredible results and very happy customers.
From Film to Fabric: The Critical Curing and Heat Press Stages
Getting your design printed on the film feels like a huge win, but the real magic happens next. The post-print process—applying the adhesive powder, curing the ink, and heat pressing the transfer—is what turns that wet design into a durable, sellable product. This is where precision is non-negotiable. One small mistake here can undo all your hard work.
Right after your design comes off the printer, it's time to apply the DTF adhesive powder. Think of this fine polymer as the glue that will permanently bond your design to the fabric. You have to move quickly, applying it while the DTF white ink and color layers are still wet. The goal is a perfectly even coat that covers every inch of the design without any clumps.
If you miss a spot with the powder, that part of the design simply won't stick to the shirt. It’s that simple. Once coated, give the film a gentle shake to knock off any excess powder, making sure no stray granules are left on the clear areas.
Gelling: The Key to a Flawless Transfer
Next up is the curing stage, which is often called "gelling." This step involves melting the adhesive powder and fusing it with the ink, creating a single, unified transfer layer. We're not trying to completely dry the ink here; we're just transforming the powder from a solid into a gel-like adhesive that’s ready for the heat press.
This is a delicate dance. You need a consistent, even heat source that doesn't make direct contact with the film. A dedicated curing oven or a heat press hovered just above the film works perfectly.
- Under-Curing: Not enough heat or time means the powder won't melt properly. This results in poor adhesion, and your design will almost certainly peel or crack after the first wash.
- Over-Curing: Too much heat is just as bad, if not worse. It can literally cook the oils out of the ink, leaving you with a greasy, unusable transfer that refuses to stick to anything.
For most setups, a temperature between 240-320°F (115-160°C) for roughly two to five minutes is the sweet spot. But remember, always run a few tests with your specific equipment and supplies to dial in the perfect recipe.
The Final Press: Bringing It All Together
With a properly cured transfer in hand, you're ready for the main event: the heat press. This is the moment your design becomes a permanent part of the garment. Success here comes down to three things: temperature, pressure, and time. Nailing this trifecta ensures a professional-grade finish that feels soft to the touch and holds up wash after wash.
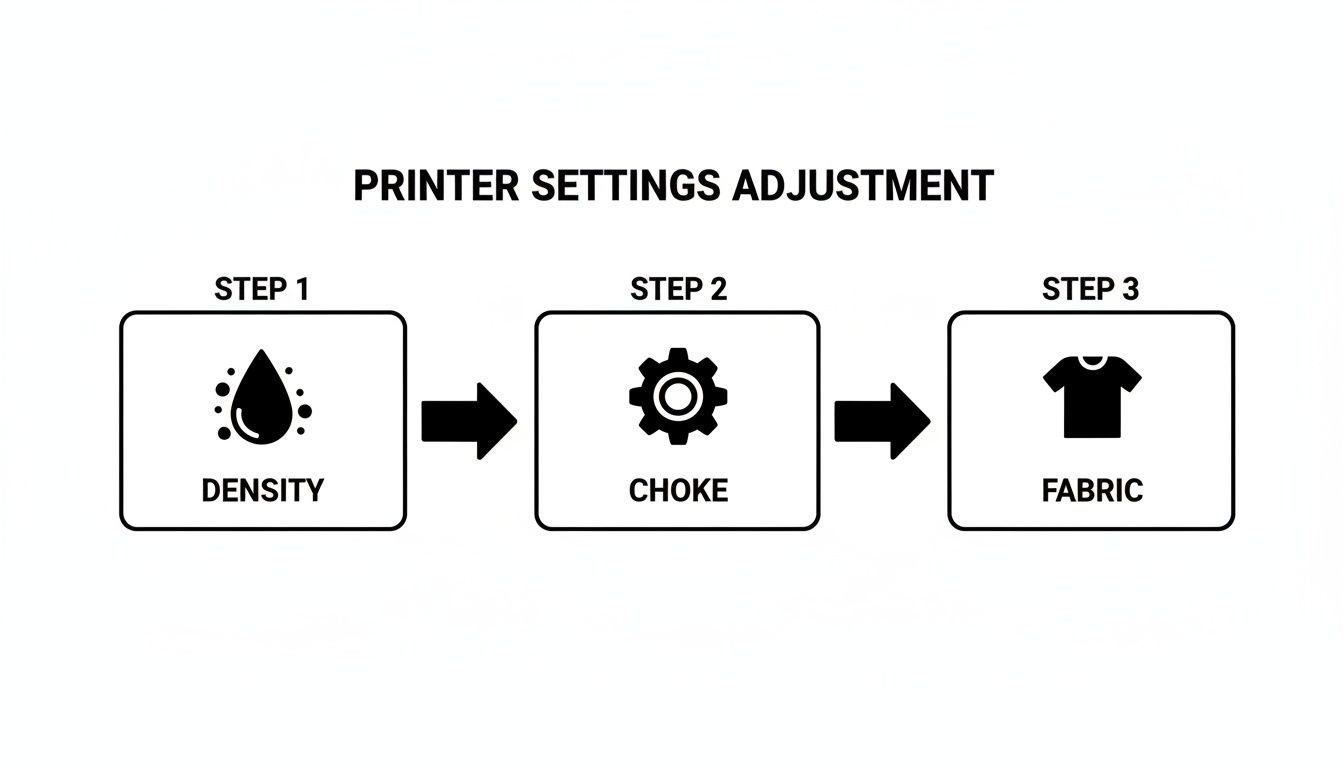
The flowchart below shows how printer settings like ink density and choke directly influence your heat press results, proving that a great final product starts way back at the design stage.
Ready to press? Follow these simple steps for a perfect application every time:
- Pre-press the Garment: First, press the blank garment for 5-10 seconds. This smooths out wrinkles and, more importantly, removes any hidden moisture.
- Position the Transfer: Carefully place your cured transfer on the shirt, design-side down.
- Press the Design: Use firm pressure at the recommended temperature—usually around 300-325°F (150-163°C)—for 10-15 seconds. For a deeper dive, check out our complete guide to heat press settings for DTF.
- Peel with Confidence: Let the transfer cool down completely (this is known as a "cold peel") before gently peeling the film away. A successful transfer leaves the design perfectly bonded to the fabric, with no lifting or residue.
Mastering these steps is how you ensure the incredible quality of your DTF white ink translates into a final product customers will absolutely love. The technology is only getting better. By 2026, white ink opacity has climbed to over 95% on PET films—a 25% leap from 2020—creating prints tough enough to handle 50+ washes. In North America, which makes up 35% of the global DTF market, US-based suppliers like Cobra DTF are leading the way with 100% American-sourced inks, avoiding the 15% import duties that can drive up competitor costs.
Troubleshooting Common DTF White Ink Problems
Even in the most buttoned-up print shop, DTF white ink is going to throw you a curveball now and then. Its unique, pigment-heavy formula is the very thing that creates those brilliant, solid prints, but it also means it needs a little more babysitting than your standard CMYK inks. When issues pop up, it’s not just a headache—it’s lost time, wasted materials, and mounting frustration.
Think of your white ink system like a high-performance engine; it needs regular tune-ups to run at its peak. This guide is your troubleshooting playbook for the most common white ink hiccups, from stubborn clogs to washed-out prints. With a clear diagnosis and a few proven fixes, you can get back to pressing flawless transfers with minimal downtime.
Problem 1: Clogged Nozzles or Missing White Ink
This is the big one. It's probably the most frequent frustration DTF operators run into. You run a nozzle check, and you see gaps, or worse, entire white channels have disappeared. This happens because the titanium dioxide pigments in white ink are heavier than color pigments. If the ink sits still for too long, they settle at the bottom and create a sludge that blocks the tiny nozzles in your printhead.
The main culprit is almost always a lack of agitation. If your printer is idle, even just overnight, those heavy pigments start to separate and form sediment.
The Fix: A Step-by-Step Approach
- Agitate the Ink: Before you do anything else, grab your external white ink tank or bottle and give it a gentle shake for 20-30 seconds. This gets those settled pigments back into suspension. If your printer has a built-in circulation system, make sure it’s running.
- Run a Head Cleaning Cycle: Now, go to your printer's utility software and run one or two standard head cleaning cycles. This will pull the freshly mixed ink through the lines and into the printhead.
- Perform Another Nozzle Check: Print another nozzle check pattern. If you see a big improvement but it’s still not perfect, it's okay to run one more cleaning cycle. Just try to avoid running more than three in a row, as this can flood the capping station and create a bigger mess.
- Gentle Suction (Advanced): If the cleanings aren't cutting it, you can try gently pulling a tiny amount of ink from the capping station's waste line with a syringe while the printhead is parked. This can sometimes dislodge a stubborn clog without resorting to more aggressive methods.
Crucial Maintenance Tip: The best way to fix a clog is to prevent it from ever happening. Get into the habit of giving your white ink a gentle shake every single day before you start printing. This simple, 30-second task can save you hours of troubleshooting down the line.
Problem 2: Poor Opacity or Faded White Layers
You've printed a beautiful transfer, but the white underbase looks weak, grayish, or almost see-through. This is bad news for your final product, as the shirt's color will peek through and make your entire design look dull and muddy.
This problem almost always comes down to your software settings or the ink itself. You're either not telling the printer to lay down enough ink, or the ink you're using just doesn't have the pigment density to do the job right.
- Check Your Ink Density: The most common cause is a white ink density setting that’s too low in your RIP software. For dark garments, you need a bright, solid foundation. Try increasing your white ink percentage in small steps, maybe 5-10% at a time, and run test prints until you get that perfect, opaque white.
- Evaluate Your Ink Quality: If you’ve cranked your density settings to the max and the white still looks weak, it might be time to question your ink. High-quality, US-made inks are specifically formulated with a higher pigment load, which means you get superior opacity without having to push your settings to the limit.
- Verify Your Profile: Make sure you’re using the right ICC profile for your specific printer, ink, and film. The wrong profile can throw off your ink output completely and is a common cause of poor results.
Problem 3: Color Bleeding into the White Ink
Ever notice how the edges of your colors look a bit fuzzy or seem to bleed into the white underbase on the film? This "color bleed" can destroy the crisp lines of your design and is usually a sign that you're putting down too much ink too fast.
Imagine trying to paint on paper that’s already soaking wet—the colors would just run together. The exact same thing is happening on your DTF film.
How to Stop the Bleed
- Reduce Total Ink Limit: Dive into your RIP software and look for a setting called "Total Ink Limit" or "Max Ink." Lowering this just a little can prevent the film from getting oversaturated.
- Adjust White Ink Laydown: Some RIPs have a handy feature that lets you add a brief delay between the color pass and the white pass. Even a fraction of a second can give the color layer just enough time to set before the white ink comes down on top of it.
- Check Your Film: Don't forget the film itself. Make sure you're using a high-quality DTF film that’s made to handle a heavy ink load. Cheaper films sometimes have coatings that don't absorb ink properly, which is a recipe for bleeding.
By methodically working through these common issues, you can keep your quality consistent and your production line moving. For more tips on getting the absolute best results from your setup, you can also learn more about how to improve print quality in our detailed guide.
Why High-Quality White Ink Is Your Best Investment
Think of your DTF white ink as the foundation of every print you sell. It’s not just another consumable; it’s a core investment in your shop's reputation and your bottom line. Choosing a premium, reliable white ink isn't about spending more—it’s about safeguarding your profits.
When you start with a top-tier ink, you sidestep all those frustrating, hidden costs that eat away at your margins. Fewer clogged nozzles and better opacity mean you're not constantly wasting film, powder, and ink on reprints. But even more valuable is the time you get back. Instead of troubleshooting your equipment, you and your team can focus on what really matters: printing orders and growing the business.
The True Cost of "Cheaper" Alternatives
That low price tag on overseas ink looks tempting, I get it. But more often than not, it’s a trap that ends up costing you more. These inks are notorious for their inconsistent pigment quality, which means you're gambling with every print. One batch might look great, but the next could be a weak, grayish mess that needs multiple passes just to look decent—and there go your cost savings.
On top of the quality gamble, relying on international suppliers throws a whole wrench into your workflow. Suddenly, your business is at the mercy of things you can't control:
- Unexpected Tariffs: Those import fees can pop up out of nowhere and completely wipe out any savings you thought you had.
- Lengthy Shipping Delays: Your entire operation can grind to a halt while you wait weeks for a shipment to clear customs.
- Customs Issues: One little paperwork mistake can leave your ink stuck at a port for who knows how long.
Sourcing from a USA-made supplier like Cobra DTF just makes sense. You eliminate all that uncertainty. With fast, domestic shipping, you get the high-quality DTF white ink you need in just 1-3 days. Your production line keeps moving, no matter what.
By sourcing materials domestically, you're not just buying ink; you're investing in operational stability and a predictable supply chain, which is a massive competitive advantage.
Driving Profitability with USA-Made Quality
The numbers don't lie. The switch to high-quality, American-made ink pays for itself. The incredible cost-efficiency of DTF has already changed the game, with many shops cranking out 500-1,000 prints a day. For those using premium ink, the white layer costs just $0.15-$0.30 per print—that’s a massive 40% lower than what you’d pay for imported inks once you factor in tariffs.
The real win? Customer loyalty. Shops using premium transfers report a 50% boost in repeat orders because the quality is just that much better. In lab tests, a superior print can show 2x the fade resistance of an import. It’s important to see how this stacks up against other methods and understand how long other printed shirts last to appreciate the value you're providing.
In the end, the white ink you choose says something about your business. It tells your customers that you refuse to cut corners on quality and durability. It’s a commitment to excellence that builds trust and keeps them coming back. You’re not just making a great t-shirt; you’re building a reputation for putting out fantastic work, time and time again.
For a deeper dive, check out our guide on choosing the right DTF printer ink to help you make the smartest choice for your shop.
Common Questions About DTF White Ink
Working with DTF white ink can seem a little intimidating at first, but once you get the hang of a few key routines, it becomes second nature. Let's walk through some of the most common questions we get from shop owners. Getting these fundamentals right is the key to keeping your printer happy and your jobs flowing smoothly.
Think of this as the practical, day-to-day stuff that turns potential headaches into simple, manageable tasks.
How Often Do I Really Need to Do Maintenance on My White Ink System?
If there's one golden rule with white ink, it's this: stay ahead of it. The heavy titanium dioxide pigments that give the ink its incredible opacity are also the main cause of clogs. If left to sit, they settle out of the solution and can create stubborn blockages. A little proactive maintenance goes a long, long way.
Make these two steps a non-negotiable part of your daily startup routine:
- Give the Ink a Gentle Shake: Before you do anything else, agitate your external white ink tank for 20-30 seconds. This gets those heavy pigments back into suspension, so you're feeding the printhead a perfectly consistent mix.
- Run a Quick Nozzle Check: This is your printer's morning health report. A quick printout will instantly tell you if any channels are weak or missing. If they are, you can run a head cleaning cycle right then and there, before a small dropout turns into a major clog.
Honestly, just doing these two things every single day will prevent 90% of the white ink problems we see.
What’s the Best Way to Store My DTF White Ink?
How you store your ink is just as critical as your daily maintenance. Bad storage can ruin a perfectly good bottle of ink, leading to poor prints and even damage to your printer. It's a lot like storing house paint—you wouldn't leave the can open in a freezing shed and expect it to work perfectly later.
Always store your DTF white ink in a cool, dark place, well away from any direct sunlight. The sweet spot for temperature is between 60-80°F (15-27°C). Big temperature swings are the enemy, as they can cause the ink's components to separate for good.
Also, make sure you keep the bottle caps sealed tight. Air exposure will cause the ink to thicken and eventually dry out. Following these simple rules ensures your ink is ready to perform, from the first drop to the last.
Can I Just Mix and Match Different Brands of White Ink?
I know it can be tempting to grab whatever ink is cheapest or most available, but trust me on this one—don't do it. Every ink manufacturer has its own unique chemical formula. When you mix different brands, you're essentially conducting a chemistry experiment inside your printer, and the results are rarely good.
Mixing inks can cause them to react poorly, leading to serious clogs, inconsistent colors, and even permanent damage to your expensive printhead.
For the best results and peace of mind, find a high-quality ink system from a supplier you trust and stick with it. Using a consistent, premium DTF white ink gives you predictable, vibrant results and helps keep your equipment running reliably for the long haul.
At Cobra DTF, we're all about providing top-tier, USA-made DTF transfers with the speed and reliability your business depends on. Check out our custom DTF transfers and see the difference for yourself.