
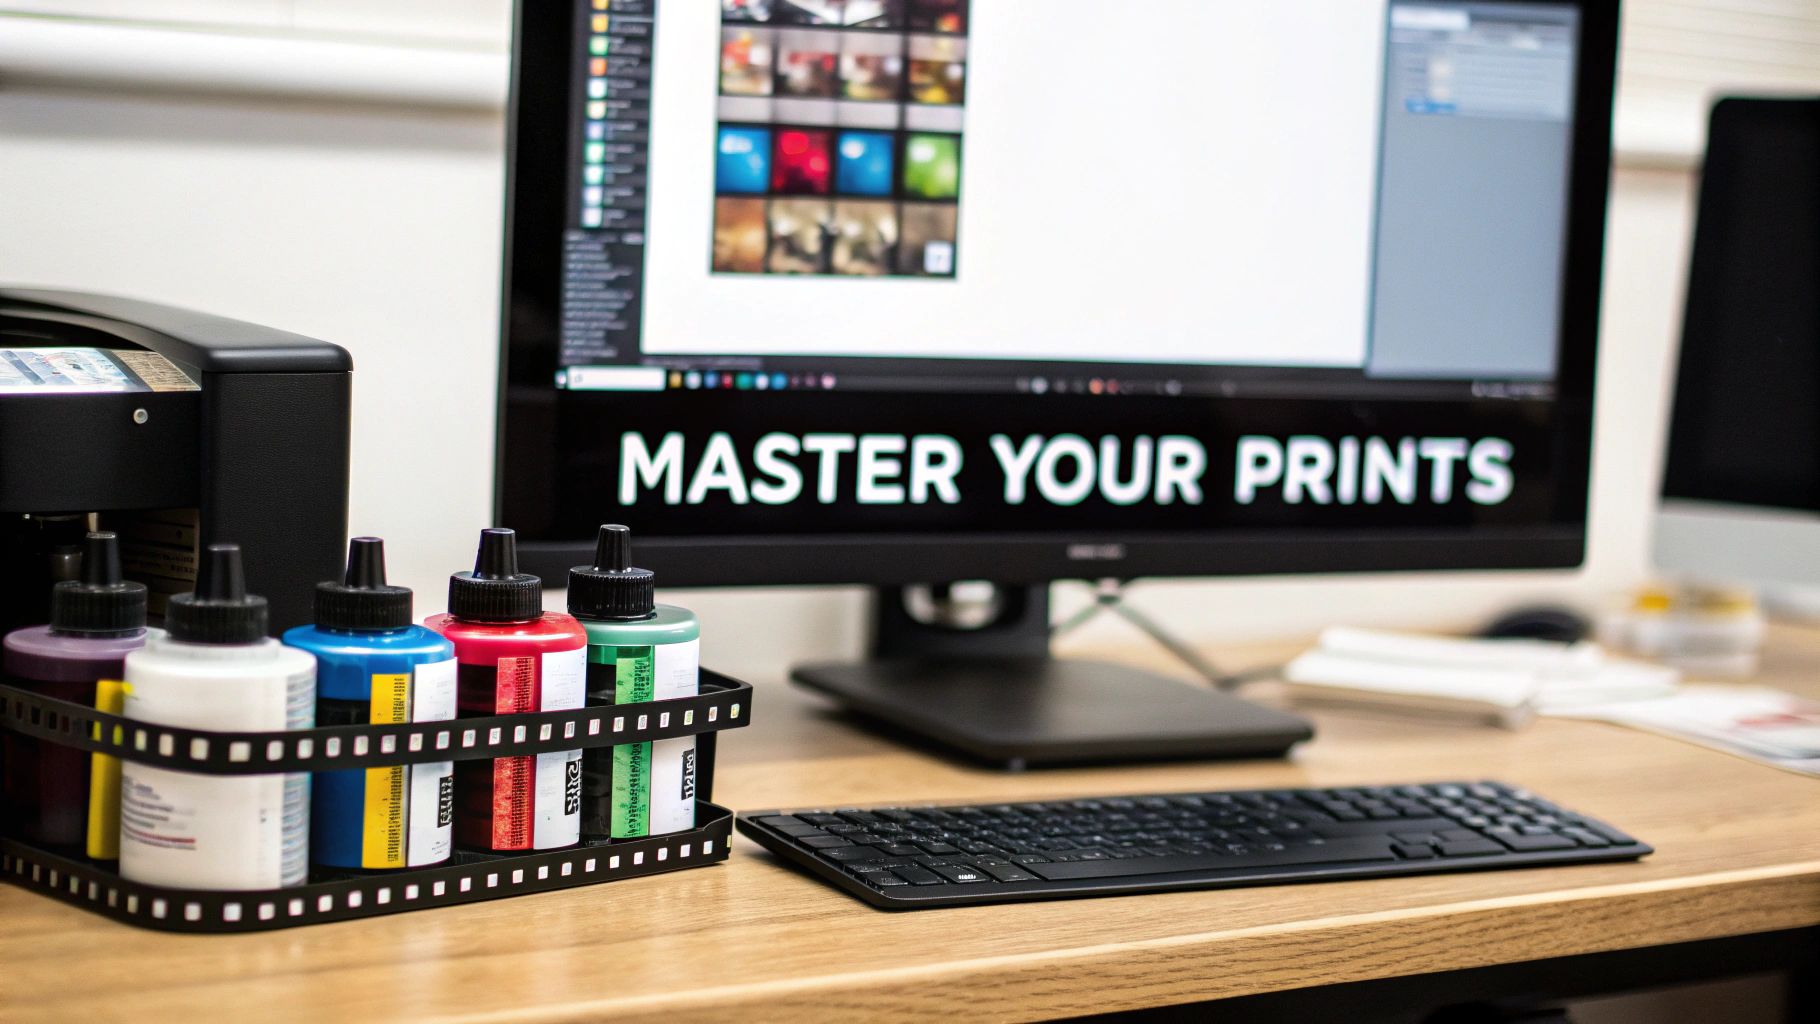
Choosing Your DTF Printing Software
Think of DTF printing software as the master conductor of an orchestra. You can have the best instruments (your printer, inks, and film), but without a skilled conductor, all you'll get is noise. This software is the critical link that translates your digital artwork into a stunning, physical print.
It’s a purpose-built tool designed to handle the unique challenges of DTF, like laying down a perfect white ink base and ensuring your colors pop. A standard printer driver just isn't built for that kind of detailed work. Honestly, trying to get professional results without it is a recipe for frustration.
Why DTF Printing Software Is Your Most Critical Tool
Let's use an analogy. Imagine trying to bake a complex, multi-layered cake but all you have is a microwave. You've got all the right ingredients—inks, film, powder—and the main appliance, but you lack the fine-tuned control needed to get it right. That’s what it's like printing without dedicated DTF printing software.
This software, which you'll often hear called a Raster Image Processor (RIP), is the command center for your entire printing workflow.
It takes your design file—be it a PNG, TIFF, or vector graphic—and meticulously converts it into instructions the printer can execute flawlessly. More importantly, it orchestrates the delicate dance between the color inks and the crucial white underbase. This solid white layer is the secret sauce that makes your colors look bright and solid on any fabric, especially dark-colored shirts. To get a better handle on the whole process, check out our guide on what is DTF printing at https://cobradtf.com/blogs/guides/what-is-dtf-printing.
The Engine of Quality and Efficiency
A standard printer driver just prints what it sees. DTF printing demands a far more intelligent approach. The software gives you hands-on, granular control over every tiny detail, from how much ink is laid down to how the different color channels are mapped.
This level of control has a direct impact on your business's bottom line:
- Superior Print Quality: You can finally achieve colors that are not just vibrant, but also accurate to what you see on your screen.
- Reduced Waste: It helps you optimize ink usage and lets you "gang" multiple designs onto a single sheet of film, saving you a ton on expensive supplies.
- Increased Productivity: You can automate a lot of the tedious, repetitive steps, which speeds up the whole journey from design file to finished transfer.
Without a proper RIP, you’re gambling with every print. You risk dull colors, inconsistent results, wasted materials, and hours spent pulling your hair out. It's no surprise that many industries rely on specialized process documentation software solutions to ensure workflows are efficient and repeatable; the same principle applies here.
A classic rookie mistake is underestimating the software's importance. New shop owners will drop thousands on a great printer and heat press, then try to save a few bucks on the RIP software. They quickly find out that all the potential of their expensive hardware is locked away until they get the right software to run it.
To help you see how everything fits together, here's a quick look at what the software is really doing behind the scenes.
Core Functions of DTF Software at a Glance
| Software Function | What It Does | Impact on Your Final Print |
|---|---|---|
| Raster Image Processing (RIP) | Converts your design file (vector or pixel) into a grid of tiny dots (a raster image) that the printer can understand. | This is the fundamental translation step. Without it, the printer wouldn't know what to print. |
| White Underbase Generation | Automatically creates a white ink layer that sits underneath the color layer. | This is what makes your colors opaque and vibrant, especially on dark or colored garments. |
| Color Management (ICC Profiles) | Uses color profiles to ensure the colors you see on your monitor are accurately reproduced by the printer's inks. | Prevents color shifts, so your "fire engine red" doesn't print out as "muted orange." |
| Ink Channel Control | Manages which printhead nozzles fire which inks and precisely controls the amount of ink being put down. | Crucial for preventing oversaturation (blurry prints) and optimizing ink consumption. |
This table really just scratches the surface, but it gives you a clear idea of why this software is so much more than a simple "print" button.
A Rapidly Growing Industry Standard
You don't just have to take my word for it; the market speaks for itself. The global DTF printing market was valued at about USD 2.72 billion in 2024 and is on track to hit around USD 2.89 billion by 2025. This incredible growth shows just how seriously professionals are taking this technology and the tools that support it.
At the end of the day, buying good DTF software isn't just another business expense. It's a direct investment in the quality, consistency, and profitability of your work. It's what turns your collection of hardware into a streamlined, professional production system that can deliver amazing results, print after print.
The Three Pillars of DTF Software
To really wrap your head around DTF printing software, it helps to think of it as having three core jobs. These aren't separate features working in isolation; they're more like three pillars holding up the entire printing process. Getting them to work together is the secret to moving past frustrating experiments and into the world of consistent, sellable prints.
Each of these pillars tackles a specific hurdle in the DTF workflow, from telling the printer what to do, to getting colors right, to making sure you're not burning through expensive film and ink. When they're all in sync, you get the vibrant, durable transfers you're after.
Pillar 1: The Raster Image Processor (RIP)
First up, let's talk about the RIP, which stands for Raster Image Processor. The best way to think of a RIP is as an expert translator. Your computer and design software, like Adobe Illustrator, speak in pixels and vectors. Your DTF printer, on the other hand, only understands one language: microscopic ink dots.
The RIP’s job is to translate your digital artwork into that precise dot language. It meticulously calculates the exact placement for every single droplet of ink for both the color layer and, more importantly, the white underbase. A standard printer driver that came with your desktop printer just can't handle this. It would be like trying to translate a legal document with a tourist phrasebook—all the critical details get lost.
The RIP is truly the brain of the operation. Without it, your printer has no clue how to properly layer white ink under the color ink, control how much ink is put down, or manage the unique demands of printing on film. It is the single most important factor for achieving high-quality results.
Pillar 2: Color Management
Ever designed something with a beautiful, bright red on your monitor, only for it to come out of the printer looking like a sad, dull orange? That's a classic color management problem, and it's exactly what this second pillar is built to solve. It’s all about making sure the colors you see on screen are the colors you get on the final product.
The magic wand for this is the ICC profile. Think of an ICC profile as a specific recipe that tells the software how your unique combination of printer, ink, and film produces color. It acts as a universal decoder, allowing the software to make smart adjustments before the first drop of ink ever hits the film.
Getting this right means you can produce consistent results from one print run to the next. For any professional shop that needs to match a client's specific logo or brand colors, this isn't just a nice-to-have; it's absolutely essential.
Pillar 3: Layout and Workflow Tools
The third pillar is all about working smarter, not harder. This is where your software helps you save time and, just as importantly, money. The best DTF software comes packed with tools designed to streamline your production process and cut down on material waste. These features have a direct impact on your bottom line.
Two of the most valuable tools you'll use constantly are nesting and ganging.
- Nesting: Imagine you have a bunch of small, odd-shaped designs for an order. The nesting feature is like a game of Tetris, automatically arranging all those pieces into the tightest possible cluster. This dramatically reduces how much film and powder you use.
- Ganging: This feature lets you put designs from completely different jobs onto a single sheet of film. Instead of running one small transfer at a time, you can fill an entire roll or sheet, which saves an incredible amount of time and material.
These workflow tools are what turn your DTF printer from a simple output device into a genuine production machine. They help you get more orders out the door, faster, while keeping your cost-per-print as low as it can be. Together, these three pillars—the RIP, color management, and workflow tools—are what make specialized DTF printing software a non-negotiable tool for any serious business.
Must-Have Features in Your DTF Software
Jumping into the world of DTF software can feel like a lot. Every developer claims to have the best features, but cutting through that marketing noise is key. What you really need to focus on are the tools that will directly boost your print quality, save you money, and make your day-to-day work easier.
Think of good software as the command center for your whole printing operation. It's not just about hitting "print." It’s the specialized brain that translates your digital file into a perfect film transfer, handling the tricky stuff like color separation, ink layering, and print layouts. Making the right choice here means less time fighting with your printer and more time creating vibrant, profitable products.
Advanced White Ink Control
If there's one thing that makes or breaks a DTF print, it's the white ink underbase. This is the single most important function of your software. You need precise, granular control to get professional results on different colored garments and complex designs.
Look for these specific white ink controls:
- Choke Settings: This is non-negotiable. A choke feature pulls the white underbase in just a tiny bit from the edges of the color layer. Why does this matter? It completely prevents that distracting white "halo" from peeking out around your design, giving you a sharp, clean finish every time.
- Ink Density and Opacity: You absolutely need the ability to adjust how much white ink goes down. A bold design on a black t-shirt requires a thick, opaque base. But that same design on a light gray shirt might need far less, which saves you a surprising amount of ink and money over time.
- Gradient and Highlight Handling: The software has to be smart. For designs with gradients or photo-realistic elements, it needs to lay down a white base that varies in density. It should automatically put less white ink under the lighter colors and more under the darker ones, which is the secret to a smooth, natural-looking print instead of a flat, plastic-y one.
Robust Color Management and ICC Profile Support
Color accuracy is what separates the pros from the hobbyists. Your software must fully support the use of custom ICC profiles. An ICC profile is basically a translator—a small data file that ensures the colors you see on your screen are the same colors that come out of your printer.
Without proper ICC support, you're just guessing and hoping for the best. A program that lets you easily import and apply profiles built for your specific printer, ink, and film combination is your ticket to predictable, repeatable results. This is absolutely critical when a client needs you to match their brand colors perfectly. To get a better handle on how inks and profiles work together, check out our comprehensive guide on DTF printer ink.
Think of it this way: running a DTF business without proper ICC profile support is like trying to bake a cake without measuring cups. You might get close sometimes, but you'll never achieve consistent, reliable results that keep clients coming back.
Workflow Automation and Layout Tools
In this business, efficiency equals profit. The best DTF software is packed with tools designed to slash material waste and save you precious time. These aren't just flashy add-ons; they directly lower your cost for every single print you make.
When choosing software, small shops have to be smart about what they're paying for. You need the tools that will make an immediate impact on your bottom line and daily stress levels, without getting bogged down by features you'll never use.
Essential vs. Nice-to-Have Software Features
| Feature | Why It's Essential for a Small Shop | Impact on Your Business |
|---|---|---|
| Gang Sheet & Nesting | Maximizes every inch of expensive film by fitting multiple designs onto one sheet. | Directly cuts material costs and waste, boosting profit margins on every print run. |
| Hot Folders | Automates the printing of repeat jobs. Just drop a file in a folder, and it prints with preset settings. | Frees up hours of your time, reduces errors, and makes high-volume orders much more manageable. |
| Cost Calculator | Automatically calculates ink and film cost per job based on the design. | Gives you instant, accurate pricing so you can quote jobs confidently and ensure profitability. |
| AI Background Removal | A "nice-to-have" that can speed up art prep, but not a core printing function. | Saves a little time on simple jobs, but dedicated graphic design software often does a better job. |
| Advanced Job Queuing | A "nice-to-have" for single-printer shops but becomes essential as you add more machines. | For a solo operator, it's overkill. For a growing shop, it's crucial for managing multiple printers. |
Ultimately, focus on the features that automate repetitive tasks and reduce your material costs. That's where you'll see the biggest return on your software investment right away.
A Practical Guide to the DTF Print Workflow
Alright, we’ve covered the key features. Now, let's put it all together and see what the DTF process actually looks like through the lens of your software. This is where the rubber meets the road. A solid, repeatable workflow is the backbone of any profitable print shop, and your DTF printing software is the control center for your entire operation.
Think of this as a roadmap, guiding you from a finished design file to a transfer that's ready to press. Nailing these steps every single time is how you cut down on mistakes, save money on wasted materials, and produce the kind of quality that keeps customers coming back.
Step 1: Preparing Your Design File
It all begins with good artwork. The old saying "garbage in, garbage out" couldn't be more true for digital printing. Your software is powerful, but it's not a magician—it can't magically fix a blurry, low-resolution image.
Before you even launch your RIP software, double-check that your design file is good to go:
- Resolution: Aim for 300 DPI (dots per inch) at the final size you intend to print. This is the secret to getting those crisp, sharp details instead of a pixelated mess.
- File Format: The gold standard for DTF is a PNG file with a transparent background. That transparency is absolutely critical; it’s what tells the printer where not to lay down any white ink.
- Clean Edges: Zoom in on your design and make sure the edges are sharp and clean. Any stray pixels or fuzzy halos can confuse the software when it generates the white underbase, leading to a sloppy-looking final print.
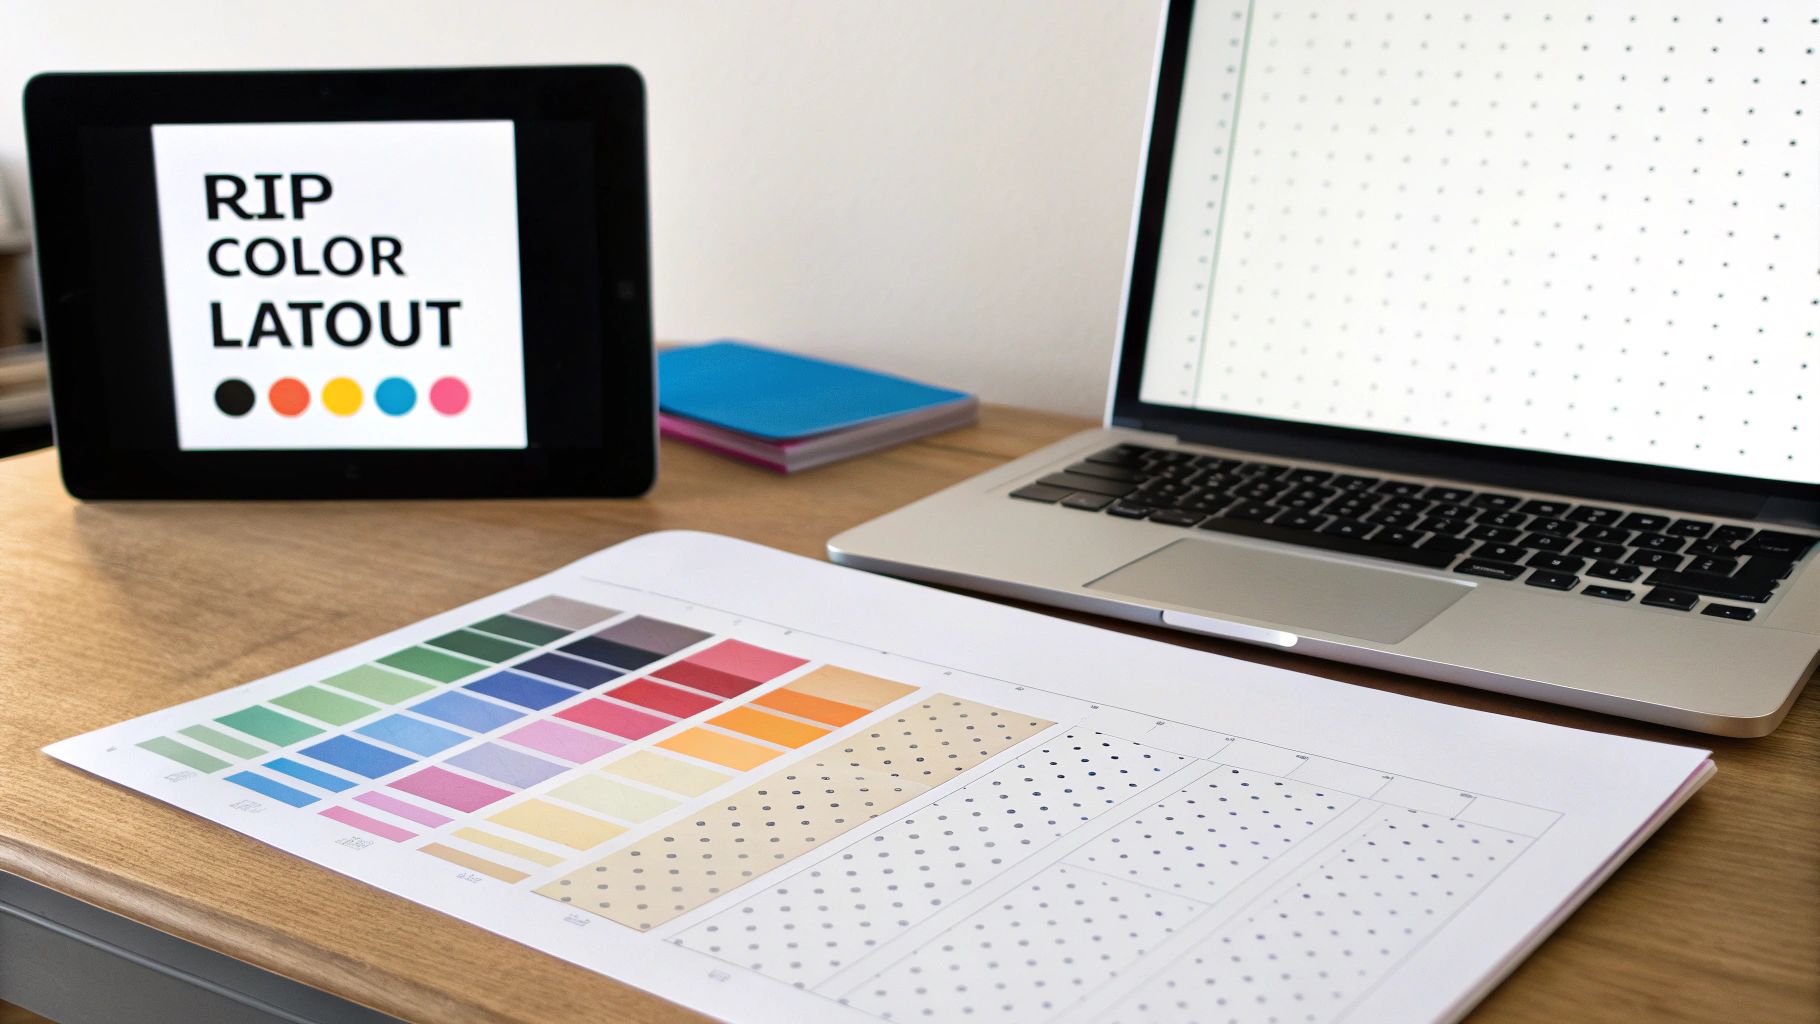
Step 2: Importing and Configuring in the RIP
With your art file prepped, it's time to pull it into your RIP software. This is where you shift gears from designer to print operator. The interface might look a little intimidating at first, but you'll quickly find that your day-to-day work lives in just a handful of key settings.
When you import your PNG, you'll see a preview of it on a digital canvas that represents your film. This is your command center for telling the printer exactly how to build the transfer, layer by layer.
This workflow diagram shows how getting your software settings right from the start pays off down the line.

As you can see, a quality-first approach in your software directly leads to real savings and a smoother production process.
Step 3: Dialing in the Print Settings
This is arguably the most important part of the software workflow. Here, you’ll apply the right print profile and fine-tune the settings for the specific job at hand. The perfect combination is what gives you vibrant colors, an opaque white base, and a transfer that lasts.
Your main tasks in this step are:
- Select the ICC Profile: Choose the profile that perfectly matches your printer, ink set, and the brand of DTF film you're using. This is the key to getting colors that look on the shirt the way they did on your screen.
- Adjust Ink Levels: Most pre-built profiles are excellent starting points, but sometimes you need to tweak the ink density. For example, you might bump up the white ink percentage by a few points for a design going onto a black t-shirt to make sure it’s completely opaque.
- Set the White Ink Choke: This is a non-negotiable step. A "choke" simply shrinks the white underbase, pulling it in slightly from the edge of the color layer (usually by 1-2 pixels). This tiny adjustment is a lifesaver—it prevents any white ink from peeking out around your design, giving you a clean, professional finish.
A classic beginner mistake is forgetting to set the choke. The print looks perfect coming off the printer, but after it's pressed, a faint white halo appears around the design. Taking three seconds to apply a choke in the software prevents this headache every single time.
Step 4: Arranging the Gang Sheet
Why print one design when you can print ten at once? That’s the magic of a gang sheet. Your RIP software lets you import multiple designs—whether for one big order or several small ones—and pack them together to use every last inch of your film.
Use the layout tools in your software to rotate, resize, and nest your images as tightly as possible. Many programs even have an "auto-nesting" or "auto-fill" feature that arranges everything for you, instantly calculating the most efficient layout. Getting good at ganging your prints is one of the fastest ways to cut your material costs and boost your profit margins.
Step 5: Sending to Print and Final Curing
Once all your settings are locked in and your gang sheet is arranged, you’re ready for the main event: hitting "Print." The software will process ("rip") the file, translating your design into a language the printer understands, and send the precise instructions for laying down the color and white ink.
After the printer works its magic, the software's job is officially done. The printed film moves on to the hands-on steps of applying the adhesive powder and curing it with heat. But remember, the quality of these final steps is built on the foundation you created in the software.
Once cured, you'll have a vibrant, durable transfer ready for its new home. For a detailed walkthrough of the final application process, check out these helpful DTF press instructions to ensure a flawless finish.
Solving Common DTF Software and Print Problems
Sooner or later, every print shop runs into a snag. Even with the best gear and top-shelf supplies, you'll eventually pull a transfer off the press that just looks… wrong. When that happens, the root cause is almost always hiding somewhere in your DTF printing software settings. These frustrating moments can burn through time, ink, and film, but learning how to diagnose them is a skill that will save you a ton of money and headaches down the road.
Think of this section as your first line of defense. We'll walk through the most common print fails, pinpoint the likely software-related cause, and get you straight to the fix. It’s a cheat sheet for turning print disasters into successes, keeping your shop running smoothly and building your confidence as a DTF pro.
Problem 1: Dull or Off-Key Colors
Symptom: You press a transfer, and the colors look washed out, flat, or just plain weird. That vibrant red from your monitor came out as a dull orange, or the deep navy blue on your design now looks purple on the shirt.
Likely Cause: This is a classic color management problem. Nine times out of ten, you're either using the wrong ICC profile or don't have one selected at all. An ICC profile is basically a translator that gets your printer, ink, and film to all speak the same color language. Without it, things get lost in translation.
Solution:
- Check Your Profile: Pop open your RIP software and confirm you have the exact ICC profile selected for your specific printer, ink, and film. Using a generic profile—or one meant for a different setup—is a guaranteed way to get wonky colors.
- Grab It From Your Supplier: Good suppliers, like Cobra DTF, provide custom ICC profiles built to work perfectly with their products. Make sure you've downloaded and installed the correct one for what you're using.
- Confirm Your Color Space: Your original artwork should be in RGB color mode. While CMYK is standard for paper printing, most DTF RIP software is built to do its best conversion work from an RGB source file.
Problem 2: Banding or Streaks in the Print
Symptom: You're seeing ugly horizontal lines or streaks running across your print. Sometimes they're faint, other times they're obvious, creating a "zebra stripe" effect that completely ruins the look of the design.
Likely Cause: Banding is often a physical printer issue, but your software settings can definitely make it worse. The usual suspects are a clogged printhead nozzle or a print quality setting that's telling the printer to move too fast for its own good.
Solution:
- Run a Nozzle Check: First thing's first. Print a nozzle check pattern from your printer's control panel or utility software. If you see any gaps or broken lines, run a head cleaning cycle and try again.
- Bump Up the Print Quality: In your DTF software, find the quality settings and kick them up a notch. Moving from 720x720 dpi to 1440x720 dpi, for example, slows the print head down. This gives it more time to place ink droplets precisely, which often solves the banding problem.
- Try Unidirectional Printing: Bidirectional printing is faster because the head prints in both directions, but it can sometimes cause tiny alignment issues that show up as banding. Switching to a unidirectional setting in your RIP software is slower, but it's a much more accurate and reliable way to print.
A weak or blotchy white underbase will kill the vibrancy of any print. The brightness and solidity of that white layer are directly controlled by the ink density percentages in your RIP software. For designs on dark black shirts, don't be afraid to create a custom setting and bump up the white ink channel by 5-10% to get that totally opaque foundation.
Problem 3: Weak or See-Through White Underbase
Symptom: You press your design onto a dark shirt, and the colors look muddy because the fabric color is showing through. That white layer just isn't solid enough to make the colors pop like they should.
Likely Cause: Your RIP software's ink density settings for the white channel are probably too low. The software gives you total control over how much white ink goes down, and the default setting often isn't strong enough, especially for dark garments.
Solution: Dive into the color channel or ink settings in your RIP software. Find the white ink density (sometimes called percentage or limit) and increase it. For a typical print on a black t-shirt, a white ink level between 60-80% is a great starting point. If it still looks a little thin, bump it up in small steps until you get that bright, solid base you're looking for.
To get ahead of future problems, it's a smart move to create an effective troubleshooting guide template tailored to your shop's specific setup. It can make solving these issues much faster for you and your team.
Got Questions About DTF Software? We've Got Answers.
Stepping into the world of DTF printing can feel a bit overwhelming, especially when it comes to the software that drives everything. It's totally normal to have questions, and getting the right answers is the first step to avoiding costly mistakes and setting your shop up for success.
We hear the same questions pop up all the time from print shop owners. This section is here to clear the air, cut through the technical jargon, and give you the straightforward, practical advice you need. Think of it as your personal cheat sheet for making sense of DTF software.
Do I Really Need Special RIP Software for My DTF Printer?
Yes, 100%. This isn't just a suggestion; it's a must-have for getting professional-quality prints. Your standard desktop printer driver has absolutely no idea how to handle the most important part of the DTF process: the white ink underbase.
Without specialized DTF printing software—what we call a RIP (Raster Image Processor)—your printer can't create that crucial layer of white ink. The result? Colors on dark shirts will look dull, muddy, and completely washed out.
A dedicated RIP is what gives you real control over the whole operation:
- Spot-On Color: It uses ICC profiles to make sure the colors on your screen actually match the colors on the finished shirt.
- Ink Management: You can tell the printer exactly how much ink to lay down, which stops you from wasting expensive ink and creating a thick, heavy print.
- Smart Workflows: Features like gang sheets let you squeeze as many designs as possible onto your film, drastically cutting down your material costs.
Trying to run a DTF setup without a proper RIP is like trying to drive a sports car that's stuck in first gear. You've got all this potential, but no way to actually use it.
What Is an ICC Profile and Why Does It Matter for DTF?
Think of an ICC profile as a universal translator for color. It’s a small data file that makes sure every device in your workflow—from your computer monitor to your printer—is speaking the same color language. It’s the secret sauce for getting consistent, accurate, and repeatable results every single time.
Let's say a client's logo uses a very specific shade of corporate blue. Without an ICC profile, your printer might interpret that color as a bit purplish or maybe a dull navy. The profile knows the unique quirks of your exact printer, ink, and film, and it makes tiny adjustments behind the scenes so the blue you print is the blue you actually wanted.
For any print shop that cares about quality and reputation, using the right ICC profile is non-negotiable. It's the difference between delivering a professional product that wows your clients and playing a frustrating guessing game that just leads to wasted materials and unhappy customers.
Can I Just Use Free Software for DTF Printing?
The idea of free software is always tempting, but in the world of DTF, it's a classic case of "you get what you pay for." Most free and open-source programs simply weren't built to handle the complex demands of this process. They almost always fall short on the features that matter most.
Here’s where free options typically fail:
- White Ink Control: They might have a basic function to print white, but they rarely offer advanced controls like "choking" the underbase, which is essential for preventing white edges from peeking out on your final print.
- Color Management: Proper support for ICC profiles is often spotty or completely missing, turning color accuracy into a constant battle.
- Technical Support: When something goes wrong—and it will—there’s no one to call. You’re left on your own, which means expensive downtime for your business.
Investing in professional software isn't just an expense; it's an investment that pays for itself. You’ll quickly make back the initial cost through reduced ink and film waste, not to mention the time you’ll save with a smoother, more reliable workflow.
How Does Software Actually Help Reduce My Printing Costs?
This is where good DTF software really proves its worth and gives you a direct return on your investment. It’s loaded with features specifically designed to attack your two biggest ongoing expenses: materials and labor.
The biggest money-saver by far is ganging, sometimes called nesting. This feature lets you arrange multiple designs, even for different customers, onto a single large sheet of film. The software’s layout tools help you pack these images together like a game of Tetris, making sure you use every last square inch of your pricey film. This one feature alone can cut your film costs by 20-30% or more.
On top of that, precise ink controls stop you from laying down more ink than is needed, preventing oversaturation and waste. Finally, automation tools like hot folders and print queues are huge time-savers, which lowers your labor cost on every single print and helps you push more orders out the door each day.
Ready to produce vibrant, durable, and cost-effective transfers? Cobra DTF offers premium, American-made DTF supplies, including the high-quality film and inks your software needs to perform at its best. Get started with our industry-leading products today.