
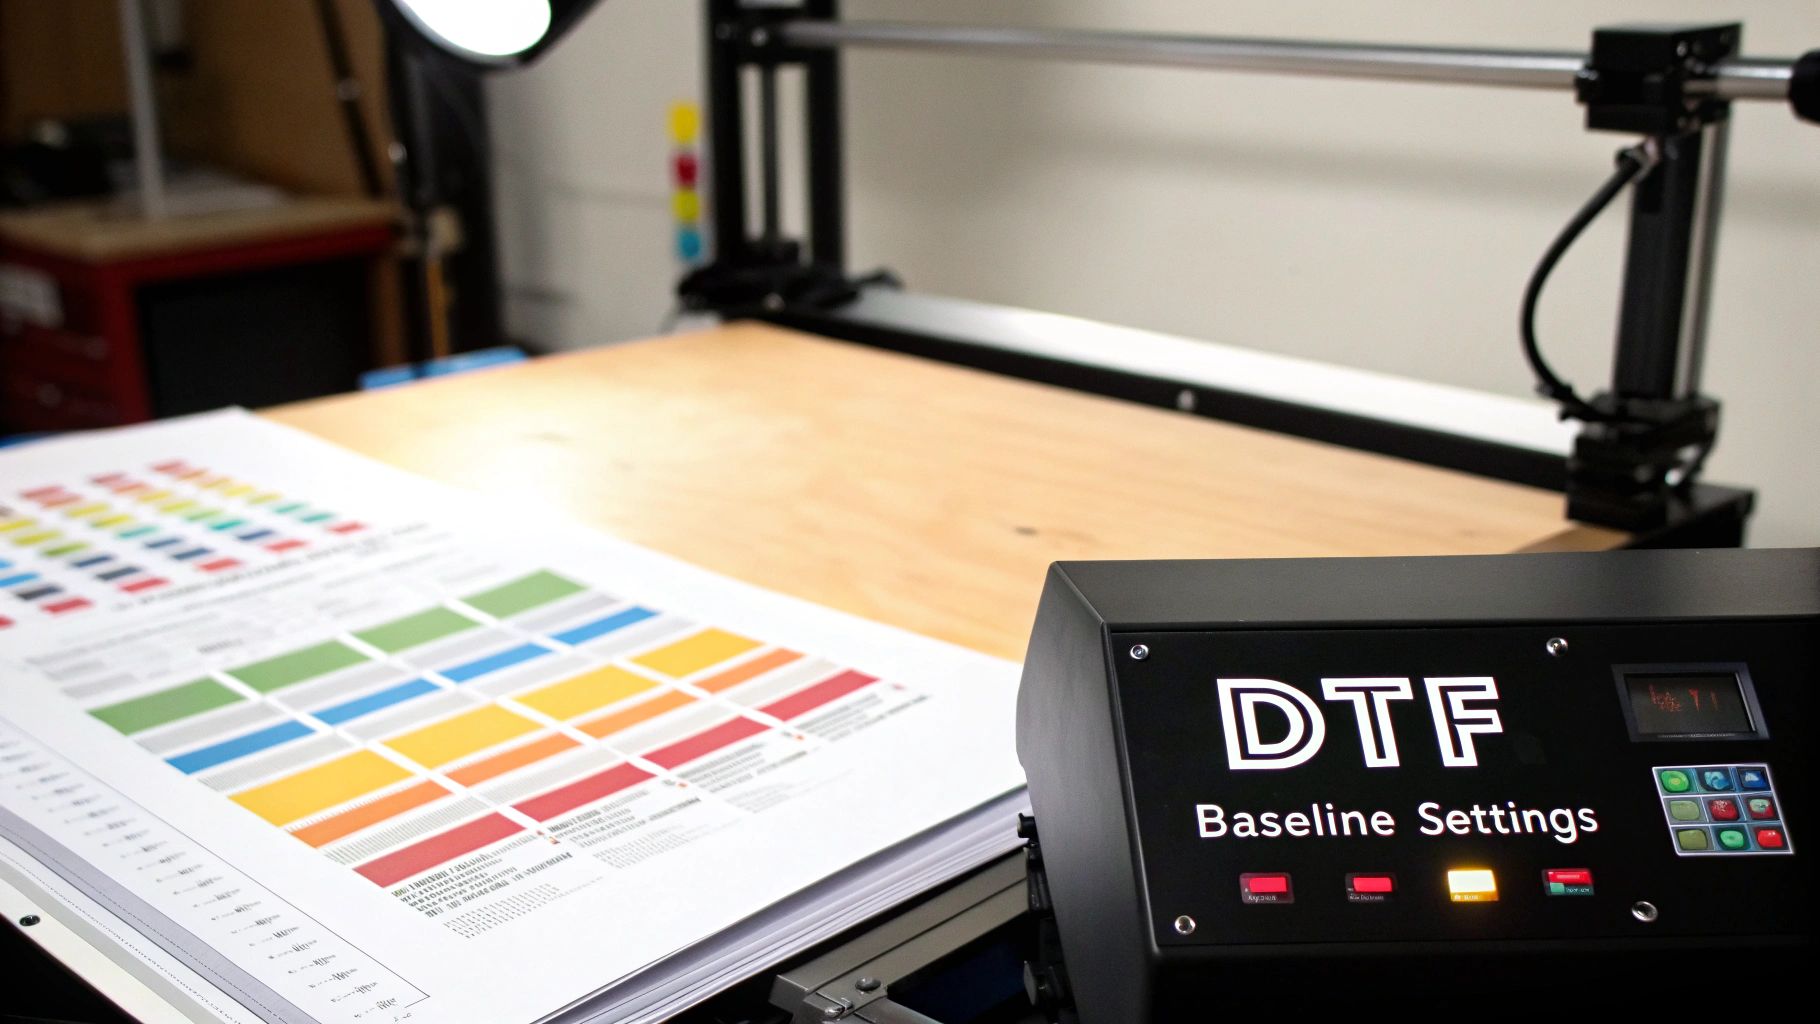
Nail Your DTF Press Settings for Perfect Prints
Getting your DTF press settings right is where the magic really happens. It's the key to getting those vibrant, long-lasting prints we're all after. While every setup is a little different, a solid starting point for most jobs is a temperature between 300-320°F (149-160°C), a good medium pressure, and a press time of about 12-15 seconds. This will get you in the ballpark, but truly nailing it requires a bit more finesse.
The Core Trio of DTF Press Settings
Think of mastering your heat press like becoming a good cook—it's not about one magic recipe, but about understanding how the ingredients work together. For DTF, those ingredients are heat, pressure, and time. This trio works in concert to melt the adhesive powder, fuse the ink deep into the fabric fibers, and create a print that both looks and feels professional. Getting this balance right is what separates a fantastic product from a frustrating failure.
It’s no surprise that DTF printing is taking over. The demand for quick turnarounds and stunning quality has pushed this technology to the forefront. In 2022, DTF machines made up about 44.5% of all garment printers globally, and that number is expected to jump to 64.4% by 2027. This just shows why dialing in your settings is crucial for keeping your work top-notch.
H3: Temperature: The Activator
Temperature is what kicks off the whole process. Its main job is to melt the adhesive powder on the back of your DTF film, turning it into a glue that will bond your design to the garment.
If your press is too cold, that adhesive just won't melt properly. The result? A print that looks okay at first but starts to peel and crack after just one or two washes—a nightmare for any business.
On the flip side, too much heat can be just as bad. You can easily scorch delicate fabrics like polyester or trigger "dye migration," which is when the color from the shirt bleeds into your beautiful white ink. The goal is to find that perfect temperature that creates a rock-solid bond without damaging the garment itself. For a closer look at this, check out our in-depth guide on DTF heat press temperature.
H3: Pressure: The Enforcer
Pressure is what ensures every last bit of that melted adhesive gets pushed into the fibers of the fabric. Think about putting a sticker on a bumpy surface—if you don't press it down firmly, it only sticks to the high spots. It’s the exact same concept here.
- Medium pressure is almost always the sweet spot. It provides enough force to embed the transfer into the fabric weave, giving you a soft feel and fantastic durability.
- Too little pressure is a common mistake. The transfer might look attached, but the bond is weak because the adhesive is just sitting on top of the fibers.
- Too much pressure can cause the ink to smoosh out, blurring fine details. It can also leave you with a shiny, plastic-like finish on the design.
I see it all the time: people think cranking up the pressure is the answer. With DTF, you just need enough even force to ensure the entire design makes solid contact, especially when you're working over tricky areas like seams or collars.
H3: Time: The Finalizer
Dwell time—how long the transfer is actually under heat and pressure—is the final piece of this puzzle. You need to give the chemical reaction enough time to complete, which is what creates that permanent bond we're looking for. A press of 12 to 15 seconds is usually all it takes.
If you cut the time short, you risk the adhesive not fully curing, leading to a weak bond. But press it for too long, and you run into the same problems as having excessive heat, like scorching or discoloration. Finding that sweet spot in your timing is what will give you consistent, high-quality results with every single press.
Getting Your Garments Ready for a Perfect Press
A vibrant, long-lasting DTF print has a secret weapon, and it has nothing to do with the transfer itself. It all starts with prepping the garment. Skipping this step is the number one reason I see people struggle with bad adhesion, cracking, and prints that just don't hold up.
Think of it this way: you wouldn't paint a dirty, bumpy wall. The same idea applies here. Your job is to create the perfect canvas for that DTF adhesive to grab onto and never let go. The two biggest enemies of a solid press? Hidden moisture and pesky wrinkles.
Why You Can't Skip the Pre-Press
Every single piece of fabric, even if it feels bone dry to the touch, is holding onto moisture from the air. When your heat press comes down, that moisture instantly turns to steam and has to go somewhere. If it gets trapped under your transfer, it acts like a force field, stopping the adhesive from melting properly into the fabric fibers.
That’s why a quick pre-press is an absolute must. You’re not just ironing out wrinkles; you're actively forcing that moisture out and creating a flat, dry, super-receptive surface for the transfer.
- Standard T-shirts & Cotton Blends: A quick 5-7 second press is all you need to get rid of moisture and smooth things out.
- Heavier Stuff (Hoodies, Sweatshirts): These thicker garments need a bit longer. Give them a good 10-12 seconds to make sure the heat gets all the way through.
- 100% Polyester & Delicate Fabrics: Be quick here. A short 3-5 second press is enough to do the job without risking scorch marks.
People often ask me, "Can't I just use a regular iron?" An iron might flatten some wrinkles, but it just can't deliver the consistent, even heat needed to properly evaporate all that trapped moisture. The pre-press isn't for looks; it's a technical step for a permanent bond.
Lining It Up Like a Pro
With the fabric prepped, the next step is nailing the placement. A slightly crooked design can instantly make a great shirt look cheap and homemade. Don't just eyeball it and hope for the best, especially when you're making more than one. Consistency is what separates the pros from the hobbyists.
Here are a few simple tricks to get your alignment right every single time:
- The Center Crease Method: Fold the shirt in half vertically and give it a quick press to make a faint line down the middle. Then, gently fold your DTF transfer in half (film side in) to create a matching crease. Just line up the two creases, and you're perfectly centered.
- Grab a T-Shirt Ruler: These alignment guides are a game-changer. They're cheap, easy to use, and have markings that help you center your design and place it the same distance from the collar on every shirt, no matter the size.
- The "Three-Finger" Rule of Thumb: For a classic chest print, a quick and easy way to gauge placement is to position the top of your design about three fingers' width down from the collar.
Don't Forget Your Cover Sheet
The final piece of the prep puzzle is the cover sheet. Placing a protective sheet over your DTF transfer before pressing does two very important things: it shields the garment from the intense, direct heat of the platen, and it keeps your platen clean from any ink or adhesive that might squeeze out.
A Teflon sheet is great, but honestly, a simple piece of parchment paper works just as well. Think of it as cheap insurance—it protects your gear and your shirt, ensuring a clean press every time. Now that your garment is perfectly prepped, you're all set for a flawless application.
Adjusting Settings for Different Fabrics and Films
Think of those baseline DTF press settings as your starting point. They're reliable, but the real magic happens when you learn how to tweak them for the specific material you're working with. After all, you wouldn't treat a delicate polyester shirt the same way you'd press a heavy cotton hoodie—that’s a surefire way to waste time, money, and perfectly good garments.
This is where you graduate from simply following instructions to truly mastering the craft. Getting consistently professional results comes from knowing when to dial back the heat, bump up the pressure, or switch your peel method. It’s all about reading the fabric and adjusting your technique to match.
This flowchart lays out the very first steps you'll take before the transfer even touches the shirt.
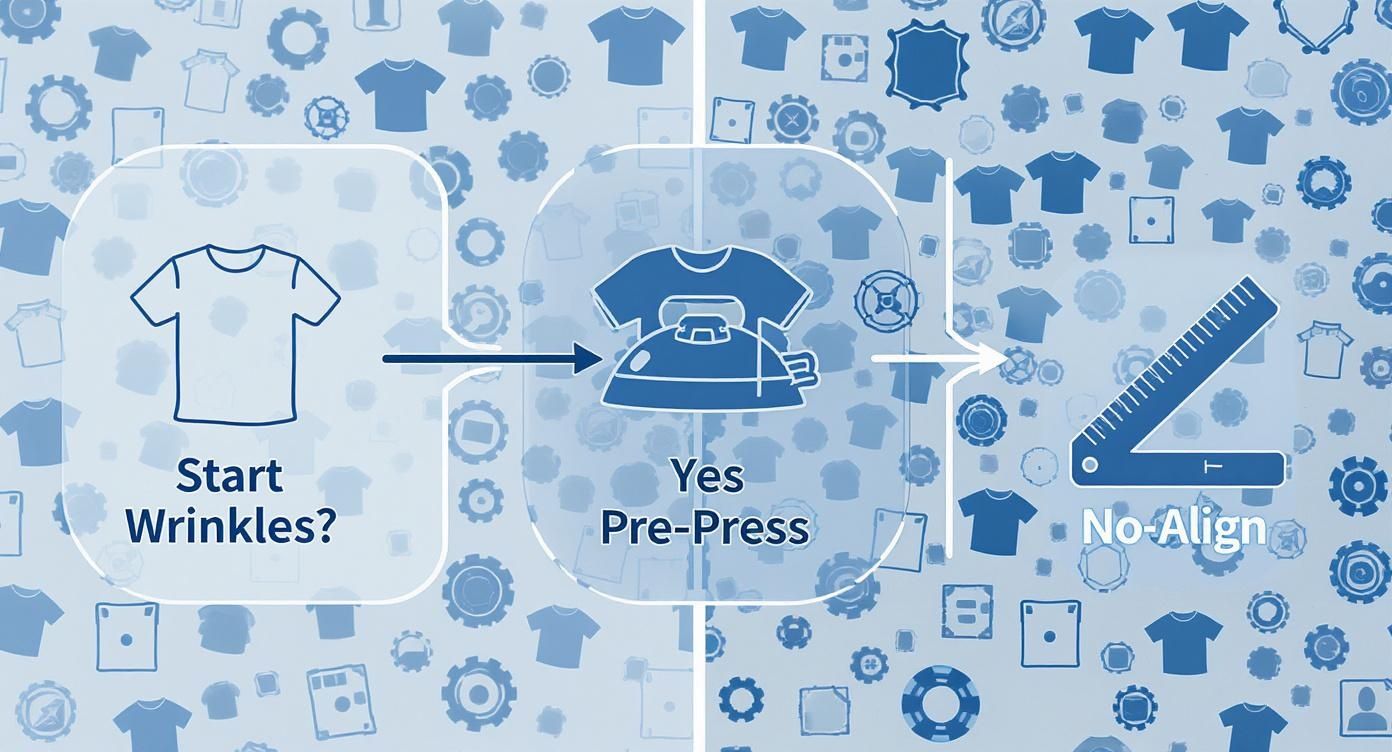
As you can see, something as simple as checking for wrinkles determines if you need to pre-press. It’s a foundational step that has to happen before you can even think about lining up your transfer.
Handling Heat-Sensitive Synthetics
Fabrics like polyester, spandex, and other synthetic blends are everywhere, but they need a gentle touch. Unlike tough old cotton, these materials can easily scorch, melt, or get that ugly shiny box from the press platen if the heat is too high.
For a standard 100% polyester garment, your first move should be to lower the temperature to the 280-300°F (138-149°C) range. This is non-negotiable if you want to protect the fabric's integrity.
It's a similar story for anything with stretch, like fabrics containing Spandex or Lycra. Too much heat will fry the elastic fibers, killing the stretch and ruining the garment. Stick with lower temperatures and consider shortening your press time to around 10-12 seconds.
Tackling Textured and Heavy-Duty Fabrics
On the other end of the spectrum, you have materials like canvas, denim, or thick fleece hoodies. These pose a different challenge: their heavy, textured surfaces make it tough for the transfer's adhesive to get a solid grip.
With these tough guys, pressure is your best friend. Crank it up to a firm or heavy pressure setting. That extra force is what physically pushes the melted adhesive down into the weave of the fabric, ensuring it bonds properly instead of just sitting on the surface.
- Canvas and Denim: These often benefit from a slightly longer press time, maybe 15-18 seconds, just to make sure the heat penetrates all the way through the thick material.
- Hoodies with Seams: Bulky seams are a classic cause of failed presses because they create uneven pressure. A heat press pillow placed inside the hoodie is the perfect solution. It elevates the print area, creating a flat, even surface for a perfect transfer.
When a transfer doesn't stick to a thick fabric, the first impulse is often to increase the heat. But most of the time, the real problem is pressure. You need that force to drive the adhesive into the fabric's texture.
Hot Peel vs. Cold Peel Films: A Practical Comparison
The type of DTF film you're using is another huge factor in your settings and workflow. The two main players are hot peel and cold peel, and they couldn't be more different.
Hot peel films are built for speed. You peel the carrier sheet off the moment the press opens, while everything is still piping hot. This is a game-changer for high-volume jobs, as it shaves precious seconds off every single press.
Cold peel films, as the name implies, require you to wait until the garment and transfer have cooled down completely. The patience pays off, though—cold peeling often delivers a smoother, more matte finish and can be a bit more forgiving for designs with tiny, intricate details.
Your choice really comes down to balancing speed against the final look you want. But whatever you do, always follow the film manufacturer's recommendation. Using a hot peel method on a cold peel film (or vice-versa) is a guaranteed way to ruin a perfectly good print.
Ultimately, getting the best DTF settings comes down to knowing your materials. This is especially true for popular jobs like T-shirt printing, where fabric blends can vary widely. If you need some ideas on what fabrics work best, check out our guide on the best shirts for DTF.
The Final Press: Locking in Durability and Feel

Once you’ve peeled off the carrier film, it’s so tempting to call it a day. But if you skip the final press, you're missing the single most important step for getting that soft-hand feel and true wash-proof durability. Think of it this way: the first press puts the design on the shirt; this second press makes it part of the shirt.
This quick finishing press is non-negotiable in my book. It physically melts the ink deeper into the fabric's fibers, forging a much stronger bond. A print that gets this final touch will survive dozens of washes without cracking or fading, which seriously boosts the garment's quality and what you can charge for it.
Perfecting Your Finishing Press Settings
The goal here isn't to re-cure the adhesive. It's all about melding the ink with the fabric. That means your dtf press settings need to change slightly from the initial application. You’ll want a much shorter dwell time to avoid over-curing the ink, which can ironically make it brittle.
For most jobs, a quick hit of just 5 to 8 seconds is perfect. I usually keep the temperature the same as the first press but dial the pressure back to a light-medium setting. It's just enough heat and time to soften the ink and push it into the weave of the fabric.
I always tell people to think of the final press as ironing the design into the shirt, not just sitting on top of it. This is what transforms a stiff, plastic-like transfer into a soft, flexible print that moves with the garment and feels like it belongs there.
Choosing a Cover Sheet for Texture Control
The cover sheet you use in this step is your secret weapon for controlling the final finish. You can add a subtle, professional texture that really elevates the final product. Just remember to never, ever press directly onto the exposed ink with a bare hot platen.
Here are the cover sheets I keep on hand and what they do:
- Parchment Paper: This is my go-to for most jobs. It's cheap, easy, and gives the print a beautiful, smooth matte finish that looks and feels completely natural.
- Teflon Sheet: If a design needs a little more pop, a reusable Teflon sheet will impart a slight sheen or semi-gloss finish. You have to be careful, though, as too much time or pressure can make it feel a bit "plasticky."
- Matte Finishing Sheets: When a client wants that premium, screen-printed look, these are unbeatable. These specialty sheets are designed to kill every bit of shine, leaving you with a high-end, ultra-matte texture.
Playing around with different cover sheets is a simple way to offer clients a range of finishes without having to mess with your core dtf press settings.
Don't Skip the Cool-Down
After that final press, there’s one last thing to do: let the garment cool down completely. Don't fold it, don't stack it, don't bag it. The ink is still pliable when it's hot, and folding it too soon can create permanent creases or cause different parts of the design to stick together.
I just lay the shirts flat on a clean table or hang them on a rack for a few minutes. This gives the ink time to fully set and harden into its final state, locking in that perfect texture you just created. Rushing this last part can undo all your hard work in an instant.
Solving Common DTF Pressing Problems
Even with perfectly dialed-in DTF press settings, you're going to run into a stubborn transfer that just doesn’t want to cooperate. It happens to everyone. The real skill is knowing how to diagnose and fix the problem quickly, turning a frustrating moment into a learning experience instead of a wasted shirt.
Think of this as your field guide for troubleshooting. We’ll cover everything from prints that refuse to stick to colors that bleed on tricky fabrics. Once you understand the root cause, you can make a fast adjustment and get right back to production.
Why Is My DTF Transfer Not Sticking?
This is, without a doubt, the most common snag people hit. When a transfer fails to adhere, it's almost always one of three culprits: not enough heat, not enough pressure, or hidden moisture in the garment.
Before you start messing with other settings, grab an inexpensive infrared thermometer and check your heat press. You’d be surprised how often a press's digital display is off. If the temperature is on the money, then pressure is your next suspect. A weak bond usually means the adhesive melted on top of the fabric fibers instead of being pushed into them.
- Crank up the pressure. Don't be shy. You need firm, even pressure to really embed the design into the fabric's weave.
- Look for obstructions. Things like bulky seams, collars, or zippers can create gaps where the platen can't make full contact. Slide a heat press pillow inside the shirt to raise the printing area and create a flat, even surface.
- Pre-press longer. Remember, moisture is the enemy of a good transfer. On a humid day or with a heavy fleece hoodie, a quick 5-second pre-press won't cut it. Try extending that to 10-15 seconds to make sure you're driving out every last bit of steam.
Dealing with Color Bleeding or Dye Migration
You’ve been there: you press a crisp white design onto a vibrant red polyester shirt, peel the film, and are met with a sad, pinkish print. That's dye migration in action. The heat from the press causes the dye in the polyester to turn into a gas, which then stains the ink of your transfer.
The fix here is all about managing your heat. The first and most effective move is to lower the temperature.
For 100% polyester or any poly-blends known for bleeding, I immediately drop my temperature into the 280-300°F (138-149°C) range. You might need to add a few extra seconds to your press time to compensate, but it’s the surest way to keep your whites white and your colors true.
When the Print Looks Too Glossy or Feels Stiff
A great DTF transfer should have a soft hand and a clean, matte finish that blends into the fabric. If your final print looks overly shiny or feels like a stiff, plastic sticker, you’ve likely overdone it with heat or time on the final press. This essentially bakes the ink, preventing it from melding gently with the fabric.
To fix this, make two simple but crucial adjustments to your final, post-peel press:
- Cut the time way down. The second press is just a quick set, not a full cure. Drop the time to just 3-5 seconds.
- Use parchment paper. A Teflon sheet can add a bit of a sheen. Switching to a simple piece of parchment paper is a pro move for absorbing excess shine and achieving that perfect, soft matte texture.
If you find yourself running into these issues often, it never hurts to revisit the basics. Our complete guide to heat transfer shirt printing is a great resource for refreshing the core principles that set you up for success.
Why Did My Transfer Crack After Washing?
There’s nothing worse than a print that looks perfect right off the press, only to have the customer send you a picture of it cracking after one wash. This is a tell-tale sign of a poor bond. The adhesive never truly fused with the fabric, so the ink layer fractures as soon as the garment is stretched or washed.
This problem almost always brings you back to the fundamentals: temperature and pressure.
The transfer may have looked like it stuck, but the chemical bond was incomplete. The first thing you should do is double-check your platen's temperature with a heat gun. More often than not, though, the real culprit is pressure. This is especially common on thick garments like hoodies, where what feels like "medium" pressure simply isn't enough to force the adhesive deep into those coarse fibers.
DTF Pressing Problem and Solution Guide
When things go wrong, a quick reference can be a lifesaver. This table helps you diagnose the issue at a glance and points you toward the right fix so you can get back to printing flawless garments.
| Problem | Potential Cause | Solution |
|---|---|---|
| Transfer not sticking | 1. Insufficient heat/pressure 2. Moisture in the garment 3. Obstructions (seams, zippers) |
1. Verify temp, increase pressure 2. Increase pre-press time to 10-15s 3. Use a heat press pillow |
| Colors look faded/dull | 1. Not enough pressure 2. Temperature is too low |
1. Increase to firm pressure 2. Raise temp in small increments |
| Dye migration (color bleed) | Heat is too high for the fabric (common on polyester and sublimated items) | Lower temperature to 280-300°F and slightly increase press time if needed |
| Print is shiny or stiff | Over-curing (too much heat/time on the final press) | 1. Reduce final press to 3-5 seconds 2. Use parchment paper instead of a Teflon sheet |
| Cracking after washing | Incomplete adhesion due to low pressure or incorrect temperature | Re-verify your temp with a heat gun and significantly increase your pressure |
| Tiny holes in the print | Fabric texture "poking through" the ink due to uneven pressure | Increase pressure; use a flexible finishing sheet or foam pillow to press the ink into the texture |
Remember, every heat press and garment is a little different. Don't be afraid to do a little testing and fine-tuning to find the settings that work perfectly for your specific setup.
Got Questions About DTF Press Settings? We've Got Answers.
Even when you think you've got the process down, a new fabric or a weirdly humid day can throw a wrench in things. Let's tackle some of those "what if" scenarios that pop up when you're on the job. Answering these common questions will help you fine-tune your DTF press settings and give you the confidence to handle whatever comes your way.
Here are a few practical questions we hear all the time.
How Can I Test Settings on a New Fabric?
There’s nothing worse than wasting a perfectly good garment on a test run. A much smarter—and cheaper—way to learn is to use a "scrap swatch" from the same material. If you don't have scraps, here's a pro tip: if you're printing on the back of a shirt, you can often press a tiny, hidden part of the design on the inside near the bottom hem.
For any new fabric, I'll snip a small piece of a larger design, like a single letter from a word or a small logo icon. Pressing this tiny test piece lets you quickly check for three things:
- Adhesion: Is it sticking like it should?
- Scorching: Are you seeing any heat damage on the fabric?
- Dye Migration: Are the colors bleeding or looking muddy?
This little test takes less than a minute, but it can literally save you from ruining an entire batch of shirts. It’s a small bit of prep that delivers huge peace of mind.
Does Humidity Really Affect My Press Settings?
Oh, absolutely. Humidity is that invisible gremlin that can wreck a perfect press. On a damp day, your garments soak up a surprising amount of moisture from the air, even if they feel totally dry. This hidden water is a major roadblock for solid adhesion.
When that moisture flashes into steam under the heat press, it physically pushes the DTF adhesive away from the fabric fibers, preventing a good bond.
If your transfers suddenly start failing on a humid day, don't blame your settings just yet. The culprit is almost always moisture. The fix? Just increase your pre-press time. Instead of the usual 5 seconds, bump it up to 10-15 seconds to really drive all that moisture out before you lay down the transfer.
Can I Use the Same Settings for Hot and Cold Peel Films?
This is a big one. Never assume you can use the same DTF press settings for hot peel and cold peel films. They are built differently, with unique adhesives and release agents that require their own specific processes. If you try to hot peel a film designed for cold peeling, you’re almost guaranteed to pull up the design and ruin the garment. The adhesive simply hasn't had time to cool and set.
- Hot Peel Films are made for speed. You peel the carrier sheet right away while the garment is still hot on the press.
- Cold Peel Films need patience. The garment must cool down completely to let the adhesive harden and grab onto the fabric before you remove the film.
Always, always follow the manufacturer's directions for the specific film you're using. Mixing up these two methods is one of the most common mistakes we see, but it's also one of the easiest to avoid. When you respect the chemistry of your materials, you get that clean peel and a durable, professional print every single time.
At Cobra DTF, we're all about providing top-tier, American-made DTF transfers that you can rely on for consistent, professional results. Our films and inks are engineered to work perfectly with properly dialed-in DTF press settings, giving you the vibrant, long-lasting finish your customers will love. Check out our products today at https://cobradtf.com.