

DTF for Shirts: A Practical Guide for Small Businesses
DTF for shirts is a production method, with global output exceeding 7.2 billion prints in 2024, up almost 30% year over year. The key decision isn't whether DTF works, but which shirts to press, what each job costs, and when DTF makes more sense than screen printing.
It's Monday morning at the shop. A stack of blank tees is leaning against the heat press, the platen is warming, and three customer orders are due by Friday. One order needs a dozen full-color shirts, another might become a much larger team run, and the third customer still hasn't settled on a shirt color.
I've spent enough time around DTF production to stop debating whether the technology is ready. The better questions are operational: Which blanks should you stock? How should you price a short run? When does screen printing win? What equipment keeps quality consistent instead of merely producing a shirt that looks good at pickup?
The recommendations below focus on those decisions, including fabric selection, workflow order, equipment requirements, wash testing, and pricing.
Why DTF for Shirts Is a Small-Business Decision, Not a Tech Trend
A dozen black cotton tees with a detailed front graphic can be a strong DTF job. A larger run of identical white shirts may favor screen printing. A rush order across several garment colors brings different risks from a repeat customer who orders the same design each month.
The question for a small shop is not whether DTF works. It is whether the method protects your margin and delivery promise on the job in front of you. Shirt type, order size, artwork, press consistency, and reprint risk all belong in that decision.
Shop-floor rule: Don't buy equipment because DTF is popular. Choose a workflow that protects cash flow, consistency, and delivery promises.
The four decisions that matter
Shirt selection comes first. A quality transfer can still fail commercially if the blank has a coating, loose knit, or dye behavior your process has not tested. I would rather sell a dependable 50/50 cotton-poly shirt than gamble on a fashionable blank that looks soft online but presses poorly.
Workflow sequencing controls quality. Art preparation, white-ink management, powder coverage, curing, garment preparation, and pressing all affect the finished shirt. Skip one step and you may see poor adhesion, cracking, scattered powder, or unstable color after washing.
Equipment has a floor. A printer alone is not a production setup. You need a controlled way to print, apply adhesive, cure the transfer, and press it evenly. A bargain heat press with inconsistent pressure can ruin usable transfers and turn a profitable order into rework.
Pricing has to include failure risk. Your quote needs to cover the shirt, ink, film, powder, labor, overhead, and the occasional reprint. Pricing only the blank and transfer leaves no room for a bad press, a failed garment, or extra production time.
Apparel remains a major DTF use, and shirts are a central commercial application. A market review reported apparel at 45.2% of DTF demand in 2024, while promotional products accounted for 18.1% (WTiN's 2025 DTF market review). Those figures do not justify pressing every shirt with DTF. They reinforce the practical decision: test the blank, calculate the complete unit cost, and match the decoration method to the order.
How DTF for Shirts Actually Works
Think of DTF as a printable sticker system, except the adhesive is heat-activated and the design carries its own white foundation. You print the artwork onto PET film, coat the wet print with hot-melt powder, cure that powder, and then press the finished transfer onto the garment.
The production sequence
- Print the artwork. The printer lays down CMYK color and a white-ink layer on PET film. The RIP software controls the white underbase, which matters on dark garments because the colors need an opaque foundation.
- Apply adhesive powder. While the print is still wet, hot-melt powder is distributed across the back of the design. Excess powder must be removed so loose particles don't become visible around the transfer.
- Melt and cure the powder. Heat turns the powder into an adhesive film. The cure must be even. Under-cured powder can weaken the bond, while excessive heat can create other problems, especially on sensitive synthetic garments.
- Position the transfer. Place the cured film on the shirt with the design facing up. Alignment matters just as much as printing quality. A slightly crooked full-front design is still a customer-facing defect.
- Heat-press the transfer. The press combines heat, dwell time, and pressure to bond the adhesive to the fibers. Those three settings work together, so changing one without testing the others creates avoidable failures.
- Peel and finish. Depending on the film, peel hot or cold, then apply any recommended finishing press. Let the shirt cool before judging color, edge adhesion, and hand feel.
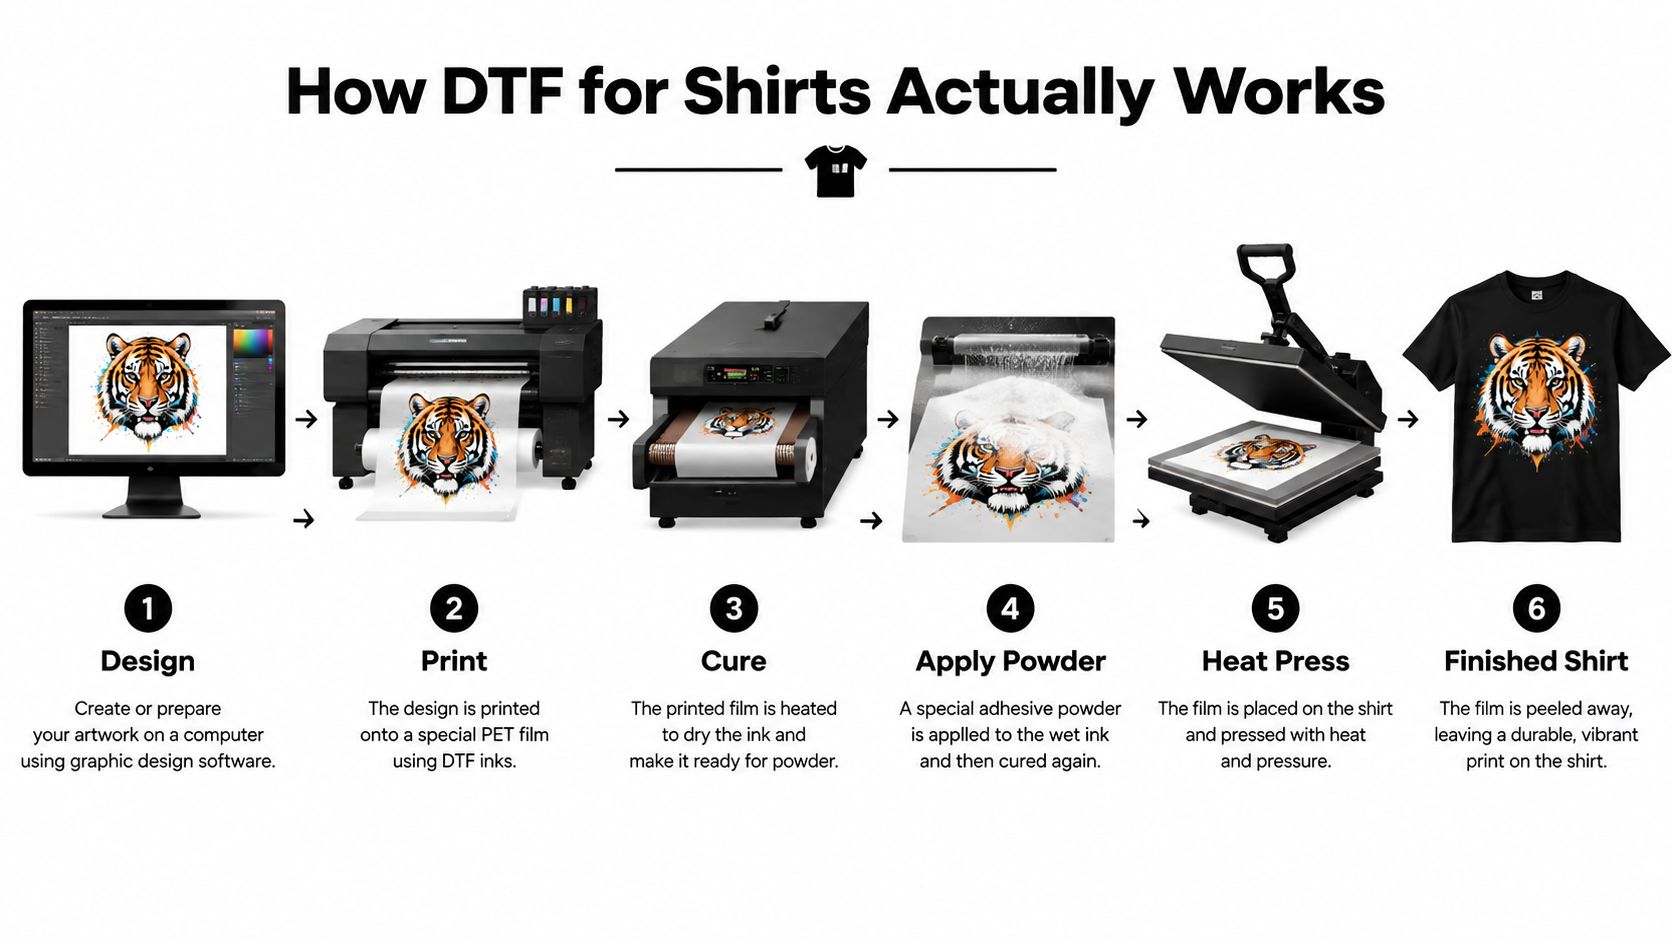
The full workflow is covered in this direct-to-film printing process guide, but the business distinction is simple. Screen printing uses mesh screens and separate ink layers, so setup becomes more valuable as the quantity rises. DTG prints directly onto the garment, but pretreatment and fabric compatibility make the process less forgiving.
DTF sits between those methods. It gives you full-color artwork without creating screens, works across more shirt categories than traditional DTG, and lets you print transfers ahead of the final garment order. The trade-off is a more noticeable film-like hand than many water-based screen prints.
Digital production also changes how businesses think about physical materials and short runs. If you're evaluating broader production efficiency, this resource on how to reduce packaging costs with digital printing provides useful context beyond apparel.
Which Shirts DTF Presses Best
I recommend starting with 100% cotton ringspun shirts if you're building a dependable sample line. Bella+Canvas and Next Level blanks typically give a clean surface and a soft retail feel, which makes them easier to sell and easier to evaluate.
A 50/50 cotton-poly shirt is the workhorse. It handles regular production well, gives customers a familiar feel, and tends to behave predictably under a properly tested press. If you're quoting schools, teams, local businesses, or repeat merch buyers, this blend is often the practical middle ground.
Fabric decisions at the press
100% cotton: Start here for standard lifestyle tees. The surface usually accepts the adhesive cleanly, and the fabric doesn't create the same dye-migration concerns found in some synthetic garments.
Polyester and performance poly: DTF can work on these shirts because the adhesive bonds to synthetic fibers, but don't treat every polyester blank as identical. A performance tee, sublimated jersey, and dark polyester garment can respond differently to heat. Use a lower tested press temperature when the transfer and garment instructions support it, and test before promising a large run.
Tri-blends: These can press well, but their soft drape can make a heavy ink deposit feel stiffer and appear more prominent. Keep the design reasonably balanced with the shirt's lightweight hand.
50/50 blends: This is the safest broad-use option when you want consistent production across everyday orders. It gives you a practical balance of durability, feel, and predictable pressing.
Blanks I'd reject or test aggressively
Avoid heavyweight canvas work shirts unless the transfer supplier specifically supports the surface. Be careful with stain-release treatments, silicone-decorated blanks, and very loosely knitted thermal shirts. Adhesive needs a suitable surface and enough contact to form a dependable bond.
The table below is a starting matrix, not a substitute for testing your exact transfer, blank, and press. The verified thermal research found that pressing at 170°C for 10 seconds minimized color change and reduced black-density loss in the tested polyester and TPU-based system (2025 DTF granulate study). Convert that tested setting through your own equipment rather than assuming every product behaves identically.
| Fabric | Temp (°F) | Time (sec) | Pressure | Result |
|---|---|---|---|---|
| 100% cotton ringspun | 300 to 320 | 10 to 15 | Medium | Clean bond and strong starting point |
| 50/50 cotton-poly | 300 to 320 | 10 to 15 | Medium | Reliable workhorse for repeat orders |
| Tri-blend | 300 to 315 | 10 to 15 | Medium | Good result with lighter ink coverage |
| Performance polyester | Use supplier-tested lower setting | Use supplier-tested dwell | Medium | Test for dye migration and hand feel |
For more blank-specific guidance, use this best shirts for DTF guide before you commit to a new garment line.
The Small-Shop DTF Workflow From Art to Worn Shirt
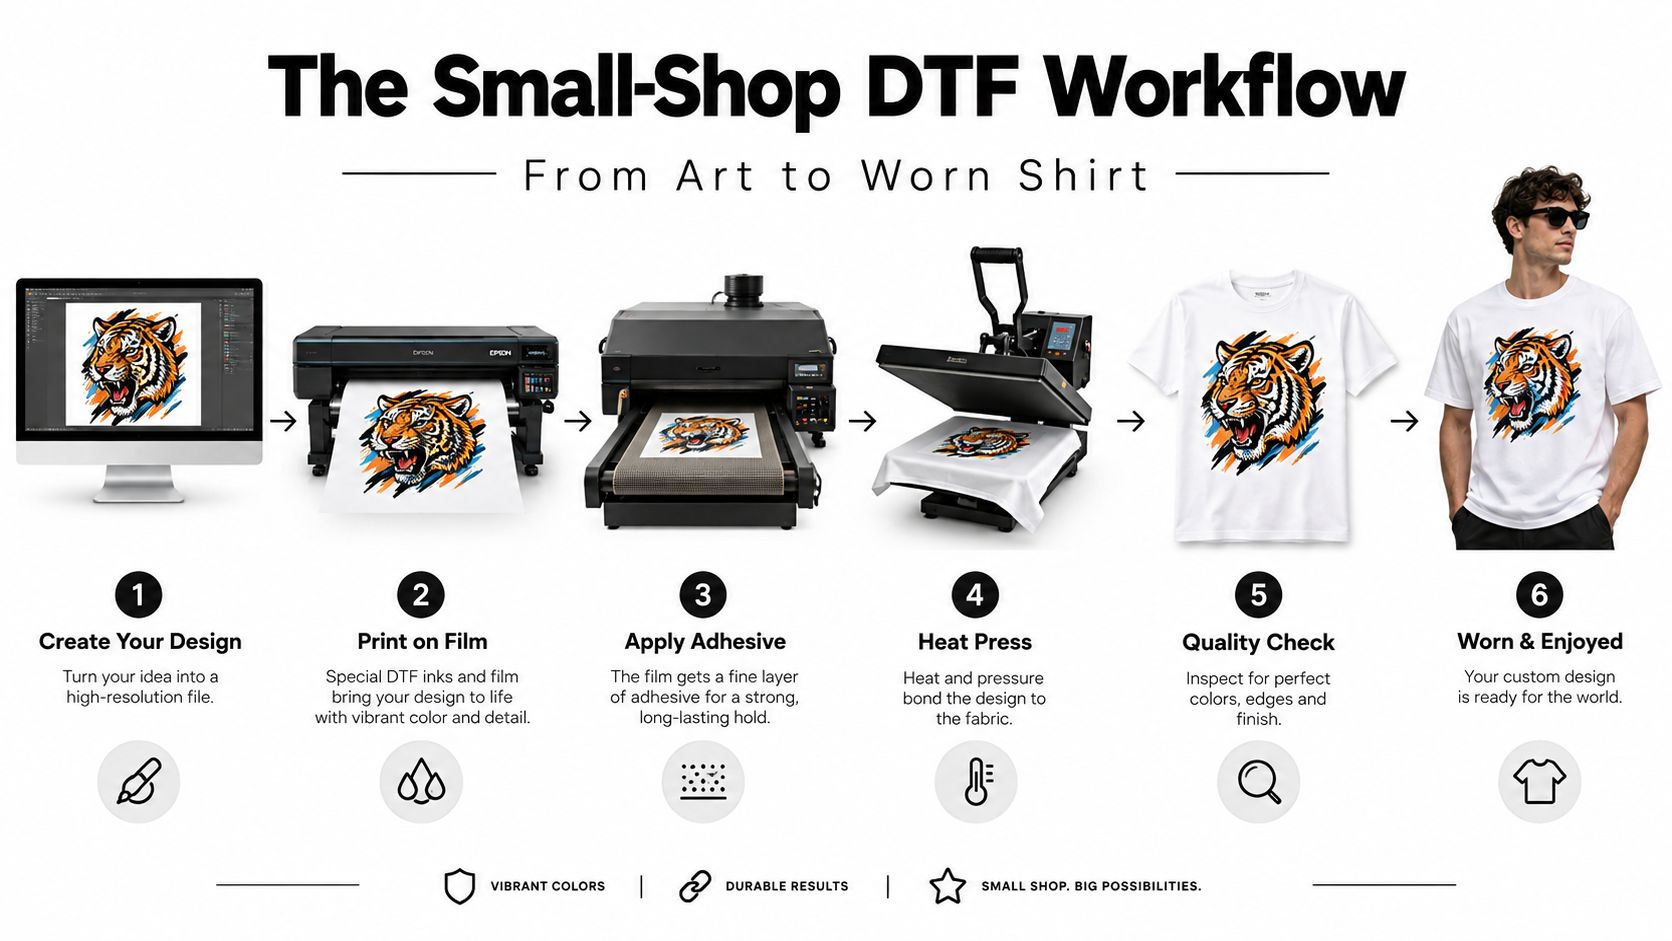
A two-person shop cannot afford reprints caused by a damp blank, weak white underbase, uneven powder, or inconsistent press pressure. Set the workflow once, record the settings, and follow the same sequence on every order.
Prepare the file before printing
Start with a transparent PNG or production-ready artwork file. Size the design against the actual shirt, not only the transfer sheet. A full-front graphic that looks fine on a monitor can feel oversized on a lightweight tee, so check the garment and placement before printing.
Set the RIP software to build the white underbase and mirror the artwork for film printing. Before sending a gang sheet, check the nozzle pattern and inspect the white ink channel. If color coverage is uneven, stop there. Fix the printer before wasting film, powder, and shirts.
Print, powder, and cure in sequence
Print the color and white layers onto the film, then apply powder while the print is still wet. Shake off excess powder carefully. Powder scattered beyond the artwork leaves a dirty edge, while thin or missing coverage produces weak adhesion.
Cure the powder using the method specified for your transfer system. A curing oven usually gives more even coverage than hovering a heat press over each sheet. A small shop can start with a controlled heat source, but only after sample transfers confirm that the adhesive has melted and bonded consistently.
Press the garment, then inspect it like a customer
Pre-press the shirt briefly to remove moisture and flatten the pressing area. Align the transfer on the platen, add a cover sheet when the system requires one, and use the tested pressure, temperature, and dwell time. Record those settings with the blank and transfer combination.
Inspect the finished shirt for banding, stray powder, polyester scorching, lifted corners, and uneven edges. A crack test and stretch test expose immediate problems. Keep a wash sample for each new blank or transfer combination, then check it after 1, 5, and 10 cycles as part of internal quality control.
Polyester scorching calls for lower tested heat exposure, not more pressure or guesswork. A lifting transfer points you toward pressure or curing. Banding means production should stop while you inspect nozzle health, ink flow, and RIP settings. Those checks protect your margin because one failed shirt can also mean a delayed order, a replacement blank, and unpaid press time.
DTF vs Screen Printing vs DTG on Real Unit Economics
Small shops don't need a theoretical comparison. They need to know which process protects a 12-piece order, which one earns its setup time on a 144-piece run, and which method can meet a rush deadline without creating rework.
DTF usually earns its place on short, varied, full-color jobs. Screen printing becomes more attractive when one design, one garment setup, and a larger quantity let you spread preparation across the run. DTG can produce a soft direct print, but its equipment and pretreatment workflow require enough steady demand to justify the commitment.
| Metric | DTF | Screen Printing | DTG |
|---|---|---|---|
| Setup profile | Print, powder, cure, press | Screens, setup, ink changes, cleanup | Pretreatment, direct print, cure |
| Practical minimum | Very small runs | Larger same-design runs | Small runs |
| One-piece job | Strong fit for custom work | Poor fit because setup dominates | Possible, with higher process overhead |
| Twelve-piece job | Usually efficient for full color | Often setup-heavy | Viable where cotton workflow is established |
| 144-piece job | Competitive when artwork or garment variety is high | Often strongest for one repeated design | Usually less attractive for long runs |
| Rush turnaround | Strong when transfers are ready | Slower when screens must be prepared | Depends on pretreatment and queue |
| Main advantage | Full color and low setup friction | Efficient repeated production | Direct, soft print on suitable garments |
| Main limitation | Film hand and consumables | Setup and color separation | Fabric and pretreatment constraints |
I'm not using invented equipment prices or pretend per-shirt costs here. Your actual break-even point depends on printer capacity, transfer sourcing, blank cost, labor, waste, overhead, and whether you print transfers in-house or buy them ready to press.
The economic advantage is often inventory risk, not merely print quality. Digital textile printing is growing around rapid customization and small-batch production, while roll-to-roll digital printing's share of global textile output rose from 6% in 2018 to 12.6% in 2025, with output rising from about 2.6 billion square meters to 5.3 billion square meters (digital textile printing market coverage). Small brands can test designs without ordering a large stack of finished inventory.
For a broader comparison that includes another process, review these sublimation printing pros and cons. For the shirt-specific decision, this T-shirt printing methods guide is more useful than choosing a process based only on the softest hand.
Honest Pros and Cons of DTF for Shirts
DTF earns its place when a small shop needs full-color work without screen setup. You can run detailed artwork in short runs, then press the same transfer onto cotton, blends, and many performance garments after testing the exact blank.
What works on the shop floor
- Low-run flexibility: One design does not need a large minimum order to justify screens, so samples and short customer runs stay practical.
- Full-color artwork: Gradients, photographs, fine details, and multiple colors fit the process without separate screens for each color.
- Garment range: Cotton-poly blends and performance fabrics can work, provided you test the specific shirt before accepting a larger order.
- Transfer inventory: Prepare popular designs before the final garment order arrives, then press them when the customer confirms sizes and colors.
- Good durability: Correct curing, pressure, and application can produce prints that survive roughly 50 or more home wash cycles, according to the cited testing (DTF wash durability findings).
What new shops underestimate
The hand feels thicker than a soft water-based print. Customers expecting ink to sink into the fabric may notice the film, especially with large, heavy graphics. DTF wins on color and short-run flexibility, not on the softest possible shirt.
Hot-peel timing creates failures when the film, transfer, and press settings do not match. Cheap film and poorly controlled white ink can leave weak edges or a dull underbase. Polyester may show dye migration or scorching when heat and dwell time are poorly controlled.
Consumables raise the quote. Count film, white ink, colored ink, powder, cleaning supplies, failed shirts, and labor. A hobby setup can produce sellable samples, but consistent retail work requires a dependable printer, controlled curing, and a real heat press.
My candid recommendation: If you cannot control pressure and temperature, do not promise wash durability. A transfer supplier can do everything right and still lose the job at your press.
Running DTF for Shirts as a Small Business
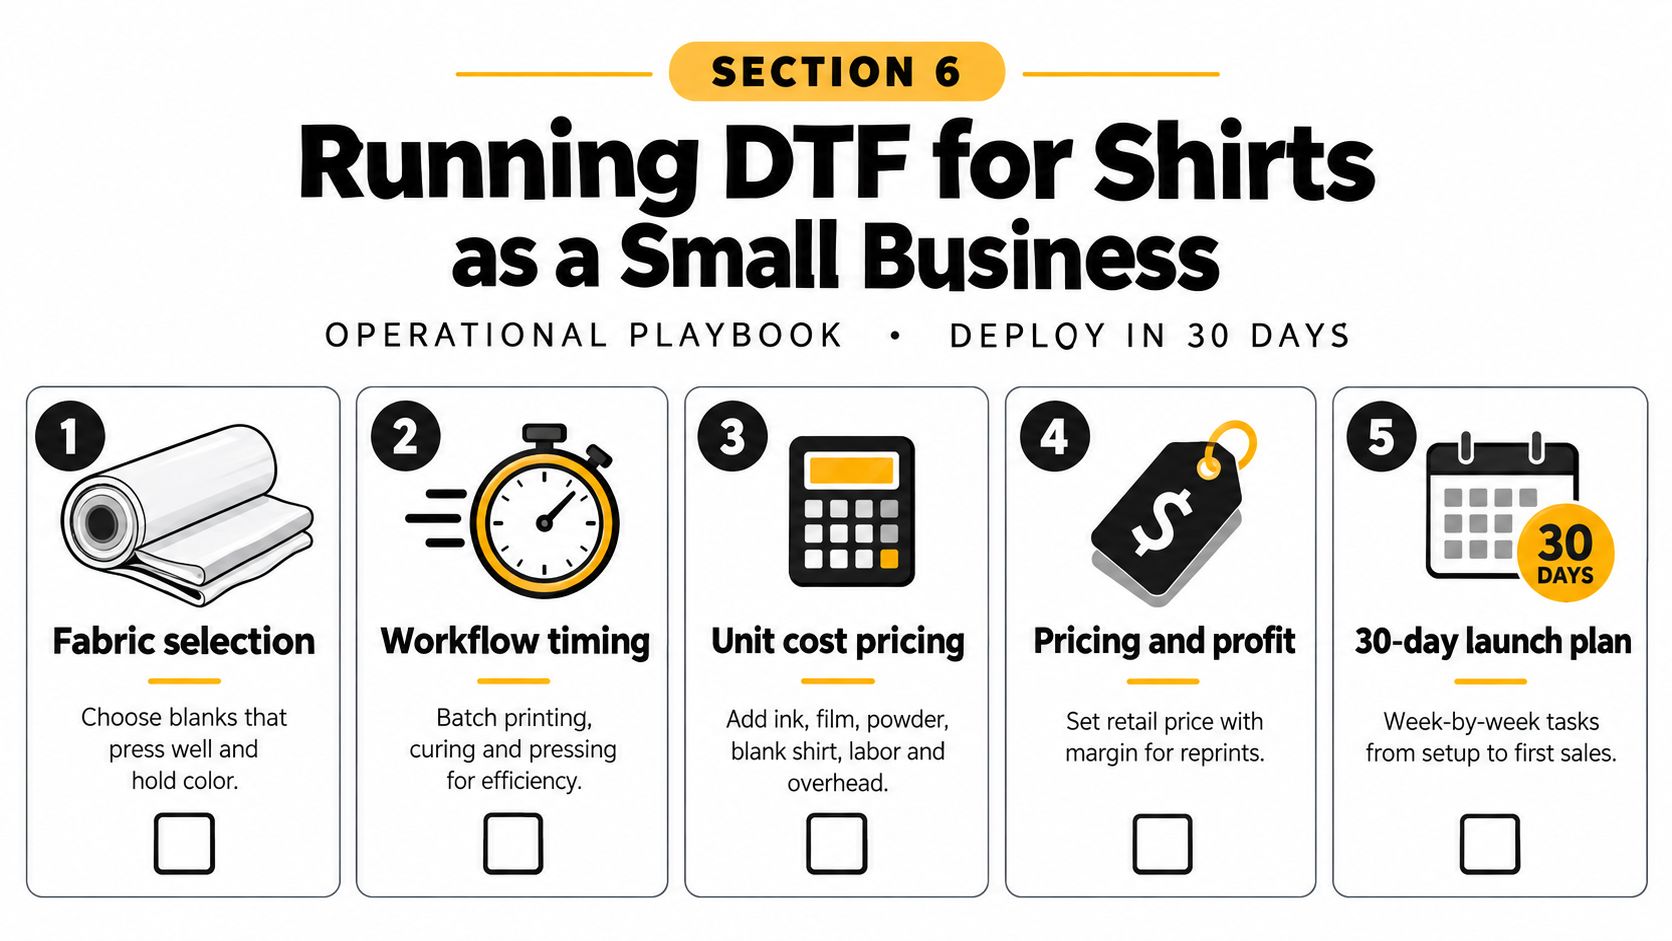
Treat DTF as an operations business, not a craft project. Your price should include ink, film, powder, blank garment, labor, overhead, and a reasonable allowance for reprints. If you omit labor because you're working from home, you're measuring cash cost, not business cost.
For production planning, record press time per shirt, alignment time, trimming, folding, packaging, and customer communication. A design that takes little time to press can still consume labor during artwork revisions and shirt-size substitutions.
Build promises around what you control
A practical service menu can separate same-day shipping for transfers already in stock, 24 to 48 hours for gang-sheet work, and 5 to 7 days for full custom runs, provided those promises match your actual queue and supplier capacity. Don't advertise a deadline until the artwork, blank, and pressing responsibility are clear.
Stock a narrow range of dependable neutrals rather than every color and style. Black, white, heather, and navy in your most frequently ordered blanks are easier to replenish and easier to test. Repeat customers benefit from ready-to-press transfers because you can fulfill the same artwork without rebuilding the file and starting the print workflow from scratch.
Use direct language with customers:
- Color expectations: “The screen preview and pressed shirt can differ slightly. I'll confirm the garment color and transfer proof before production.”
- Size substitutions: “Your selected size is unavailable. I can use the tested alternate blank, or I can wait for the original style.”
- Wash care: “Turn the shirt inside out, wash cold, and dry on low. Don't use harsh bleach or apply direct high heat to the design.”
Your margin improves when you prevent avoidable reprints. The best shop owners don't just press faster. They test the blank, document the settings, and communicate before the shirt reaches the platen.
Next Steps and Common DTF Questions
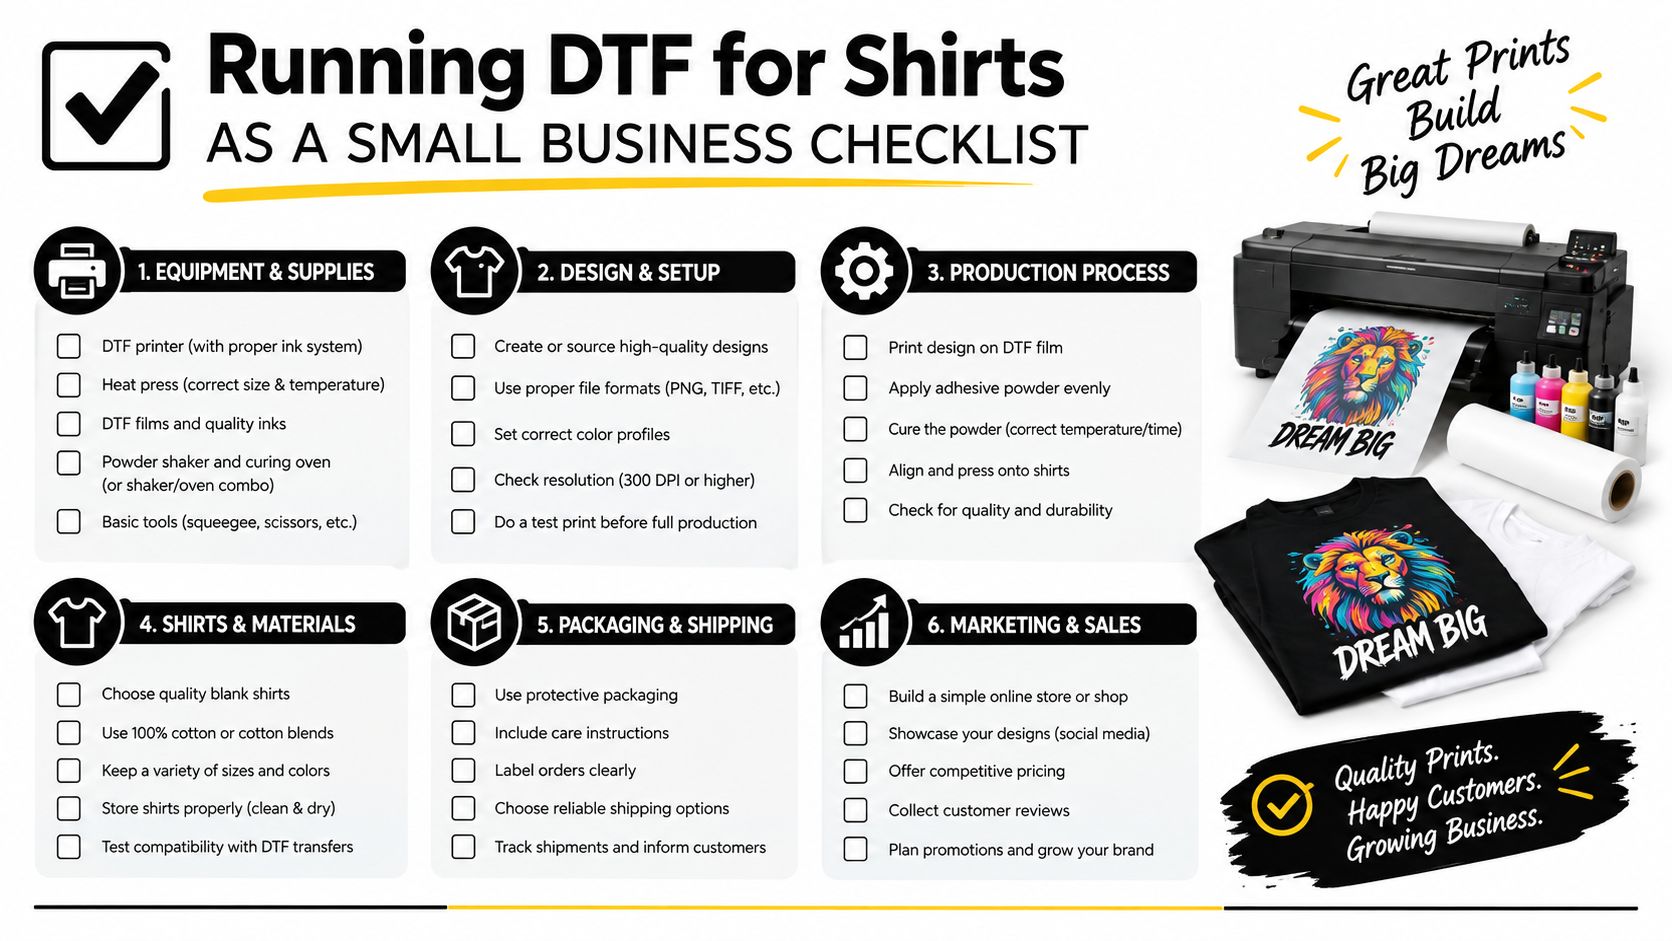
Before taking another order, press samples on the blank you sell most. Test the three designs customers request most, compare different fabric blends, and record how each sample looks after washing. That log gives you a dependable starting point for pricing and reprints.
Does DTF need white ink on dark shirts? Yes. A white underbase sits beneath the artwork so the design stays visible against the garment color. On light shirts, the required ink setup may differ, but dark garments need that base layer.
How should customers wash DTF shirts? Tell them to turn the shirt inside out, wash it in cold water, and dry it on low. Properly produced and applied transfers can withstand roughly 50 or more home wash cycles, while the blank, artwork coverage, curing, and press settings still determine your actual result. Review the wash durability testing and run your own samples before promising long wear.
What equipment do you need? You need a DTF printer or a transfer supplier, PET film or finished transfers, adhesive powder and a curing method if printing in-house, plus a reliable heat press. Choose the setup after deciding whether you will print transfers yourself or buy them ready to press.
Start with one dependable blank and a small sample batch. Cobra DTF supplies custom transfers for chest logos, sleeves, and full-front graphics. Visit Cobra DTF to review transfer options for short runs.