

Finding the Best Heat Press Machine for T Shirts
When you're searching for the best heat press machine for t shirts, you're really looking for three things: consistent temperature, even pressure, and a size that matches your workflow. For most small businesses, a 15"x15" or 16"x20" clamshell or swing-away press hits that sweet spot between performance and price, giving you professional results for DTF transfers and beyond.
Your Guide to Choosing the Right T-Shirt Heat Press
Finding the right heat press is the cornerstone of any serious apparel business, especially when your reputation rides on the quality of every single shirt. This guide isn't just a roundup of popular models. Instead, we’re going to get into the nuts and bolts—the tech, features, and workflow tricks that separate a simple purchase from a smart, long-term investment.
Think of your heat press as the engine of your creative business. A cheap, unreliable engine will leave you stranded, but a great one will power your growth for years to come. Your choice here directly impacts your product quality, how fast you can get orders out the door, and ultimately, your bottom line.
Why Your Heat Press Is a Business Asset
Starting with the right equipment saves you from the headaches of costly mistakes, wasted inventory, and unhappy customers down the road. A quality press is your guarantee that every garment leaving your shop meets a professional standard, which is how you build a brand people trust. If you're just getting your feet wet, our guide on the best heat press machine for a small business has some great pointers for new shop owners.
A dependable press is really doing three critical jobs for your business:
- Quality Control: It delivers the steady heat and even pressure needed for transfers to properly bond and cure. This is what gives you vibrant, durable prints that won't crack or peel after the first wash.
- Operational Efficiency: Smart features like an auto-open function or a slide-out drawer might seem small, but they make a huge difference. They cut down on operator fatigue and speed up your process, letting you press more shirts in less time.
- Product Versatility: Choosing a press with a good platen size opens up a world of possibilities. You're no longer just a t-shirt shop—you can easily expand into hoodies, tote bags, and countless other items.
A heat press isn't just another tool; it’s your commitment to quality. The machine you choose sets the ceiling for your product's durability and professional finish.
This guide will walk you through everything you need to know, from the basic concepts to the finer points that separate the pros from the amateurs. Our goal is to give you the confidence to pick a machine that will not only handle our premium DTF transfers perfectly but also help your brand shine. Let's start by looking at the different types of presses on the market.
Understanding the Core Heat Press Machine Types
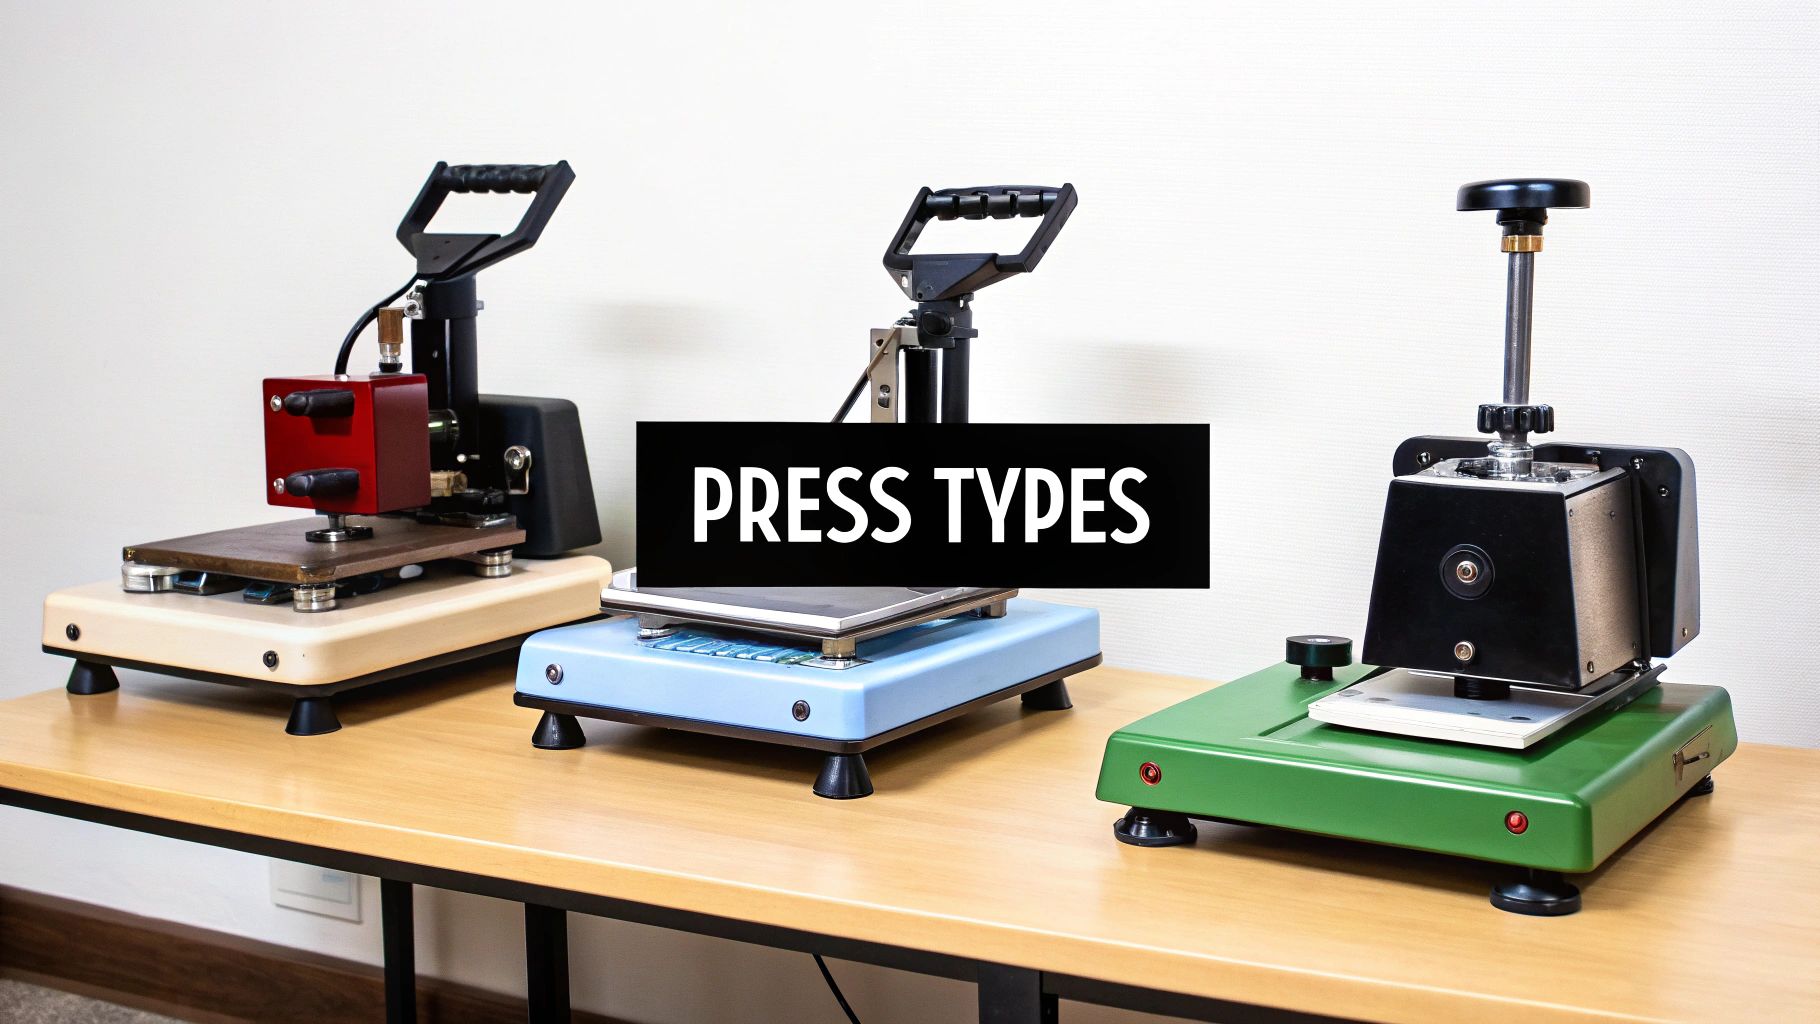
Before you get lost in the weeds of technical specs, the very first thing to wrap your head around are the three basic designs of heat presses. Each one opens and closes differently, and that single mechanical difference has a massive impact on your day-to-day workflow, how you set up your shop, and even what kinds of products you can successfully create.
Think of it this way: a chef has different knives for different jobs. You need to pick the right "knife" for your apparel business. Let's break down the big three: Clamshell, Swing-Away, and Draw. Getting to know how they work is the first real step to finding a machine that’s a partner, not a problem.
The Clamshell Heat Press
The Clamshell is where most people start, and for good reason. It's often the top choice for beginners or any shop that's tight on space. Just as the name implies, it works like a clam opening and closing—the top heating element (the platen) is on a hinge and lifts straight up from the bottom platen.
This design is a huge space-saver. You don't need any extra room on the sides for it to operate, making it the perfect fit for a small workshop, the back room of a retail store, or a home-based setup where every inch matters. Clamshells are also built for speed; that simple up-and-down motion makes for a quick, efficient workflow when you’re knocking out a big run of standard t-shirts.
But there’s a trade-off. Because of the hinge, the top platen comes down at a slight angle. This can cause uneven pressure when you’re working with thicker items like hoodies or sweatshirts. It can also be a little nerve-wracking for new users to lay out transfers when the hot platen is looming right above your hands.
The Swing-Away Heat Press
A Swing-Away press takes a completely different approach. Instead of lifting up, the entire top platen swings out horizontally, moving completely away from the bottom station. Picture a gate swinging open—that’s the motion. This gives you a wide-open, totally unobstructed view of your workspace.
This design delivers two huge wins:
- Safety: By moving that scorching-hot element completely out of the way, the chance of accidentally burning your knuckles drops to nearly zero. You can lay out your garment and position your DTF transfer with total confidence.
- Versatility: The top platen comes down perfectly flat and level every single time. This gives you true, even pressure across the entire surface, making swing-away models the champion for pressing thicker, trickier items like plaques, tiles, and bulky hoodies.
The main drawback? Space. That top platen needs a lot of room to swing out, so these machines demand a much larger footprint than a clamshell with the same platen size. This is something you absolutely have to plan for in a smaller shop.
A Swing-Away press gives you an open field to work on, ensuring perfect placement and even pressure. A Clamshell is like working in a cozy, efficient booth—fast and compact, but with less room to maneuver.
The Draw Heat Press
Finally, we have the Draw press, which is a clever hybrid of the other two. It functions like a sliding drawer. The top platen stays put while you pull the bottom platen out toward you. This gives you the same fantastic, unobstructed access to your layout area as a swing-away, but without needing all that side-to-side clearance.
The draw press is a fantastic compromise. It’s for the business owner who wants the precision and safety of a swing-away but is dealing with the spatial limits that usually point toward a clamshell. You get a safe, easy-to-load workspace while keeping the machine's overall profile compact.
Heat Press Type Comparison at a Glance
Feeling a bit overwhelmed? Not to worry. Use this quick reference table to see how the three main types stack up against each other based on what matters most for your business.
| Press Type | Primary Benefit | Workspace Footprint | Best For |
|---|---|---|---|
| Clamshell | Speed & Compact Size | Small | High-volume t-shirt production and shops with limited space. |
| Swing-Away | Even Pressure & Safety | Large | Thicker items (hoodies, plaques), detailed layouts, and user safety. |
| Draw | Safe Layout & Compact Size | Medium | Shops wanting the benefits of a swing-away without the large side clearance. |
Ultimately, there's no single "best" type—only the best type for your specific needs, products, and workspace. Thinking through these differences now will save you a lot of headaches down the road.
The Specs That Actually Move the Needle
A spec sheet can look like a wall of numbers, but those numbers tell a story. They tell you whether a heat press will be your most reliable employee or a constant source of frustration. Getting this right is what separates a pro from an amateur—and what keeps your customers coming back for vibrant, long-lasting apparel instead of leaving bad reviews about peeling prints.
Let's cut through the jargon and talk about what these specs mean for the t-shirts you’re actually making. This is about connecting the numbers on a product page to the real-world quality of your work.
Platen Size: Your Production Canvas
The platen is the hot plate that does all the work. Its size is probably the single most important choice you'll make because it sets a hard limit on what you can produce. Think of it like a painter's canvas—if it’s too small, your art is going to be limited.
-
15" x 15" Platen: This is a solid, all-around starting point for most shops. It’s perfect for standard chest graphics on t-shirts, smaller logos, and most kids' clothing.
-
16" x 20" Platen: This is the workhorse of the professional world for a good reason. The extra space lets you tackle oversized designs, hoodies, and most importantly, press a full DTF gang sheet in one shot. That alone is a massive time-saver that dramatically speeds up your entire workflow.
Skimping on platen size often forces you to press larger designs in two or more sections. That's a dangerous game. It's incredibly difficult to avoid leaving press lines or getting uneven adhesion, which leads straight to wasted shirts and lost profits. Investing in a bigger platen upfront is one of the smartest things you can do for your business's future.
Why Rock-Solid Temperature Is Non-Negotiable
Consistent, accurate heat is everything. DTF transfers, in particular, are finicky—they need a specific temperature to cure correctly. A swing of just 10-15 degrees can be the difference between a perfect print and a complete failure.
It’s like baking. If your oven has hot and cold spots, you end up with a cake that's burnt on one side and raw in the middle. A heat press is no different. Inconsistent heat across the platen means parts of your transfer won't stick properly. That’s why you see prints that crack or peel off after the first wash; it's almost always a temperature problem, not a transfer problem.
A heat press with poor temperature control is a gamble with every garment. Always prioritize machines with high-quality heating elements that guarantee even, edge-to-edge heat. It protects your inventory, your time, and your reputation.
Understanding the Squeeze: Pressure Systems
Pressure is the final key ingredient. It’s the force that physically bonds the transfer's adhesive into the fabric's fibers for good. Presses generally use one of two ways to apply that force.
Manual Pressure:
Most clamshell and swing-away presses are manual. You crank a knob to set the pressure, then use your own muscle to lock the platen down. This works, but it's entirely dependent on you. When you're pressing dozens of shirts, it's easy for fatigue to set in, and suddenly the pressure you're applying isn't so consistent anymore.
Automatic Pressure:
The more advanced presses use pneumatic (air) or electromagnetic systems to apply pressure for you. These machines are incredible because they deliver the exact same, perfectly calibrated pressure every single time you hit the button. They take the guesswork and physical strain out of the equation, giving you a level of consistency that's nearly impossible to match by hand. For any shop doing serious volume, this is a game-changer.
The industry is clearly moving in this direction. The market for t-shirt printing machines hit $1.2 billion in 2024 and is projected to climb to $1.9 billion by 2033. This growth is being fueled by small businesses just like yours demanding more reliable, efficient, and automated equipment. You can find additional insights online to learn more about the custom apparel market's expansion.
Modern Controls for a Saner Workflow
Finally, look at the machine’s brain—its timer and controls. Old-school presses with clunky analog dials are just asking for trouble because they aren't precise. Modern digital controls, on the other hand, let you lock in the exact time and temperature, giving you repeatable results every single time.
Look for these quality-of-life features that make a real difference:
- Digital Readouts: Bright, clear screens mean fewer mistakes.
- Programmable Presets: The ability to save settings for different jobs (e.g., "DTF on Cotton" or "DTF on Poly") is a huge time-saver and a great way to maintain consistency.
- Auto-Open: This feature is a lifesaver. The press pops open on its own when the timer is done, preventing you from over-cooking a transfer and freeing you up to prep the next shirt.
These aren't just fancy add-ons. They're workflow tools that reduce errors, fight fatigue, and ultimately help you make more money by producing better shirts, faster.
Mastering Your Workflow With DTF Transfers
Getting a great heat press is a fantastic start, but your day-to-day process is what really turns that machine into a money-maker. A solid, repeatable workflow is the secret to getting flawless results, especially when you're working with high-quality Direct-to-Film (DTF) transfers. This isn't just about pushing a button; it's about mastering a sequence of small, critical steps that ensure quality, cut down on mistakes, and make your whole operation run smoother.
Let's walk through the life of a DTF transfer, from the moment it lands on your workbench to the final, vibrant print on a shirt. When you nail this process, every single shirt you make will have that same professional finish, building a reputation for quality that your customers will love. The goal is to get this system down so well that it becomes second nature, freeing you up to think about the bigger picture—like growing your business.
Preparing the Garment and Design
The first step, and one that gets skipped way too often, is the pre-press. Think of it as preparing your canvas. Every garment, especially if it's cotton, holds a surprising amount of moisture from the air. That, plus any wrinkles, can completely ruin a print. A quick 3-5 second press flattens the shirt and zaps the moisture, giving you a perfect surface for the transfer to stick to.
With the shirt prepped, it's all about placement. Use a t-shirt alignment tool or even just a ruler to get your design perfectly centered and straight. A logo that’s even slightly crooked can make an otherwise perfect shirt look sloppy. Don't rush this part—a few extra seconds of lining things up can save a shirt from the scrap pile.
The pre-press isn't an optional step; it's your insurance policy against moisture-related adhesion problems and wrinkles. Skipping it is one of the most common—and easily avoidable—mistakes in t-shirt production.
Dialing In the Perfect Press
Okay, your garment is ready and the transfer is exactly where you want it. Now it's time to press. This is where time, temperature, and pressure all come together to lock that design into the fabric for good. While the exact settings can shift a bit depending on the material you’re working with, having a reliable starting point for DTF is essential.
For a complete rundown of the best settings for different fabrics, our guide on heat press settings for DTF is a great resource to keep bookmarked in your shop. It takes the guesswork out of the equation so you're applying proven parameters for the best possible look and feel.
This is also where you'll see how different printing methods have their own unique needs. DTF is incredibly versatile, but it's worth understanding other techniques, too. For instance, learning about Epson printers for sublimation printing can give you a broader perspective on how heat application changes between different customization methods.
The Critical Moment: The Peel
Once that timer beeps, you've reached the final, crucial step: the peel. DTF transfers generally come in two types, and you absolutely have to know which one you're working with to get a clean result.
-
Hot Peel Transfers: Just like the name says, you peel these immediately after the press opens while the shirt is still hot. It’s a fast, smooth motion that’s perfect when you’re cranking out a big order. A quick, confident peel is the key.
-
Cold Peel Transfers: These demand a little patience. You must let the garment cool down completely—or at least until it’s barely warm—before you even think about peeling. If you peel too soon, you'll pull the ink right off with the film, and the print will be ruined.
Always double-check the peel type for the transfers you’re using. As a final touch, many pros will do a quick second press for about 5-7 seconds, placing a Teflon sheet or parchment paper over the design. This little trick helps meld the ink even deeper into the fabric, making the print more durable and giving it a softer, more matte finish.
Essential Maintenance and Safety for Your Workshop
Your heat press is the workhorse of your shop. When it’s running smoothly, so is your business. But like any critical piece of machinery, it needs a little TLC to keep performing at its peak. Consistent maintenance isn't just about preventing breakdowns; it's about guaranteeing that every single shirt you press looks just as good as the last.
At the same time, we have to talk about safety. A heat press gets incredibly hot—hot enough to cause a serious burn in a split second. Putting simple, firm safety rules in place is non-negotiable. It’s how you protect yourself, your team, and your business from accidents that are almost always preventable. Let's walk through the essential checks and habits that keep your machine dependable and your workspace safe.
Your Routine Maintenance Checklist
Think of this as a quick health check for your press. Spending just a few minutes on these tasks every week or two can save you from the headache of costly downtime and wasted materials. A well-maintained press is a predictable one, and in this business, predictability is money in the bank.
- Clean the Platen: Once the press is completely cool, wipe down the non-stick platen with a soft cloth. A non-abrasive cleaner will lift any leftover ink or adhesive residue that could otherwise mess up your next job.
- Inspect Cords and Connections: Give the power cord a quick once-over, looking for any frays or damage. A damaged cord is a serious hazard. Always plug your press directly into a proper wall outlet, not an extension cord or power strip.
- Verify Temperature Accuracy: This is a big one. Grab an infrared temperature gun and check a few different spots on your platen. This is the fastest way to find cold spots that can cause uneven adhesion and ruin a perfectly good transfer.
This diagram breaks down the simple but crucial three-step process for applying a DTF transfer.
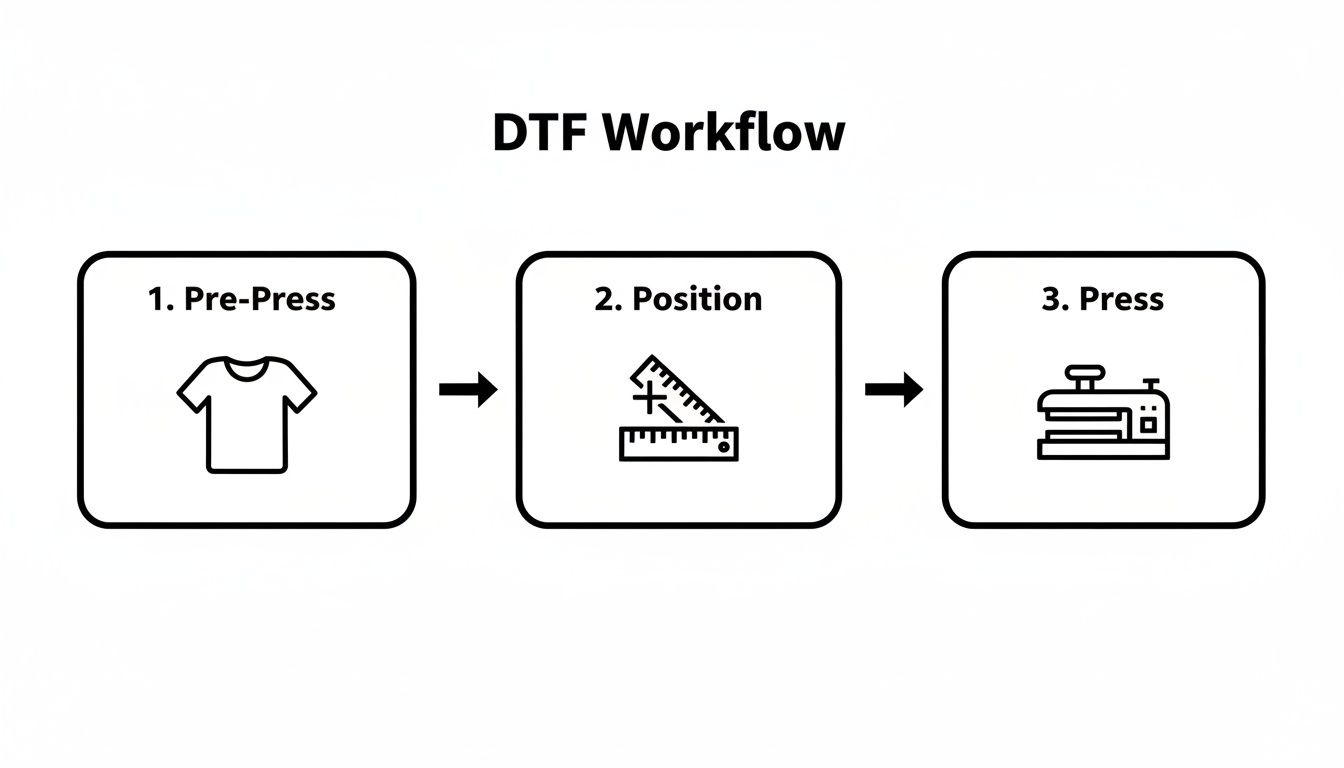
Getting this pre-press, position, and press sequence down to a reflex is fundamental to both your quality control and your workshop's safety.
Building a Safe Operating Environment
Safety isn't about memorizing a list of rules; it's about creating an environment where the safe way is the easy way. The goal is to make these practices second nature, especially when you're deep into a long production run and starting to get tired.
Good ventilation is a great place to start. While today's DTF inks are much safer than the old-school chemicals, running any high-heat equipment in a stuffy room is never a good idea. Make sure you have solid airflow, whether that’s from an open window, a fan, or a proper ventilation system. It makes the whole space healthier and more comfortable to work in.
Safety First, Always: Never, ever leave a heat press unattended while it's on. Treat it like a hot stove—it’s a powerful tool that demands your full attention when it’s in use.
Another simple but effective safety measure is just keeping the place tidy. A cluttered workspace is a trip hazard waiting to happen. Set up clear zones around your press: one spot for blank garments, another for finished shirts, and a place for your tools. A clean setup is a safe setup.
Speaking of tools, our guide on heat-resistant tape for your heat press has some great tips for locking down your transfers perfectly without getting your fingers too close to the heat.
Finally, don't forget personal protective equipment (PPE). A pair of heat-resistant gloves is a cheap investment that can save you from a nasty burn. They give you the confidence to handle garments around the hot platen without worrying about accidental contact.
Making a Smart Investment for Your Business
Let's shift gears from the technical specs and talk about what this decision really is: a major investment in your business's future. Picking the right heat press isn't just about the upfront cost. It's about choosing a workhorse that will pay you back over and over again. A great machine isn't an expense; it's a core asset that expands what you can produce, cuts down on costly mistakes, and ultimately, makes you more money.
Think about it. A reliable press that holds its temperature and pressure means fewer misprints. That’s less money wasted on ruined shirts and pricey DTF transfers, which can seriously eat into your profits. More importantly, when every shirt you send out looks fantastic, you build a reputation for quality that brings customers back.
Calculating Your Return on Investment
It's easy to see how a better machine directly impacts your bottom line. A press with smart features, like an auto-open function or a slide-out platen, lets you work faster and with less fatigue. If a new machine helps you press just 10 extra shirts a day, that small improvement can snowball into thousands of dollars in new revenue over a year.
And the opportunity is definitely there. The custom apparel world is growing fast. The global market for custom t-shirt printing is expected to jump from $8.93 billion in 2025 to $9.88 billion in 2026, with another $2.23 billion in growth projected by 2029. Those numbers point to a huge customer base ready for high-quality products, and the right equipment is what lets you tap into that demand. Learn more about the expanding custom apparel market.
Your Pre-Purchase Buyer Checklist
Before you pull the trigger, take a minute to walk through this checklist. It’s designed to make you think about the real-world fit of the machine in your specific workspace and workflow.
- Workspace Assessment: Have I actually measured my space? Do I have enough room for the machine's footprint, especially if it's a swing-away model?
- Product Line Review: Will a 16"x20" platen (or whatever size I'm considering) handle the biggest designs and items I want to sell, now and in the next year?
- Power Supply Check: Is my outlet and circuit ready for this? Do I have the right kind of power available to run the press safely without tripping breakers?
- Workflow Needs: Will features like auto-open or programmable presets actually make my day easier and faster, or are they just bells and whistles for my situation?
- Long-Term Value: What’s the plan B? I need to think about the warranty, the quality of customer support, and how easy it is to get spare parts down the road.
Your heat press should be a solution, not a new set of problems. Thinking through these questions now prevents expensive buyer's remorse later.
Critical Questions to Ask Vendors
Finally, don’t be shy when talking to suppliers. The way they answer these questions will tell you a lot about the equipment and the company standing behind it.
- What is the full warranty period, and what exactly does it cover? Parts? Labor? The heating element itself?
- How do you test for temperature accuracy and even heat distribution across the platen before it ships?
- If I run into trouble, what does your technical support look like? What are your average response times?
- How easy is it to get replacement parts for this specific model, like a new controller or heating element?
- Can you connect me with or show me reviews from other print shops that are my size?
Asking these tough questions puts you in control. When you combine solid technical knowledge with a smart business mindset, you’ll find a heat press that doesn't just make incredible shirts—it becomes the engine that drives your business forward.
Got Questions? We've Got Answers.
Jumping into the world of heat presses always sparks a few questions. Whether you're just starting out or looking to upgrade, getting clear answers is key to finding the right machine for your t-shirt business. Here are a few of the most common things we get asked by apparel creators.
What Platen Size Should I Get?
A 15"x15" press is a fantastic, versatile starting point. It's the workhorse for most standard jobs—think chest graphics, youth sizes, and most logos. If you're building your business from the ground up, this size will serve you well.
That said, if you have plans for oversized graphics, regularly print on larger items like hoodies, or want to press a full DTF gang sheet in one go, a 16"x20" press is a much better long-term investment. The bigger surface area means you can tackle larger designs in a single press, which is a massive boost to your workflow and production speed.
How Big of a Deal Is Even Pressure?
It's everything. Honestly, even pressure is non-negotiable for creating durable, professional-looking prints that you can be proud of. This is especially true with DTF transfers, where uneven pressure means parts of your design won't bond correctly to the fabric.
When that happens, you get prints that peel, crack, or fade after just a few washes. That’s a fast track to unhappy customers and a damaged reputation.
Try this pro tip: Use the "dollar bill test" to check for even pressure. With the press cold, close it and slide a dollar bill under each of the four corners. If you feel about the same amount of resistance when you pull on each bill, your pressure is probably well-distributed.
Can't I Just Use a Home Iron?
For a one-off hobby project? Maybe. For a professional apparel business? Absolutely not. A home iron is a recipe for disaster because it simply can't provide the two essential ingredients for a successful transfer: consistent, high heat and heavy, even pressure.
Without both of those, a DTF transfer can't cure properly and bond with the fabric fibers. You'll end up with a print that feels stiff, looks amateur, and will likely crack or wash away almost immediately. Investing in a real heat press isn't just a suggestion; it's a fundamental step in producing the kind of quality that paying customers expect and deserve.
Ready to create vibrant, durable custom apparel with transfers that never disappoint? Trust Cobra DTF for premium, American-made DTF transfers that bring your designs to life. Explore our high-quality DTF transfers today!