UV DTF Printing The Ultimate Guide for Print Shops
Picture this: you've just created a stunning, super-tough sticker. It wraps flawlessly around a curved coffee mug, sticks tight to a glass window, and even brands a piece of metal—no special prep or coatings needed. That’s the power of UV DTF printing in a nutshell.
This technology is all about creating what are essentially next-level decals. It gives you a way to transfer intricate, durable designs onto an incredible variety of hard, smooth surfaces with surprising ease.
Your Guide to UV DTF Printing
At its core, UV DTF is a clever hybrid. It brings together the muscle of UV-curable inks and the simplicity of a transfer film process. Instead of printing directly onto an object, which can be tricky, you print the design onto a special sheet first. What you get is a ready-to-apply transfer that acts like a premium, high-performance sticker.
Think of it as a smart, two-stage system for custom graphics. The first part happens in the printer, and the second is the simple, hands-on application to your product. It’s this separation of printing and applying that makes UV DTF so incredibly versatile.
The Core Concept A Two-Part System
The whole magic trick relies on two special films, known as the "A" and "B" films.
- The "A" Film (Print Film): This is the base layer where your design comes to life. A UV printer lays down the ink in a specific order: first your color, then a solid white ink for pop and opacity, and finally a tough layer of varnish for protection.
- The "B" Film (Transfer Film): Once the design is printed, this second sheet is laminated right on top. It has a powerful adhesive that’s designed to grab onto the ink and, eventually, your final product.
These two films work together to sandwich the UV-cured ink, creating a self-contained graphic ready for transfer. When it's time to decorate, you just peel the printed design off the "A" film's backing, press it firmly onto your item, and peel away the top carrier sheet. The vibrant, slightly raised design is left behind, bonded perfectly to the surface.
This is a totally different beast from standard Direct-to-Film (DTF) printing, which is built for t-shirts and other fabrics and relies on heat to transfer the design. UV DTF is all about hard goods.
Why It's a Game Changer for Print Shops
The biggest win with the UV DTF process is that it completely sidesteps the headaches of direct-to-object printing. You no longer have to figure out how to load a bulky helmet, a weirdly shaped thermos, or a delicate piece of glass into a printer.
By creating a transfer first, you gain the freedom to apply intricate, full-color designs to virtually any hard surface, regardless of its shape or size. This opens up a world of product customization that was previously complex or impossible to achieve efficiently.
This kind of flexibility can blow the doors wide open for a print shop. Suddenly, you can say "yes" to one-off custom jobs or small-batch orders for things like phone cases, awards, metal signs, and glassware without the massive setup time other methods demand. It's a fantastic tool for adding new revenue streams and tapping into the huge market for personalized gear.
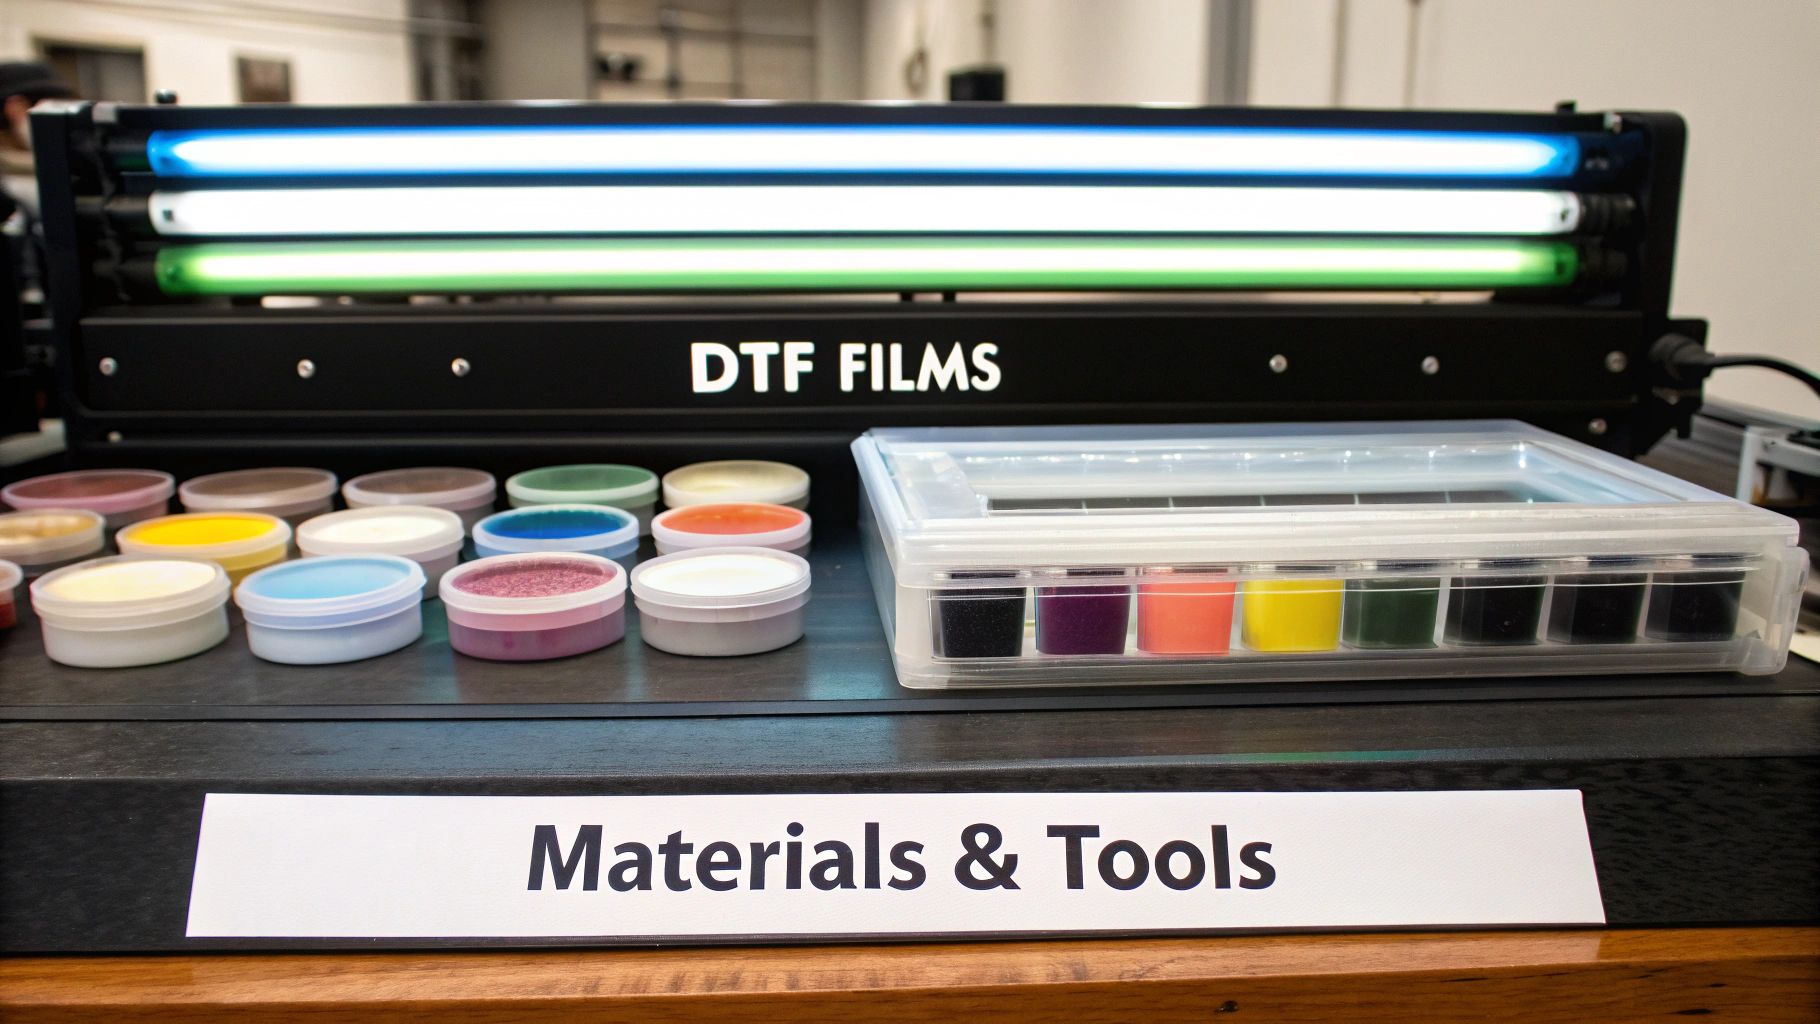
Your Essential UV DTF Printing Toolkit
So, you're ready to jump into UV DTF printing? Great. Moving from theory to practice means getting the right gear in your shop. Think of it like setting up a professional kitchen—each piece of equipment has a critical role, and they all need to work together seamlessly to create a fantastic final product. Let's walk through your shopping list and break down what each component does.
The buzz around this technology isn't just hype. The global UV DTF market is on track to hit around $1.5 billion by 2033, growing at a 10.5% compound annual rate from 2025 to 2033. This explosion is driven by industries like fashion and advertising that need high-quality, versatile printing for everything from custom apparel to slick promotional gear. You can find more insights about the expanding UV DTF market and see what's fueling the demand.
The UV Printer: The Heart of the Operation
Everything starts with the UV flatbed printer. This isn't your standard inkjet or even a regular DTF machine. This printer is purpose-built to handle UV-curable inks, and its secret weapon is the integrated UV LED lamp that cures the ink the instant it hits the film.
That immediate curing process is what makes the whole thing work. It allows the printer to lay down color, white ink, and varnish in precise layers without any risk of bleeding or smudging. For a small shop just starting out, a desktop-sized UV printer is often the perfect entry point. It gives you solid production capability without taking over your entire workspace. Just make sure the model you choose can smoothly handle the roll-fed "A" film.
The A and B Films: The Magic Duo
The real trick to creating a transferable decal is the two-part film system. These films are engineered to work as a team, and skimping on quality here is a mistake you don't want to make. Using a matched, high-quality set is non-negotiable if you want professional results.
- "A" Film: This is your print base. It's a clear film with a special release coating where the printer lays down the ink. Its only job is to hold that cured ink perfectly until you're ready to laminate.
- "B" Film: This film is all about the adhesive. It’s a sheet of strong, clear adhesive with a paper backing. Once the "A" film is printed, you apply the "B" film over the top, and it sticks only to the ink.
Think of it this way: the "A" film is the artist's canvas, and the "B" film is like a special frame that lifts the finished art right off the easel, ready to be placed on a new wall. Together, they create a perfect, ready-to-apply sticker.
UV Curable Inks: The Color and Muscle
Your final product is only as good as the ink you put down. UV DTF printing demands a specific set of UV-curable inks designed to react instantly to the printer's UV lamp. When that light hits, the liquid ink hardens into a durable, slightly raised layer that can take a beating.
The standard ink setup you'll need includes:
- CMYK: Cyan, Magenta, Yellow, and Black are your core colors, creating the full spectrum of your design.
- White Ink: This is a non-negotiable base layer. It's printed first, under the colors, to ensure your design pops on any surface, light or dark.
- Varnish: This is the finishing touch—a clear, protective topcoat that adds a beautiful gloss and, more importantly, gives the sticker serious scratch and water resistance.
The Laminator: Putting It All Together
The last major piece of hardware you'll need is a laminator. After your design is printed and cured on the "A" film, the laminator's job is to press the "B" film onto it with firm, even pressure. This step is what makes the adhesive on the "B" film bond to the printed ink.
You don't need anything too fancy; a cold-press laminator will do the job just fine. The most important feature to look for is adjustable pressure control. This lets you dial in the perfect setting to get a bubble-free application every time. Don't underestimate this step—bad lamination is a primary cause of failed transfers and wasted materials.
To make it even clearer, here's a quick rundown of the essential gear and what to look for when you're shopping.
Essential UV DTF Printing Equipment and Supplies
| Component | Primary Function | Key Feature to Look For |
|---|---|---|
| UV Flatbed Printer | Prints and instantly cures the ink layers onto the "A" film. | Built-in UV LED lamp, compatibility with roll-fed "A" film, desktop size for small shops. |
| "A" Film | The clear, coated sheet that receives the printed ink. | High-quality release coating, compatibility with your printer and "B" film. |
| "B" Film | The adhesive transfer sheet applied after printing. | Strong, clear adhesive that bonds only to ink, easy-to-peel backing. |
| UV Curable Inks | Provide the color, opacity, and durability of the final sticker. | Full CMYK + White + Varnish set, good adhesion, and scratch resistance. |
| Laminator | Bonds the "B" film to the printed "A" film. | Adjustable pressure control, even roller pressure, cold-press capability. |
Getting these core components right from the start will save you a ton of headaches and set you up for producing high-quality, durable transfers your customers will love.
A Step-by-Step Walkthrough of the UV-DTF Printing Process
Knowing the gear is one thing, but seeing how it all fits together is where the magic really happens. The UV-DTF workflow is a precise dance, a series of steps that take your digital idea and turn it into a tough, ready-to-apply decal. If you want consistently flawless results, you have to master this sequence.
Think of it like baking a layer cake. Every step has to be done right, and in the right order, for the final product to come out perfect. If you rush it or mix up the steps, the whole project can fall flat.
This infographic gives you a quick visual of the entire workflow.
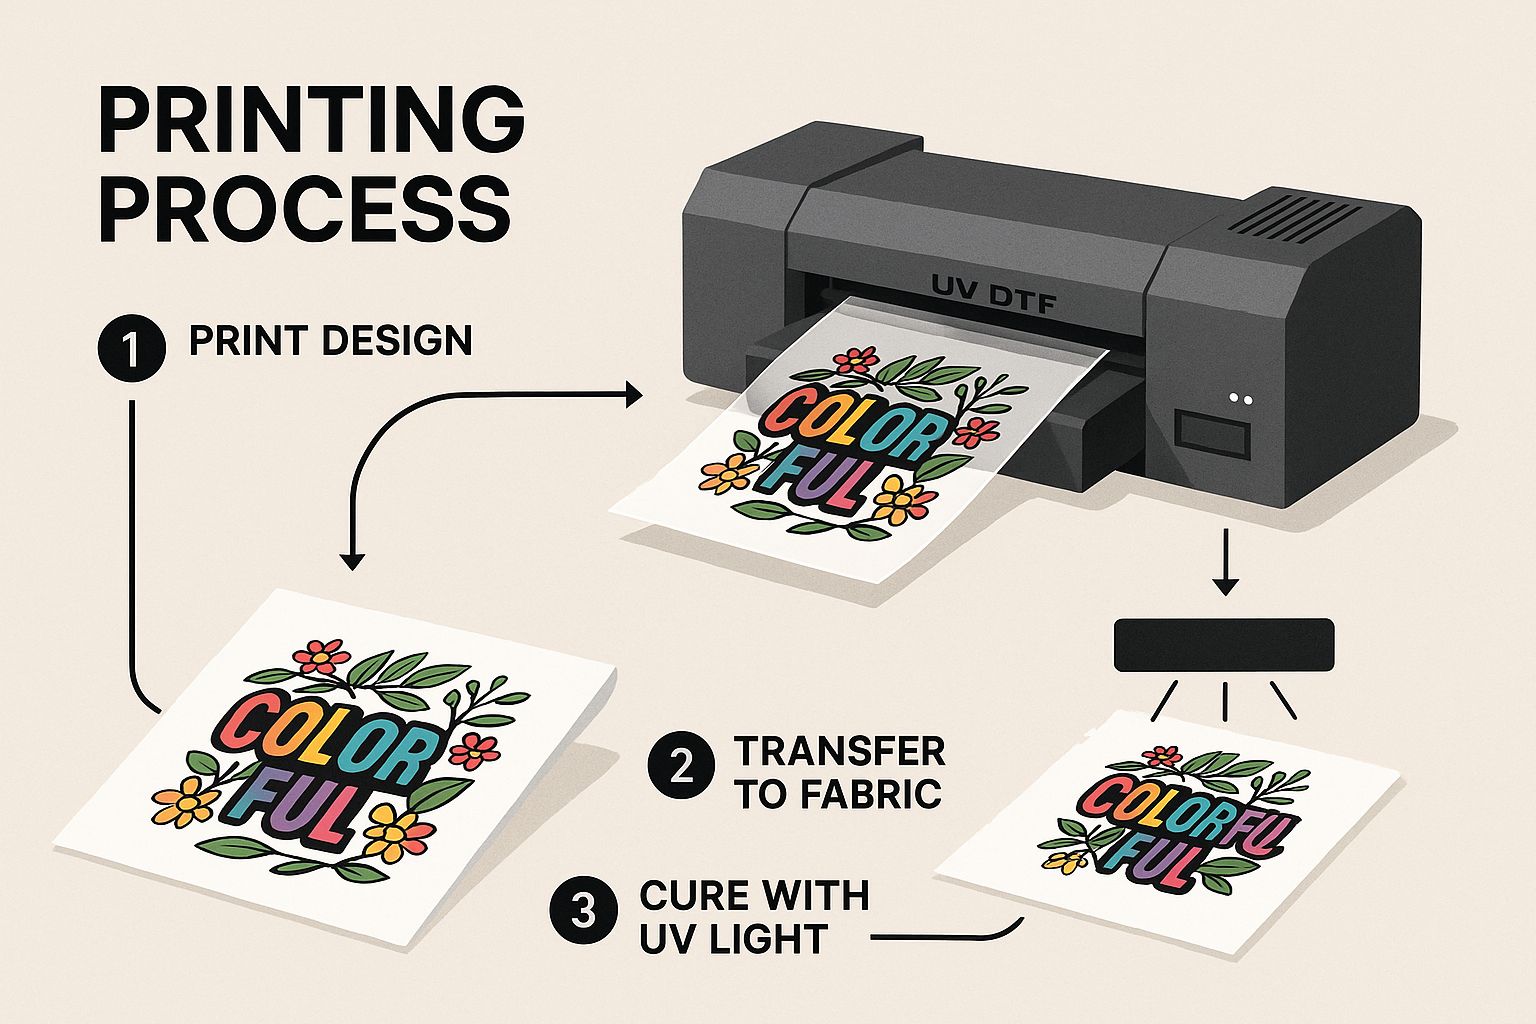
As you can see, it’s a pretty straightforward path from the printer to the finished product. Each machine has a critical job to do. Let's break down exactly what happens at each stage.
Step 1: Prep Your Digital Artwork
Before a single drop of ink is laid down, your success starts on the computer. Getting your file prep right is absolutely non-negotiable for a quality transfer. This is where your design software, typically a RIP (Raster Image Processor), comes in to set up the crucial ink layers.
You’ll need to configure the software to print these layers onto the "A" film in a very specific order:
- Color Layer (CMYK): This is your actual design, the full-color image that gets printed first.
- White Ink Layer: Next, a solid layer of white ink goes down right on top of the color. This white base is what makes your design pop, ensuring the colors stay bright and true no matter what color surface you stick it on.
- Varnish Layer: Finally, a clear coat of varnish is applied over the white ink. This is the secret sauce that gives the transfer its durability, a beautiful gloss, and that all-important scratch resistance.
Nailing these layers is what gives the final transfer its professional look and feel.
Step 2: Print onto the A Film
With your file ready to go, it’s time to hit "print." The UV printer pulls the "A" film from the roll and starts the simultaneous process of printing and curing.
As the printhead lays down each layer of ink, the built-in UV LED lamp trails right behind, instantly hardening it. This flash-curing is what keeps the inks from bleeding into each other, giving you those razor-sharp edges that define a professional print. You'll see your design appear on the film in reverse, all set for the next stage.
Pro Tip: Before you start a big print run, always run a quick nozzle check. Just one clogged nozzle in your white or varnish layer can ruin an entire sheet of transfers, costing you serious time and money. This check takes seconds but can save you hours of headaches.
Step 3: Laminate the A and B Films
Once the "A" film is fully printed and cured, it’s time to move over to the laminator. Here, you'll introduce the "B" film—the clear adhesive transfer sheet. You’ll carefully lay the "B" film over your printed "A" film, making sure the sticky side is facing the ink.
The whole point here is to get a perfect, bubble-free bond. Run both films through your cold-press laminator with firm, even pressure. This squeezes the adhesive from the "B" film onto the cured ink only, not onto the blank parts of the "A" film. It’s this selective adhesion that makes the whole transfer process work.
Step 4: Apply the Finished Transfer
And just like that, you have a finished UV-DTF transfer, ready to bring a product to life. The final application is pretty simple, but it requires a clean surface and a steady hand.
Here's how you do it:
- Prep the Surface: First things first, clean the item you’re decorating. A wipe-down with isopropyl alcohol gets rid of any dust, oils, or fingerprints that could mess up the bond.
- Cut and Peel: Cut your design out from the larger sheet. Now, carefully peel the printed design (which is stuck to the "B" film's adhesive) away from the "A" film’s backing.
- Position and Press: Line up the transfer on your item. Once you're happy with the placement, press it down firmly from the center out. Use a squeegee or your fingers to push out any air bubbles.
- Remove the Carrier Film: Give the design one final, good rub to ensure it’s stuck on tight. Then, slowly peel away the top clear carrier film. All that should be left behind is your vibrant, durable design.
The result is a slightly raised, glossy graphic that looks like it was printed directly on the object.
Why UV DTF is a Game-Changer for Print Shops
If you’re in the printing business, the mission is always the same: create amazing products for your customers, do it efficiently, and turn a healthy profit. We’ve all worked with the old standbys like screen printing and sublimation, and they definitely have their moments. But UV DTF printing has stormed onto the scene, solving many of the nagging problems that hold those older methods back. It’s a technology that completely redefines what you can do, especially with small-batch, high-value custom jobs.
The magic of UV DTF really boils down to one word: versatility. Forget being boxed in by material limitations. Sublimation, for example, pretty much locks you into polyester-coated items or light-colored fabrics. With UV DTF, you can print on almost any hard, non-porous surface you can think of—wood, metal, glass, plastic, ceramics, you name it. This blows the doors wide open on your product catalog without forcing you to mess with special coatings or treatments.
Breaking Free from Material Constraints
One of the biggest headaches in custom printing is playing matchmaker between a printing process and the item itself. Screen printing often demands different inks and setups for different materials, and direct UV printers can really struggle with anything that isn't perfectly flat.
UV DTF neatly sidesteps all of that by turning the print into a universal transfer.
Think of it like creating a super-premium, industrial-strength sticker. Since the printing happens first and the application happens second, you can suddenly decorate things that would never fit inside a printer.
- Weird Shapes Are No Problem: Got a customer who wants their logo on a helmet, a curvy water bottle, or even a guitar? Direct printing would be a nightmare. But laying down a flexible UV DTF transfer? Simple.
- No Pre-Treatment Necessary: To sublimate on a mug or a piece of metal, you need one with a special polymer coating. UV DTF transfers stick directly to the raw material, which cuts out a huge amount of time, labor, and cost.
This kind of material freedom is a massive competitive advantage. It lets you say "yes" to more jobs—especially the unique, creative ones that command higher prices. You're no longer stuck just printing on flat coasters and phone cases.
A Finish That Looks and Feels Premium
Beyond its incredible flexibility, UV DTF just produces a tougher, more impressive final product. The process builds up layers of ink and then seals it all with a cured varnish topcoat. What you get is a decal with serious staying power.
These prints are incredibly resistant to scratches, water, and general wear and tear, making them perfect for things that get handled a lot, like phone cases, travel mugs, and keychains.
The finish itself is a huge selling point. The cured ink and varnish create a slightly raised, 3D effect with a gorgeous gloss. It's something customers can immediately see and feel, giving the product a tangible sense of quality that you just don't get with flat prints. It’s an easy way to boost the perceived value of an item without complicating your workflow.
The print world is catching on fast. The UV DTF printing market is projected to grow at a compound annual growth rate of 6.0%, hitting $3.92 billion by 2030. That growth is being fueled by the explosion of e-commerce and the simple fact that this method is incredibly cost-effective for small, custom runs. Businesses are jumping on this trend, and you can discover more insights about hot-selling UV DTF printers to see what’s driving the demand.
UV DTF Printing vs Other Methods
To really get a feel for why UV DTF is making such a splash, it helps to see how it stacks up against the familiar players. Let's put it head-to-head.
This table gives a quick snapshot of the key differences:
| Feature | UV DTF Printing | Screen Printing | Sublimation |
|---|---|---|---|
| Material Compatibility | Extremely wide (metal, glass, wood, plastic) | Limited; requires different inks/setups | Limited to polyester or poly-coated items |
| Setup Time | Very low; digital process | High; requires screens for each color | Low; digital process |
| Best for Small Runs | Excellent; no setup cost per design | Very poor; cost-prohibitive | Excellent; ideal for one-offs |
| Color Vibrancy | High, with an opaque white base | Good, but multi-color is complex | High, but only on light backgrounds |
| Durability | Excellent scratch & water resistance | Good, but can crack or peel over time | Excellent; ink becomes part of the material |
| Textured Effects | Yes, noticeable 3D gloss finish | No, prints are flat | No, ink is infused into the surface |
As you can see, UV DTF manages to combine some of the best features of other technologies while leaving their biggest drawbacks behind. It’s a single, streamlined process that delivers durable, premium results on the widest possible range of products.
While UV DTF is the king of hard goods, its "print-first, apply-later" philosophy has parallels in the apparel world. If you’re also decorating t-shirts and hoodies, our guide comparing DTF vs DTG printing is a must-read for understanding the top technologies in that space.
Unlock New Revenue with UV DTF Applications
Knowing how the technology works is one thing, but figuring out how to make money with it is what really counts. The magic of UV DTF printing isn't just in the tech itself—it's in the massive range of high-value products you can suddenly create. Let's move past the "how" and dive into the "what"—the actual applications that can open up brand-new revenue streams for your print shop.
The beauty of UV DTF is its versatility. You can finally move beyond the same old print jobs and tap into niche markets that command higher prices. Because these transfers stick to almost any hard surface, your product catalog is suddenly as big as your imagination. You can start saying "yes" to those one-off, tricky custom requests that used to be too much of a headache to even consider.
Tapping into the Promotional Products Market
One of the easiest and most profitable markets to jump into is promotional products. Businesses are always on the hunt for unique branded swag for trade shows, new employee kits, or for their loyal customers. With UV DTF, you can pump out these items efficiently, even if it's just a small batch.
Think about offering things like:
- Branded Drinkware: Imagine putting crisp, full-color logos on coffee mugs, travel tumblers, and water bottles—all without needing any special coatings.
- Custom Office Supplies: Create personalized pens, USB drives, or notebooks that have a premium, slightly raised feel.
- Unique Keychains and Awards: Produce durable, glossy graphics on acrylic, metal, or wood for trophies and memorable giveaways.
This market is always buzzing. Your ability to turn around high-quality, custom gear on a dime gives you a serious advantage over shops still stuck with slower, more limiting methods.
Expanding into Personalization and Tech
People love personalized stuff. It's a trend that's only getting bigger. Everyone wants products that scream "this is me," and UV DTF is the perfect tool for the job. You can create vibrant, scratch-resistant designs on the very items people carry with them every single day.
This move toward on-demand customization is a huge reason the digital printing world is growing. The DTF Printer Market was valued at USD 2.53 billion in 2024 and is expected to hit USD 4.25 billion by 2032. It’s all driven by tech that cuts down setup time and lets you put unique designs on almost anything. You can dig deeper into these trends in the full 2024 DTF printer market analysis.
Check out these high-demand ideas:
- Custom Phone Cases: The possibilities are endless. Apply detailed, tough-as-nails artwork to blank phone cases.
- Personalized Laptop and Tablet Skins: Give customers a way to deck out their expensive gadgets with graphics that are durable but still removable.
- Home Decor and Signage: Create one-of-a-kind designs on glass, ceramic tiles, or small wooden signs for a unique home goods line.
By zeroing in on these niches, you can become the go-to shop for premium, personalized gear. This not only brings in customers directly but also forces you to get smart about how to reduce production costs by making the most of your materials on these smaller, high-margin items. This is your roadmap for turning a cool piece of tech into a real growth engine for your business.
Got Questions About UV-DTF? We've Got Answers.
Jumping into any new printing technology is going to come with a lot of questions. Even after you get the hang of the workflow, you’re still left wondering about the practical stuff—durability, costs, and the rookie mistakes to avoid. This section is all about tackling the most common questions we hear from shop owners just like you.
Think of this as the last piece of the puzzle. We’re getting into the nitty-gritty so you can move forward with confidence and a clear picture of what it really takes to make this work.
How Durable Are UV-DTF Prints, Really?
This is usually the first thing people ask, and for good reason. You need to sell products that are built to last. The short answer? UV-DTF prints are exceptionally durable. In many cases, especially on items that get handled a lot, they're even tougher than a direct UV print.
The secret is in the construction. You have a flexible layer of UV-cured ink, a powerful adhesive backing, and a protective varnish topcoat. This combination creates a seriously robust decal that bonds tight to just about anything. It’s a multi-layer shield that stands up incredibly well to scratches, water, and general abrasion.
While a direct UV print is tough on its own, the transfer film application of UV-DTF gives it an extra layer of resilience. This makes it a fantastic choice for high-contact items that see daily wear and tear.
- Phone Cases: They’re constantly being dropped, handled, and shoved into pockets.
- Drinkware: Think about mugs and tumblers that are used and washed over and over.
- Keychains: These things live a rough life, constantly rubbing against keys and getting tossed around.
Can I Just Use My Regular DTF Printer for This?
Let’s clear this up right away, because it's a critical point: No, you absolutely cannot use a regular DTF printer for UV-DTF printing. Trying to do so would be a quick and very expensive mistake. The two technologies are fundamentally different from the ground up.
Here’s why they don’t mix:
- Different Inks: Your standard DTF printer uses water-based pigment inks made for fabric. UV-DTF, on the other hand, requires specialized UV-curable inks that harden almost instantly when hit with UV light.
- Different Curing: A normal DTF print is cured with heat—either in an oven or with a heat press—to melt the adhesive powder. A UV-DTF print is cured on the spot by a UV LED lamp built right into the printer.
If you were to run UV inks through a standard DTF machine, the ink would never cure. Worse, it would almost certainly clog and ruin your printhead and ink lines, leaving you with a very expensive paperweight. You must have a dedicated UV flatbed printer for this process.
What’s the Average Startup Cost?
Alright, let's talk budget. For any small business, this is a huge piece of the puzzle. To get a complete, entry-level UV-DTF printing setup off the ground, you can typically expect to invest somewhere between $5,000 and $15,000.
That initial investment will generally cover the essentials you need to start producing:
- A small-format UV flatbed printer
- A cold-press laminator
- Your first batch of A/B films and UV inks (CMYK, White, and Varnish)
Of course, prices can go up from there for bigger, faster printers with more bells and whistles. And while that initial cost is more significant than some other methods, the incredible versatility and low cost-per-print on custom jobs can lead to a surprisingly fast return on your investment.
By opening up your shop to a whole new world of products and materials, a UV-DTF setup can quickly pay for itself. You'll be able to capture those high-margin orders that were previously out of reach, making it a smart investment in your shop's future.
What Are the Most Common Mistakes to Avoid?
Getting the hang of any new process takes a bit of practice, but you can save yourself a ton of time and wasted material by learning from a few common beginner mistakes. Most of the time, problems pop up when one of three key steps gets rushed.
Here are the top pitfalls to watch out for:
- Bad Lamination: This is the #1 reason transfers fail. If you rush this step or don't apply even pressure, you can trap tiny air bubbles between the A and B films. Those bubbles create weak spots where the adhesive never makes contact with the ink, which means your transfer will peel or won't stick completely.
- Wrong Printer Settings: Don't just hit "print" and hope for the best. Forgetting to lay down enough white ink will leave your design looking washed out and weak, especially on dark items. Skipping the varnish layer strips away the print’s main defense against scratches and moisture. Always take a moment to double-check your settings in the RIP software before you start a job.
- Poor Surface Prep: You could have the stickiest adhesive in the world, but it won't do a thing on a dirty surface. If you don't properly clean the item with something like isopropyl alcohol, you're leaving behind a layer of dust, oils, and fingerprints. That junk acts as a barrier, preventing the adhesive from getting a solid grip and causing your decal to lift or peel right off.
Ready to see how high-quality transfers can elevate your product offerings? Cobra DTF provides premium, USA-made DTF solutions that deliver vibrant, durable results every time. Visit us at cobradtf.com to see how our products can help your business grow.