

Flawless Iron Transfer Shirts: Guide to DTF & Durability
You print a shirt, peel the carrier, and it looks great on the table. Then the first wash happens. The edges lift, the image cracks, or a dull rectangle shows up around the design. That's the moment a lot of people realize the craft-store version of heat transfers and the sellable version are not the same thing.
If you're making iron transfer shirts for a business, or even for a side hustle that needs repeat customers, failure gets expensive fast. A ruined blank costs money. A bad finished shirt costs more. A refunded order costs even more because it also takes your time and your reputation.
That's why the details matter. The custom t-shirt printing market was valued at $5.16 billion in 2024 and is projected to reach $9.82 billion by 2030, with 11.5% CAGR from 2025 to 2030, according to Printful's t-shirt industry statistics roundup. Small shops, e-commerce sellers, and independent brands are a big part of that growth. The opportunity is real. So is the quality gap between hobby methods and production methods.
Beyond the Basics of Iron Transfer Shirts
A common assumption is that if heat makes the transfer stick, an iron should be enough.
That assumption works just well enough to keep people trying it. You can make a shirt that looks acceptable for a photo, a one-day event, or a quick gift. But once the goal becomes consistency, repeatability, and something you can sell, the weak spots show up fast.
What a failed shirt usually tells you
A transfer that peels at the corners usually wasn't pressed evenly. A design that cracks early often never bonded correctly in the first place. A hazy box around the artwork usually means too much unused transfer area stayed attached to the garment. None of those problems are random.
They come from one root issue. The process wasn't controlled well enough.
A shirt can look finished and still be under-pressed.
That's the difference between hobby advice and shop-floor advice. Hobby advice focuses on getting the image onto fabric. Shop-floor advice focuses on whether the shirt still looks good after wear, washing, folding, packing, and delivery.
Where the business opportunity sits
The reason this matters goes beyond technique. The custom shirt business is crowded, but buyers still reward clean prints, soft feel, and wash durability. Shops that get those three things right keep customers. Shops that don't usually end up trapped in remake work and discounting.
Iron transfer shirts still have a place. They're useful for testing designs, making short runs, and decorating blanks without the setup involved in screen printing. But if you want dependable output, you need to think like a producer, not like someone following the back of a package.
That means choosing the right transfer type, using the right press, and accepting a simple truth early. Household irons are a workaround. They are not a production tool.
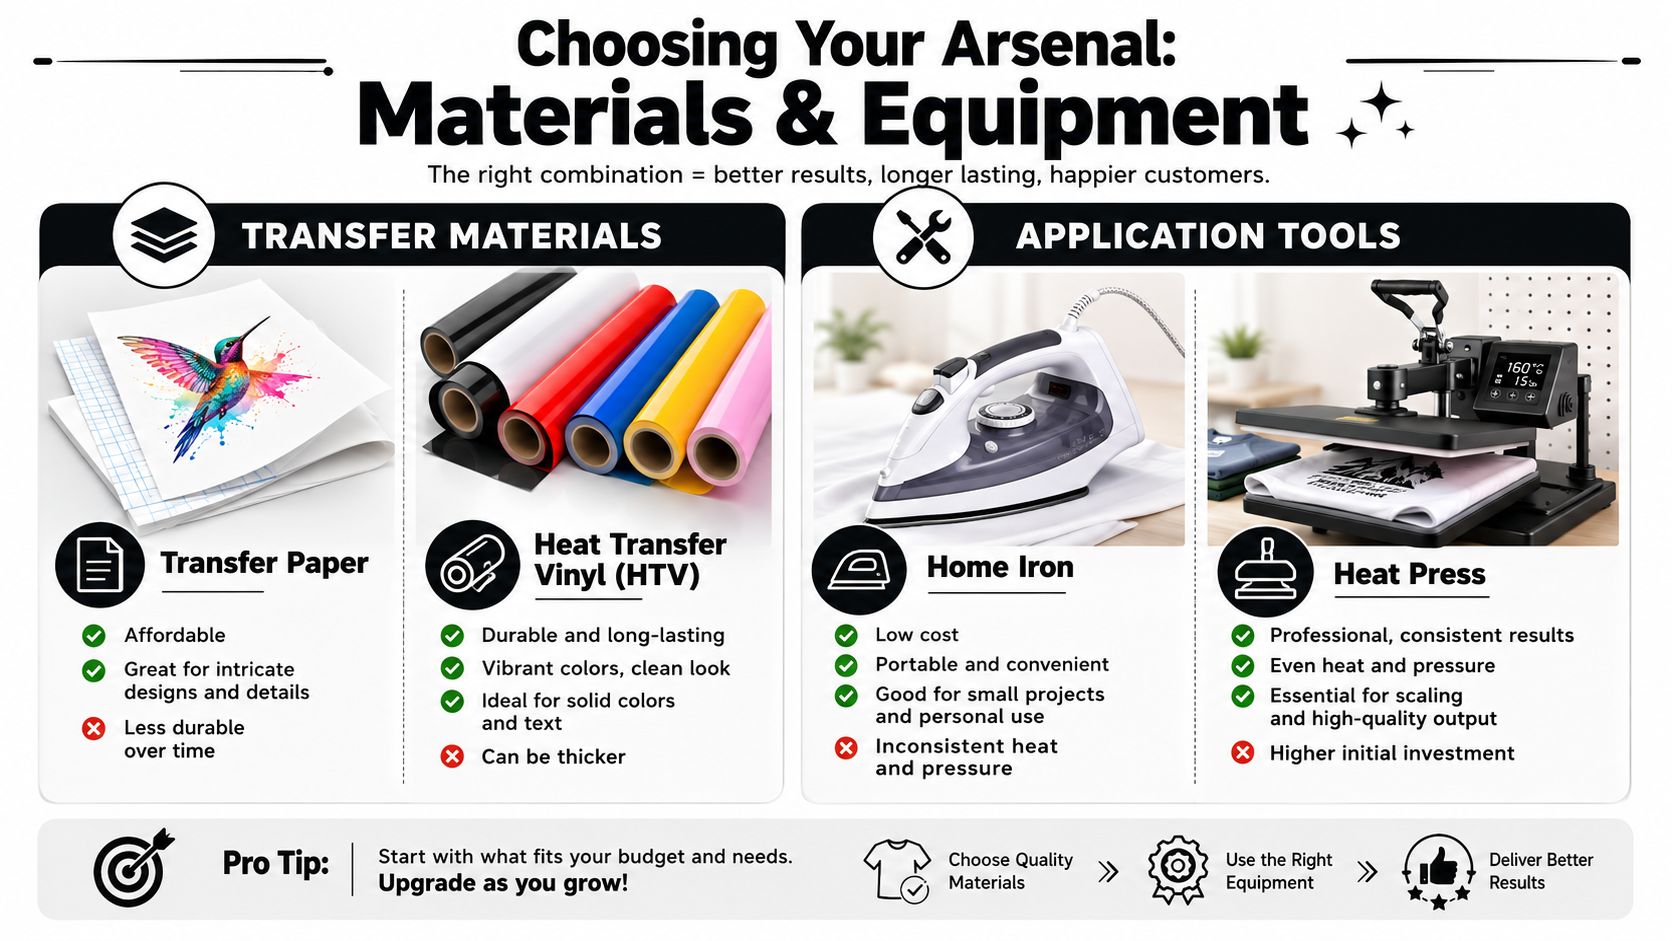
Choosing Your Arsenal Materials and Equipment
The shirt quality you end up with is mostly decided before you press anything. Bad blanks, weak transfers, and the wrong heat tool create problems that no “extra few seconds” will fix.
For iron transfer shirts, there are really two decisions that matter most. First, what transfer material are you using? Second, what machine is applying it?
Transfer paper versus DTF transfers
Traditional transfer paper is where many makers begin. It's easy to access, familiar, and useful for one-offs. It can work for simple projects, especially when you need a fast sample or a single shirt for personal use.
But transfer paper has limits that show up quickly in paid orders:
- Finish and feel: It often leaves a more noticeable hand on the garment.
- Tolerance for error: Small mistakes in cutting, pressing, or peeling show up immediately.
- Durability concerns: It's more vulnerable to cracking, fading, and edge failure over time.
DTF transfers are a different category. They're better suited to a shop that needs sharp color, cleaner production, and more reliable results across different shirt types. They also make life easier when you're decorating more than one garment at a time because the process is more repeatable.
If you're deciding what shirts to pair with transfers, this guide to best shirts for DTF is useful because garment choice affects feel, adhesion, and final presentation as much as the transfer itself.
Household iron versus heat press
This is the defining fork in the road.
A household iron is cheap and available. That's its strongest argument. For casual use, that may be enough. For business use, it usually isn't.
A heat press gives you what a shirt shop needs:
| Tool | Strength | Weak spot | Best use |
|---|---|---|---|
| Household iron | Low barrier to entry | Uneven heat and uneven pressure | Personal projects, occasional use |
| Heat press | Controlled temperature and pressure | Higher upfront cost | Sellable apparel, repeat production |
The problem with an iron isn't just that it's less powerful. The bigger issue is inconsistency. You're moving it by hand, the soleplate has holes and grooves, and the pressure changes from one second to the next. That means one part of the design can bond while another part barely makes contact.
Practical rule: If you plan to sell the shirt, press it with equipment built to press shirts.
Garment choice matters more than beginners think
Cotton is forgiving. Blends can also work well. Synthetics are where many people get into trouble.
A lot of home instructions assume high heat and cotton-friendly settings. That's fine until you start decorating performance wear, fashion polyester, or stretchy blends. Then you're balancing transfer adhesion against the risk of scorching, shine marks, or fabric distortion.
Use these garment-selection habits:
- Start with stable blanks: Midweight cotton and cotton-rich blends are easier to dial in than slick, thin athletic fabrics.
- Match the transfer to the end use: Casual merch, uniforms, event shirts, and premium retail pieces don't all need the same decoration method.
- Check the fabric before production: Texture, weave, coating, and stretch all affect how the transfer bonds and how the print looks after pressing.
What actually works in a small shop
For samples or quick personal use, transfer paper can still be handy. For commercial output, a quality heat press and quality DTF transfers are the setup that gives you the best chance of delivering shirts you won't be embarrassed to hand over.
That doesn't mean every iron-made shirt fails. It means the failure rate, the rework, and the unpredictability are built into the process. Once you've remade enough shirts, the “cheap” option stops being cheap.
The Perfect Press A Step-by-Step Application Guide
Clean application comes from control. Good presses aren't magic. They just let you repeat the same conditions every time.
For standard light-shirt transfer paper, the manufacturer instructions are demanding: a dry iron on cotton/high at 375°F/190°C with heavy pressure for 3 minutes for a full sheet, 90 seconds for a half sheet, or 45 seconds for a quarter sheet, followed by a 2-minute cooling period before peeling, according to Avery's light fabric transfer ironing instructions. The same instructions also warn against using an ironing board because the padded surface blocks the pressure and heat transfer needed for proper adhesion.
That's exactly why irons frustrate so many people. The process demands precision that the tool doesn't deliver well.
Start with garment prep
Before any transfer touches the shirt, prep the blank.
- Inspect the shirt. Look for lint, wrinkles, moisture, and pressing marks.
- Pre-press the garment. A short pre-press flattens the print area and drives out moisture.
- Set the shirt square on the platen. Crooked loading causes crooked prints.
- Check seams and collars. Raised seams can tilt the pressing surface and create uneven bonding.
Skipping prep doesn't always ruin the shirt. It does make every later step less reliable.
Placement and securing the transfer
Alignment separates a clean-looking shirt from one that feels homemade.
Use a consistent placement method. That might be a ruler, a placement guide, or a measured workflow you repeat for every size. Don't eyeball production work if you want matching results across a batch.
Once the transfer is positioned, make sure it won't shift when the press closes. A tiny slide during closing is enough to throw off a centered chest print.
If a transfer moves during setup, stop and reset it. Trying to “save it” usually creates a shirt you can't sell.
Why iron instructions are hard to execute
With a household iron, the operator has to create pressure manually while also trying to cover the image evenly. That's already difficult on a small graphic. On a full-size front print, it becomes a struggle.
These are the usual weak points:
- The iron doesn't press evenly: Steam holes create cooler zones.
- Your pressure changes constantly: Hand pressure isn't uniform.
- You're often using the wrong surface: Padded boards absorb force.
- Timing gets sloppy: Long applications are hard to hold consistent by hand.
A practical settings table
Every transfer brand has its own instructions, so shop testing still matters. But this table reflects practical starting logic for common situations.
| Fabric Type | Transfer Type | Temperature (°F/°C) | Time (Seconds) | Pressure | Peel Type |
|---|---|---|---|---|---|
| 100% cotton | Standard light-shirt transfer paper with household iron | 375°F / 190°C | 180 for full sheet | Heavy, hand-applied | Cool peel after 2 minutes |
| 100% cotton | DTF transfer with heat press | Follow transfer supplier instructions | Follow transfer supplier instructions | Firm and even | Follow transfer supplier instructions |
| 50/50 blend | DTF transfer with heat press | Follow transfer supplier instructions | Follow transfer supplier instructions | Controlled, even | Follow transfer supplier instructions |
| Polyester or performance blend | DTF transfer with heat press | Follow transfer supplier instructions designed for synthetics | Follow transfer supplier instructions | Controlled, even | Follow transfer supplier instructions |
If you need a brand-specific workflow for press setup, this page on DTF press instructions is the kind of reference worth keeping open during production.
The method that produces cleaner results
For small business work, the repeatable process looks like this:
- Pre-press first: Flatten the shirt and remove moisture.
- Load carefully: Keep the print zone level and seam-free.
- Position with intention: Use a consistent placement standard.
- Press with a machine, not guesswork: Even heat and even pressure matter more than speed.
- Peel exactly when the transfer requires it: Hot peel, warm peel, and cold peel are not interchangeable.
- Check the print before stacking: Look at edges, small details, and any area near seams.
That's why a heat press changes everything. It doesn't just apply heat. It removes variables. Once those variables are reduced, iron transfer shirts stop feeling unpredictable and start feeling like production.
Ensuring Your Designs Last Wash After Wash
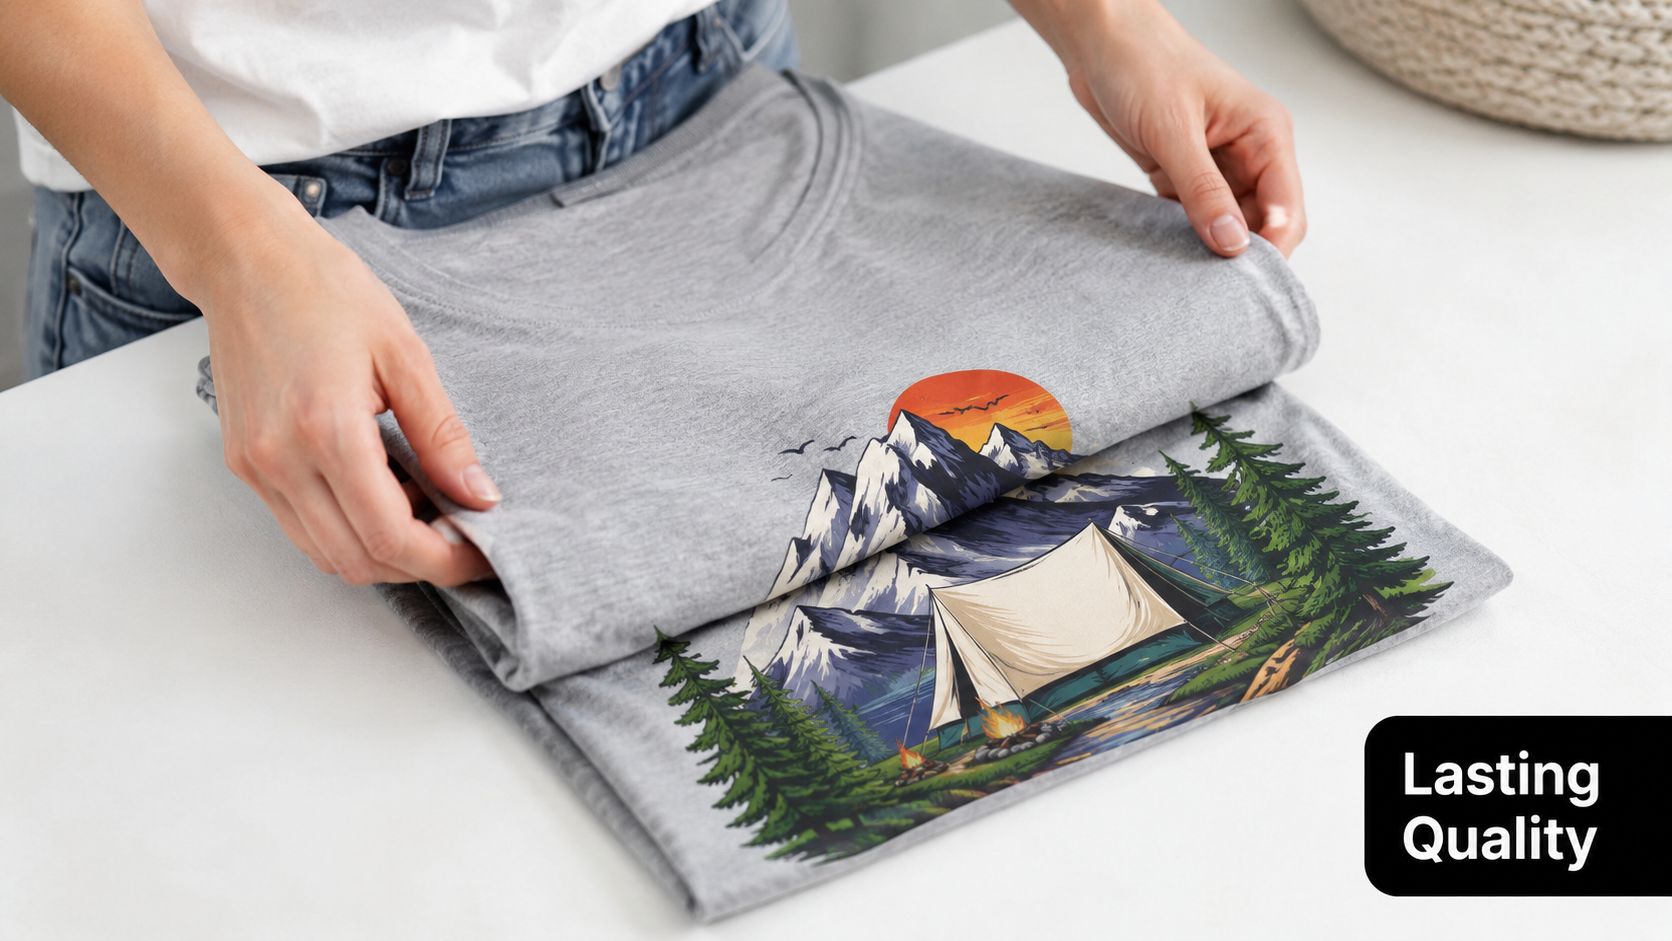
A shirt isn't proven when it comes off the press. It's proven after repeated wear and washing.
That matters even more if you're selling to schools, brands, teams, local businesses, or event organizers. They won't judge your work by how the shirt looked on pickup day. They'll judge it after the print has been washed, dried, folded, and worn again.
What durability data makes clear
Independent lab testing found that 78% of household-iron-applied transfers showed cracking or fading after 25 commercial wash cycles at 60°C, while heat-press-applied DTF transfers retained 95% integrity under the same conditions, as reported in this guide on how to use iron transfer paper.
That gap is the whole argument in one comparison. If the shirt needs to hold up beyond occasional use, iron-applied transfers put you at a disadvantage before the customer even opens the package.
Wash care that protects the print
Good aftercare won't rescue a badly applied transfer. It will help a correctly applied one last longer.
Use simple care rules and give them to customers in writing:
- Turn the shirt inside out: That reduces direct abrasion on the print.
- Wash in cold water: Gentler conditions help preserve the adhesive bond and printed surface.
- Use mild detergent: Harsh chemistry shortens the life of decorated garments.
- Skip rough treatment: High-heat drying and aggressive cycles are hard on transfers.
For a customer-facing version of those instructions, this guide on DTF washing instructions is a practical reference.
Why shops should care about the difference
The durability gap between iron application and heat-press application affects more than product lifespan. It affects refunds, replacements, and whether a customer orders again.
Shirts that come back after washing are usually process problems, not customer problems.
If you're serious about iron transfer shirts as a product category, durability has to be part of the build. Not an afterthought. Not a hope. A requirement.
That's why professional shops treat the press step and the care instructions as one system. The print has to be applied correctly, and the buyer has to know how to wash it correctly. Leave either part out and you create preventable failures.
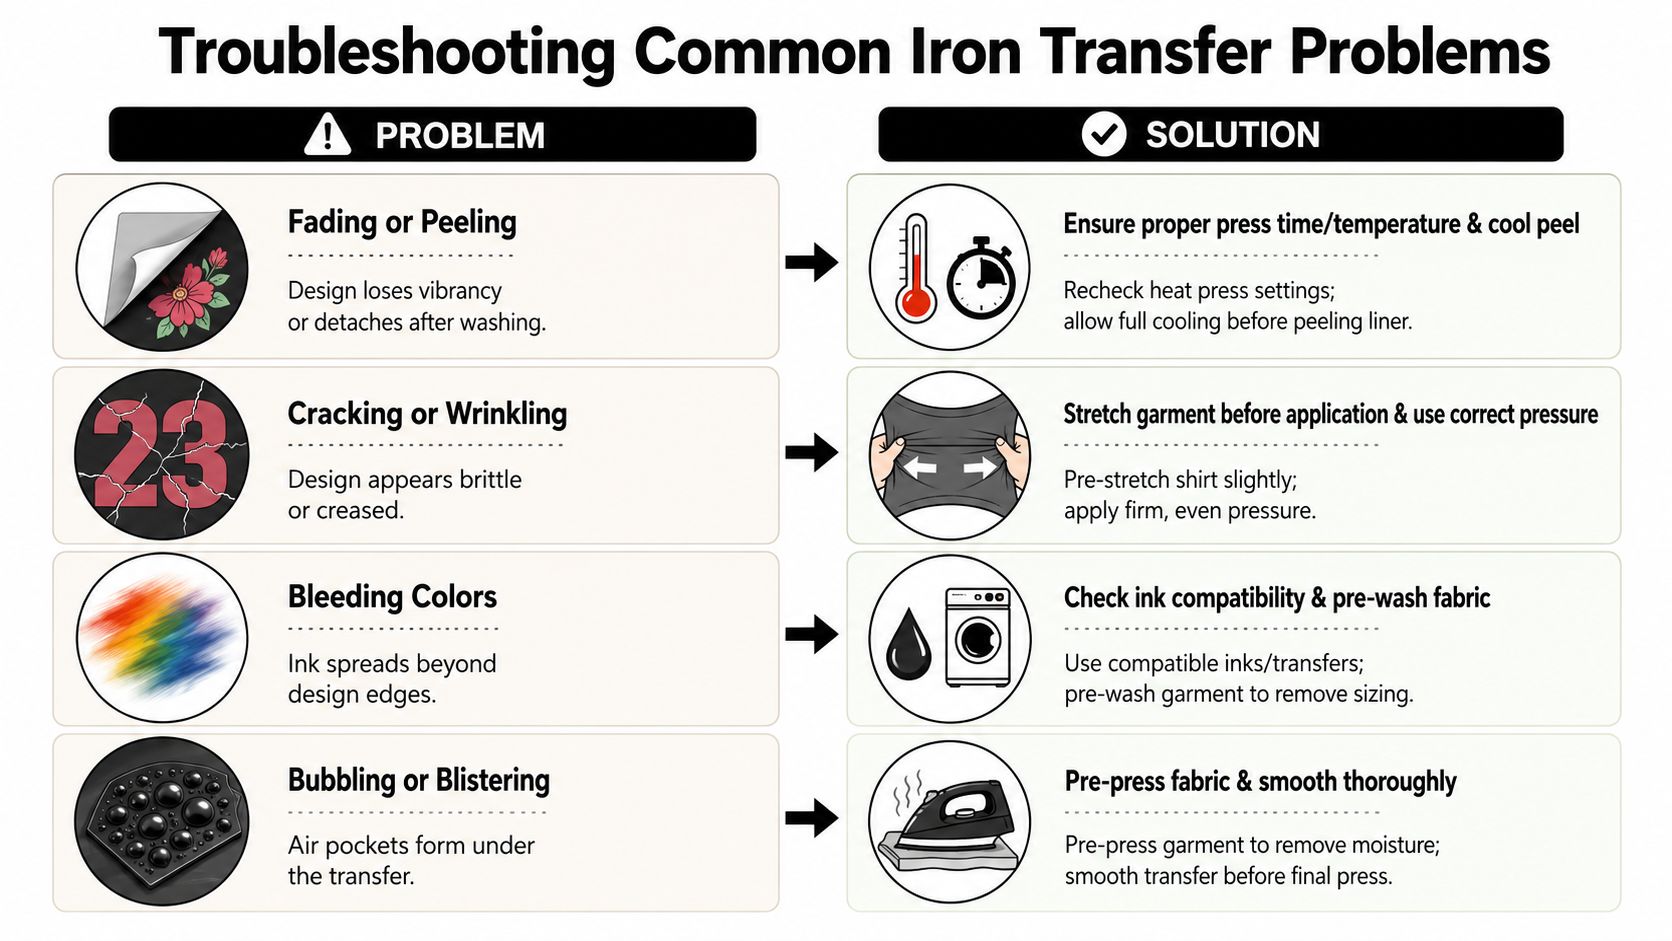
Troubleshooting Common Iron Transfer Problems
Bad transfers usually leave clues. The trick is reading them correctly.
A peeling edge, a cloudy border, a cracked print, or a scorched shirt each points to a different failure in pressure, heat, trimming, fabric handling, or wash care. If you diagnose the wrong cause, you waste shirts and repeat the same mistake.
The root problem with household irons
The biggest issue is pressure consistency. Expert analysis points to household irons failing because they can't deliver uniform pressure, and their steam holes create unheated spots across the transfer surface, making the process rarely successful for professional-grade results. The same analysis also warns that using fabric softener raises the likelihood of fading, cracking, or peeling in the wash, and that excess blank paper left around a design causes visible shadowing on the finished shirt, as noted in this discussion of transfer failures and care mistakes on the referenced expert post.
That explains why two shirts pressed “the same way” with an iron can behave very differently. Hand pressure changes. Coverage changes. Contact changes.
Problem patterns and what they usually mean
| Problem | Likely cause | What to do |
|---|---|---|
| Edges lifting | Uneven pressure or incomplete bonding | Rework your pressing method and use a heat press for uniform contact |
| White box or shadow around image | Transfer paper not trimmed closely enough | Cut exactly around the artwork before application |
| Cracking soon after wear | Under-pressing, poor adhesion, or wrong wash care | Tighten process control and avoid fabric softener |
| Dull or patchy areas | Steam holes or uneven soleplate contact | Stop using the household iron for production work |
| Scorching or shine on synthetics | Heat too aggressive for the fabric | Lower-risk method: use transfer and press settings designed for that garment |
The mistakes that waste the most blanks
Some failures happen during pressing. Others happen after the shirt leaves your shop.
Watch for these repeat offenders:
- Using an ironing board: Soft surfaces absorb pressure and reduce contact.
- Leaving excess transfer border: That creates visible paper shadow.
- Treating all fabrics the same: Cotton settings can damage synthetic garments.
- Washing with fabric softener: That weakens long-term performance.
- Rushing peel timing: Pulling too early can lift parts of the image.
The fastest way to improve results is to remove variables, not to press harder and hope.
A shop mindset beats a craft mindset
If you're troubleshooting iron transfer shirts, don't ask only “What went wrong on this shirt?” Ask “What part of my process allows this to happen at all?”
That question changes how you work. Instead of adjusting one shirt at a time, you start fixing the system:
- Standardize garment prep.
- Standardize placement.
- Standardize transfer type by garment category.
- Standardize wash instructions.
- Replace the tool that introduces the most inconsistency.
For most small shops, that last point is the turning point. Once the iron stops being the main application tool, the rest of the workflow becomes much easier to control.
Scaling Up Your Shirt Business with Confidence
Growth in custom apparel doesn't come from making one good shirt. It comes from making the same good shirt over and over without drama.
That's where many shirt makers hit a ceiling. They can produce a few nice pieces manually, but batch work exposes every weak part of the workflow. Placement drifts. press quality varies. reprints pile up. Turnaround slows down because every order depends on personal effort instead of a stable system.
Build around repeatability
The global iron-on transfer sheet market was valued at $1.2 billion in 2025 and is projected to reach $1.9 billion by 2034 at a 5.8% CAGR, according to Market Intelo's iron-on transfer sheet market report. That tells you demand is still there. Small businesses still have room to compete if they operate cleanly.

The shops that scale usually do a few things well:
- They simplify their blank lineup: Fewer garment variables means fewer pressing surprises.
- They batch similar jobs together: Similar garments and transfer types keep output more consistent.
- They document settings and placement rules: Memory is unreliable. A shop standard isn't.
- They buy tools that reduce rework: A better press is often cheaper than repeated mistakes.
Treat cash flow like production equipment
A lot of small apparel businesses don't fail because demand disappears. They struggle because they can't finance better tools, larger blank orders, or smoother operations at the moment they need to grow. If you're planning equipment purchases or working capital, reviewing best SBA lenders for businesses can help you compare financing options in a more structured way.
Growth also depends on supplier reliability. You need transfers that arrive fast, print clean, and stay consistent from order to order. Long delays and unpredictable quality make it hard to quote lead times or keep customers happy.
If you want to turn iron transfer shirts from a side project into a dependable business line, scale the process that produces stable quality. Don't scale improvisation.
If you're ready to move from trial-and-error transfers to production-grade results, Cobra DTF is worth a close look. Their Texas-based, family-owned operation focuses on high-quality DTF transfers made in the USA, with fast turnaround and no overseas shipping delays. For small shops that need dependable color, consistent film quality, and quick delivery, that kind of supplier support makes day-to-day production a lot easier.