
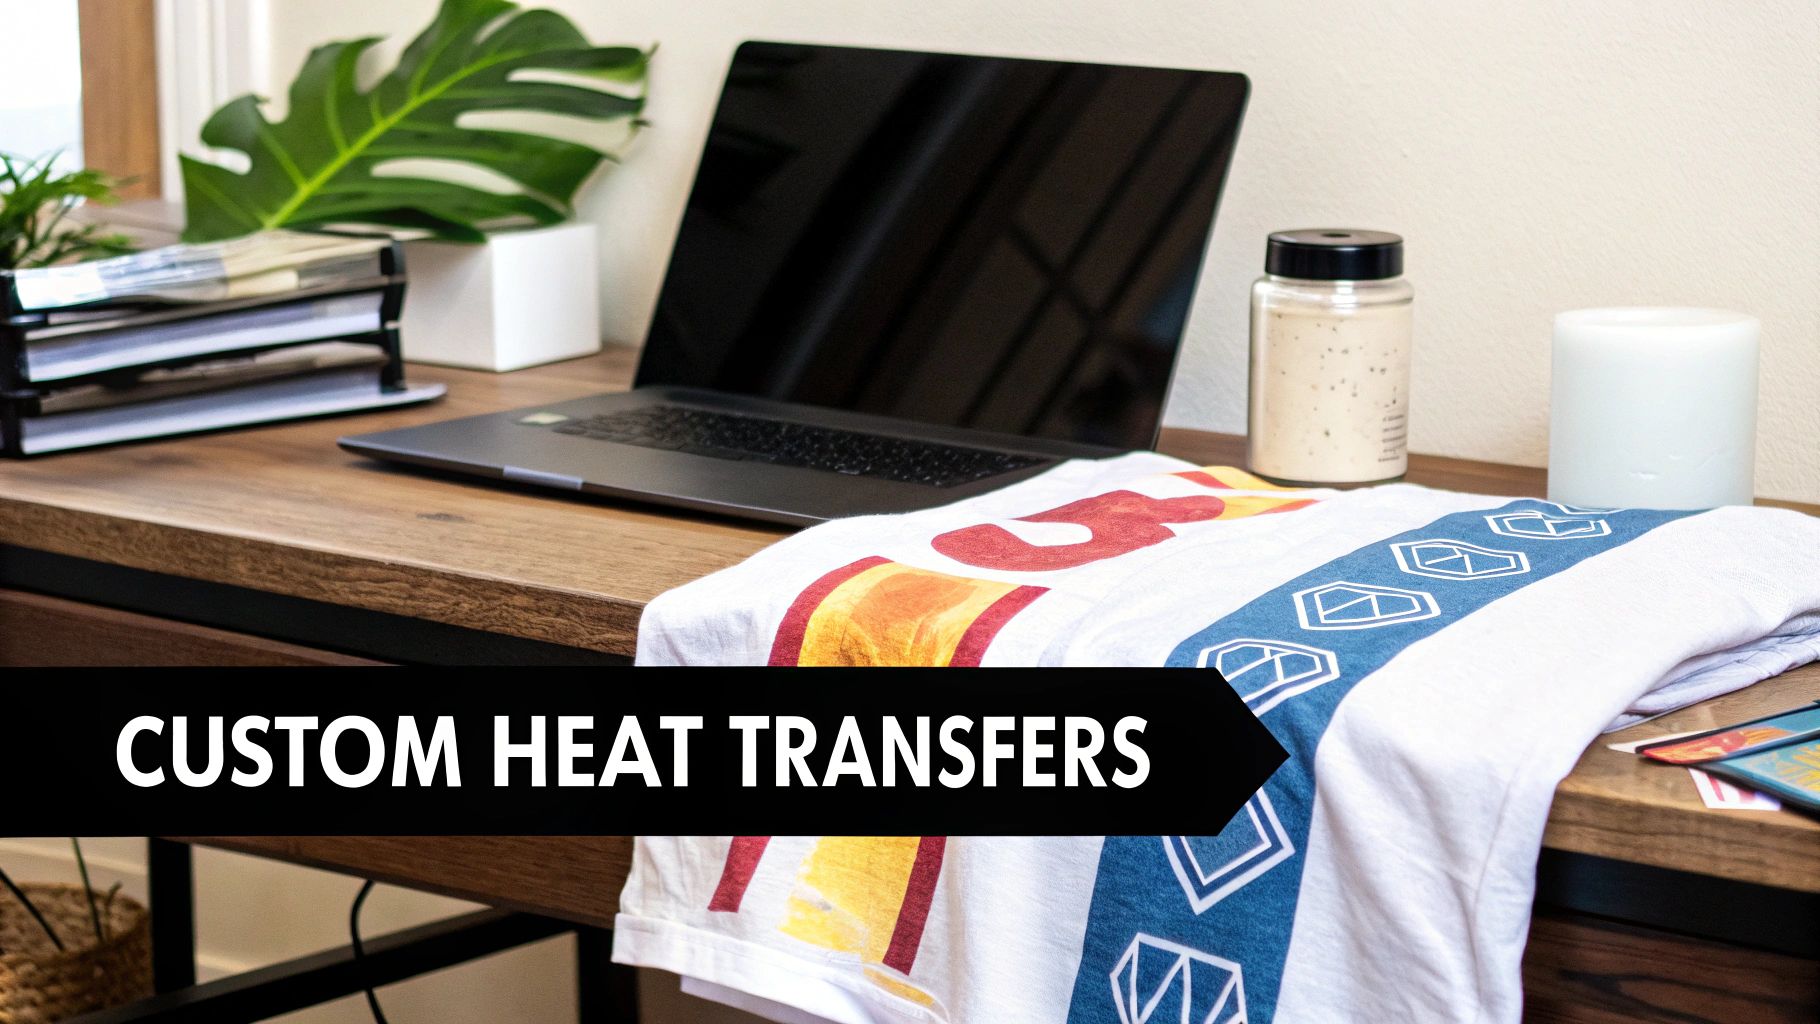
How to Print Heat Transfers at Home a Complete Guide
So, you're ready to turn your digital designs into wearable art? Printing your own heat transfers is a fantastic way to create custom apparel, and it all starts with a simple idea: take a design from your computer and permanently press it onto fabric. This process opens up a world of possibilities for creators, small businesses, and hobbyists.
It's a game-changer because it brings professional-quality results right into your home or workshop.
Unlike other printing methods that can be picky about colors or materials, DTF heat transfers are incredibly flexible. You can create detailed, full-color designs that feel soft on the fabric and hold up well in the wash. This guide is here to walk you through the entire journey, from digital file to finished shirt.
To give you a bird's-eye view, here's a quick breakdown of what the process looks like from start to finish.
Quick Overview of the Heat Transfer Printing Process
| Stage | Key Action | Primary Goal |
|---|---|---|
| Digital Prep | Finalize artwork in design software | Create a print-ready file with the correct settings and resolution. |
| Printing | Print the design onto DTF film | Transfer the digital ink design onto the specialized transfer sheet. |
| Powdering & Curing | Apply and melt the adhesive powder | Prepare the transfer with a bonding agent for permanent application. |
| Pressing | Use a heat press on the garment | Bond the design from the film onto the fabric using heat and pressure. |
| Finishing | Peel the film from the garment | Reveal the final, vibrant design permanently attached to the apparel. |
Each stage is crucial for getting that perfect, professional-looking print.
The Core Stages of the Process
Let's break down that workflow a bit more. I find it helps to think of it in three main phases.
First up is digital preparation. This is where you get your artwork polished and ready for the printer. Next comes the printing and curing stage, where your design comes to life on the transfer film and gets coated with the crucial adhesive powder. Finally, there's the application, which involves using a heat press to permanently bond that transfer to your t-shirt, tote bag, or whatever you're printing on.
The real magic of DTF is its ability to combine the detail of digital printing with the durability of traditional methods. It empowers small-scale creators to produce results that rival large-scale manufacturing operations, all from a home or workshop setup.
This isn't just a niche hobby; it's part of a huge shift toward on-demand, customized production. The global heat transfer printer market is projected to grow from $2.5 billion in 2025 to roughly $4.2 billion by 2033. That growth is driven by the apparel industry’s need for quick turnarounds and unique, small-batch runs.
If you're eager to see the whole process in action, diving into a more detailed walkthrough can be really helpful. For a deeper look, I'd recommend exploring a practical guide to print heat transfers to get a solid foundation.
Assembling Your At-Home Printing Toolkit
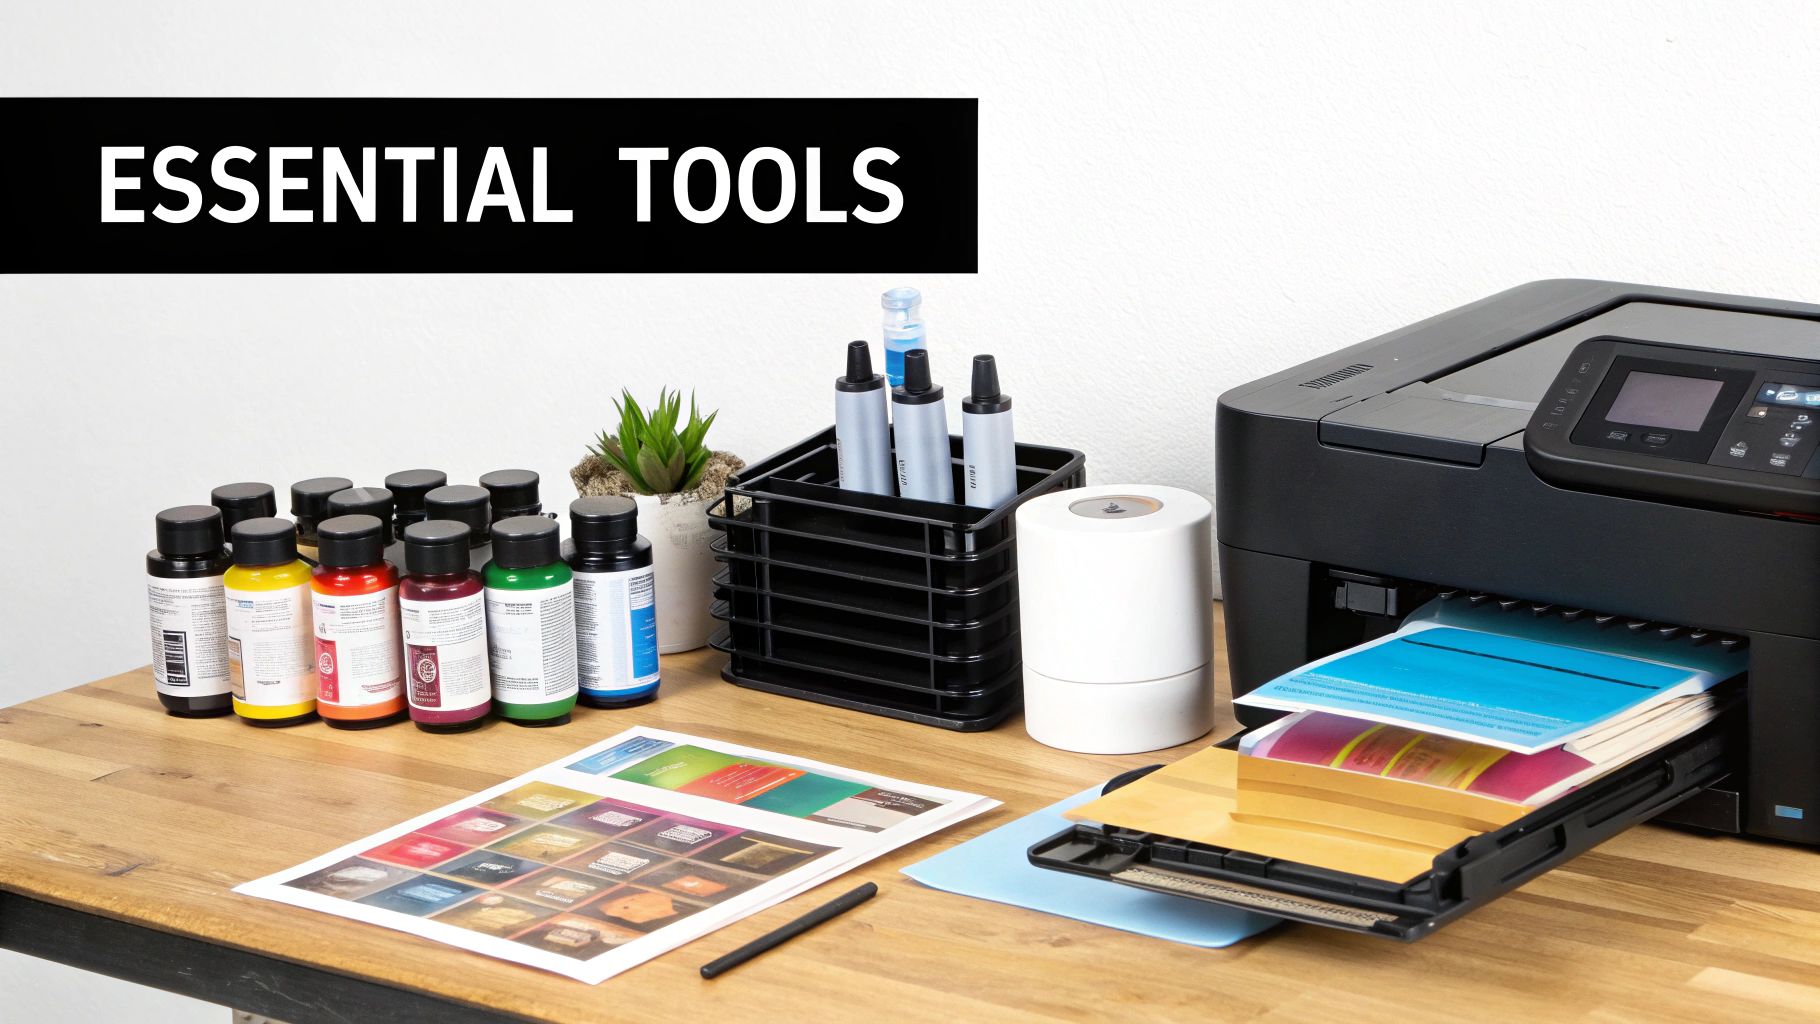
Getting great results in DTF starts long before you ever hit "print." It begins with putting together the right gear. Think of it less like a shopping list and more like building a cohesive system where every single piece plays a crucial role.
I like to compare it to setting up a professional kitchen. You obviously need the oven, but the quality of your ingredients and bakeware is what separates a decent cake from a perfect one. For us, the DTF printer is the oven, and the inks, film, and powder are the non-negotiable, high-quality ingredients.
Your Core Printing Gear
The heart and soul of your entire setup is the Direct-to-Film (DTF) printer. I see a lot of newcomers ask if they can just convert a standard office inkjet, but the short answer is no. A dedicated DTF printer is specifically built to handle thick textile inks and, most importantly, has a white ink channel—that's the magic that lets you print vibrant designs on dark fabrics.
Along with the printer itself, you'll need a trio of essential consumables that work together:
- DTF Inks: These aren't your everyday inks. They're specially formulated to be elastic, which keeps your designs from cracking when the shirt is stretched or washed. You'll need the standard Cyan, Magenta, Yellow, and Black, plus that all-important high-opacity White.
- DTF Film: This is the special coated sheet that acts as the carrier for your design. It's engineered to hold the ink and adhesive powder perfectly and then release it cleanly onto the garment when you press it.
- DTF Adhesive Powder: This fine powder is what gives your transfers their staying power. You'll coat the wet ink with it, and under the heat of the press, it melts and creates an incredibly strong bond with the fabric fibers.
Without all three of these working in perfect harmony, you simply won't get a transfer that looks good and lasts.
The Essential Heat Press
You can print the most beautiful transfer in the world, but it's completely useless if you can't apply it correctly. That's where a quality heat press comes into play. It provides two critical things a household iron just can't deliver: precise temperature and consistent, heavy pressure. These are absolutely essential for a durable, professional finish that won't peel after a few washes.
You’ll typically find two styles on the market:
- Clamshell Press: This design opens and closes like, well, a clamshell. It's a fantastic space-saver, making it a popular choice for home studios and smaller workshops.
- Swing-Away Press: With this style, the heated top platen swings out to the side. This gives you a clear, open workspace to lay out your shirt and align the transfer without worrying about bumping your hands on a hot surface.
Honestly, the choice between them often boils down to personal preference and how much space you have. Both will give you excellent results. The heat press is such a vital tool that the global market for these machines is projected to grow at a CAGR of 5.9% between 2023 and 2030, which shows just how much demand there is for this kind of high-quality printing. You can dig into more of that data over at Cognitive Market Research.
Supporting Tools and Software
Okay, beyond the big-ticket items, there are a few smaller tools that will make your life infinitely easier and your results far more consistent. Think of these as the supporting cast that makes the star of the show look good.
Key Insight: Don't skimp on the "small stuff." I've seen more prints ruined by a shifting transfer than I can count. A simple roll of heat-resistant tape or a Teflon sheet can be the difference between a perfect press and a costly do-over.
Here are the accessories I refuse to work without:
- RIP Software: A Raster Image Processor, or RIP, is the brain of the printing operation. This software is what correctly translates your design for the DTF printer, giving you critical control over ink levels and managing the white ink underbase. It’s what ensures your colors come out looking like they did on your screen.
- Teflon Sheet or Cover: This is just a reusable, non-stick sheet you place over your transfer before pressing. It does a few things: protects your garment from scorch marks, stops any ink from sticking to your press, and helps distribute the heat a little more evenly.
- Heat-Resistant Tape: This is exactly what it sounds like—tape that won’t melt under high heat. You’ll use small pieces to tack down the corners of your DTF film to the garment, locking it in place so it doesn't shift and create a blurry "ghosting" effect when you lower the press.
Having these items ready to go from day one will save you a lot of headaches and help you build a smooth, repeatable workflow right from the start.
Preparing Your Designs for Flawless Transfers
A killer DTF transfer doesn't just happen at the press. It starts way before you even think about turning on the printer. The real magic, the secret to those crisp, vibrant results that make clients come back, happens right on your computer screen.
Think of your design file as the foundation of a house. If the foundation has cracks—like low resolution, the wrong orientation, or a wasteful layout—the whole project will be shaky. Taking a few extra minutes to prep your digital design is probably the most important thing you can do. It's what separates the pros from the rookies.
Setting Up Your Canvas for Success
The software you use to design can make a big difference. Sure, you can get by with basic programs, but if you're serious, you need vector-based software like Adobe Illustrator. Why? Because vector files are infinitely scalable. You can stretch a design from a pocket logo to a full back print without losing a single bit of quality. Every line stays sharp, every letter crisp.
No matter what program you land on, there's one setting you absolutely cannot ignore: resolution. You must set your file to 300 DPI (dots per inch). This is the gold standard for professional printing. If you try to print something set at 72 DPI (which is fine for web images), it's going to look blurry and pixelated on a shirt. It’s a dead giveaway of an amateur job.
My Two Cents: Always start with the highest quality artwork you can get your hands on. You can always shrink a high-res image down and it'll look great. But trying to blow up a low-res image? It's a recipe for a fuzzy, unprofessional-looking disaster every single time.
The Most Common (and Painful) Beginner Mistake
I've seen it happen more times than I can count. A beginner gets everything else right, but forgets one crucial click: mirroring the design. Your DTF printer prints exactly what it sees. Since you place the transfer face-down on the garment, the design has to be printed as a mirror image to look correct when it's pressed.
Think about it—if you print a word like "COBRA" normally, it’s going to read "ARBOƆ" on the final shirt. Every single part of your design needs to be flipped horizontally before it goes to the printer. Most RIP software has a simple checkbox for this, but I find it’s a good habit to do it in my design program first. It’s one click that can save you a world of frustration and a lot of wasted film and ink.
Optimizing Your Film with Gang Sheets
In this business, wasted material is wasted money. One of the smartest things you can do to boost your profit margin is to master the gang sheet. This is just a fancy term for arranging multiple designs onto a single sheet of film. Instead of printing one small logo on a huge sheet, you fill all that empty space with other jobs, logos, or even some extra designs you can sell later.
This approach is a game-changer for efficiency. You can knock out several different orders in one print run, which drastically cuts down on film waste and printing time.
Here's how to build a great gang sheet:
- Give 'em space. Leave about a quarter-inch between designs so you can easily cut them apart later.
- Play Tetris. Rotate your designs to nest them as tightly as possible. You'll be amazed at how much you can fit on one sheet if you get creative.
- Mix it up. Squeeze smaller designs, like pocket logos or sleeve graphics, into the awkward gaps left by larger back pieces.
Nailing your design prep is what truly elevates your work. It's a fundamental skill that pays dividends on every single item you press. And if you're exploring other ways to get graphics onto garments, understanding the principles of how to use transfer paper can offer a broader perspective. Get your digital file perfect from the start, and the rest of the process becomes so much smoother.
Your Step-by-Step Printing and Curing Workflow
Alright, your design file is prepped and looking sharp on the screen. Now it's time for the real magic—turning that digital artwork into a physical, ready-to-press transfer. This is where the hands-on fun begins, and getting this part of the process dialed in is what separates okay results from fantastic ones.
The whole workflow really comes down to three key actions: printing on the film, applying the adhesive powder, and curing it all together. Each step flows right into the next, so a little precision and attention to detail here will make a huge difference in your final product. Let's get into it.
This infographic breaks down the crucial prep work that sets the stage for a perfect print.
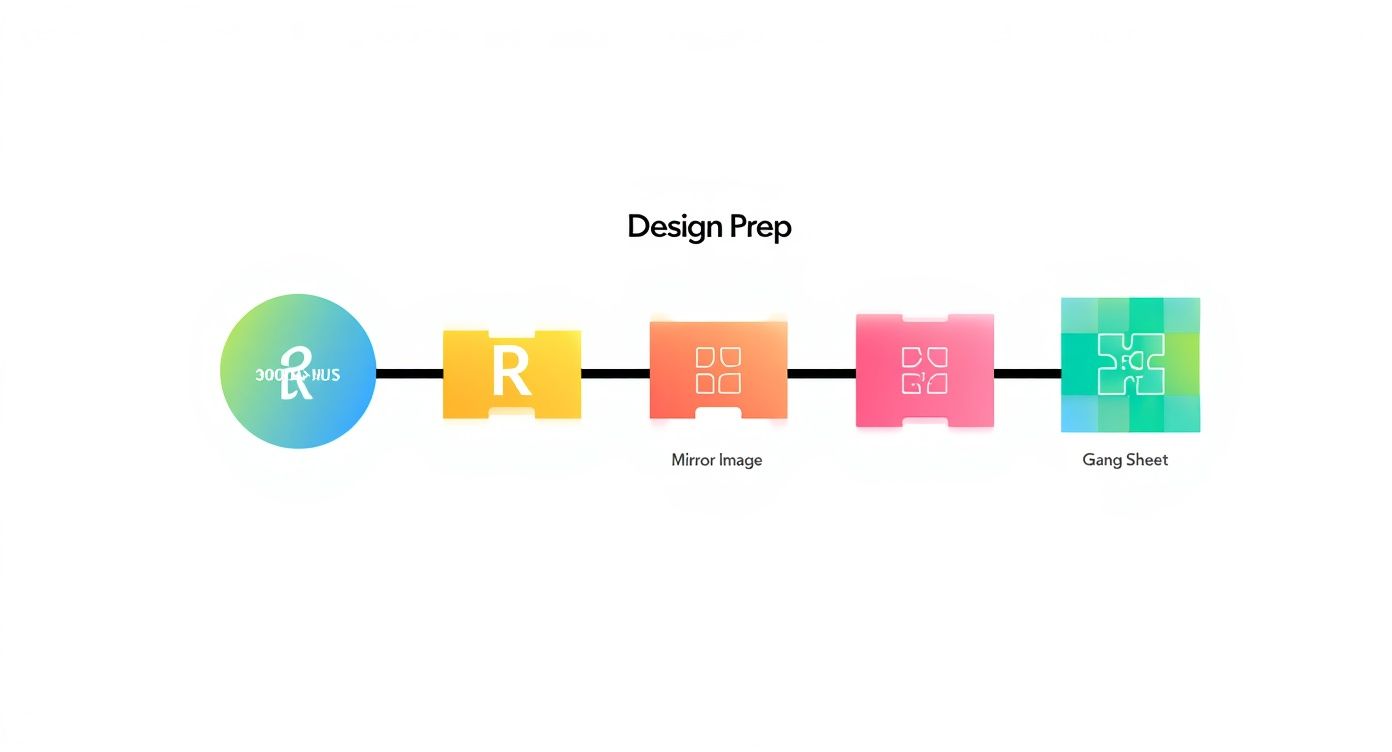
Honestly, if you nail the prep—using high-res files, remembering to mirror your image, and ganging up designs to save film—the actual printing part becomes so much smoother. Consider it a non-negotiable first step.
Configuring Your Print Settings
Before you hit "Print," you’ll need to talk to your RIP software. This tool is the brain of the operation, telling your Cobra DTF printer exactly how much ink to lay down for the best color, opacity, and feel.
Your main focus here will be the ink density settings. You're looking for that sweet spot: enough color to be vibrant, but not so much that it bleeds. Even more important is managing the white ink underbase. This is what makes your colors truly pop, especially on dark fabrics. Most RIP software includes pre-loaded profiles for common materials, which are a fantastic starting point.
A common rookie mistake is thinking more ink automatically means better color. Too much ink can actually lead to a messy, oversaturated print and cause headaches when you get to the powdering and curing stages. My advice? Start with a standard profile and always run a small test print before committing to a big job.
The Printing Process Itself
Now for the exciting part. Go ahead and load your DTF film into the printer. The crucial thing here is to make sure you're printing on the coated, slightly matte side. If you get it backward and print on the glossy side, the ink will just bead up and create a frustrating mess. We’ve all done it once!
Once the film is loaded correctly, you can send your mirrored design from the RIP software to the printer. The machine is a workhorse; it lays down the CMYK color layer first and then, in the same pass, prints the white ink layer right on top. It’s a huge time-saver.
As the film exits the printer, handle it with care. The ink is wet and can smudge easily. Make sure you have a clean, flat spot ready to receive it where nothing will touch the printed surface.
Applying the Adhesive Powder Evenly
With your design freshly printed, it’s time to introduce the DTF adhesive powder. This fine, white powder is the secret sauce that physically bonds your design to the garment. Getting an even, consistent coating here is absolutely essential for a durable transfer that won't crack or peel after a few washes.
The best way to do this is to lay the wet print flat inside a shallow bin or tray to contain the powder. Generously sprinkle the powder all over the printed area, making sure every bit of wet ink is covered. Don't be shy; it's always better to use too much than not enough.
After the design is fully coated, gently pick up the film and rock it back and forth to help the powder settle. Then, holding it by the edges, give it a good flick to shake off all the excess. You'll see the powder only sticks to the wet ink, leaving the rest of the film perfectly clean.
The Critical Curing Stage
This is the final step in creating your transfer: curing. You’re essentially melting the adhesive powder so it forms a smooth, uniform layer over the ink. It’s a delicate balance—you need enough heat to melt the powder completely but not so much that you scorch the ink or warp the film.
You have a couple of solid options for curing:
- Heat Press Hover: Place the transfer on the bottom platen of your heat press. Lower the heated top platen so it hovers about a half-inch above the film—do not let it touch. A good starting point is hovering for about two minutes at around 375°F (190°C).
- Curing Oven: For the most consistent results, a dedicated curing oven is the way to go. It circulates hot air to melt the powder perfectly evenly every time.
Pro Tip: You’ll know the transfer is perfectly cured when the powdery adhesive transforms into a glossy, slightly bumpy texture, often described as an "orange peel" look. This is the visual cue that the adhesive has fully bonded with the ink and is ready for pressing.
The thermal printing sector, which includes heat transfer technologies, is a significant market, valued at $48.1 billion in 2025 and projected to keep growing. This trend underscores just how reliable and efficient these methods are across countless industries.
Once your transfer is cured, it’s ready for the main event! For in-depth instructions on that final step, head over to our complete guide: https://cobradtf.com/blogs/guides/dtf-press-instructions. And as you get comfortable with the process, think about showing it off; learning how to create compelling product videos can be a great way to market your work.
Mastering Your Heat Press Application
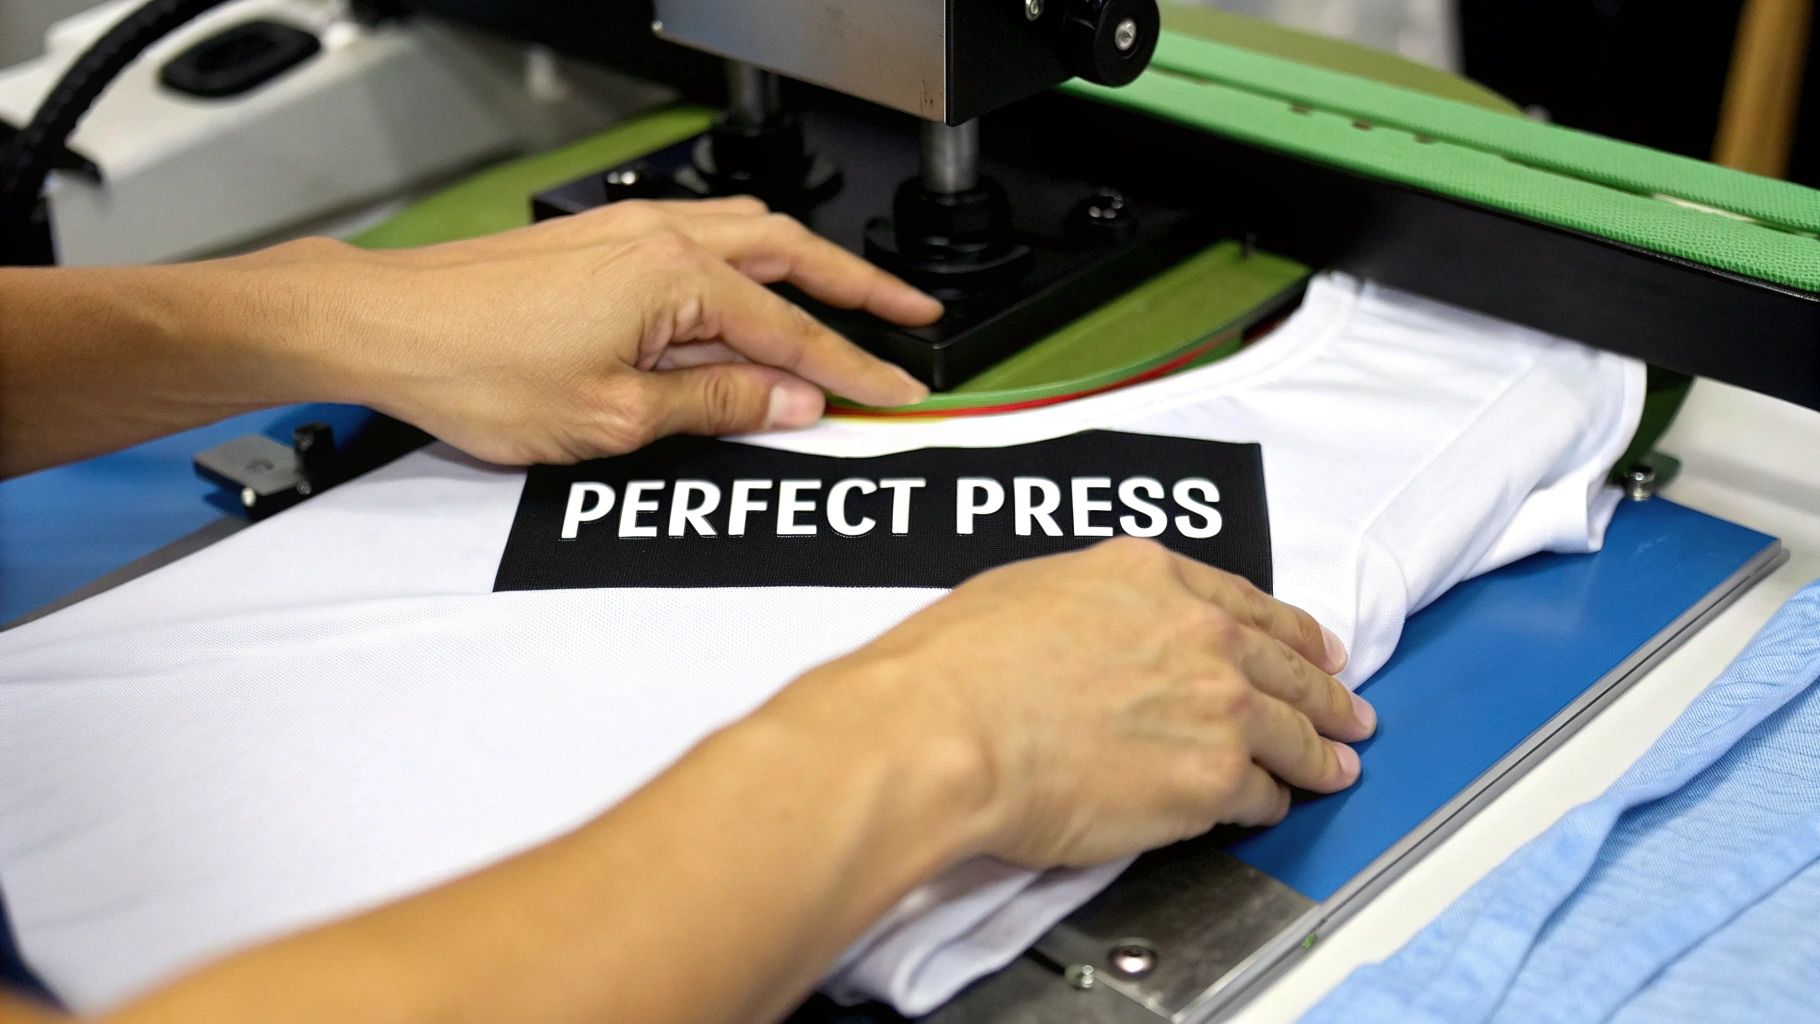
A perfectly printed and cured transfer is a beautiful thing, but it’s only half the job. The final, and I'd argue most critical, phase is the heat press application. This is the moment of truth where your design permanently becomes one with the fabric.
Think of it as a careful balance of three key ingredients: time, temperature, and pressure. Getting this right is what makes a design feel like part of the shirt and last wash after wash. Nail this, and you've nailed the craft.
Why You Should Never Skip the Pre-Press
Before you even think about laying down your transfer, there's one step you absolutely cannot skip: the pre-press. Every garment, even one that feels bone dry, holds a surprising amount of moisture. If you trap that moisture under your transfer, it turns to steam and can wreck your adhesion, leaving you with a splotchy, uneven finish.
A quick 5-10 second press is all it takes. This little step drives out that hidden moisture and flattens any wrinkles, giving you a perfect canvas. It’s a simple habit that prevents so many common headaches down the line.
Perfect Placement and Securing Your Design
With the garment prepped, it's time to place your transfer. Carefully lay the cured DTF transfer onto the shirt, getting the alignment just right. When you're starting out, tools like a t-shirt alignment guide can be a real lifesaver for consistency.
Here's a pro tip: use a couple of small pieces of heat-resistant tape to tack down the corners. This stops the film from shifting when you lower the press, which prevents the dreaded "ghosting" effect—that blurry shadow that ruins an otherwise perfect print. A little tape is cheap insurance.
The Critical Trio: Time, Temperature, and Pressure
The success of your press really comes down to dialing in the right settings for your material. Cotton, polyester, and blends all behave differently under heat, so a one-size-fits-all approach is a recipe for disaster. Always start with the recommendations from your transfer provider, but here are some solid starting points I use.
- Temperature: For most cotton and poly-blends, I find that somewhere between 300-325°F (150-163°C) is the sweet spot. If you're working with 100% polyester, you'll want to stay on the lower end of that range to avoid scorching the fabric.
- Time: A press time of 10-15 seconds is usually plenty. Go too long, and you risk burning the adhesive or the garment itself. Too short, and you'll get a weak bond that peels after the first wash.
- Pressure: You're aiming for medium to firm pressure. The idea is to embed the ink and melted adhesive right into the fibers of the fabric. Too light, and it just sits on top; too heavy, and you can thin out the design.
For a deeper dive into settings for different fabrics, our guide on heat transfer shirt printing is a great resource. Understanding these variables is key for anyone learning how to print heat transfers effectively.
The Final Peel: Hot vs. Cold
Once the timer goes off, the final step is to remove the carrier film. DTF transfers are typically either hot peel or cold peel, and you absolutely have to know which one you're working with for a clean release.
Key Takeaway: The peeling method isn't just a suggestion; it's a critical instruction. If you try to peel a cold peel transfer while it's still hot, you’ll pull the whole design right off the shirt and have to start over.
-
Hot Peel Transfers: These are meant to be peeled immediately after the press opens. You'll pull the film off while the shirt is still on the platen and piping hot. It's a quick, satisfying peel.
-
Cold Peel Transfers: With these, you need to let the garment cool down completely. I usually take the shirt off the press and set it on a clean surface for a minute or two. Once it's cool to the touch, you can peel the film away. This process usually leaves a beautiful, smooth matte finish.
No matter which type you use, I always finish with a quick 2-3 second final press. Just lay a Teflon sheet or a piece of parchment paper over the naked design and give it one last hit of heat. This really helps lock the ink into the fabric, improving washability and giving it that extra soft, professional feel.
Troubleshooting Your DTF Prints
Sooner or later, every print job hits a snag. It's just part of the process. When a transfer doesn't come out right, it’s tempting to get frustrated, but most of these common issues are surprisingly easy to solve once you know the signs. Don't think of it as a failure—think of it as dialing in your technique.
One of the first things people notice is a color mismatch. Your design looks perfect on screen, but the print comes out looking dull or just plain wrong. Nine times out of ten, this points directly to your color profile settings inside the RIP software. You have to make sure you've selected the exact profile for the ink and film you're using. That profile is what translates the digital RGB colors into the right CMYK ink mix for the real world.
Why Isn't My Transfer Sticking?
A transfer that lifts, peels, or just won't stick is a classic problem, and it almost always comes down to the three pillars of pressing: time, temperature, and pressure. If you're pressing on a thick hoodie, for instance, you'll likely need to crank up the pressure to get the heat to really sink into those dense fibers.
Here’s what to check first:
- Is Your Temperature Right? If it's too low, the adhesive won't fully melt. Too high, and you can scorch the glue or even the fabric itself.
- Is There Enough Pressure? You need firm, even pressure to physically push that melted adhesive into the weave of the garment.
- Did You Pre-Press? Skipping the pre-press is a rookie mistake. Any moisture trapped in the fabric will turn to steam and ruin the bond.
Solving Issues That Show Up After Washing
What about a transfer that looks flawless right off the press but cracks or peels after a single wash? That's the textbook sign of an under-cured transfer. It means the adhesive powder didn't melt completely before it was pressed, creating a weak bond that can't handle the stress of a washing machine.
Pro Tip: After curing and before pressing, your transfer should have a glossy, slightly bumpy texture, a lot like an orange peel. If it still looks powdery or uneven, it needs more time under the heat before it’s ready for the garment.
Another sneaky issue is that faint, powdery halo you sometimes see around the edges of a design. This is simply loose adhesive powder that wasn't removed before curing. The fix is easy: after you apply the powder, give the film a good, solid flick with your finger to knock off any excess. For intricate designs, a small, soft brush can help clean up the edges for a perfectly crisp result.
Digging Deeper Into Heat Transfers: Your Questions Answered
If you're getting into the world of heat transfers, you probably have a few questions. Let's tackle some of the most common ones we hear from both new and experienced printers.
DTF vs. HTV: What's the Real Difference?
This is easily one of the most frequent questions we get. Think of it this way: Direct-to-Film (DTF) is like printing a high-resolution sticker for your fabric. We print your design with special inks onto a film, cover it in a powdered adhesive, and then it's ready for you to press. This method is a game-changer for detailed, full-color designs—think photographs, intricate logos, or artwork with lots of gradients. Best of all, there’s zero weeding involved.
Heat Transfer Vinyl (HTV), on the other hand, is a completely different animal. You're essentially cutting a design out of a pre-colored sheet of vinyl and then pressing it onto the shirt. It's fantastic for simpler graphics, like bold text or single-color logos.
The Bottom Line: DTF is your go-to for complex, multi-color art. HTV is the workhorse for basic shapes and lettering. You'd use DTF for a photorealistic band t-shirt, but you'd grab HTV for the numbers on the back of a sports jersey.
Can I Just Use My Regular Inkjet Printer for This?
I wish it were that simple! While you can certainly use a standard inkjet printer with the kind of transfer paper you find at a craft store, it is absolutely not compatible with professional DTF printing.
The whole DTF process relies on a specific ecosystem of specialized DTF inks, unique film, and a powdered adhesive that just won't work in an unmodified office printer. If you're chasing those vibrant, durable, professional-quality results, a dedicated DTF printer (or ordering professionally made transfers) is the only way to go.
How Can I Make Sure My Transfers Last?
Longevity really boils down to getting your technique right from the start. First, your transfer needs to be perfectly cured—when you look at the back, the adhesive should have a subtle "orange peel" texture. That's the sign it's ready. Then, it's all about dialing in the correct heat press settings for the specific fabric you're working with.
Once the shirt is made, aftercare is everything. Always give your customers these simple instructions to keep their prints looking fresh:
- Wash the garment inside out using cold water.
- Tumble dry on the lowest heat setting, or better yet, hang it to dry.
- Never use bleach, and definitely don't iron directly over the design.
Ready to create some seriously vibrant, long-lasting custom apparel? At Cobra DTF, we specialize in premium, American-made DTF transfers and back them up with a satisfaction guarantee. Get your designs in 1-3 days with our fast, reliable shipping. Explore our DTF transfer products and see what a difference quality makes.