

How to Heat Press a Shirt Flawlessly with DTF Transfers
Knowing how to properly heat press a shirt is all about getting three things just right: temperature, pressure, and time. It sounds simple, but getting these elements dialed in for your specific fabric is what separates amateur work from professional, sellable products. The process itself is straightforward—prep the shirt, line up your DTF transfer, press it, and peel the film—but mastering the details is key.
Your Foundation for Perfect Custom Shirts
This is a no-fluff guide built for small businesses and online brands that need consistent, high-quality results every single time. We're skipping the generic advice and jumping straight into a repeatable workflow you can use to turn blank tees into profitable products with Direct-to-Film (DTF) transfers.
Getting this right is more than just a creative skill; it's a smart business decision. The custom t-shirt market is exploding and expected to hit $14.61B by 2030, with a massive 10.3% growth rate each year. That growth is driven by efficient, high-quality methods like DTF. Nailing your heat press technique is your ticket to grabbing a piece of that booming industry.
What This Guide Covers
This walkthrough is based on what actually works, day in and day out, in a real print shop. We're focusing on the critical steps that ensure every shirt you make is something you'd be proud to sell.
Here's what you'll learn to do:
- Prep your garments the right way to get rid of moisture and wrinkles that kill adhesion.
- Dial in the perfect heat press settings for everything from 100% cotton to tricky poly-blends.
- Get perfect transfer placement every time with a few simple alignment tricks.
- Master the cool peel for designs that are sharp, vibrant, and durable.
Why Quality Materials Are Non-Negotiable
As we go, you'll see how much your final product depends on the quality of your materials. Using reliable, USA-made DTF transfers gives you a huge leg up. You avoid the frustrating shipping delays and customs headaches that come with ordering from overseas, which can throw your entire production schedule off track. Good materials give you predictable results, and that's the foundation of a brand people trust.
The secret to growing a shirt business isn't just about working faster—it's about being consistent. A solid, repeatable process for heat pressing removes the guesswork, slashes your error rate, and makes sure every customer gets the same fantastic product.
The blank shirt you choose is just as critical as the transfer. The fabric dictates your heat press settings and how the final design looks and feels. To really get into the weeds on this, check out our guide on the https://cobradtf.com/blogs/guides/best-shirts-for-dtf.
Once your pressing technique is locked in, the next step is showing off your work. For an e-commerce brand, your product photos are everything. It’s worth looking into professional product photography services to make your shirts look as incredible online as they do in person. It’s a small investment that can make a massive difference in catching a customer's eye and closing the sale.
Setting Up Your Workspace for Success
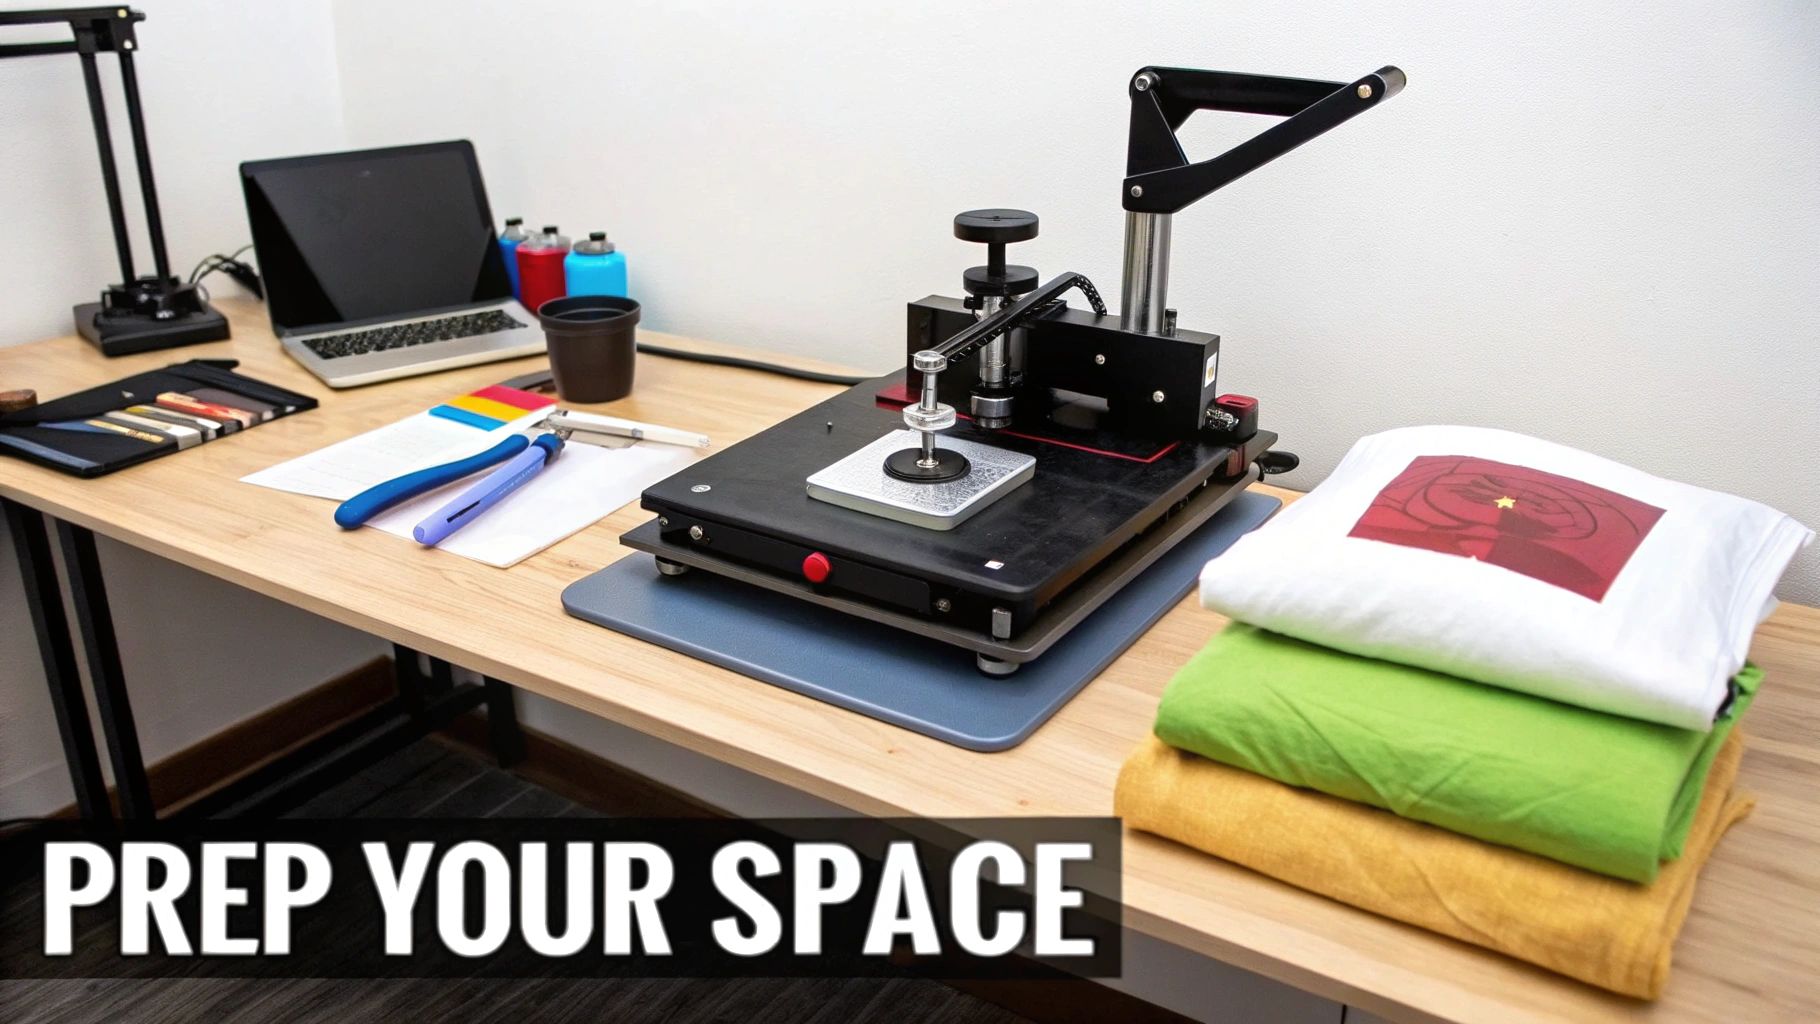
Before you even think about that first press, let's talk about your setup. An efficient, organized workspace isn't just nice to have—it's the bedrock of your entire operation. A messy station is a recipe for mistakes and wasted materials, while a thoughtfully laid-out space makes the whole process feel smooth and professional.
Think about creating a logical flow, moving from a blank shirt to a finished product without backtracking or fumbling for tools. An organized space is key to any successful craft, and you can get some great ideas from guides on the perfect sewing room setup. A little prep work here prevents the kind of small errors that can completely ruin a good shirt.
Your Core Equipment and Supplies
The heat press is the heart of your workspace. It can be tempting to grab a cheap model to get started, but if you're serious about this, investing in a quality press with reliable, even heat is a non-negotiable. I've seen it time and again: inconsistent heat and pressure from budget machines are the top culprits for failed transfers.
The global market for Multifunction Heat Presses recently topped $0.5 billion and is growing at 8.5%, largely because the apparel industry demands precision. This just goes to show how vital accurate temperature and even pressure are for professional results.
With your press in place, it’s time to gather your toolkit. Having these essentials right at your fingertips will make your life so much easier.
- Premium DTF Transfers: Your designs are what sell the shirt, so don't skimp here. Using high-quality, USA-made transfers from a trusted source like Cobra DTF gives you the vibrant colors and lasting durability you need.
- Garments: Keep your blank shirts sorted and ready. Whether you're working with cotton, polyester, or a blend will determine your press settings, so keep them organized.
- Teflon Sheet: This is your press's best friend. It protects the platen from any stray ink and shields your garment from scorching.
- Heat-Resistant Tape: Just a couple of small pieces are all you need to lock your transfer in place. This prevents it from shifting and creating that awful "ghosting" effect.
- Pressing Pillow: An absolute must-have for any garment with seams, collars, or buttons. The pillow elevates the print area, ensuring the pressure hits the transfer directly and evenly.
- Laser Alignment Tool or T-Square: These tools eliminate all the placement guesswork. You'll get perfectly centered, straight designs every single time.
Organizing Your Workflow
Try to arrange your space to follow your production steps. I like to have a station for blank garments where I can prep and lint-roll them. Right next to the heat press, I keep my transfers and alignment tools. Finally, I have a separate, clean surface nearby that's dedicated to letting the shirts cool before peeling.
A logical workspace isn't just about being tidy; it's about building a system. When every tool has a home and every step has a designated area, your muscle memory takes over, allowing you to work faster and with fewer errors.
This kind of methodical setup turns what could be a chaotic guessing game into a streamlined, repeatable process. You'll be able to focus on what really matters—creating fantastic, high-quality shirts your customers will be excited to wear.
Dialing In Your Heat Press Settings
This is where all your prep work pays off—or where things can quickly go south. Getting your heat press settings right is probably the single most crucial part of creating a shirt that looks professional and actually lasts.
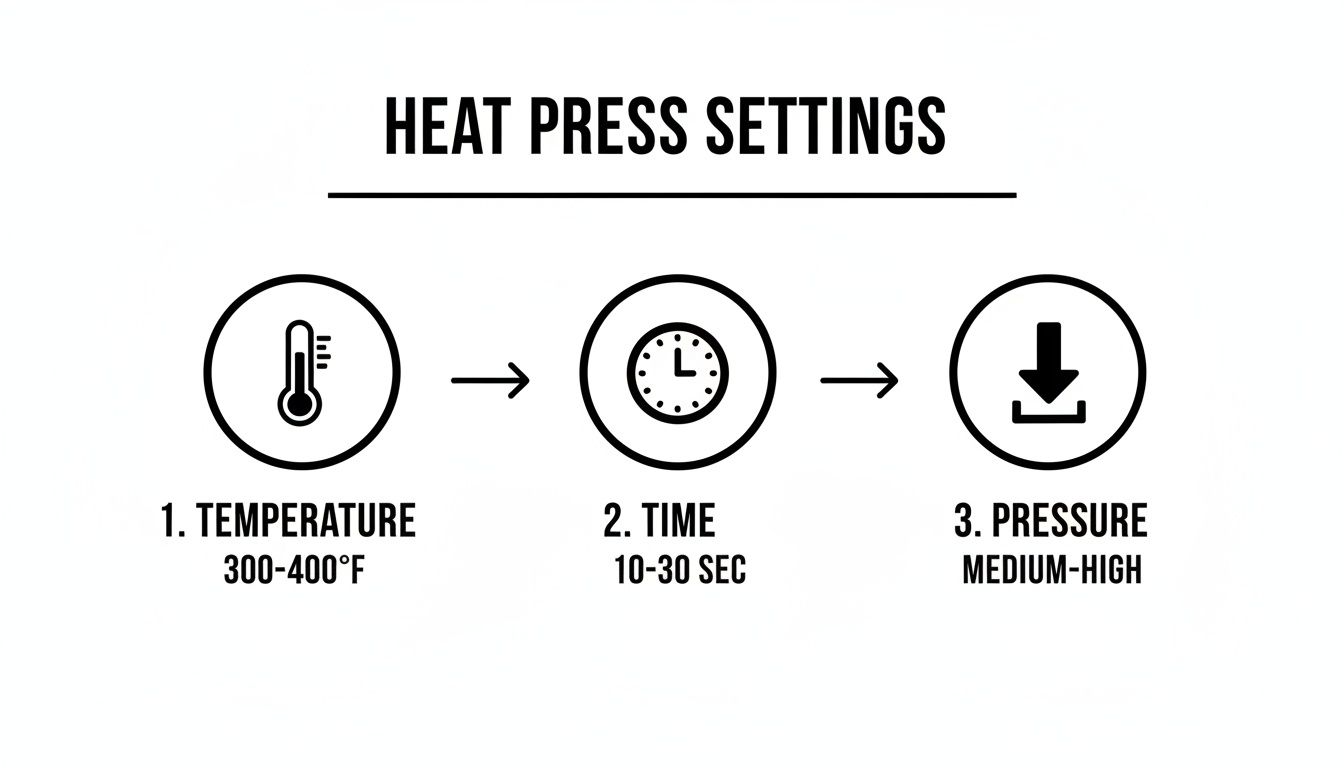
Think of it like a three-legged stool: temperature, time, and pressure. If one of those is off, the whole thing is unstable. Get them working together, and you'll get a perfect, permanent bond between the transfer and the shirt, every single time. This isn't a "set it and forget it" process; it’s about knowing how to adapt to the specific fabric you’re working with.
Don't Skip the Pre-Press
Before you even think about laying down your transfer, you have to pre-press the garment. Seriously, don't skip this. It's a non-negotiable step that solves a ton of common adhesion problems right from the start.
Just press the blank shirt for about 5-7 seconds at your target temperature. This quick step does two incredibly important things: it irons out any wrinkles and, more importantly, it forces out any moisture hiding in the fabric. Moisture is the number one enemy of a good DTF application; it turns to steam under the heat and prevents the adhesive from properly melting into the fibers. A pre-press gives you a perfectly dry, flat canvas to work with.
Finding the Sweet Spot for Different Fabrics
The right settings are completely dependent on what the shirt is made of. The temperature that works beautifully for a heavy cotton hoodie will absolutely scorch a thin polyester tee. You have to adjust accordingly.
To get you started, here’s a quick-reference guide with the optimal time, temperature, and pressure settings we recommend for the most common garment types you'll encounter.
Recommended Heat Press Settings for DTF Transfers
| Fabric Type | Temperature Range (°F) | Press Time (Seconds) | Pressure Level | Peel Type |
|---|---|---|---|---|
| 100% Cotton | 315°F - 330°F | 12 - 15 | Medium to Firm | Cold |
| 50/50 Cotton/Poly Blend | 300°F - 315°F | 10 - 12 | Medium | Cold |
| 100% Polyester | 280°F - 300°F | 8 - 10 | Medium | Cold |
| Triblends & Synthetics | 270°F - 290°F | 8 - 10 | Light to Medium | Cold |
Think of these numbers as your baseline. Your specific heat press, the humidity in your shop, and even the shirt's color can affect the outcome, so don't be afraid to make small tweaks. If you’re ever unsure, especially with a new type of garment, always do a test press on a scrap piece first. For a much deeper dive, check out our complete guide on heat press settings for DTF to really master the details for any material.
What Does "Medium" Pressure Actually Feel Like?
Pressure is easily the most subjective setting on your press. There's no digital display for it, so you have to learn to go by feel. It’s also where a lot of people get tripped up.
So, what’s the difference between light, medium, and firm?
- Light Pressure: The platen closes with almost no effort. You can lock it down easily with one hand. This is best for super delicate synthetics that can’t take a lot of force.
- Medium Pressure: This is your go-to for most DTF work. You'll feel solid resistance as you close the handle, and it takes intentional effort to lock it in place. You shouldn't be straining, but it's a firm, confident close.
- Firm Pressure: You’ll need some real muscle for this one, maybe even two hands. The handle should clamp down with a very solid "thud." This is typically reserved for thicker items like sweatshirts or specialty materials.
Here's a classic trick for checking your pressure: the "dollar bill test." On a clamshell press, stick a dollar bill under each of the four corners of the top platen and close it. Try to pull the bills out. If any of them slide out easily, your pressure is too light or uneven. Adjust it until all four bills are held tight.
You can do a similar test on a swing-away press with four small squares of paper. The goal is the same: perfectly even pressure across the entire design. Uneven pressure is a leading cause of transfers peeling up around the edges. Take a few minutes to get this right, and you'll save yourself a lot of headaches down the road.
Bringing It All Together: The Press and Peel
You've got your settings dialed in and your shirt is prepped and ready. Now comes the part where all that preparation pays off. Getting a flawless application isn't just about slamming the press shut; it's a careful dance of alignment, protection, and patience.
First things first, let's talk about placement. Just "eyeballing" where the transfer goes might be okay for a one-off shirt for yourself, but if you're selling these, consistency is king. This is where tools like a simple T-square ruler or a laser alignment system become your best friend. They completely remove the guesswork, helping you nail that perfectly centered design every single time, whether it's on the chest, back, or sleeve.
Lock It Down and Protect Your Work
Once your transfer is exactly where you want it, you need to make sure it stays there. The slightest shift when you close the press can ruin the whole thing. A small piece of heat-resistant tape on one corner is the simple, pro-level trick to prevent this. It stops that dreaded "ghosting" effect—that blurry shadow that appears when a transfer moves even a millimeter during pressing.
Next, always place a protective sheet over the transfer before you press. A Teflon sheet or even a piece of parchment paper works perfectly. This sheet acts as a barrier, shielding your shirt from direct heat and preventing any ink from getting onto your heat platen. Think of it as cheap insurance against scorch marks and a messy machine.
The image below recaps the core settings you've already set up – the essential trio of time, temperature, and pressure that makes this whole process work.
With everything perfectly aligned and protected, it's finally time to press. For those of us running a business, getting this workflow down to a science is what separates the pros from the amateurs. A precise 10-15 second press doesn't just make a great shirt; it can lead to a 20% faster workflow. That time really adds up when you've got a stack of orders to get through.
The Most Important Step: The Cold Peel
When that timer beeps, your first instinct will be to rip that film off and admire your work. Don't do it! This is easily the most critical moment of the whole process, and it demands patience. Our Cobra DTF transfers are a cold peel, which means the transfer and the shirt must cool down completely before you even think about touching that film.
Pro Tip: Rushing the peel is the number one mistake I see new printers make. If that film is even slightly warm, you risk pulling up parts of the design, causing cracks, or getting a patch adhesion. Just set the shirt aside on a cool, flat surface and let it be. This gives the adhesive the time it needs to properly cure and bond to the fabric fibers.
Once the shirt is completely cool to the touch, it's time for the big reveal. But don't just yank it off like a band-aid. The best technique is to start at a corner and peel the film back low and slow. Try to roll it away from the design instead of pulling it straight up. This gentle, steady motion ensures every last detail, no matter how small, releases cleanly from the film and stays put on the shirt.
When you do it right, you're left with a vibrant, crisp design that feels incredibly soft. This is what turns a blank shirt and a piece of film into a professional, high-quality product you can be proud to sell.
Finishing Touches and Troubleshooting Common Issues
Just because you’ve peeled the film doesn’t mean the job is over. A couple of final steps can take your shirts from just "good" to truly professional-grade, seriously boosting their durability and feel. These finishing touches, along with knowing how to fix problems on the fly, are what really separate the pros from the beginners.
The Finishing Press: A Game-Changer for Quality
One of the best habits you can get into is the finishing press. It’s technically optional, but I highly recommend it. This one extra step makes a massive difference in the final product.
After you've done your main press and peeled the film, just lay a sheet of parchment paper or a Teflon cover over the design. Press it again for just 5-10 seconds at the same temperature, but back off to light pressure. It’s a quick move, but it does so much—it helps lock the ink deeper into the fabric, makes the shirt more durable in the wash, and gives the design a soft, matte finish that feels like it’s part of the shirt, not just sitting on top of it.
Keeping Your Work Looking Great: Care Instructions
Your job isn't done when the customer walks out the door. Giving them clear, simple care instructions is a huge part of good service. It protects the work you just did and ensures your customers stay happy. Trust me, bad washing habits are the number one killer of custom apparel.
For the best, longest-lasting results, tell your customers to follow a few simple rules:
- Wash the shirt inside out. This protects the design from rubbing against other clothes.
- Always use cold water. Hot water is tough on the adhesive and can fade the colors over time.
- Tumble dry on low, or better yet, hang it to dry. High heat from a dryer is the design's worst enemy.
- Steer clear of bleach and fabric softeners. The harsh chemicals in these can break down the ink.
Sharing this advice helps your creations look fantastic for years. A high first-pass quality rate is essential for any profitable shop, and proper care ensures your designs can handle 50+ washes. That’s the standard customers expect, especially in a market where custom tees make up over 50% of all decorated apparel revenue.
For a more comprehensive guide you can share, check out our detailed post on DTF washing instructions.
Solving Common Heat Press Problems
Even when you do everything right, things can still go wrong. Knowing how to quickly spot and fix these issues will save you a ton of time, materials, and headaches. Here’s a look at some of the most common frustrations you'll likely run into.
Why Isn't My Transfer Sticking?
If your design is lifting at the edges or just not adhering at all, the culprit is almost always one of the big three: pressure, temperature, or moisture.
The Fix: First, double-check your pressure. You should have to use a good bit of muscle to lock the handle down for "medium" pressure. If it closes with barely a touch, crank it up. Next, make sure your temperature is right for the specific fabric you're using. And finally, never skip the pre-press. That quick 5-7 second step pulls out hidden moisture that will absolutely ruin adhesion.
Help! I Scorched the Shirt!
Seeing a faint brownish tint or a shiny outline around your design? That’s a classic scorch mark, usually from too much heat on sensitive fabrics like polyester or light-colored blends. They just can't take the same heat as a heavy cotton tee.
The Fix: Lower your temperature immediately. For most polyester, you’ll want to be down in the 280°F - 300°F range. Using a Teflon sheet or a protective cover can also help by distributing the heat more evenly and gently.
Why Does the Design Feel Thick and Rubbery?
A great DTF transfer should feel soft and flexible, almost like it's part of the fabric itself. If yours feels stiff, thick, or has a glossy, plastic-like feel, you’ve probably overcooked it.
The Fix: This is usually a sign of too much time or too much pressure. Try cutting your press time by a few seconds. When a transfer is pressed for too long, the adhesive can spread out too much, creating that thick, heavy layer. Also, double-check that you aren't using heavy pressure when medium is all that's needed.
Your Heat Pressing Questions Answered
Even when you think you've got the process down, questions always come up. This section is your go-to guide for troubleshooting the most common issues and curiosities you'll encounter when heat pressing DTF transfers. Think of these as quick, direct answers to help you solve problems on the fly and press with a lot more confidence.
The demand for this kind of work is exploding. Valued at $2808 million, the Heat Transfer Film market is projected to hit $3914 million by 2032. That growth is fueled by small businesses and online shops needing to crank out custom orders fast, which makes a rock-solid pressing process absolutely essential. You can dive deeper into these trends over at Cognitive Market Research.
Why Is My DTF Transfer Not Sticking to the Shirt?
This is, by far, the most common headache, but the fix is almost always straightforward. It usually comes down to one of three things: not enough pressure, the wrong temperature, or sneaky moisture hiding in the garment. These are the absolute fundamentals of a good press.
First, check your pressure. Most DTF transfers need a solid medium-to-firm setting. If you can lock down your press with one hand and almost no effort, it's definitely too light. Next, double-check that your temperature is right for the fabric—polyester and cotton have very different heat needs.
Finally, and this is the big one, never skip the pre-press. Pressing the blank shirt for just 5-7 seconds before you place the transfer is your secret weapon. It zaps any lingering moisture that would otherwise turn to steam and prevent the transfer's adhesive from properly bonding to the fabric fibers.
Can I Use a Regular Home Iron Instead of a Heat Press?
You might see this in hobbyist videos, but for any professional work, using a home iron is a recipe for disaster. A standard iron just can't deliver the two things that matter most for a durable, quality DTF transfer.
What are those two things?
- Consistent, even pressure across the entire design.
- Precise, stable temperature that a heat press is built to maintain.
An iron creates hot spots and uneven pressure, which leads to peeling, cracking, and a design that won't make it through the first wash. A quality heat press is a non-negotiable investment if you're serious about selling shirts. It's the difference between a one-time craft project and a lasting, professional product.
A heat press isn't just a piece of equipment; it's your commitment to quality. It guarantees every shirt you sell meets the same high standard, which builds customer trust and reinforces your brand's reputation.
What Does "Cold Peel" Actually Mean?
The term "cold peel" is literal, and it's one of the golden rules of DTF. It means you have to wait for both the shirt and the transfer film to cool down completely to room temperature before you even think about removing the film.
Patience isn't just a virtue here—it's a requirement. If you peel the film while it's still warm, the adhesive hasn't had enough time to fully cure and grab onto the fabric. This can cause parts of your design to lift, you'll lose intricate details, or the whole graphic will have weak, patchy adhesion. Let it cool. It’s the key to a sharp, flawless result.
How Do I Prevent the Square Outline of the Press on My Shirt?
Seeing that dreaded "press box" outline on a finished shirt is frustrating, but it’s totally fixable. This problem is usually caused by applying too much pressure directly over the garment’s collar, seams, or hems.
The best way to solve this is with a heat press pillow. Just slide a pillow inside the shirt to elevate the main printing area. This simple trick isolates the pressure directly onto your transfer, letting the thicker seams and collar drop down around it. The edges of your heat platen never make hard contact with the surrounding fabric, and that unwanted outline disappears completely.
Ready to create amazing, professional-quality custom shirts with transfers you can count on? Cobra DTF provides premium, USA-made DTF transfers that deliver vibrant colors and incredible durability. We ship them right from our Texas facility to your door in just 1-3 days.