
Heat Transfer Printing T Shirts A Practical Guide
Heat transfer printing is one of the go-to methods for getting designs onto t-shirts, and for good reason. It's a straightforward process that uses heat and pressure to bond a pre-printed design directly to the fabric. This isn't your '80s-era iron-on transfer that cracks and peels after one wash; today's technology delivers a professional, durable finish that feels great and looks even better.
What Exactly Is Heat Transfer Printing?
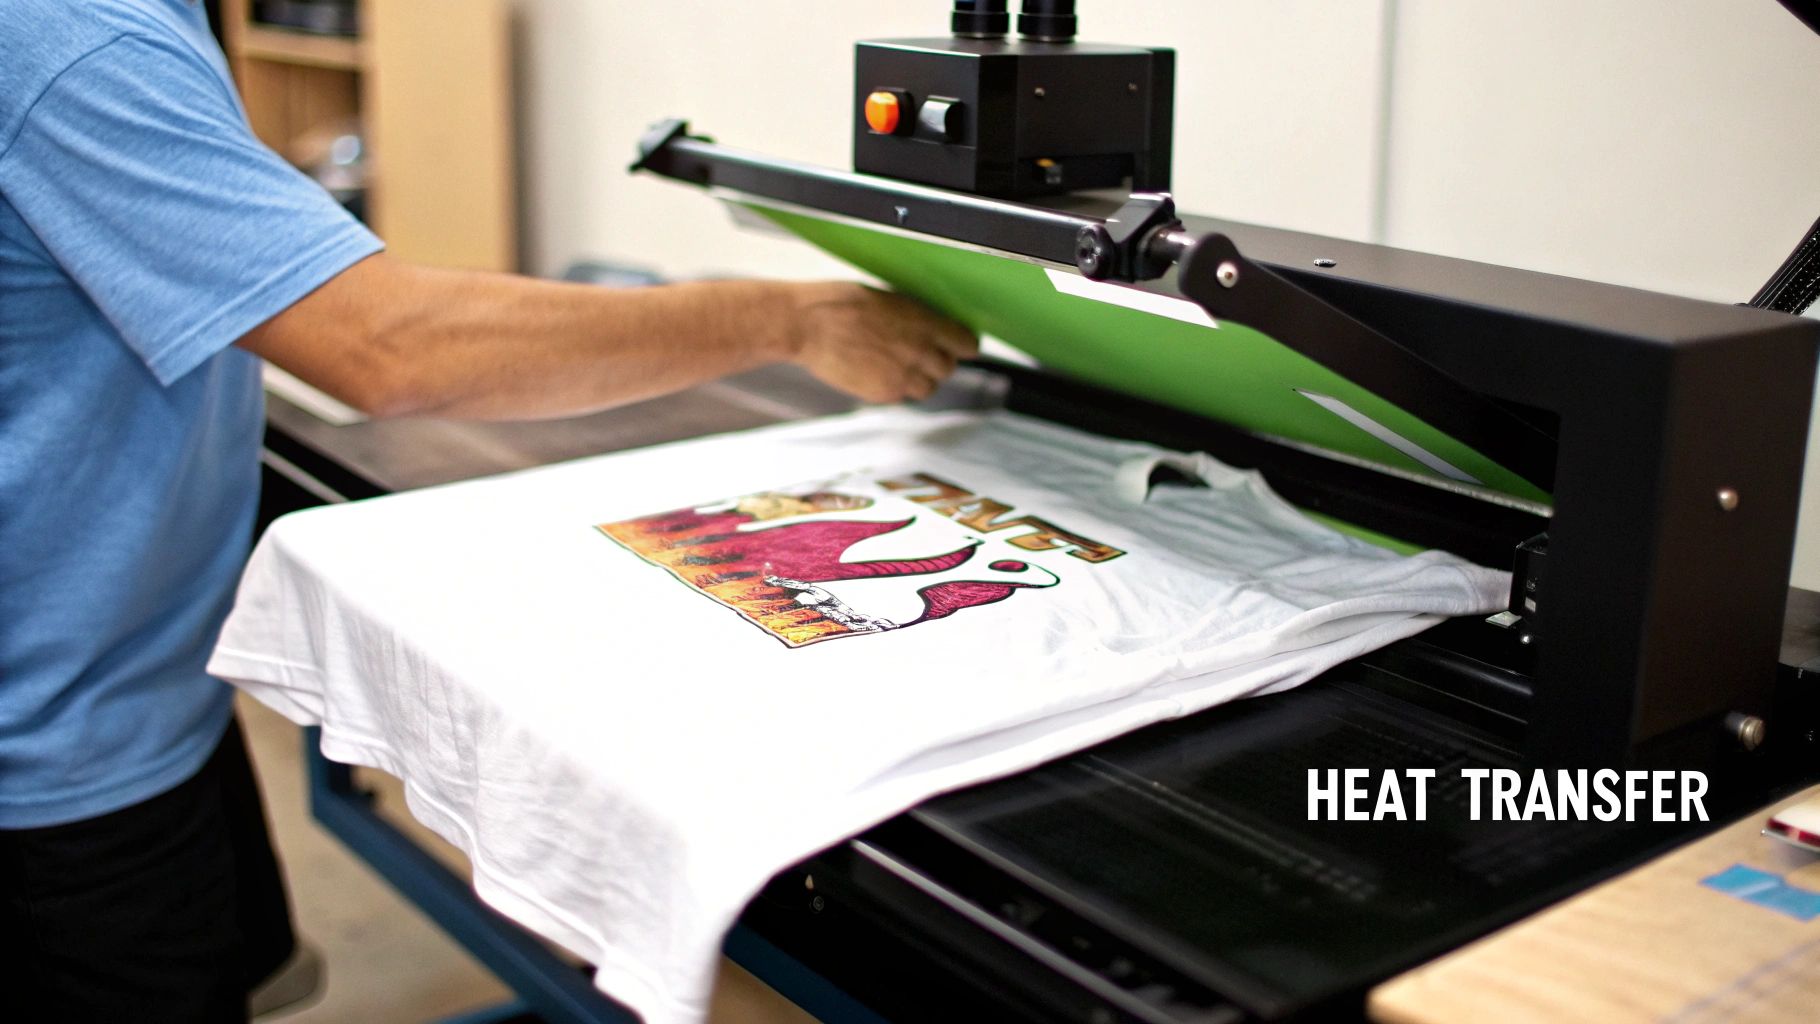
Think of it as a high-tech stamp. First, your design is printed onto a special carrier, like a transfer film. Then, you place that film on a t-shirt, put it in a heat press, and the machine works its magic. The controlled heat and pressure permanently fuse the ink into the fabric's fibers, creating a seamless part of the garment.
The technology has come a long way. The real game-changer has been Direct-to-Film (DTF). DTF transfers are remarkably soft, flexible, and tough enough to handle plenty of wear and washing, all while capturing stunning detail and color. If you're new to the term, you can get the full rundown in our guide on what Direct-to-Film printing is.
Why This Method Is So Popular
The sheer versatility of heat transfer printing is what makes it a favorite for so many creators, from hobbyists to established brands. You aren't boxed into using just one type of fabric, which opens up a world of creative possibilities.
Here’s why so many people swear by it:
- Fabric Compatibility: It works beautifully on 100% cotton, polyester, and the ever-popular poly-cotton blends. These are the workhorses of the t-shirt world.
- Design Complexity: Got a photorealistic image or a design with a dozen colors and fine lines? No problem. Heat transfers handle intricate details without the complex, multi-screen setups that other methods require.
- Cost-Effectiveness for Small Runs: This is a huge win for small businesses. There are virtually no setup costs, making it perfect for custom one-offs, sample runs, or limited-edition drops.
This accessibility has turned custom apparel into a booming industry. The global custom t-shirt printing market was valued at around USD 6.46 billion in 2024 and is only expected to climb. That's a lot of custom tees!
So whether you’re just starting out with a few unique designs or scaling up a full clothing line, heat transfer printing for t shirts offers a reliable, high-quality path to bring your ideas to life. It’s the perfect middle ground between professional quality and practical, accessible production.
Getting Your T-Shirt Printing Space Ready

Before you ever press your first shirt, setting up a smart and efficient workspace is a must. This is about more than just unboxing equipment; it’s about making deliberate choices that will save you a world of headaches and wasted materials later on. The heart of your entire operation is the heat press, so picking the right one is your first critical decision.
You'll mainly find two types on the market: the clamshell and the swing-away. A clamshell press opens and closes like its name suggests, making it a great space-saver. The swing-away, on the other hand, lets you move the hot top platen completely out of the way, giving you a safe, clear view of your shirt as you work.
For anyone just starting out, I often recommend a swing-away. It moves that scorching-hot surface away from your hands, which significantly cuts down the risk of accidental burns while you're carefully lining up your transfer.
Picking a Press and Gathering Your Tools
Your choice of heat press really boils down to your workspace and what you plan to create.
- A clamshell press is perfect for standard t-shirts and fits nicely in smaller workshops or spare rooms. They’re built for speed and efficiency, which is great when you're knocking out a big order.
- A swing-away press gives you more versatility for thicker items like hoodies and offers that extra safety margin and clear line of sight when positioning designs.
Once you have your press, a few other tools are absolutely essential for getting that professional finish. A Teflon sheet is non-negotiable. It acts as a protective barrier between your transfer and the press, preventing scorching and stopping any ink from sticking to the hot platen. You’ll also want some heat-resistant tape to lock your transfers in place—it’s a lifesaver, especially on slippery polyester fabrics that love to shift around.
Key Takeaway: Do yourself a favor and invest in quality tools from day one. A good t-shirt alignment ruler and a fresh roll of heat-resistant tape will pay for themselves by saving you from crooked prints and expensive do-overs.
Before you get started, having a clear list of what you need can streamline the whole process. Here’s a quick rundown of the gear that should be in your workspace.
Essential Equipment Checklist for T-Shirt Heat Transfers
| Item | Primary Function | Key Feature to Consider |
|---|---|---|
| Heat Press | Applies heat and pressure to bond the transfer to the fabric. | Platen Size (should be larger than your biggest design) and Pressure Consistency. |
| DTF Transfers | The printed design on a special film that transfers to the garment. | Vibrancy and Feel (should be soft, not plastic-like) and Peel Type (hot or cold peel). |
| Teflon Sheet | Protects the garment and heat press platen during application. | Durability and Thickness; a good one will last for thousands of presses. |
| Heat-Resistant Tape | Secures the transfer to the shirt to prevent shifting. | Adhesive Strength; it should hold firm but remove cleanly without residue. |
| T-Shirt Alignment Ruler | Ensures consistent and centered placement of designs every time. | Clear Markings and a durable, heat-resistant material. |
| Blank T-Shirts | The canvas for your designs. | Fabric Composition (cotton, poly, blends) and Quality Construction. |
Having these items on hand means you’re prepared for a smooth and successful printing session, rather than scrambling for tools mid-press.
How to Spot a High-Quality DTF Transfer
The quality of your Direct-to-Film (DTF) transfer is just as important as your press. A bad transfer will ruin a good shirt, no matter how perfect your technique is. A top-notch DTF transfer should feel soft and flexible to the touch, not thick or plasticky. The colors need to pop, and all the edges should be sharp and clean, with absolutely no bleeding or fuzziness.
The DTF process is really taking over the custom apparel world because it’s so versatile and looks fantastic on all kinds of fabrics. If you're looking to start a custom apparel business but aren't ready to invest in your own equipment just yet, the Printify Print On Demand service is a solid alternative to handle production.
Heat transfer technology, with DTF leading the charge, is changing the game. It allows for brilliant, full-color designs on cotton, polyester, and blends—something older methods struggled with. This is precisely why its popularity has exploded. When you choose a premium transfer, you're ensuring your final product won't crack, peel, or fade after a few washes, which keeps customers happy and coming back for more.
Getting Your T-Shirt and Design Ready for the Press
A top-notch final product is all in the prep work. Honestly, what you do before that heat press even warms up is what makes the difference between a homemade-looking shirt and something truly professional. Nailing these initial steps with your design file and the t-shirt itself lays the groundwork for a transfer that’s not just vibrant but will last.
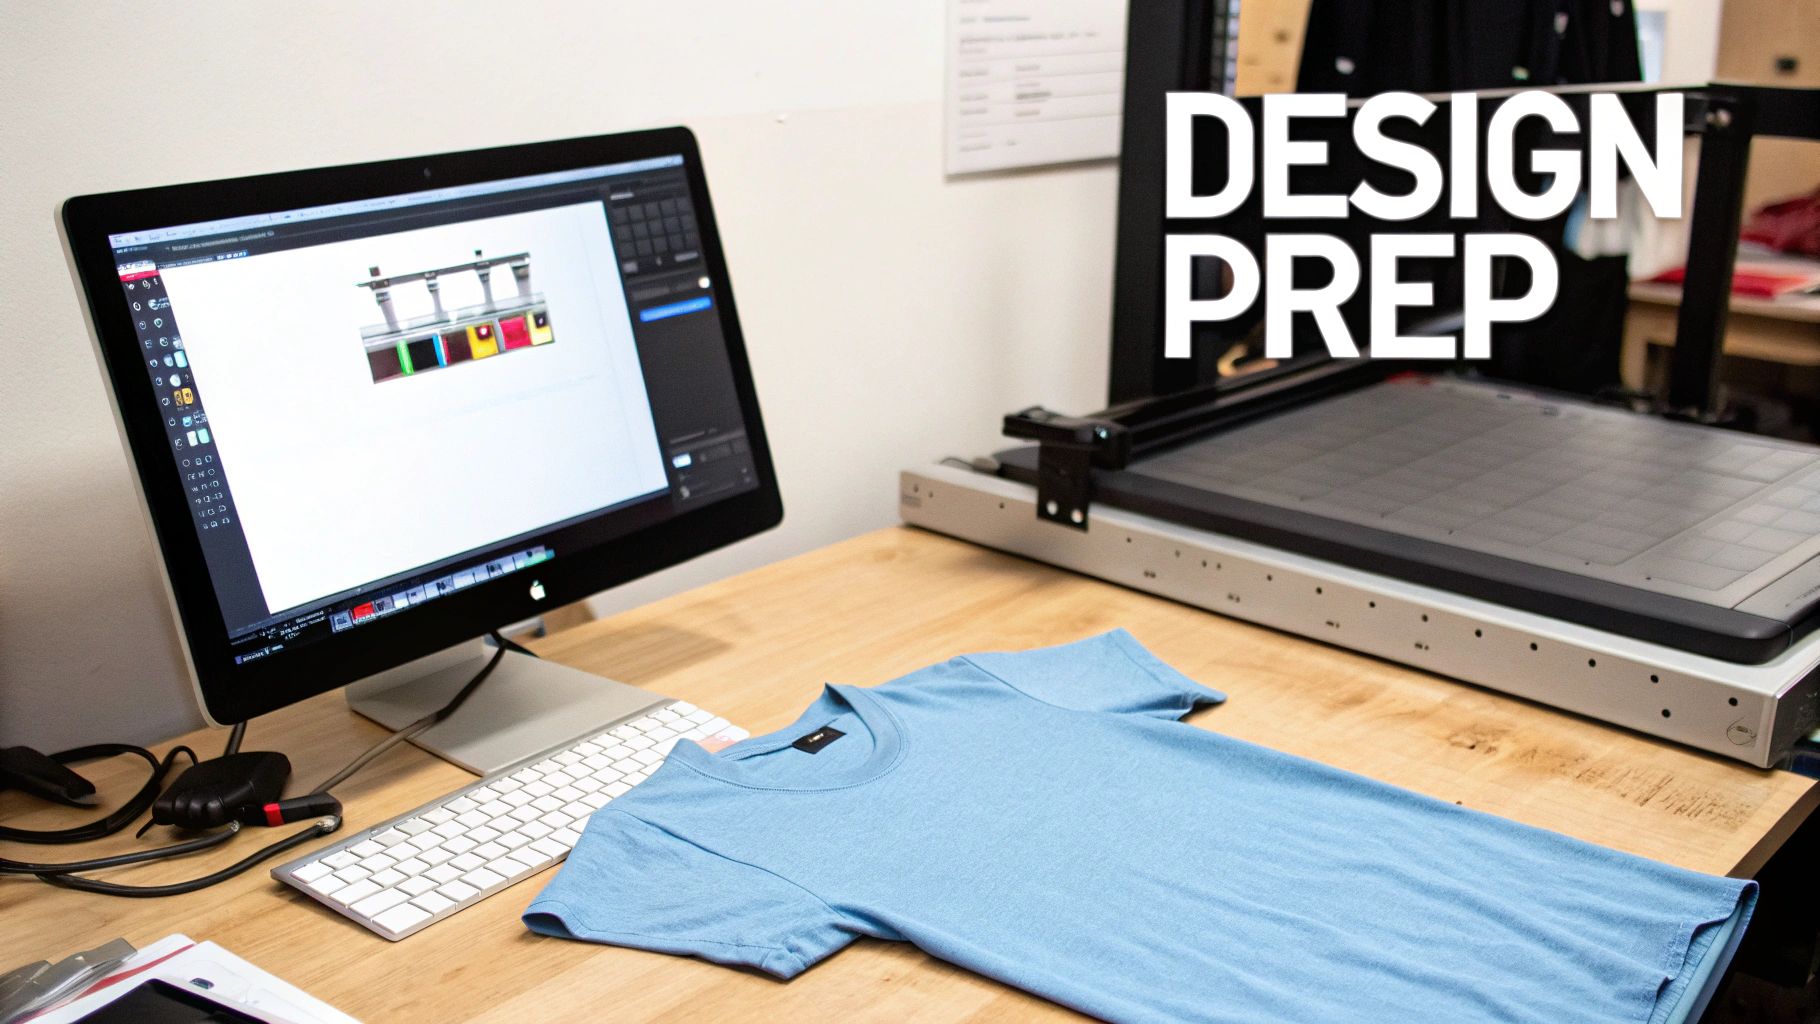
Prepping the Digital Design File
It all starts on the computer. For the cleanest, sharpest heat transfer printing t shirts, you’ll want to work with a PNG file that has a transparent background. This is a non-negotiable for me, as it guarantees only your actual design gets printed—no weird white boxes ghosting around your graphic.
Your file’s resolution is just as important. Always, and I mean always, export your design at 300 DPI (dots per inch). That's the gold standard for print quality. Anything less might look okay on your monitor, but it will almost certainly come out looking fuzzy and pixelated on fabric.
Sizing and Mirroring Your Graphic
Once your file is technically sound, it's time to think about sizing. A design that’s perfect for a medium tee can look comically small on a 3XL or just way too loud on a youth small. As a starting point, I usually size my adult chest prints somewhere between 9 and 12 inches wide, but I always adjust based on the specific shirt I'm working with.
Here’s a step that trips up so many people: you have to mirror your image before you send it off to be printed. Your DTF transfer is applied face-down, so flipping the design horizontally is the only way it will read correctly once you press it. Forgetting this is a painful (and sometimes costly) mistake, especially with text.
Pro Tip: I always do a quick reality check. Print your design to scale on a regular piece of paper and lay it on the shirt. This simple mockup lets you see exactly how the size and placement will look in the real world before you commit a real transfer.
Getting the T-Shirt Itself Ready
Okay, your transfer is perfect. Now, let's turn to the shirt. Don't just pull a t-shirt out of the box and slap a design on it. That's a classic rookie mistake that leads to peeling and poor adhesion down the line.
Every new shirt has two things you need to deal with: moisture and wrinkles.
A quick five-second pre-press is the solution. Just lay the shirt on your press, close it for a few seconds, and pop it open. You'll probably see a little puff of steam, which is exactly the moisture you want to get rid of. This also gives you a perfectly smooth, flat canvas for your transfer.
Finally, you need to get the alignment right. A crooked print can ruin an otherwise perfect shirt. The easiest way to find the center is to fold the shirt in half lengthwise and give it a quick press to create a faint crease down the middle. This little line is your best friend for lining up the transfer perfectly every time. The material also plays a huge role in your settings; for more on that, take a look at our guide explaining the key differences between cotton vs polyester t-shirts and how each one behaves under heat.
Nailing Your Heat Press Technique
Alright, your design is ready, your t-shirt is prepped, and now we're at the moment of truth for heat transfer printing t shirts. This is where all that careful work pays off and your digital design becomes a real, wearable product. Getting a perfect, durable print every single time comes down to a delicate balance of three things: temperature, time, and pressure.
Think of it like cooking a perfect steak. You need the right heat for the right amount of time. A one-size-fits-all approach here just doesn't work; you'll either end up with scorched shirts or transfers that peel off after the first wash.
Settings for Different T-Shirt Fabrics
The fabric of your shirt is what dictates your heat press settings. A sturdy 100% cotton tee can take a good amount of heat, but a delicate polyester blend needs a much lighter touch to avoid melting the fibers or leaving that dreaded "press box" outline.
Here's a quick reference guide to get you started. These are solid industry standards, but always—and I mean always—check the recommendations from your specific DTF transfer supplier first. They know their product best.
Heat Press Settings for Common T-Shirt Fabrics
| Fabric Type | Temperature Range (°F/°C) | Time (Seconds) | Pressure Level |
|---|---|---|---|
| 100% Cotton | 300-325°F / 149-163°C | 10-15 seconds | Medium-Firm |
| 100% Polyester | 270-290°F / 132-143°C | 8-12 seconds | Medium |
| 50/50 Blends | 280-300°F / 138-149°C | 10-12 seconds | Medium |
This table is a great starting point for dialing in your press for the most common t-shirt materials you'll be working with.
Pressure is the unsung hero here. For most t-shirts, you’re aiming for a solid medium to firm pressure. You should feel some real resistance when you lock the handle down, but you shouldn't have to throw your whole body weight into it. If your press doesn't have a fancy digital pressure gauge, don't worry. The old-school "paper test" works wonders: just slide a piece of paper between the platens, close it, and try to pull the paper out. It should be held tight but still be removable with a firm tug.
Hot Peel vs. Cold Peel: What's the Difference?
Once that timer beeps, your next move depends entirely on the type of DTF transfer you're using. They generally fall into two camps: hot peel or cold peel.
- Hot Peel: Just like it sounds, you peel the clear film off immediately while the shirt is still piping hot. This is my go-to for speed and efficiency, and it usually leaves the print with a nice, soft, matte finish.
- Cold Peel: For these, you have to be patient. You need to let the garment cool down completely before even thinking about touching that film. The reward is often a slightly glossier, super-smooth finish.
Mixing these up is a recipe for disaster. Try to hot peel a cold peel transfer and you'll get a stretched, goopy mess. Wait too long on a hot peel and the film can be a nightmare to get off. Always, always confirm the peel type with your supplier.
While we're focused on DTF, these core principles of heat and time are universal in the world of heat transfers. If you want to dive deeper, we cover similar fundamentals in our guide on how to use heat transfer paper.
A Real-World Scenario: Let's say you're pressing a design over a bulky seam, like on a hoodie pocket. The uneven surface makes getting even pressure a real challenge. My trick for this is to use a heat press pillow. You slide it inside the hoodie to raise the printing area, creating a flat, even surface for the press to make perfect contact with the entire transfer.
Aftercare And Troubleshooting Common Print Issues
A great press is a fantastic start, but it's only half the job. What happens after the t-shirt leaves your shop is what truly determines its lifespan. How you handle aftercare and troubleshoot the inevitable hiccups will define the quality your customers remember.
Think of it this way: providing clear care instructions isn't just a nice-to-have, it's a critical final step in protecting your work and your reputation.
Simple Aftercare Instructions For Longevity
To keep that print looking sharp and vibrant for the long haul, your customers need a little guidance. These simple rules are my go-to for preserving the elasticity and pop of a DTF transfer.
- Let it cure. The transfer needs to fully bond with the fabric. Tell your customers to wait at least 24 hours before that first wash.
- Turn it inside out. This is a non-negotiable. Washing the shirt inside out protects the design from getting roughed up by other clothes or the machine itself.
- Go cold. Hot water is the enemy of the transfer's adhesive. Always recommend a cold wash on a gentle cycle.
- Low heat or no heat. High heat in the dryer can wreak havoc. Advise customers to tumble dry on the lowest setting. Even better? Hang it up to air dry.
This infographic lays out the essentials for getting the application right in the first place, which is the best way to ensure a durable print.

Getting that balance of temperature, pressure, and time just right will prevent most of the common headaches I see people run into.
Solving Common Heat Transfer Problems
Even when you do everything by the book, sometimes things just don't go as planned. Here’s a quick field guide to identifying and fixing the most frequent issues.
Problem 1: The Design Is Peeling After Washing
This is the classic sign of a bad press. If a customer says their design is lifting or peeling after just one wash, the first place to look is your application process.
The number one cause I see for peeling is not enough pressure. Your heat press needs to apply firm, even pressure to melt that adhesive and really work it into the fibers of the shirt. Too light, and you get a weak bond that's just sitting on the surface.
Also, take another look at your temperature and time. If you're running too cool or not pressing long enough, the adhesive never gets a chance to fully activate.
Problem 2: A Faint Box or Discoloration Surrounds the Print
Ah, the dreaded press box. This is called scorching, and it happens when your heat is set too high for the material you're working with. It's especially common with polyester and poly-blends.
To avoid it, the fix is simple: turn down the heat. I always tell people to stay under 290°F (143°C) for polyester to be safe. Another pro tip is to use a Teflon sheet; it helps diffuse the heat and adds a layer of protection for the fabric.
The demand for high-quality custom gear isn't slowing down, especially in areas like sports and corporate branding. The custom t-shirt printing market is projected to grow from USD 8.17 billion in 2024 to USD 9 billion in 2025, and heat transfer methods are a huge part of that. If you're interested, you can discover more insights about this custom apparel market trend and what's driving it.
Answering Your Top T-Shirt Heat Transfer Questions
When you're getting started with heat transfer printing t shirts, you're bound to have questions. Everyone does. Getting good answers from the get-go can save you a ton of headaches, so let's walk through a few of the most common things people ask.
How Long Does a Heat Transfer Print Actually Last on a Shirt?
This is probably the number one question I hear, and for good reason. The great news is that a high-quality DTF transfer, when applied correctly, is built to last. We're talking 50 or more washes before you'd even start to see signs of wear like cracking or fading. That's right up there with traditional screen printing.
But, and this is a big but, that longevity depends on a few things:
- The Transfer Itself: Quality matters. Starting with a top-notch DTF transfer is half the battle.
- Your Pressing Technique: You have to nail the temperature, time, and pressure for the specific shirt you're working on. This is where most prints fail—an inconsistent press leads to a print that won't last.
- Aftercare: How the shirt is washed and dried makes a huge difference. Good care extends the life of the print significantly.
Forget those stiff, peel-prone iron-ons you remember from craft stores. Today's professional heat transfers are a different breed entirely. When you do it right, the result is a soft, flexible design that can handle the rigors of daily wear and tear.
Can I Just Use My Home Iron for This?
I get why people ask this—it seems like an easy shortcut. But honestly, for professional DTF transfers, using a home iron is a recipe for disaster. It really boils down to two major problems: inconsistent heat and uneven pressure.
A real heat press is engineered to maintain a specific temperature across the entire platen and clamp down with uniform, heavy pressure. Your household iron just can't do that. It creates hot and cool spots, meaning one part of your design might stick perfectly while another part starts peeling off after the first wash. If you want a durable, professional-looking shirt that you can be proud of, a proper heat press is a non-negotiable investment.
What’s the Real Difference Between DTF and Screen Print Transfers?
The best way to think about this is to look at how they're made and what each one is best for.
DTF, or Direct-to-Film, is a digital process. Think of it like a highly specialized printer that can produce designs with unlimited colors, smooth gradients, and super-fine details. This makes DTF the clear winner for things like photorealistic images or complex logos, especially for smaller runs where you don't want to pay hefty setup fees.
Screen print transfers are a more traditional method. Plastisol ink gets pushed through a mesh screen onto release paper, one color at a time. Because each color needs its own screen, this process is ideal for simpler, spot-color designs. It really shines on huge bulk orders, where the initial setup cost is spread out over hundreds or thousands of shirts, making the per-unit price very low.
So, in a nutshell: DTF gives you total design freedom and versatility, while screen printing offers incredible efficiency for high-volume jobs.
Ready to create stunning, durable custom apparel with a team that knows quality? At Cobra DTF, we provide premium, American-made DTF transfers with vibrant colors and a fast, reliable turnaround. Explore our high-quality DTF transfers and elevate your printing game today!