
Heat Press Temps The Definitive Guide for Perfect DTF Transfers
Getting your heat press temps right is everything when it comes to DTF. You're generally looking at a range between 275°F for sensitive synthetics and up to 350°F for durable cottons. Dialing in the perfect combination of temperature, time, and pressure for each fabric is the single most important factor for getting those sharp, long-lasting prints you're after.
Your Quick Reference Guide to DTF Heat Press Temps
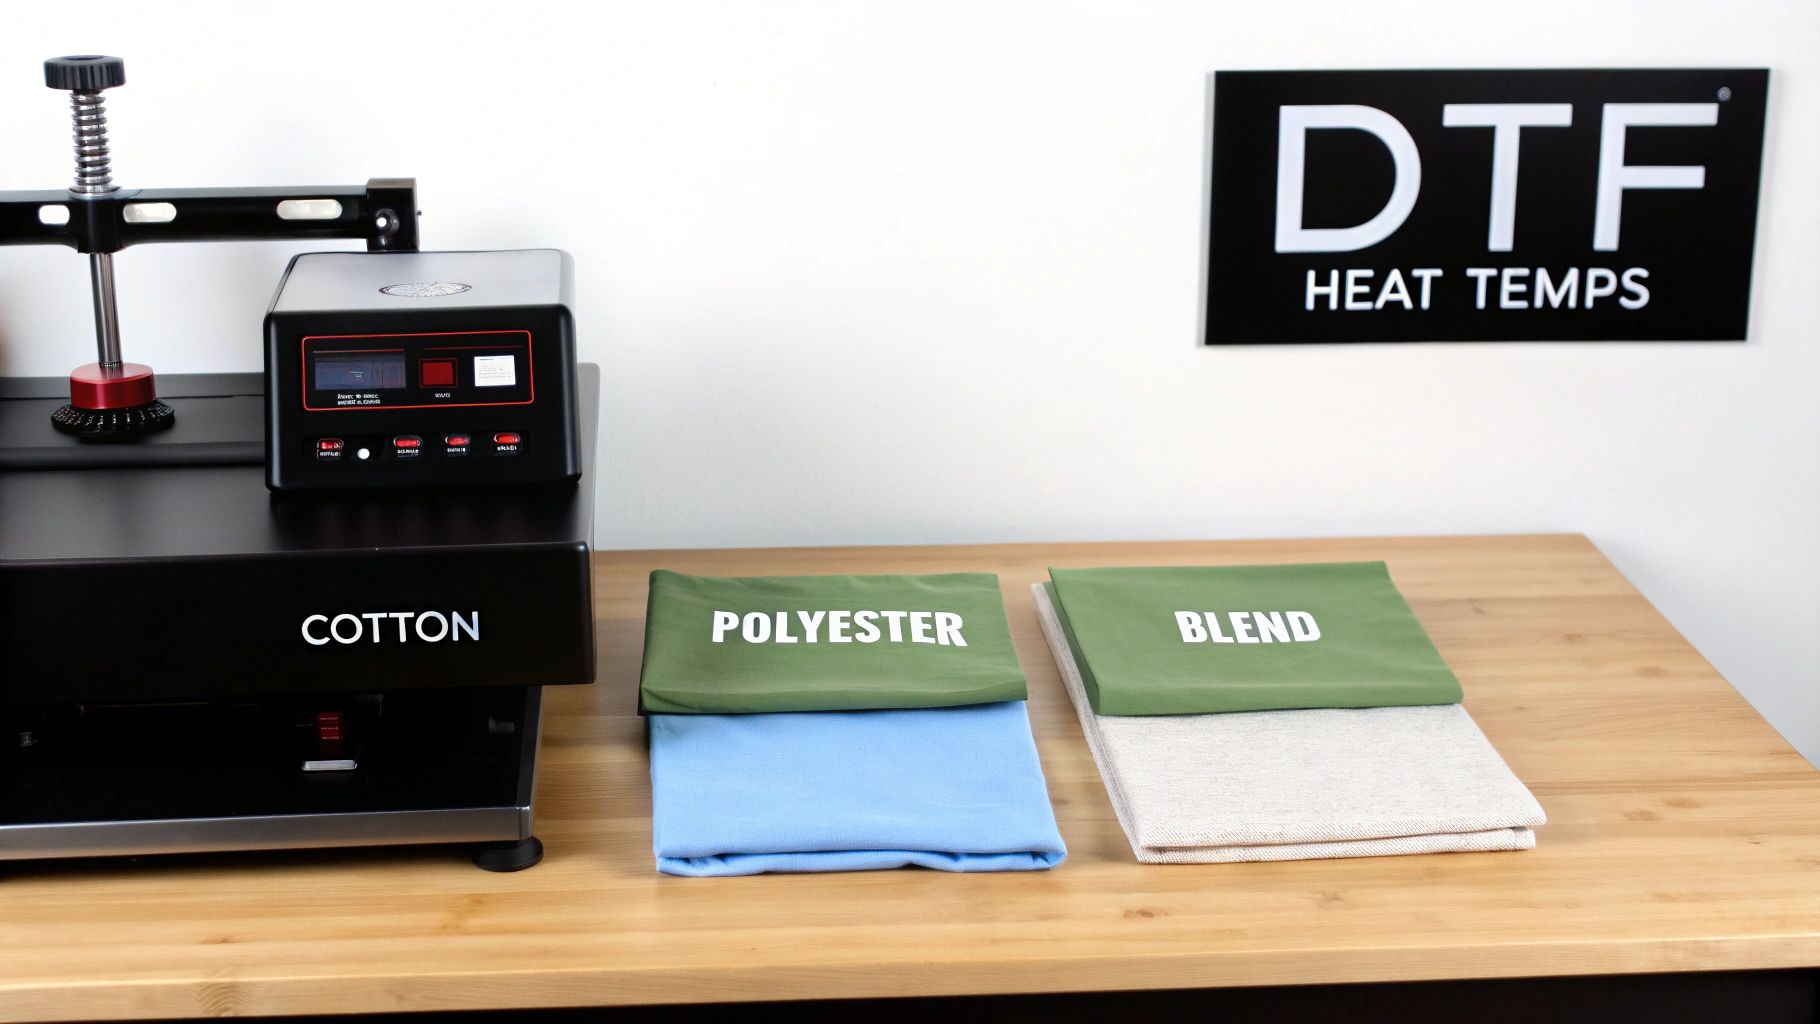
When you're starting a new job, you need settings you can trust. This chart is your go-to starting point for the most common fabrics you'll be working with day in and day out.
Think of these heat press temps as solid recommendations, but always keep in mind that every setup is a little different. Your specific heat press, the brand of the garment, and even the humidity in your shop can affect the final result. That's why I always say: treat this chart as your launchpad, not the final word.
The best habit you can ever get into is running a quick test press. Always. Grab a scrap piece of the same material or find a hidden spot on the garment itself before you commit to the full run. It’s a simple step that can save you a world of hurt, from scorching a delicate polyester to having a print peel off after one wash.
DTF Quick Reference Heat Press Settings
Here’s a breakdown of the optimal temperature, time, and pressure settings for applying DTF transfers. Use these as your baseline to get flawless results right from the start.
| Fabric Type | Temperature (°F/°C) | Time (Seconds) | Pressure | Peel Type |
|---|---|---|---|---|
| 100% Cotton | 320-350°F / 160-177°C | 15-20 | Medium-Firm | Hot/Warm |
| 100% Polyester | 275-305°F / 135-152°C | 10-12 | Medium | Cold |
| 50/50 Blends | 300-320°F / 149-160°C | 12-15 | Medium | Warm/Cold |
| Tri-Blends | 280-305°F / 138-152°C | 10-15 | Light-Medium | Cold |
| Canvas/Denim | 320-340°F / 160-171°C | 15-20 | Firm | Hot/Warm |
After you get comfortable with these settings, you’ll probably start developing your own specific recipes for the garments you use most. If you're looking to document your own procedures for your team, learning how to create effective step-by-step guides is a seriously valuable skill. Mastering the numbers here is the first step, but creating your own internal cheat sheets is what takes your shop to the next level of consistency.
Why Nailing Your Heat Press Temperature is Everything
Getting your heat press temperature right isn't just a minor detail—it's the absolute cornerstone of a great-looking, long-lasting print. Think of it less like ironing and more like a controlled chemical reaction. The right amount of heat is the trigger that melts the DTF transfer's adhesive, allowing it to fuse deep into the fabric fibers. That's what creates a permanent, flexible bond.
When you nail this process, the results speak for themselves. The ink cures perfectly, locking in those bright, vibrant colors that won't fade away. The design feels like it's part of the shirt, not just sitting on top of it, so it stretches without cracking or peeling. This is the kind of quality that builds a solid reputation and brings people back for more.
The Science Behind a Perfect Press
The real magic of a DTF transfer happens within a very specific temperature window. If you go too low, the adhesive never fully melts. It can't sink in and grab onto the fabric, which means the transfer is almost guaranteed to fail after the first wash. It might look okay coming off the press, but it has zero durability.
On the flip side, too much heat is just as destructive. Excessive temps can easily scorch sensitive fabrics like polyester, leaving behind a permanent yellow stain or that dreaded shiny outline of your press. It can also over-bake the ink and adhesive, turning a soft design into a stiff, plastic-feeling patch that nobody wants to wear.
Getting this right is more critical than ever. The global heat press market was valued at $829.13 million and is expected to hit $1,315.39 million by 2032. With so much growth, mastering the fundamentals like temperature control is what separates the pros from the amateurs. You can dig into more of these market trends over at Verified Market Research.
How Temperature Control Impacts Your Business
Let's be real: every failed press costs you money. Wasted transfers, ruined shirts, and lost time add up quickly and eat directly into your profits. Dialing in your temperature settings is a direct investment in your business's health.
Inconsistent heat is the number one reason for inconsistent results. A few degrees is all it takes to go from a perfect transfer to a piece of garbage. That's why you have to treat your heat press like a precision tool, not just a simple heater. It’s the key to growing your operation.
By mastering your heat press temps, you directly influence your success:
- Boost Product Quality: You can consistently produce vibrant, soft, and durable prints that justify higher prices and build customer trust.
- Increase Customer Satisfaction: Say goodbye to complaints and returns from designs that peel, crack, or fade prematurely.
- Minimize Material Waste: Fewer errors from scorching or bad adhesion means more money stays in your pocket.
Ultimately, precise temperature control is what elevates you from a hobbyist to a professional. It ensures every single item you sell meets a high standard, protecting your inventory and your brand's reputation with every press. This is one skill that is absolutely non-negotiable for getting reliable, top-tier results.
Heat Press Settings for Cotton and Other Natural Fibers
When you're working with 100% cotton, canvas, and other natural fibers, you've got a fantastic, durable surface for DTF transfers. These fabrics are pretty tough and can handle higher temperatures, which is exactly what you need to cure the transfer's adhesive and lock the ink into the material for a lasting print.
The whole game is about melting that adhesive layer just right. You want it to permanently grab onto the cotton fibers. When you nail it, the result is a soft, flexible design that moves with the shirt instead of feeling like a rigid sticker just sitting on top.
Our Go-To Settings for Cotton
For almost any 100% cotton garment, a great place to start is in the 320-350°F (160-177°C) range. This sweet spot is hot enough to get a strong bond without scorching the resilient cotton fabric.
Here’s the complete recipe I use for consistent results:
- Temperature: 320-350°F (160-177°C)
- Time: 15-20 seconds
- Pressure: Medium to firm (40-60 PSI)
These settings deliver the heat and pressure needed to really push the transfer into the fabric's weave. Knowing how different fabrics react to heat is a huge part of the job. To learn more, check out our guide on cotton vs. polyester applications.
Why You Can’t Skip the Pre-Press
Seriously, never skip the pre-press. Cotton is a natural fiber that soaks up moisture from the air, and that hidden water is the number one enemy of a good transfer. Pressing a shirt with any moisture in it creates steam, which messes with the adhesive and can cause your transfer to fail down the road.
A quick pre-press for 5-7 seconds does two critical things:
- Drives Out Moisture: It turns any dampness in the fabric to steam, giving you a perfectly dry surface for the transfer to stick to.
- Smooths the Surface: It flattens out any wrinkles, ensuring the heat platen makes even contact across the entire design for uniform pressure.
Pro Tip: Don't panic if you see a slight yellowing on a light-colored cotton shirt right after pressing. This is often just moisture being cooked out of the fibers. Let the shirt cool down completely; in most cases, the mark will vanish. If it doesn't, just nudge your temperature down a little for the next one.
This simple step is non-negotiable if you're aiming for professional, long-lasting results on your cotton projects. It truly sets you up for a perfect application every time.
Getting Your Heat Press Settings Right for Polyester and Synthetics
When you're working with polyester or other synthetic fabrics, you need a different game plan than you'd use for cotton. These materials are much more sensitive to heat, and getting your heat press temps wrong can spell disaster. We're talking about melting, scorching, or leaving behind that dreaded shiny press box outline around your design. Precision is everything.
The biggest headache with synthetics, especially the darker ones, is dye migration. This happens when the press is too hot, causing the dye in the fabric to turn into a gas and stain your transfer. A crisp white design can quickly become a murky pink or gray. The fix is to use a lower temperature and a shorter press time.
Recommended Settings for Polyester
With 100% polyester, your goal is simple: apply just enough heat to activate the transfer adhesive but not so much that you damage the fabric. It's a delicate balance.
Here are the starting point settings I recommend for polyester and similar synthetics:
- Temperature: 275-305°F (135-152°C). I can't stress this enough: always start at the low end of this range. You can always nudge it up if the transfer isn't sticking properly.
- Time: 10-12 seconds. A quick press is crucial. It minimizes the time the fabric is exposed to potentially damaging heat.
- Pressure: Medium. Too much pressure will just smash the transfer into the fabric's weave, giving it a flat, unnatural look.
Must-Do Steps for a Perfect Press on Synthetics
Getting professional-looking prints on performance wear and athletic apparel is about more than just the numbers. A few good habits in your pressing process will save you from ruining expensive garments.
First off, a cold peel is non-negotiable for polyester. Once you've pressed the garment, let it cool down to room temperature before you even think about peeling the film. This gives the adhesive time to fully cure and grab onto the synthetic fibers, which dramatically reduces the chance of the transfer peeling up. Of course, starting with the right garment helps, too. For some great recommendations, check out our guide on the best shirts for DTF transfers.
Pro Tip: Never press polyester without a protective cover sheet. A Teflon sheet or a piece of parchment paper acts as a buffer, helping to distribute heat evenly and shielding the fabric from direct contact that can cause scorching or that ugly glossy finish.
Heat Press Settings for Blended Fabrics like 50/50 and Tri-Blends
Blended fabrics are popular for a reason—they give you the best of both worlds. You get the soft, breathable feel of cotton mixed with the durability and wrinkle-resistance of polyester. But when it comes to heat pressing, this combination requires a bit more finesse. You're trying to cure the DTF adhesive so it bonds permanently, but you have to be careful not to scorch the heat-sensitive synthetic fibers.
The whole game is a balancing act. Too little heat and the transfer won't last. Too much, and you'll end up with that ugly, shiny "press box" outline or, even worse, a melted shirt. Finding that sweet spot between temperature, time, and pressure is what separates an amateur from a pro.
Finding the Sweet Spot for Blends
For most blended fabrics, a moderate temperature range is your safest bet. It's just hot enough to get the job done without melting or discoloring the polyester in the mix.
For a standard 50/50 cotton/polyester blend, this is a solid starting point:
- Temperature: 300-320°F (149-160°C)
- Time: 12-15 seconds
- Pressure: Medium
Tri-blends, which often include rayon, are even more delicate. For those, I always recommend starting on the lower end of that temperature range. It’s better to press twice than to ruin the garment.
When you're working with blends, precision is everything. A few degrees can be the difference between a perfect print and a ruined shirt. Always start with the lowest recommended temperature and do a test press to find what works for your specific garment and equipment.
The Impact of Precise Settings
Nailing your heat press settings for blends isn't just about making the final product look good; it directly impacts your wallet by cutting down on mistakes. In fact, production data shows that fine-tuning your settings can drastically reduce waste. Some shops have seen an 18% drop in wasted material just by creating a specific heat profile for their 50/50 blends.
Getting specific—like dialing in 305°F at 30 PSI for 10-12 seconds on polyester-heavy blends—is how you prevent scorching while still getting a vibrant, durable transfer. If you want to dig into the numbers, Scalable Press has some great data on how optimized settings boost production efficiency.
The takeaway is clear: taking the time to fine-tune your heat press is one of the single most effective ways to slash costly errors and make your workflow smoother. A methodical, careful approach to blended fabrics will give you consistent, professional results every time.
The Essential Guide to Performing a Test Press
Reference charts are a great starting point for heat press temps, but they aren't the final word. The truth is, every heat press has its own quirks, and even different dye lots of the same t-shirt brand can react differently. This is why the single most important habit for getting flawless results is always performing a test press.
Skipping this step is a gamble that risks wasting expensive garments and valuable transfers. A quick, methodical test takes the guesswork out of the equation, confirming your temperature, time, and pressure are perfectly dialed in for the specific materials you're working with. This isn't just a best practice; it's a core part of any professional workflow.
The Test Press Workflow
Executing a proper test is simple and takes less than a minute. You'll want to use a scrap piece of the same fabric or find an inconspicuous spot on the garment itself, like the inside hem or the bottom back.
- Select Your Test Area: Choose a spot that won't be visible on the final product. A small, leftover piece of a transfer design is perfect for this.
- Press the Garment: Start with the recommended settings from our reference chart as your baseline. For a 50/50 blend, for example, you might begin at 310°F for 12 seconds.
- Perform the Peel and Stretch Test: Once pressed and peeled (following the hot or cold peel instructions), gently stretch the fabric where the test transfer was applied. This is the moment of truth where you diagnose the result.
This quick procedure gives you immediate, tangible feedback on whether your settings are correct before you commit to the full production run. For a deeper dive into the mechanics of application, our complete guide on DTF press instructions offers even more valuable insights.
Diagnosing Your Results
What you see during the stretch test tells you everything you need to know. You're looking for a transfer that stretches smoothly with the fabric and shows no signs of cracking or stress.
A perfect test press results in a transfer that looks and feels like it's part of the fabric itself. If it cracks, the heat was too low. If it's glossy or stiff, the heat was too high. The stretch test never lies.
Use these visual cues to make precise adjustments:
- If the transfer cracks or peels: This is a classic sign of poor adhesion. The culprit is almost always not enough heat or pressure. Try increasing your temperature by 5-10 degrees or adding a few seconds to your press time, then test again.
- If the transfer has a glossy finish: This usually indicates too much heat. The excess temperature has essentially over-baked the adhesive, giving it a shiny, almost plastic-like look. Reduce your temperature by 5-10 degrees.
By following this simple, repeatable process, you can systematically dial in the perfect heat press settings for any garment, ensuring every single print is durable, vibrant, and professional.
Troubleshooting Common Heat Press Transfer Issues
Even when you follow all the recommended guidelines for heat press temps, things can still go wrong. A tiny bit of moisture in a cotton shirt, a cold spot on your platen, or a slight difference in fabric blend can be all it takes to ruin a press. This section is your field guide for figuring out what went wrong and how to fix it, saving you plenty of time, materials, and headaches.
Instead of just guessing and wasting transfers, let's walk through the most common problems one by one. The goal is to get you back to making great-looking products, and a methodical approach is the fastest way there.
Transfer Is Not Sticking or Peels After Washing
This is, without a doubt, the most frequent problem we see. When a transfer doesn't bond correctly, it either lifts right off the shirt during the peel or, even worse, comes off in the first wash.
Nine times out of ten, the culprit is a breakdown in the core trio: heat, pressure, or moisture.
- Temperature Is Too Low: That DTF adhesive needs to hit a specific temperature to properly melt into the fabric's fibers. If your heat press temps are too low, you're only getting a weak, superficial bond that's doomed to fail. The fix: Bump your platen temperature up by 5-10°F and run another test.
- Not Enough Pressure: The right pressure is what physically forces that melted adhesive into the weave of the garment. If your pressure is too light, the transfer is just sitting on the surface instead of becoming part of the fabric. The fix: Adjust your press to a firmer setting (for example, go from medium to medium-firm) and try again.
- Hidden Moisture: Natural fibers like cotton are like sponges—they pull moisture right out of the air. When you press a damp garment, that moisture turns to steam and actively blocks the adhesive from bonding. The fix: Always, always do a 5-7 second pre-press. This drives out any moisture and gives you a perfectly flat surface to work with.
Garment Scorching or Discoloration
There's nothing more frustrating than pulling a beautiful white shirt off the press only to see a lovely yellow or brown scorch mark. This is a dead giveaway that the fabric was exposed to way too much heat for its own good.
Polyester and poly-blends are especially sensitive to scorching. The fix is pretty simple, though: you just need to dial back your settings.
Pro Tip: I always recommend using a Teflon sheet or a sheet of parchment paper as a protective barrier. It helps distribute the heat more evenly and prevents the direct, intense contact that causes scorching. It's a must-have for any synthetic fabrics.
Start by lowering your temperature in small steps, about 5-10°F at a time, until the discoloration stops. You might also want to shave a couple of seconds off the press time, as being under heat for too long can be just as damaging as the heat being too high.
This decision tree gives you a quick visual for troubleshooting your test presses.
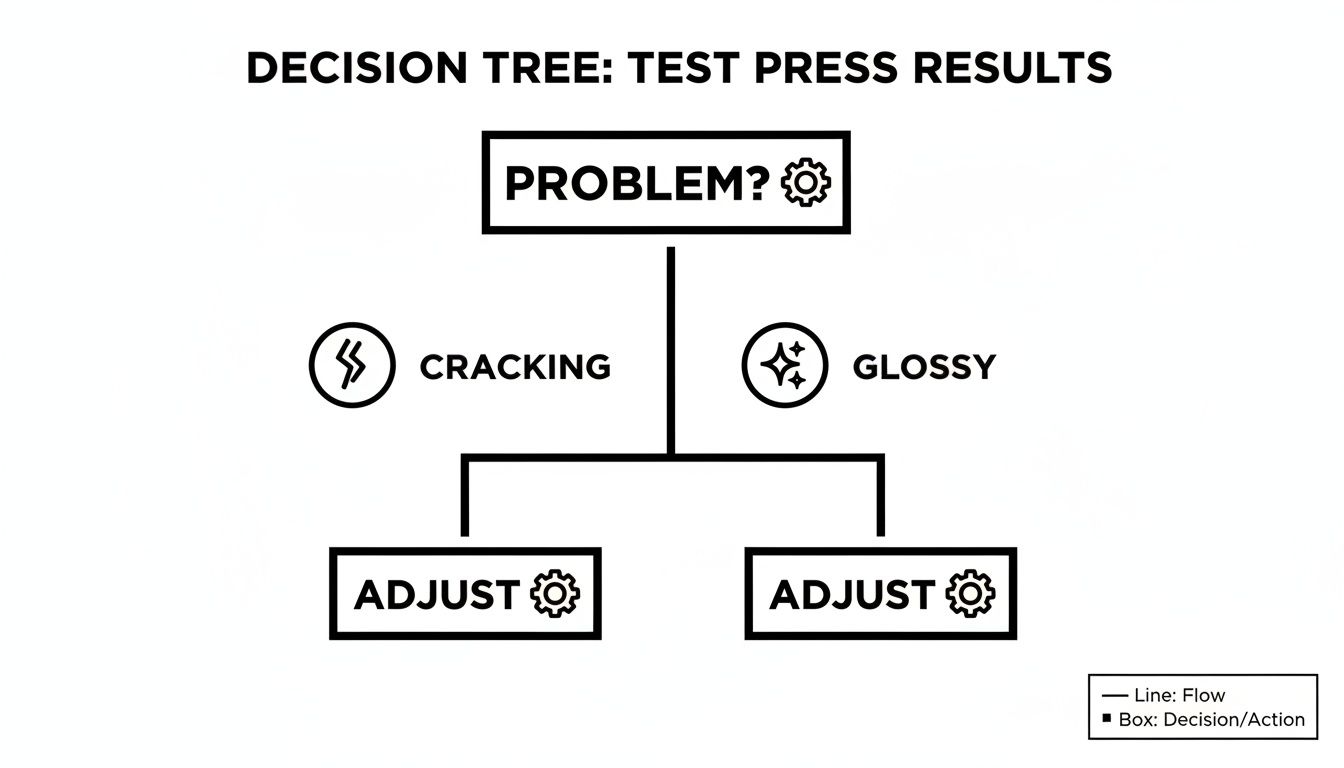
As the chart shows, whether the transfer is cracking or looks too shiny, the answer is always a calm, methodical adjustment to your press settings.
Dye Migration on Polyester Fabrics
If you’ve ever pressed a brilliant white design onto a red polyester shirt and watched it slowly turn pink, you’ve met dye migration. This happens when high heat turns the fabric's own dye into a gas (a process called sublimation), which then stains your transfer ink from below.
This is purely a heat-related issue, and it's a constant battle when working with polyester.
- Cause: The heat press temps are too high for that specific synthetic fabric, causing the garment's dyes to activate and bleed.
- Solution: Your first move should be to lower your temperature into the sweet spot for polyester, which is typically around 275-305°F (135-152°C). Sticking to a shorter press time of 10-12 seconds also helps by giving the dyes less time to migrate.
Uneven or Incomplete Transfer Application
When one part of your design looks perfect but another area is patchy or peels up, the problem is almost certainly an uneven distribution of heat or pressure. Your press simply isn't delivering the same conditions across the entire platen.
This is an incredibly common issue with cheaper, entry-level heat presses that are prone to developing "cold spots" or having warped platens over time.
- Uneven Temperature: The best way to check this is with an infrared temperature gun. Scan it across your heated platen and look for any major temperature drops. If you find significant cold spots, your machine might need servicing, or it could be time for an upgrade.
- Warped Platen: A platen that isn't perfectly flat can't make even contact with the garment. A great, simple diagnostic is the "paper test." When the press is cold, place a piece of paper in each of the four corners and clamp it down. If you can easily slide one of the pieces out, your pressure is uneven.
Frequently Asked Questions About Heat Press Temps
Even with a detailed guide in hand, questions always come up when you're right in the middle of a job. This is where we'll tackle the most common questions we get about heat press temps and getting your DTF transfers just right. Think of this as your quick-reference for those real-world, "what do I do now?" moments.
We’re covering everything from finding a solid starting point for your settings to explaining why your home iron isn't up to the task. The goal here is to build on what we’ve already discussed, giving you that extra bit of knowledge to nail your technique every time.
What Are the Best General Heat Press Temps for DTF Transfers?
While there's no single "magic number" that works for everything, a great starting point for 100% cotton is 325°F (163°C) for 15 seconds with medium pressure. But remember, the fabric you're pressing is the single most important factor. You always need to adjust your settings based on the material.
Synthetics, for instance, demand a gentler touch.
- For 100% polyester, you’ll want to drop the temperature to somewhere between 280-300°F (138-149°C) and shorten the press time to 10-12 seconds. This is crucial for avoiding scorched, shiny fabric.
- With 50/50 blends, you'll land somewhere in the middle. Aim for 300-320°F (149-160°C).
No matter what you’re pressing, the golden rule is to always run a test. Grab a scrap piece of the same material and do a trial run to dial in the perfect settings for your specific garment and press before you commit to the real thing.
Can I Use a Home Iron for DTF Transfers?
I get this question a lot, and the answer is a firm no. Using a regular household iron for DTF transfers is a recipe for disappointment. An iron simply can't deliver the two things a transfer absolutely needs to last: consistent, even heat and uniform pressure. A heat press is purpose-built to do exactly that.
A heat press provides edge-to-edge, stable heat and applies significant, even pressure across the entire design. Your iron has hot spots, cool spots, and can't generate nearly enough force. The result? The transfer will almost certainly peel, crack, or wash out. If you're aiming for professional, sellable quality, a heat press isn't just a recommendation—it's a necessity.
How Do I Know if My Heat Press Pressure Is Correct?
Getting the pressure right is just as critical as temperature. For manual presses, "medium" pressure should feel firm. You'll need to use some muscle to lock the handle down, but you shouldn't have to strain or throw your whole body into it. It's a confident, solid clamp.
A simple and effective way to check this is the "paper test":
- With the press cold, place a standard piece of printer paper under each of the four corners of the platen.
- Close and lock the press as you normally would.
- Now, try to pull each piece of paper out.
You should feel a strong, consistent drag on all four corners. If one of them slides out easily, your pressure is either too light or uneven. If you're using an automatic press with a PSI gauge, medium pressure typically falls in the 40-60 PSI range.
Why Did My White Polyester Shirt Turn Yellow?
This is a classic problem called scorching, and it's almost always caused by too much heat for the delicate polyester fibers. At its core, polyester is a type of plastic, and when it gets too hot, the fibers can start to discolor or even melt slightly.
To sidestep this, you have to treat synthetics differently. Lower your temperature into that 275-300°F (135-149°C) sweet spot and reduce your press time to about 10-12 seconds. Another great trick is to always use a protective cover, like a Teflon sheet or a piece of parchment paper. This helps distribute the heat more gently and adds a buffer between the hot platen and your garment.
Ready to create stunning, professional-quality prints with transfers you can trust? At Cobra DTF, we provide premium, American-made DTF transfers that deliver vibrant colors and incredible durability. Get started today at https://cobradtf.com.