

Heat Press Design Workflow from File to Finished Print
Tuesday morning starts with a queue, not a blank canvas. Films are waiting beside the press, a customer wants a 24-piece run out the door, and the production lead is checking filenames before anyone loads a shirt. One mirrored file, one low-resolution PNG, or one missing white underbase can turn a clean order into a stack of reprints.
That's why heat press design has to begin before the platen gets hot. The press only applies the conditions you prepare for. File dimensions, resolution, color handling, layering, mirroring, garment placement, and quality checks decide whether the transfer lands correctly and bonds consistently. Treat those decisions as production engineering, and the press becomes a repeatable manufacturing step instead of a place where artwork meets hope.
Why a Real Workflow Beats Guesswork on the Press
A small shop rarely loses money because an operator can't push the handle down. It loses money when the operator has to make design decisions while the order is already on the platen. Guessing at placement, searching through vague filenames, or discovering that the artwork wasn't mirrored creates interruptions that multiply across a run.
A useful workflow names those decisions before ink touches film. The file should already have the correct print size, the correct color setup, a defined underbase, and a clearly identified orientation. The operator should be confirming the job, not interpreting it.
Practical rule: If an operator has to ask what size, which side, or whether the file is mirrored, the design handoff isn't finished.
Start at the size you'll press
Build the artwork at its final production dimensions. For a standard adult chest print, a 12 by 16 inch canvas at 300 dpi gives the file a direct relationship to a common platen and preserves the detail needed for a sharp transfer. A left-chest design at 4 by 4 inches should still be prepared at 300 dpi, rather than enlarged from a small web graphic.
The same discipline applies to the output format. Work in CMYK when that matches the printer and RIP workflow, while retaining a tagged RGB preview for customer review under ordinary shop lighting. That preview won't eliminate the difference between screen color and printed color, but it gives the customer a more realistic reference than an untagged file viewed against a bright monitor.
Use vector paths for type, logos, and clean geometric marks. Vector artwork keeps curves and letter edges crisp when a design needs to be resized. Keep photographs and distressed textures as raster elements, but rasterize them at the final output size. Never upsample a small PNG and expect missing detail to reappear.
Keep the master separate from the press file
One layered master file protects editability. A flattened press-ready TIFF or transparent PNG protects production speed. A separate mirrored press file protects the operator from having to flip artwork manually at the last moment.
A practical file set might look like this:
| Print Zone | Canvas Size | Resolution | Format |
|---|---|---|---|
| Adult front or back | 12 × 16 inches | 300 dpi | Layered PSD, press-ready PNG |
| Left chest | 4 × 4 inches | 300 dpi | Layered PSD, press-ready PNG |
| Sleeve | 4 × 12 inches | 300 dpi | Layered PSD, press-ready PNG |
| Youth chest | Sized to garment and placement template | 300 dpi | Layered PSD, press-ready PNG |
Name files so the next person can understand them without opening five versions. FIN_Logo_12x16_CMYK_WB.psd identifies the master, while FIN_Logo_12x16_MIRROR.png identifies the file intended for film output. Add the job number, garment color, and side when a shop handles several variants in one order.
Design for the substrate, not just the screen
A dark cotton shirt may need a stronger white foundation than a light polyester garment. A heavyweight fleece can require more careful pressure distribution than a smooth tee. Oversized and heavyweight apparel have become important design considerations as customers request upgraded basics and larger silhouettes, while personalized decoration continues to broaden the range of artwork and garments shops must handle. Industry coverage of fanwear and decorated apparel trends provides useful context for why a generic T-shirt workflow no longer covers every order.
The equipment category itself has also moved beyond hobby use. One market estimate valued the global heat press machine market at USD 623.4 million in 2023 and projected USD 1,045.7 million by 2032, while another estimate placed the broader market at USD 829.13 million in 2024 and projected USD 1,315.39 million by 2032. Both estimates are summarized by heat press industry market data. Those figures point to sustained demand for even platen heat, dependable pressure, and faster production cycles, not merely decorative machine features.
Building a Placement Template That Fits the Press
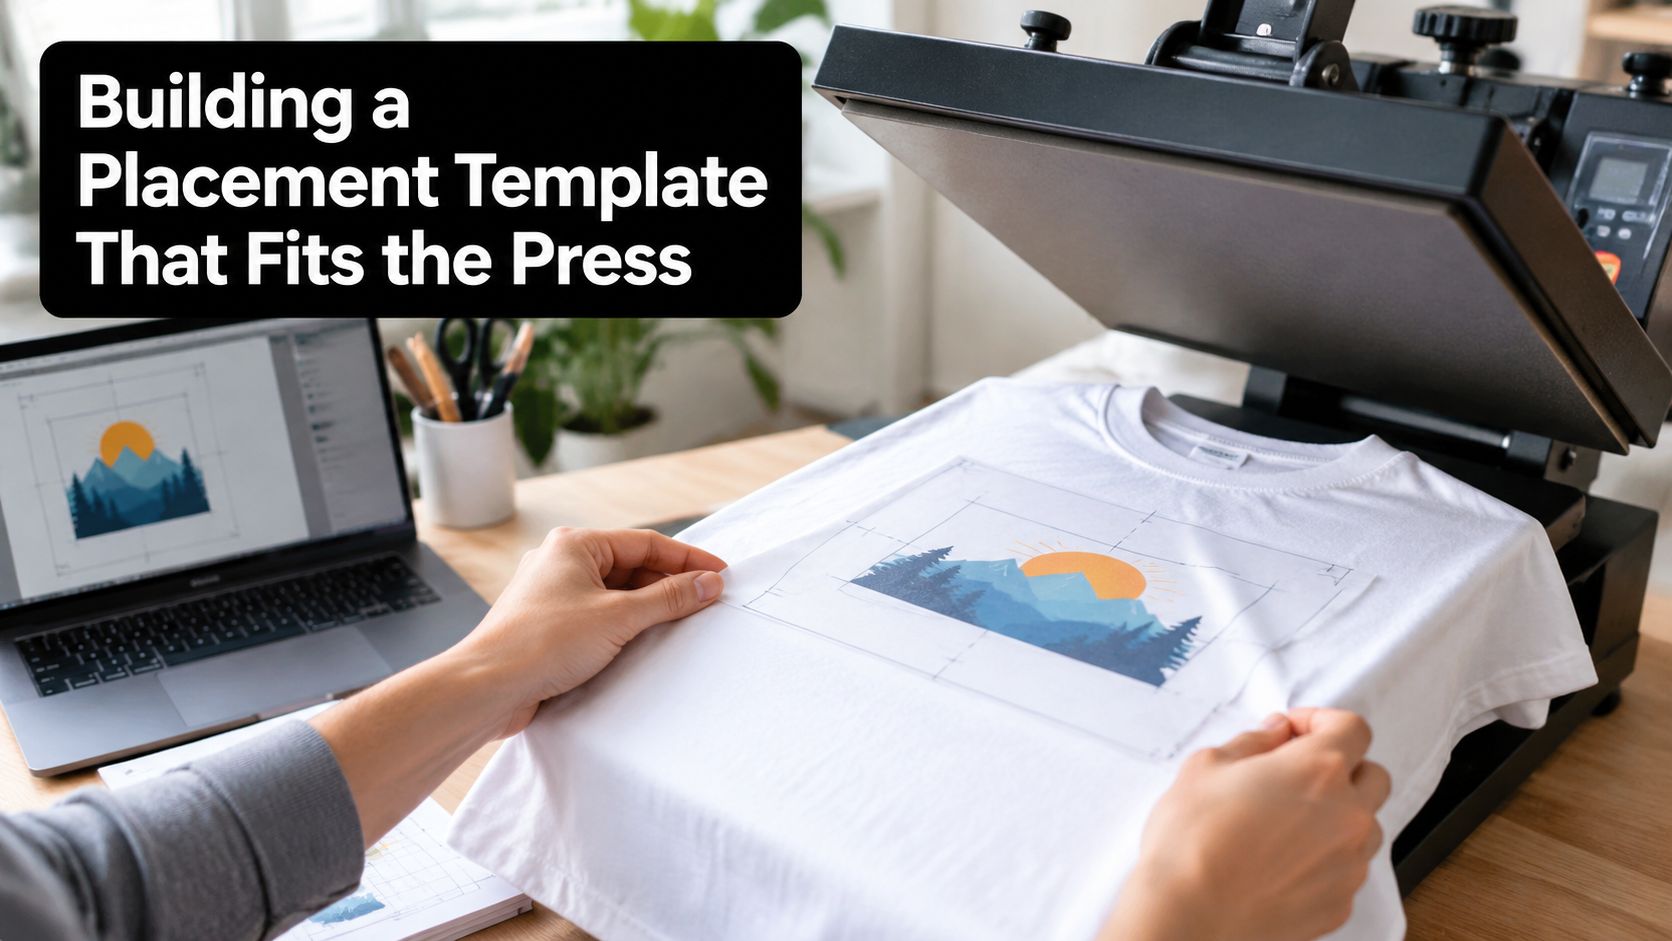
A placement template is a non-printing guide layer that shows where artwork belongs on the garment. It replaces the operator's ruler and memory with a fixed reference, which matters when several people share the same press.
Start by drawing the exact platen rectangle. Build separate templates for the 12 by 16 inch platen and the 15 by 15 inch swing-away if both are used in the shop. Then add simple garment silhouettes for adult tees, youth shirts, hoodies, pockets, and sleeves.
Build the guide once
Add a horizontal centerline and vertical crosshair to each garment shape. Mark a reference line three inches below the collar for a standard adult chest placement and two inches below the collar for a youth placement. These are starting references, not universal laws. Necklines, garment cuts, and customer preferences still require a visual check.
Lock the template layer and save it as something like TEMPLATE_12x16.psd. Open a copy for every job, never the original. Put the artwork on a separate layer, align it to the guide, and remove or hide the template before exporting the press file.
For a more detailed approach to selecting artwork dimensions by garment area, use this DTF transfer size guide as a production reference. The important point is consistency. The template should help an operator square the garment quickly, keep the design clear of seams and pockets, and avoid pressing the same shirt twice because the first placement looked uncertain.
Layering, Separating, and Mirroring for DTF
DTF artwork needs a deliberate stack. The visible CMYK color layer sits above the white underbase, and the white layer should follow the shape of the color rather than spill visibly beyond it. On dark garments, a slight choke around the white underbase helps prevent a pale halo at the edge.
A one to two pixel choke is a useful starting point for many raster workflows, but the correct value depends on output resolution, RIP behavior, and the edge detail in the artwork. Fine lettering may need a smaller adjustment than a bold logo. Always inspect the RIP preview rather than trusting the layer names.
Control the color relationships
Convert spot colors intentionally when a brand mark needs to remain recognizable across production runs. Decide whether overlapping objects should knock out or overprint. A knockout removes the area beneath an object, while overprint allows one color to print over another. The correct choice depends on the design, but leaving the setting to chance can create muddy overlaps or unexpected gaps.
Group layers by garment and variant. A black hoodie, white tee, and red performance shirt may share the same logo but need different underbase behavior or output profiles. Lock background layers once they're approved. Extend artwork slightly beyond the substrate mask when a bleed is required, and check that transparency hasn't created an accidental white rectangle.
Mirror before the film leaves the RIP
DTF film transfers face-down. The printed side is placed against the garment, so the artwork must be flipped horizontally before RIP export. If you skip that step, lettering and directional graphics land backward.
Use a filename that makes orientation obvious, such as JOB184_BLACK_FRONT_MIRROR.png. Keep the unmirrored proof beside it, but never let both files have equally vague names. The operator should know which file is for customer review and which one is for production.
A mirrored file should be a deliberate output, not a last-second button press at the printer.
Use a raster versus vector artwork guide when deciding which elements should remain paths and which should be rasterized for the transfer. Before export, confirm the bleed, lock approved layers, verify white sits beneath color, and confirm the SKU and side in the filename.
Simulation and Test Prints Before a Full Run
A full run shouldn't be the first time anyone sees the artwork on fabric. DTF proofing works best as a ladder, with each rung checking a different failure class. A screen preview checks the file, a test square checks the transfer chemistry, and a garment mockup checks the customer's expectation.
The first check is digital
Start with a RIP preview or low-resolution JPEG proof. Compare the output to the approved artwork and look specifically for a missing layer, an unintended background, a shifted color, or a design that was mirrored in the wrong place. Check placement against the template instead of judging it from a full-screen preview with no garment reference.
The digital proof is fast, but it can't show fabric texture, white opacity, edge lift, or hand feel. That's why it should never be the only approval gate.
The second check is physical
Press one DTF square onto scrap fabric using the same film, ink, powder, garment type, and current machine settings. Look at the white underbase, edge coverage, color density, and stretch behavior. A design that looks perfect on a monitor may feel too heavy on a soft shirt or reveal a weak bond when stretched.
The third check uses the actual blank and SKU. Mock up the approved design on the garment, confirm its position, and obtain sign-off before committing the run. This catches expectation mismatch, especially when a customer approves artwork digitally but hasn't considered the scale on an oversized or heavyweight garment.
| Test Step | Catches | Time Cost | Reprint Risk Avoided |
|---|---|---|---|
| Digital RIP proof | File errors, missing layers, orientation mistakes | Minutes | Prevents outputting the wrong film |
| Fabric test square | Adhesion, opacity, hand feel, edge behavior | Minutes | Prevents repeating a bad press profile |
| Actual garment mockup | Placement and customer expectation issues | Minutes | Prevents a finished run with the wrong look |
For shops choosing between decoration methods, a practical comparison of screen print versus embroidery can help clarify how artwork complexity, garment type, and production intent affect the workflow. The same principle applies here: select the verification step based on the failure you're trying to prevent.
Press Settings That Turn Prep into a Clean Print
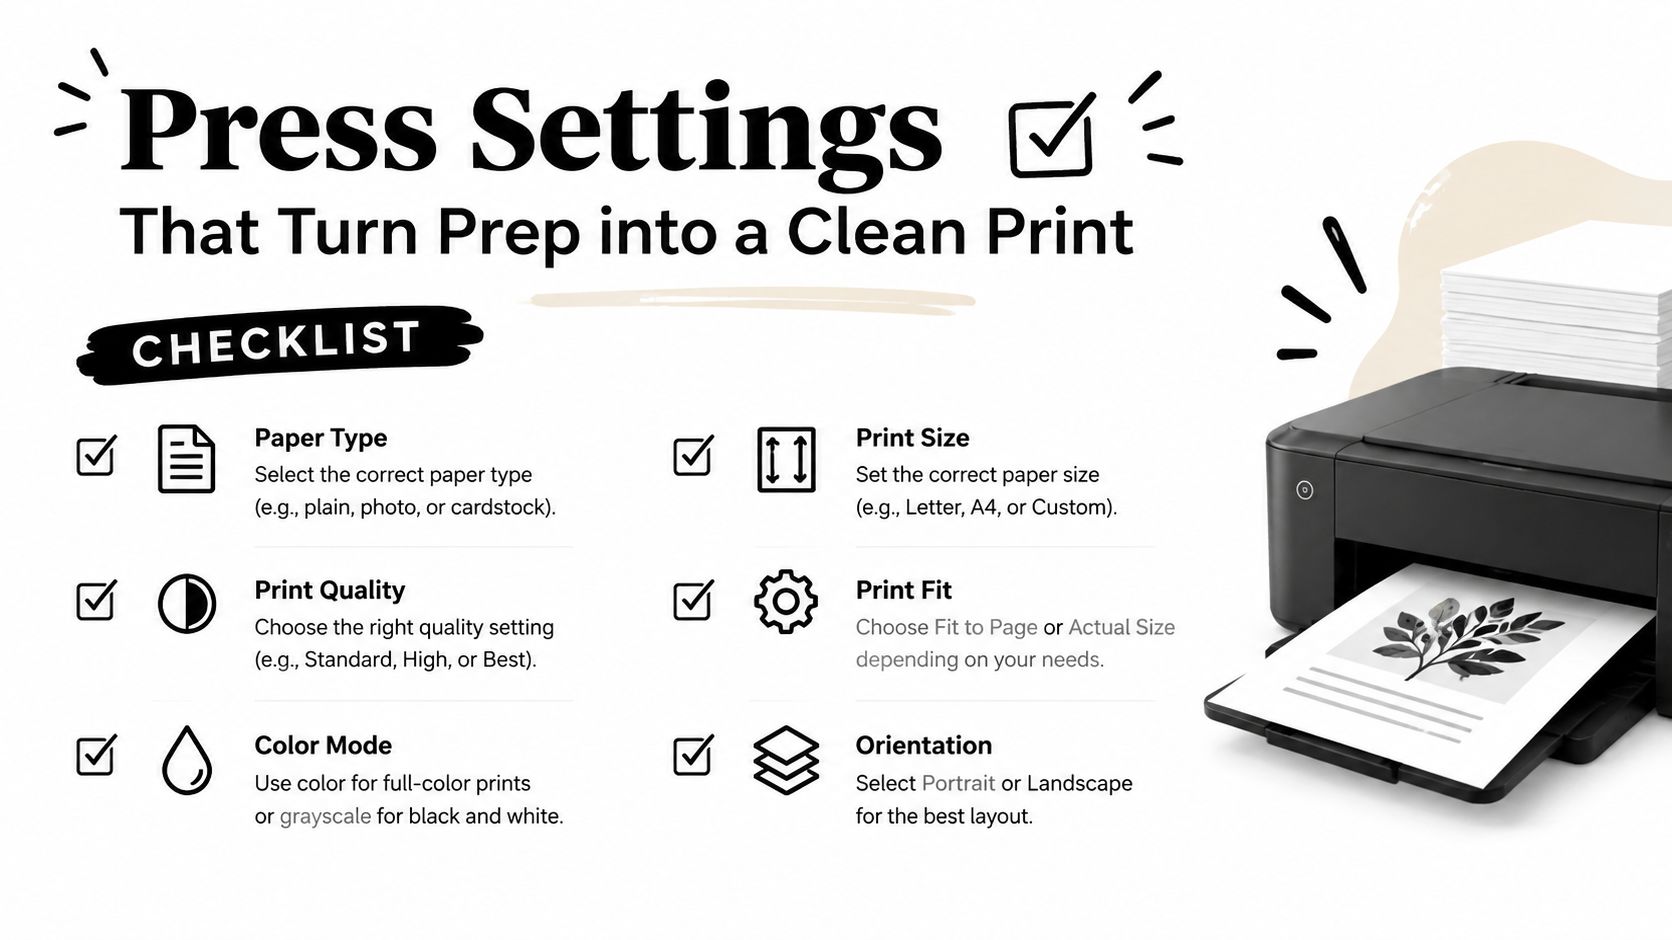
Good file preparation doesn't compensate for an unverified platen. Start with the manufacturer's instructions for the specific film and adhesive, then use a controlled baseline rather than changing temperature, dwell, and pressure randomly.
For DTF, a practical starting range is 160 to 165°C surface temperature with 15 seconds of dwell and medium-firm pressure. A 40 to 50 pound gauge reading can help confirm that the machine is applying a repeatable force when the press includes a pressure gauge. These are starting points, not universal prescriptions. Film construction, powder, ink load, garment fiber, and peel method can all change the result.
Tune one variable with intention
If a color looks washed out, raise temperature by 5°C and test again. If the transfer lifts around the edges, add pressure or dwell rather than changing both without recording the change. If white shows through the color, reduce pressure slightly and inspect the underbase choke and ink deposit before pressing another production shirt.
Peel according to the film manufacturer's instructions. Some films are designed for hot peel, while others need to cool. Stretch the finished print across the grain and inspect for cracking. Over-pressure can distort the transfer or create an unnecessarily heavy hand, while insufficient contact can leave weak edges.
A compact pressing aid can also matter on seams, collars, and curved areas. For operators working with shaped garments or sewing-related applications, this guide to an essential pressing ham for sewing professionals explains why a firm, shaped support can improve contact around contours.
Record every change in the press log. The DTF heat press settings guide is useful for organizing temperature, time, pressure, and peel information into a repeatable reference. Then create a separate profile for each blank family. Tri-blends, 100% cotton ringspun shirts, and polyester performance knits shouldn't share one untested default.
Troubleshooting the Three Print Failures That Cost Money
A failed shirt rarely has one obvious cause. Operators often blame temperature first, but adhesion, white blush, and color drift can originate in the file, the printer, the film, the garment, or the press. The fastest diagnosis starts with a small test on scrap fabric, not another full-size production piece.
Adhesion lift
Edge lift usually points to a mismatch among temperature, dwell, pressure, peel timing, or the garment surface. Check the actual platen temperature with a calibrated surface instrument rather than trusting only the control display. Then press a small test square, follow the film's peel requirement, and inspect the perimeter after cooling.
If the edge still lifts, adjust one variable and log it. A longer dwell isn't automatically better. A controlled DTF study on black cotton found that 170°C for 10 seconds produced the strongest overall balance among color stability, black-density retention, and minimal white-layer contamination, while longer dwell times reduced throughput without improving the result. The published DTF heat-press study supports testing the shortest interval that fully activates the adhesive.
White underbase blush
A pale outline around dark artwork often comes from an underbase that extends too far, an excessive white ink deposit, or pressure that pushes the layer beyond the color edge. Inspect the RIP preview first. If the choke is missing, correct the white layer before touching the press.
A practical fix may involve reducing the white deposit or tightening the underbase by 0.5 mm, but validate that adjustment against small type and fine artwork. A thinner underbase can reduce the halo while weakening opacity if taken too far.
Color drift
Color changes between jobs often begin with inconsistent profiles, different garment dyes, or a printer-paper-film combination that wasn't characterized together. Re-profile the printer and review the RIP settings before compensating by eye in the artwork. A visual correction that fixes one shirt can make the next blank worse.
| Failure | Root Cause | Quick Test | Fix Path |
|---|---|---|---|
| Adhesion lift | Heat, dwell, pressure, or peel mismatch | Press and peel a scrap square | Verify platen temperature, then adjust one setting |
| White underbase blush | Excess white deposit or insufficient choke | Inspect RIP preview and dark-fabric test | Reduce deposit or tighten the underbase |
| Color drift | Profile, ink, film, or garment variance | Compare a controlled test to the approved proof | Re-profile the printer, film, and blank combination |
Independent transfer research on 100% cotton found maximum dye-transfer efficiency at 400°F, 35 seconds, and 100 psi, with all three variables aligned. The cotton heat-transfer research reinforces a point operators often learn after costly reprints: pressure calibration matters as much as the numbers on the temperature and timer display.
Turning the Workflow into a Shop SOP
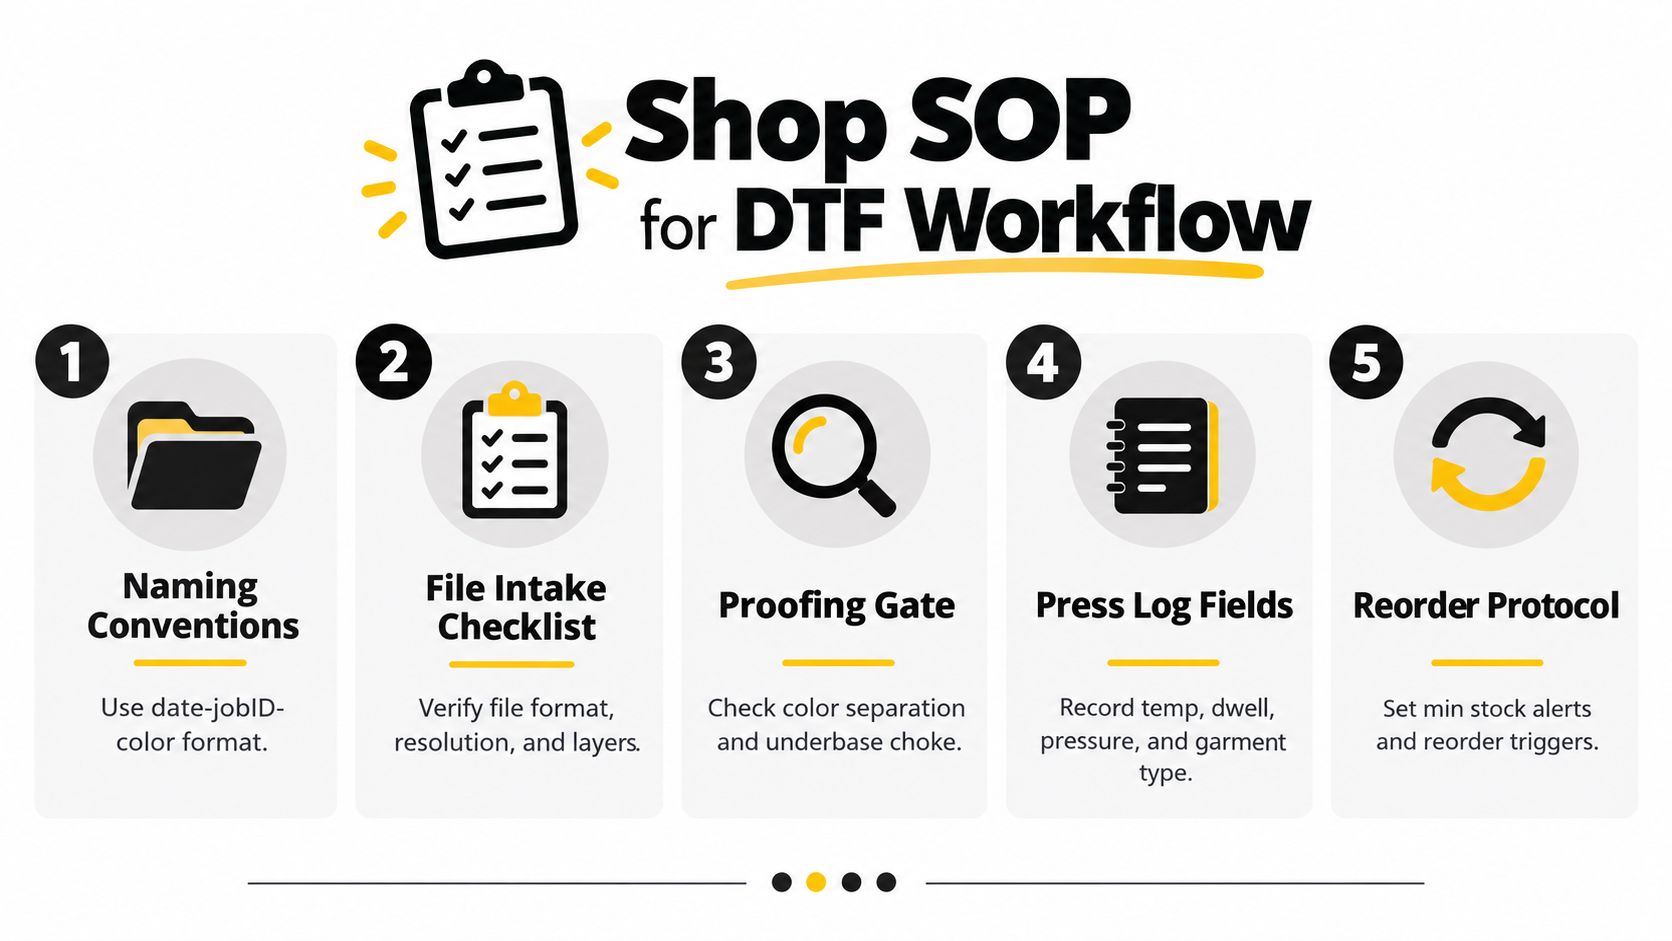
A useful SOP fits on one page and answers five questions before production starts: What file is this? What garment is it for? Has the artwork been approved? Which press profile applies? Who signed off on the first piece?
Create a folder for each job number, then create subfolders for the garment SKU, color, and decoration side. Store the layered master, customer proof, mirrored press file, and press log together. Don't bury the production file in a designer's personal folder where an operator can't find it during a rush order.
The one-page production gate
Use this sequence:
- File intake: Confirm size, resolution, transparency, color mode, artwork orientation, and garment variant.
- Template placement: Align the design to the correct platen and garment guide.
- Proofing gate: Review the RIP preview, underbase choke, bleed, and mirror status.
- First-piece approval: Press one test garment or controlled sample and record the result.
- Run authorization: Start the batch only after a named operator signs off.
- Reorder protocol: Track film, powder, ink, and garment stock with clear reorder triggers.
Your press sheet should capture at least the temperature, dwell time, pressure, and garment type. Add film brand, peel method, operator, and date when the shop has enough variation to justify it. The record turns a successful press into a usable profile instead of a memory that disappears when someone changes shifts.
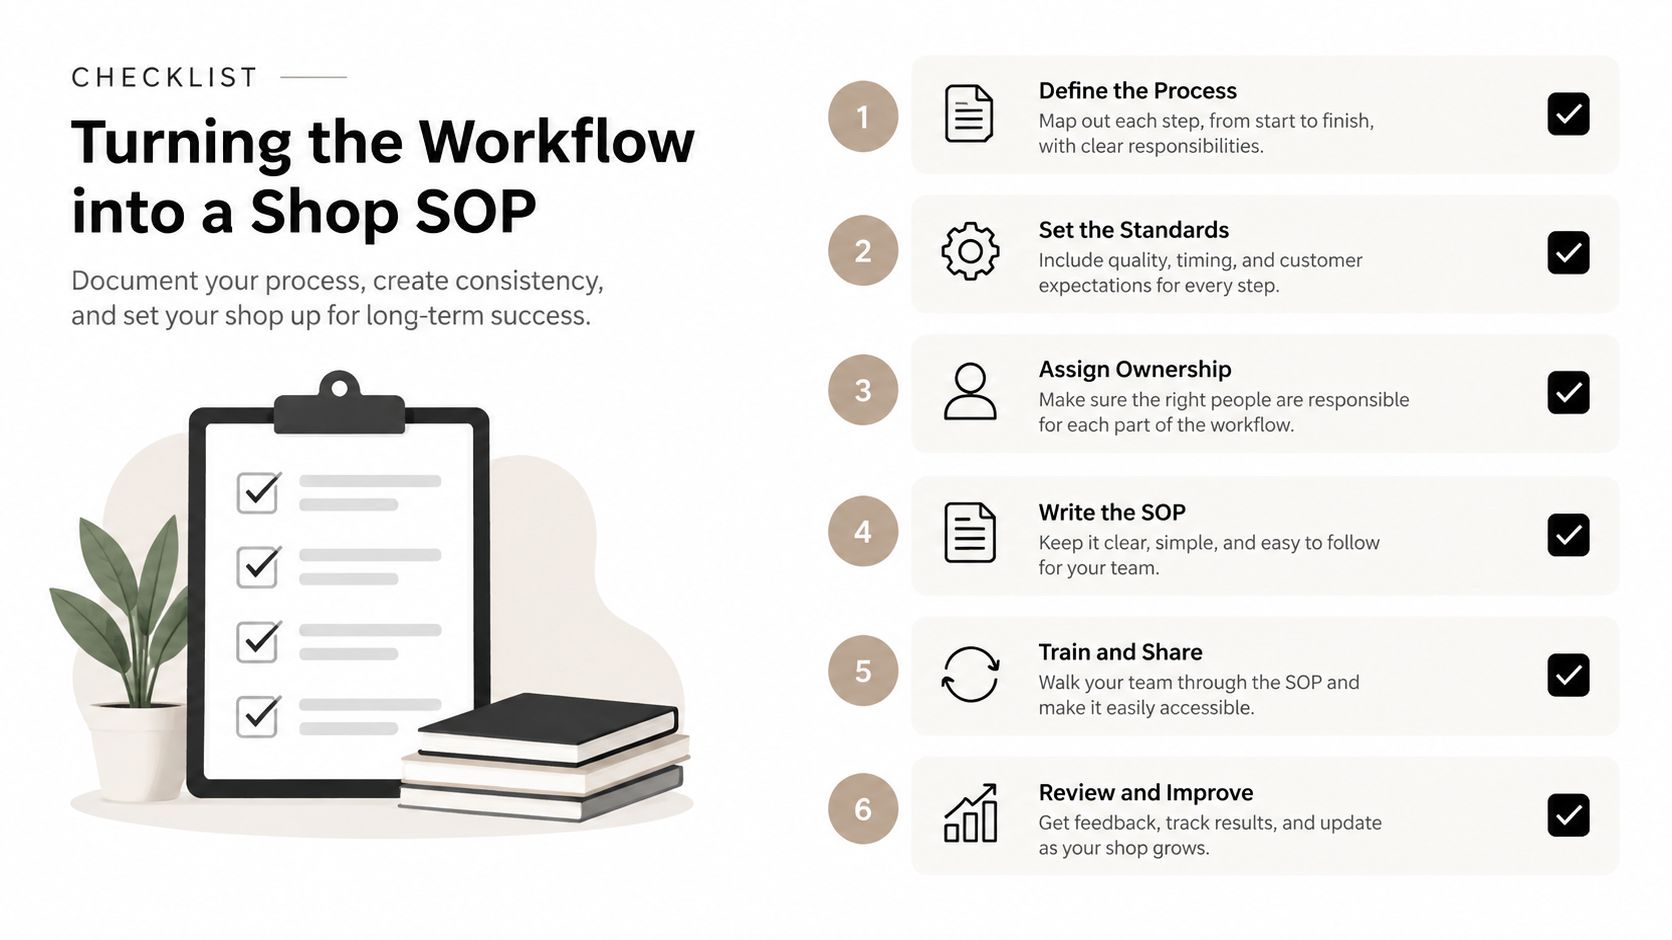
A practical rollout doesn't need to disrupt production. In the first week, build the templates and naming rules. In the second, train operators on one live order and require the checklist. In the third, audit reprints, placement errors, and missing press logs. In the fourth, revise the SOP around what caused delays.
Automation becomes useful after the process is stable. Industry coverage of 2025 heat press design trends discusses smarter controls, remote connectivity, modular equipment, energy efficiency, and AI-driven predictive maintenance, including a market summary that claims 65% of new models include automated controls. Treat that figure as reported industry coverage, not a guarantee for every product, and evaluate automation by whether it reduces operator decisions, rework, and downtime in your shop.
Cobra DTF supplies made-to-order DTF transfers that fit a controlled file-to-press workflow, with products made in the USA and same-day shipping available for orders placed by 1 PM CST. Review the transfer options and production resources at Cobra DTF, then use your approved template, mirrored file, and press log to move the next order from artwork to finished garment with fewer surprises.