

Glitter dtf film: Sparkle-Packed Guide to Custom Apparel
So, what’s the deal with glitter DTF film? Think of it as the secret weapon for adding serious sparkle to your custom apparel without the mess and hassle of old-school methods. It’s a specialty transfer film that lets you print any full-color design directly onto a shimmering, textured base.
It’s like merging a high-resolution photograph with a layer of fine, permanently sealed glitter. The shimmering particles are actually embedded into the film itself, so they become part of the final print, not just a flaky afterthought.
So, What Exactly Is Glitter DTF Film?
Imagine giving any digital design—no matter how detailed or colorful—a vibrant, sparkling finish without ever opening a single jar of loose glitter. That’s the magic of glitter DTF film. For any apparel brand or print shop looking to offer something truly special, it’s a massive step up from standard direct-to-film printing.
Instead of a plain, clear carrier sheet, this film has a glitter-infused layer that acts as the foundation for your print. Your DTF printer lays down the ink right on top of this shimmering base. When you press it onto a garment, the glitter effect is perfectly integrated into the design, creating a seamless, professional look that feels like it’s part of the fabric.
The Anatomy of a Sparkling Transfer
The real genius of glitter DTF film is in its multi-layered construction. It plugs right into your existing DTF workflow, but its unique composition is what makes the sparkle happen. It’s not just a simple sheet; it’s an engineered material built for a specific, high-impact effect.
Here’s a quick breakdown of how it’s put together:
- Release Layer: This is the top surface where the ink goes. It’s specially coated to grab onto DTF inks, making sure your colors are vibrant and your details are razor-sharp.
- Glitter Layer: Tucked just beneath the surface are microscopic glitter particles. They’re sealed right into the film, which is key—it means they won’t flake off, even after dozens of washes.
- Adhesive-Ready Base: The bottom layer is designed to bond perfectly with your DTF adhesive powder. This is the “glue” that melts during the heat press and permanently locks the entire design onto the garment.
This all-in-one approach finally solves a huge headache in the apparel world: how to create durable, detailed glitter designs without the mess of glitter inks or the bulkiness of layered glitter vinyl.
The biggest win here is efficiency. You can produce complex, multi-color glitter designs in a single pass. This slashes the production time and labor costs you’d normally face with older, multi-step methods.
The rapid growth of DTF technology has opened up all kinds of new creative doors. The direct-to-film printing market is on track to hit $4.56 billion by 2032, which shows just how many people are jumping on board. This huge demand is what’s driving innovation in materials like glitter film, giving businesses like yours a way to stand out.
To get a better handle on the core technology, check out our guide on what direct-to-film printing is. Glitter film builds on those exact same principles, just with an added dimension of visual pop that can seriously boost your profit margins.
Before we dive deeper, here’s a quick overview of what makes glitter DTF film such a great addition to any print shop's toolkit.
Glitter DTF Film At a Glance
| Attribute | Description | Benefit for Your Business |
|---|---|---|
| Material Base | A multi-layer PET film with embedded, sealed glitter particles. | Creates a premium, high-value look without the mess or inconsistency of loose glitter. |
| Print Compatibility | Works with standard DTF printers, inks, and adhesive powders. | No need for new equipment; integrates seamlessly into your existing DTF workflow. |
| Color Profile | Allows for full-color, photorealistic printing directly onto the glitter base. | Offer intricate, sparkling designs that are impossible with traditional glitter vinyl. |
| Durability | The glitter is part of the film, preventing shedding or flaking. | Higher customer satisfaction with products that look great wash after wash. |
| Application | Transfers onto cotton, polyester, blends, and more with a standard heat press. | Versatility to decorate a wide range of apparel and accessories. |
| Feel & Finish | Produces a smooth, textured finish that feels integrated with the fabric. | A more professional and comfortable feel compared to bulky, layered alternatives. |
This table sums it up nicely: glitter DTF is about adding that "wow" factor efficiently, helping you create premium products that command higher prices and set your business apart from the competition.
Your Step-By-Step Guide to the Glitter DTF Process
Alright, you've got the theory down, so let's get our hands dirty. Actually bringing one of these sparkling designs to life is pretty straightforward—it follows the same basic steps as standard DTF printing. The magic, however, is in the details. A little precision at each stage is what makes that shimmer really pop.
Think of it like building something from a kit. Each piece—your design file, the ink, the powder, and the final press—needs to be handled correctly. If you rush one step, the whole thing can fall apart, and nobody wants to waste good film and ink.
This diagram lays out the basic three-part journey: printing your art, coating it with adhesive powder, and then curing it all together. It's that simple on the surface.
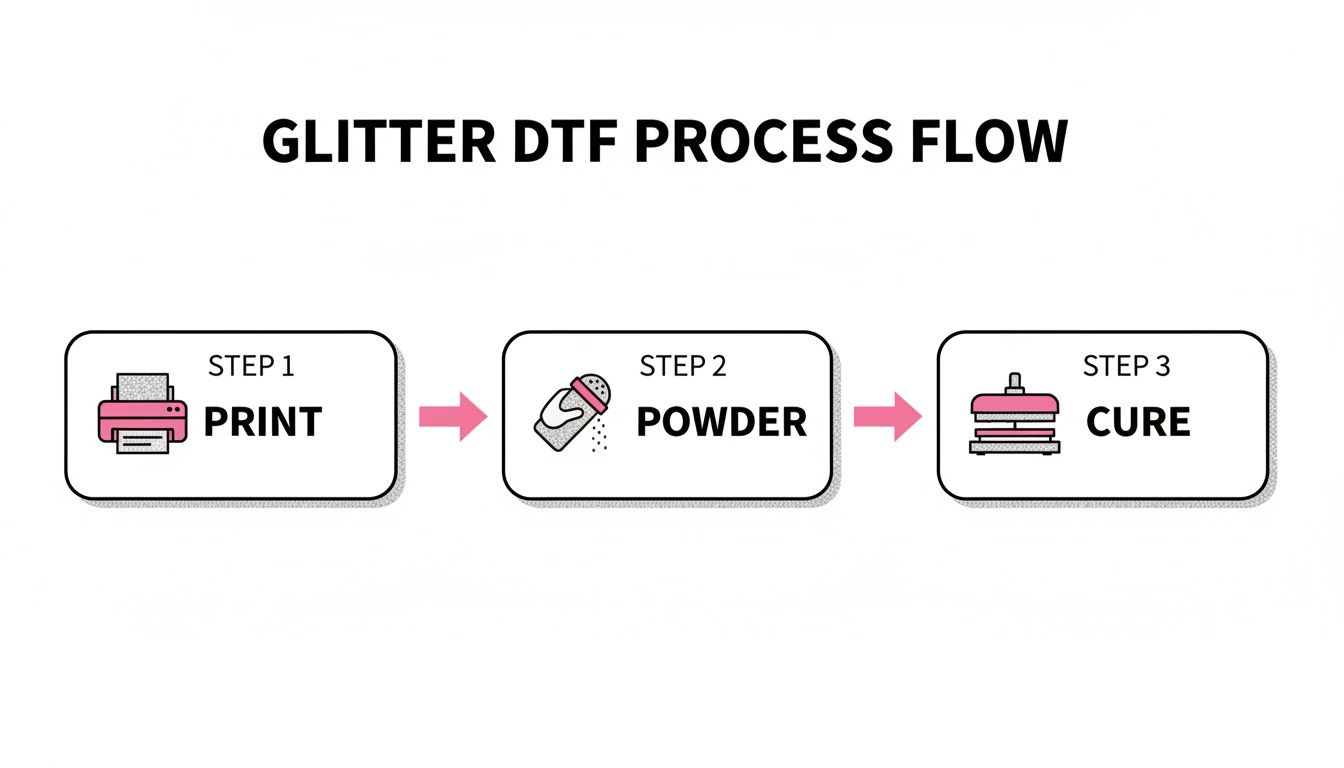
As you can see, each stage flows right into the next, turning a file on your computer into a tangible transfer that’s ready for the heat press. Now, let’s break that down into five actionable steps, from prepping the design to that satisfying final peel.
Step 1: Prepare Your Design for Printing
Great glitter prints start on the screen, long before you hit "print." The best designs for glitter film are those with bold lines, solid shapes, and chunky text. Super fine lines or tiny details can sometimes get a little lost in the glitter's texture, so bigger is often better.
Make sure your artwork is a high-resolution file, ideally 300 DPI, to keep all your edges sharp. The most important thing? You have to mirror the image horizontally in your design software. This is non-negotiable. The design prints backward on the film so that it appears correctly when you press it onto the shirt.
Step 2: Print Directly Onto the Film
With your design flipped and ready, it's time to print. Load the glitter DTF film into your printer, making sure the coated, printable side is facing the right way. Your DTF printer knows exactly what to do from here.
First, it will lay down all the colors (the CMYK layer). Then, in the same pass, it will print a thick layer of white ink directly on top of the color. This white underbase is what makes your colors vibrant and opaque, especially on dark fabrics. Without it, the design would look weak and the glitter effect wouldn't stand out.
Step 3: Apply the Adhesive Powder
As soon as the print comes out of the printer, while the ink is still wet, you need to coat it with DTF adhesive powder. This stuff is basically the magic glue that bonds your design to the fabric permanently. Getting an even coat is the key to a transfer that lasts.
An automatic powder shaker is the best tool for the job, as it guarantees a perfect, even coating every single time. If you're doing it by hand, be generous and sprinkle the powder all over the wet ink until every bit of the design is covered.
Pro Tip: Once it's covered, give the back of the film a few good flicks to knock off all the extra powder. Any stray powder that sticks to the un-inked parts of the film can leave tiny, unwanted specks of glue on the final garment.
Step 4: Cure the Powdered Transfer
Now your transfer is covered in a fine white dust. The next step is to melt, or "cure," that powder into a smooth, even layer of adhesive. You can do this by running the film through a conveyor dryer or by hovering your heat press a few inches above the film—just don't let it touch!
You're looking for the powder to melt into a glossy, slightly bumpy texture, kind of like an orange peel. The sweet spot for curing is usually around 240-260°F (115-125°C), but always double-check the instructions for your specific powder and equipment. A properly cured transfer is a durable transfer.
Step 5: Heat Press the Design
Your glitter DTF transfer is officially ready for the main event. This is where you move the design from the film to your garment. First, give the shirt a quick pre-press for a few seconds to iron out any wrinkles and remove moisture. This gives you a perfectly flat surface to work with.
Place the transfer on the garment with the design facing down. Press it at 300-325°F (150-163°C) for 10-15 seconds using firm pressure. Once the timer goes off, peel away the film (make sure you know if it's a hot or cold peel film!). For extra durability, do a quick final press for 5 seconds with a piece of parchment paper over the design. This really seals it in.
If you want to dive deeper into the pressing process, you can learn more about how custom DTF transfers are ready to press in our other guides.
Mastering Your Settings For Perfect Results
Getting that flawless, vibrant glitter DTF transfer isn't just about the materials you use; it's about nailing the settings on your equipment. Honestly, the difference between a pro-level print and a frustrating dud often comes down to a few degrees or a couple of extra seconds.
Think of your whole DTF setup—printer, shaker, dryer, and heat press—like a finely tuned engine. If one part is out of sync, the whole process can get thrown off, leading to wasted film, ink, and time.
Let's walk through the key settings you'll need at each stage to get it right every time.
Calibrating Your Printer And Powder Application
The journey to a perfect transfer starts at your printer and powder shaker. These first steps are absolutely critical—they lay the foundation for your design long before it ever touches a heat press. Getting these right prevents headaches like dull colors or bad adhesion later on.
Here’s what to zero in on:
- Ink Density: I recommend aiming for a white ink density between 70-80%. This lays down a bright, solid white base that makes your colors pop against the glitter film, but it's not so heavy that it oversaturates everything.
- Powder Shaker Speed: Set your shaker to a moderate pace. You’re looking for a consistent, even blanket of adhesive powder. Too fast, and you risk creating bald spots; too slow, and you’ll end up with clumps and an uneven coat.
- Curing Temperature: The sweet spot for curing the powder is generally between 240-260°F (115-125°C). The goal is to melt the powder just enough so it gets that smooth, "orange peel" texture. If it's under-cured, it won't stick well, and if it's over-cured, you can actually damage the film itself.
Once you’ve got these dialed in, you’re ready for the main event: the heat press.
Perfecting Your Heat Press Technique
This is it—the moment your design becomes one with the garment. The mix of temperature, pressure, and time is a delicate dance. In my experience, incorrect heat press settings are the number one reason transfers peel, crack, or just feel way too stiff.
The secret to a durable, professional-looking transfer is consistency. Using a high-quality, reliable heat press ensures even heat and pressure across the entire design, which is essential for a bond that lasts wash after wash.
I've put together a quick reference table with great starting points for the most common fabrics. But always remember to test a small, hidden spot first, especially if you're working with a new garment. For a deeper dive, you can check out our complete guide on heat press settings for DTF.
Recommended Glitter DTF Application Settings
This table provides a solid starting point for getting that perfect press. Always test first, but these settings will get you in the right ballpark for the most common materials you'll be working with.
| Fabric Type | Temperature Range (°F/°C) | Pressure | Press Time (seconds) | Peel Type |
|---|---|---|---|---|
| 100% Cotton | 300-320°F / 149-160°C | Medium-Firm | 10-15 | Hot or Cold |
| 100% Polyester | 275-300°F / 135-149°C | Medium | 8-12 | Cold |
| 50/50 Blends | 280-305°F / 138-152°C | Medium-Firm | 10-15 | Cold |
| Tri-Blends | 275-290°F / 135-143°C | Medium | 8-12 | Cold |
With these guidelines, you're well on your way to getting a perfect, long-lasting application on all your garments.
Troubleshooting Common Glitter DTF Problems
Even with the right settings, things can still go sideways sometimes. Don't sweat it—most issues are simple fixes. Here's how to tackle the most common problems you might encounter with glitter DTF film.
-
Problem: Dull or Muted Glitter Effect
- Solution: Your white ink underbase is probably too thin. Try increasing the white ink density in your RIP software. This creates a more opaque foundation and really lets that glitter sparkle pop through.
-
Problem: Transfer Peels After Washing
- Solution: This is almost always a pressure or temperature issue. Crank up your heat press pressure to firm and double-check that your temperature is correct for the fabric you're using. A little more "squish" can make all the difference.
-
Problem: Ink Bleeding or Blurry Edges
- Solution: This usually means you're laying down too much ink. Go back into your printing software and reduce the overall ink limits just a bit to prevent the film from getting oversaturated.
How Glitter DTF Stacks Up Against Other Methods
When you're decorating apparel, you've got a ton of options. Knowing exactly where glitter DTF fits in is crucial for making the right call for your business. This isn't just another way to get some sparkle on a shirt; it's a specific tool with some serious advantages.
Let's pit it against its two main rivals: standard DTF and the classic glitter heat transfer vinyl (HTV). We’ll look at the stuff that really matters for your products and your wallet—durability, the feel of the final print, how fast you can work, and creative freedom.
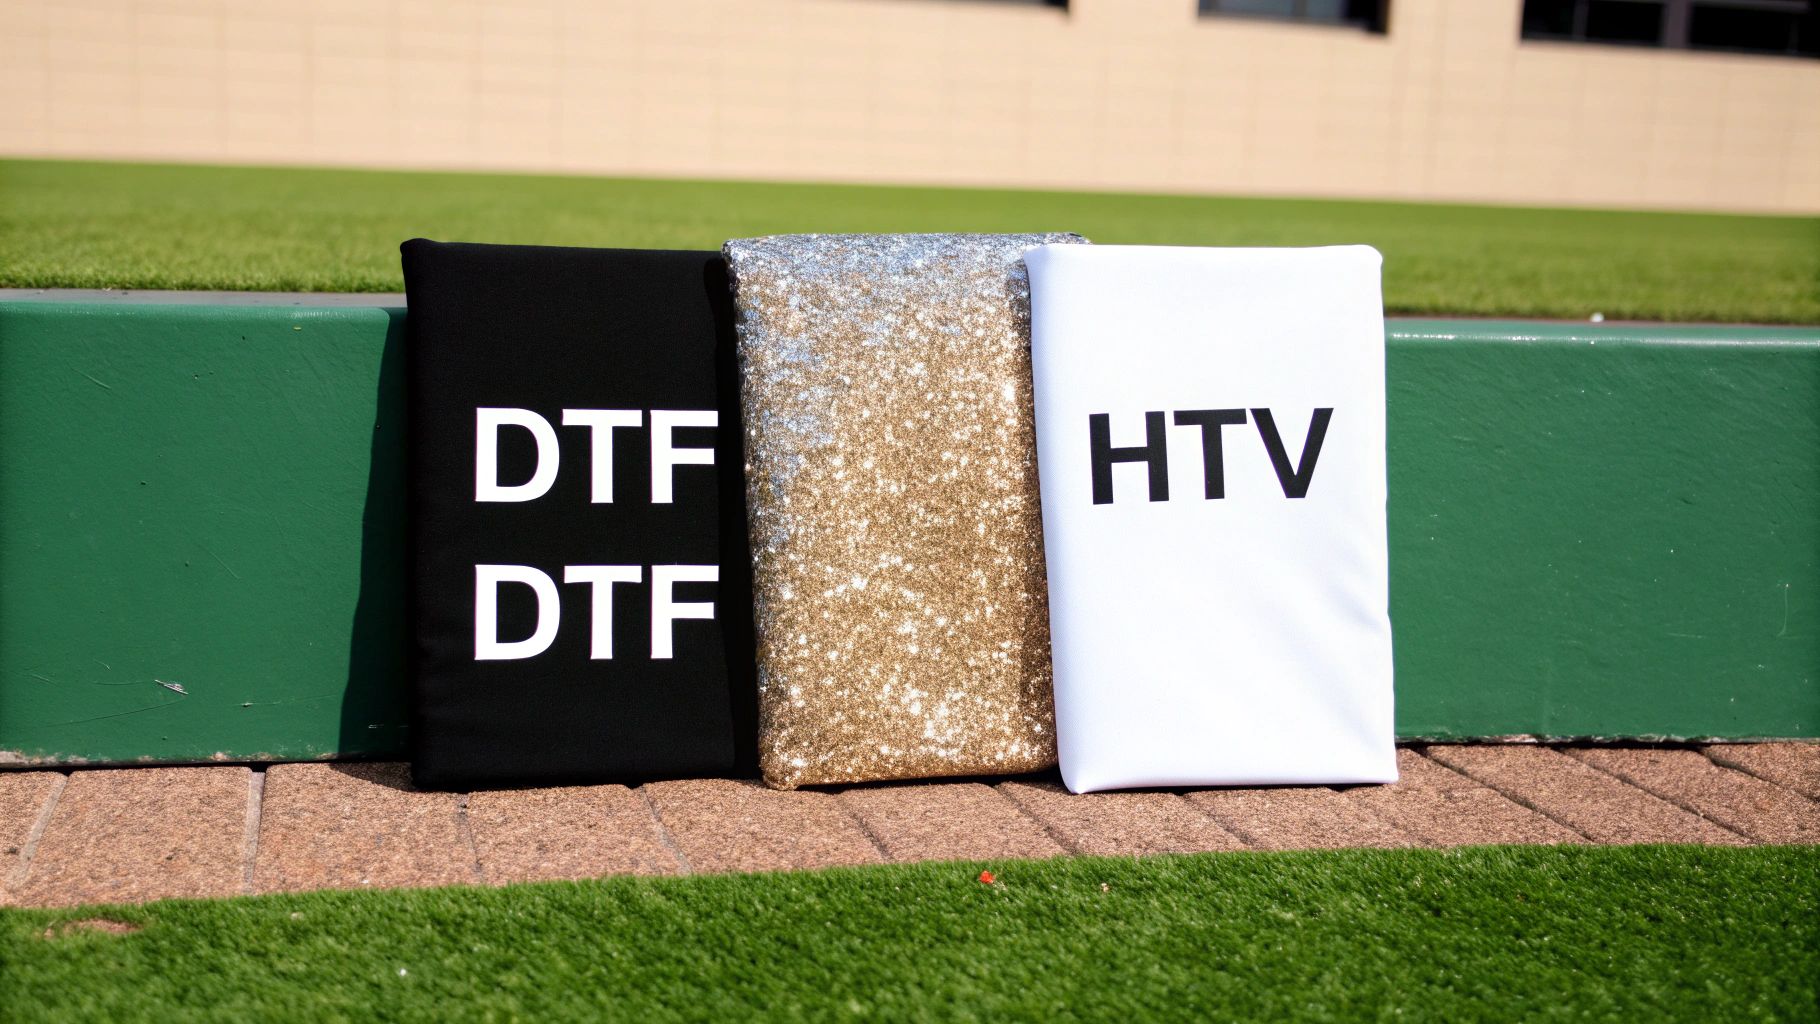
Glitter DTF Film vs. Glitter HTV
This is the classic matchup: the new-school printable method versus the old-school cut-and-weed. Both give you a glittery finish, but how they get there couldn't be more different, and the final results are miles apart. Glitter HTV has been a go-to for years, but it has some major limitations that glitter DTF was born to solve.
The biggest difference comes down to design complexity.
- Creative Freedom: With glitter DTF film, your creativity is unleashed. You can print full-color photos, gradients, and super-fine details right on top of that glittery base. With HTV, every single color is another layer you have to cut, weed, and press. Trying to do a complex, multi-color design is a recipe for a headache and a ton of wasted time.
- The "Hand" of the Garment: Anyone who's worn a shirt with a big glitter HTV design knows the feeling—it can be thick, stiff, and feel like a plastic patch. Glitter DTF transfers, on the other hand, are way thinner and more flexible. They feel like they're part of the fabric, not just sitting on top of it.
- Speed is Everything: The fact that there's no weeding with DTF is an absolute game-changer. A complex, five-color HTV graphic could easily eat up 20 minutes of tedious weeding and careful layering. You can print that same design on glitter DTF film and have it ready to press in just a few minutes. That’s a massive boost to your shop's output.
If you're looking to scale up your production and offer really impressive, detailed designs, glitter DTF film is the hands-down winner. It gets rid of the biggest bottleneck in the vinyl world—weeding—without losing that premium glitter pop.
Glitter DTF Film vs. Standard DTF
Okay, so you already have a standard DTF setup. Why bother with glitter film? It all comes down to texture, visual punch, and what customers are willing to pay for. Standard DTF is a workhorse for smooth, vibrant prints, but it just can't give you that tangible, eye-catching sparkle that people love.
Think of it like this: you can have a standard photo print, or you can have one with a special metallic finish. They’re both great, but one offers a unique look and feel that justifies a higher price tag.
- The Visual Effect: Standard DTF prints are smooth to the touch. With glitter DTF film, the shimmering particles are built right into the transfer, creating a textured surface that catches the light and gives the design real depth.
- A Seamless Switch: Here’s the best part—the process is almost identical. You use the same printer, the same inks, and the same powder. You literally just swap out your standard film for the glitter version. It’s an incredibly easy way to add a whole new product line.
- Cost vs. Value: Sure, glitter film costs a little more per sheet than standard film, but the final product is a premium item. That unique, sparkly design has a higher perceived value, which means you can increase your profit margins on specialty gear like spirit wear, holiday apparel, and fan merch.
At the end of the day, it's not about which one is "better," but which one is right for the job. Standard DTF is your everyday champion, while glitter DTF is your secret weapon for creating high-end, eye-catching pieces that truly stand out from the crowd.
Why Your DTF Supplier Matters More Than You Think
The quality of your glitter DTF prints comes down to one simple thing: the quality of your materials. If your film is flaky or your ink is dull, the best printer in the world can't save the final product. Choosing the right supplier is just as crucial as nailing your press times. It's a business decision that directly affects your shop's efficiency, your reputation, and your bank account.
For any professional print shop, consistency is everything. When you're dealing with overseas suppliers, you're rolling the dice. Customs delays, shipping that takes weeks (or months), and getting a completely different quality of film from one order to the next—these are the headaches that kill profits and make clients angry.
The "Made in the USA" Difference
Sourcing domestically isn't just about waving a flag; it's about real-world quality control and predictable delivery. Whether you're buying glitter DTF film and ink for your own printer or ordering finished transfers, a US-based supplier keeps the whole process closer to home.
Here’s what that domestic advantage really means for your shop:
- No More Guesswork: Domestic suppliers make it easier to get consistent batches and fast answers when something is off.
- Serious Quality Control: Shorter supply chains make it easier to keep adhesion, color, and durability consistent for your customers.
- Zero International Headaches: No more worrying about customs forms, surprise tariffs, or watching your supplies sit on a container ship for a month while orders pile up.
Think about it this way: sourcing your supplies from a trusted domestic partner turns your supply chain from a potential weak link into a major strength. You can take on that last-minute rush order with confidence, knowing your materials will be there when you need them.
Prefer to Skip the Printer? Order Finished Transfers
We get it. Print shops run on tight deadlines and even tighter margins. Waiting weeks for a shipment to cross the ocean just doesn't work when you've got a stack of orders waiting. Cobra DTF doesn't sell film or ink. We print custom DTF and UV DTF transfers in the USA, so you can skip the printer and the supplies entirely.
Orders placed by 1 PM CT ship the same day, and nationwide delivery usually takes 1-3 days. That means you can keep less inventory on your shelves and free up cash, while still offering vibrant, ready-to-press designs.
The U.S. is a powerhouse in the DTF printing world, and with more businesses looking to bring manufacturing and sourcing closer to home, that's not changing anytime soon. That shift makes reliable domestic sourcing, for both supplies and finished transfers, easier than ever. If you're interested in the market trends, you can dive deeper with this comprehensive industry analysis from Grand View Research.
At the end of the day, quality glitter DTF film, good inks, and fast, dependable shipping are what help you make products that turn first-time buyers into lifelong customers.
Your Top Questions About Glitter DTF Film, Answered
When you're thinking about adding something new like glitter DTF film to your lineup, you're bound to have questions. It’s a cool piece of tech that sits right at the intersection of everyday printing and eye-catching special effects, so it's smart to wonder about how it fits in, how it holds up, and how to get the best results.
We’ve been there. We've fielded tons of questions from print shops and designers just like you, so we’ve put together the most common ones right here. Think of this as your practical guide to getting started with confidence.
Can I Use My Existing DTF Printer And Inks?
Yes, you absolutely can. This is probably the best part about glitter DTF film—it’s designed to be a direct swap for your standard film. It just works.
You can use the same DTF printer, the same inks, and the same adhesive powder you already have in your shop. There’s no need to buy a special machine or mess with your current workflow. This "plug-and-play" nature makes it a super simple and cost-effective way to offer something new and exciting. Just remember to keep using a high-quality, opaque white ink for your underbase. That white layer is what makes your colors pop against the glittery background.
How Durable Are These Transfers After Washing?
When they're pressed correctly, glitter DTF transfers are incredibly tough. We're talking about surviving dozens and dozens of wash cycles without cracking, peeling, or fading. In many cases, the print will outlast the shirt it's on. The secret is all in the application—getting your heat press temperature, pressure, and timing just right is what creates that permanent bond.
To make sure your customers get the most life out of their new favorite shirt, just pass along a few simple care instructions. It makes a huge difference.
- Wash Inside-Out: This is a big one. It protects the design’s surface from getting roughed up by zippers, buttons, or other clothes in the wash.
- Use Cold Water: Cold water is just gentler on the print and the fabric, keeping the colors bright.
- Tumble Dry Low: High heat is the enemy of any print adhesive. Tumble drying on low or, even better, hanging it to dry is the way to go.
Follow these tips, and that glitter transfer will keep its sparkle for a long, long time.
What Kinds of Designs Work Best With Glitter?
While you can print some pretty detailed stuff on glitter film, some designs just work better than others at showing off the sparkle. The key is to go bold.
Here’s what really shines:
- Bold Typography: Big, chunky letters or script fonts with thick lines let the glitter texture really come through.
- Solid Shapes and Silhouettes: Designs with large fields of solid color create a stunning, unbroken sheet of sparkle that you can't miss.
- Logos with Strong Lines: Clean, well-defined company or team logos are perfect for getting the glitter treatment.
Super thin lines or tiny text can get a little lost in the texture of the film. A great pro-tip is to use glitter as an accent. You could print most of a design on regular DTF film and then hit just a few key words or elements with glitter transfers. It creates a killer mixed-media look that feels really custom and high-end.
The real magic of glitter DTF film is its ability to turn a simple design into a high-value product. By choosing artwork that complements the material, you create a piece that not only looks great but also feels more premium, justifying a higher price point.
For those looking to sell their glitter creations online, learning how to improve ecommerce conversion rates is a game-changer. It all starts with great product photos that actually capture that shimmer and shine.
Does the Glitter Shed or Flake Off the Garment?
We get this question a lot, especially from people who've dealt with craft glitter. The answer is a hard no. Unlike the loose stuff, the glitter in professional DTF film isn't just sitting on the surface. It’s actually sealed inside the film's layers during the manufacturing process.
Once you cure the transfer with adhesive powder and press it onto the shirt, the whole thing—glitter included—becomes one solid, unified layer. The finish is smooth, and the glitter is locked in for good. It won’t flake off, leave a trail of sparkles, or make a mess. This is a massive step up in quality from older, messier glitter methods.
Ready to add some serious sparkle to your product line? Cobra DTF prints custom, USA-made DTF transfers that are ready to press, with same-day shipping on orders placed by 1 PM CT, so you can offer vibrant, durable designs without running a printer yourself.