

Fit T Shirt
A fitted T-shirt is defined by the measurable ease between your body and the garment, a distinction that matters in a market of approximately 22 billion units and $85.9 billion in value in 2024. The right choice depends on the customer's body shape, the intended use, and whether large DTF graphics will cross high-stretch zones.
You've probably seen the order go wrong before. The artwork looks sharp on screen, the transfer applies cleanly, and the customer still complains because the shirt pulls across the shoulders, rides up after washing, or makes the graphic look distorted when they move. The printing wasn't necessarily the problem. The blank was.
A fitted T-shirt is not just a shirt marked “slim” on a product page. It's a combination of body measurements, garment measurements, fabric behavior, laundering, and decoration placement. Treat those variables separately and complaints multiply. Treat them as one production decision and you can protect both the fit and the print.
What Fit T-Shirt Really Means for Your Business
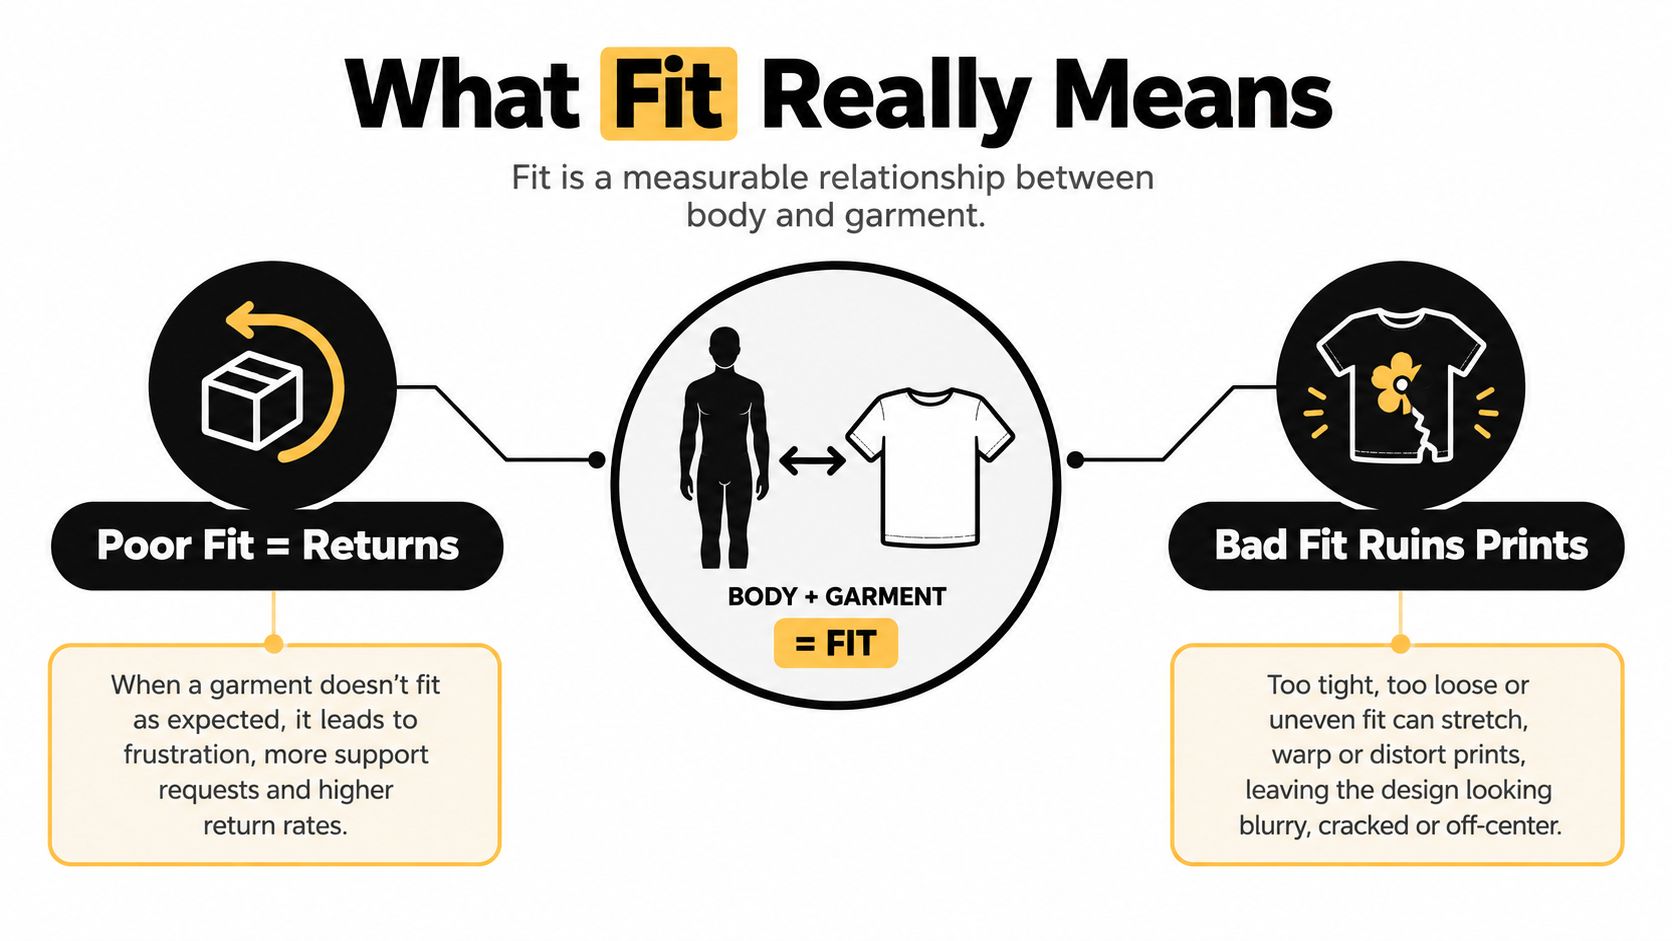
Fit means usable space between the body and the garment. In apparel terminology, that space is called ease. A shirt with too little ease restricts movement and places constant tension on the knit. A shirt with too much ease loses the close silhouette the customer expected. The best fitted T-shirt gives the wearer enough room to move while keeping the shoulder, chest, waist, sleeve, and hem in the intended relationship.
Think of ease like clearance around a moving part. A door needs enough clearance to open without scraping, but excessive clearance makes it look poorly installed. A fitted shirt works the same way. The garment needs room for reaching, bending, and breathing, but not so much room that the silhouette collapses.
The ASTM apparel-sizing terminology gives product developers a useful vocabulary for this work, including across-back shoulder width, shoulder-joint position, armscye girth, chest or bust, and vertical body lengths. Those aren't decorative details. A narrow shoulder can restrict reach, while an undersized armhole can create pressure and drag lines even when the chest measurement looks acceptable.
Why fit comes before artwork
Your decoration plan starts with the blank, not the transfer. A large graphic applied to a shirt that stretches heavily across the chest, armhole, or side seam will experience more repeated strain than the same graphic on a stable area. If the shirt is already too tight, the customer may blame the print for cracking, distortion, or discomfort.
Use this order of operations:
- Define the target wearer. Decide whether the shirt is intended for a close athletic silhouette, everyday wear, a fuller torso, or a more forgiving unisex shape.
- Record finished measurements. Measure chest, shoulder, body length, sleeve opening, and hem. Don't rely only on labels such as “small” or “fitted.”
- Assess the fabric. Note cotton content, knit stability, stretch, recovery, and expected laundering behavior.
- Approve the decoration zone. Keep large graphics away from areas that repeatedly extend during movement.
- Test the decorated sample. Evaluate it standing, reaching, lifting the arms, sitting, and after laundering.
The T-shirt's evolution helps explain why this workflow matters. It developed from practical underwear and became useful workwear because it was lightweight, washable, inexpensive, and simple to construct. The U.S. Navy formally issued a white, short-sleeved, crew-neck cotton version in 1913, helping standardize the design before the garment became mainstream casual clothing. That history still shapes custom apparel today, as explained in the history of the T-shirt.
A fitted silhouette gives artwork a clean presentation surface, but it also gives you less tolerance for error. If you're developing a product page, support the visual presentation with useful copy. Resources such as T-shirt caption examples for engagement can help you communicate the intended mood, but the product description still needs concrete fit information.
For blank selection, compare fabric weight, construction, shoulder shape, and laundering behavior rather than choosing by marketing label alone. A practical starting point is this guide to blank T-shirts for printing.
Slim, Regular, and Relaxed Fit Compared
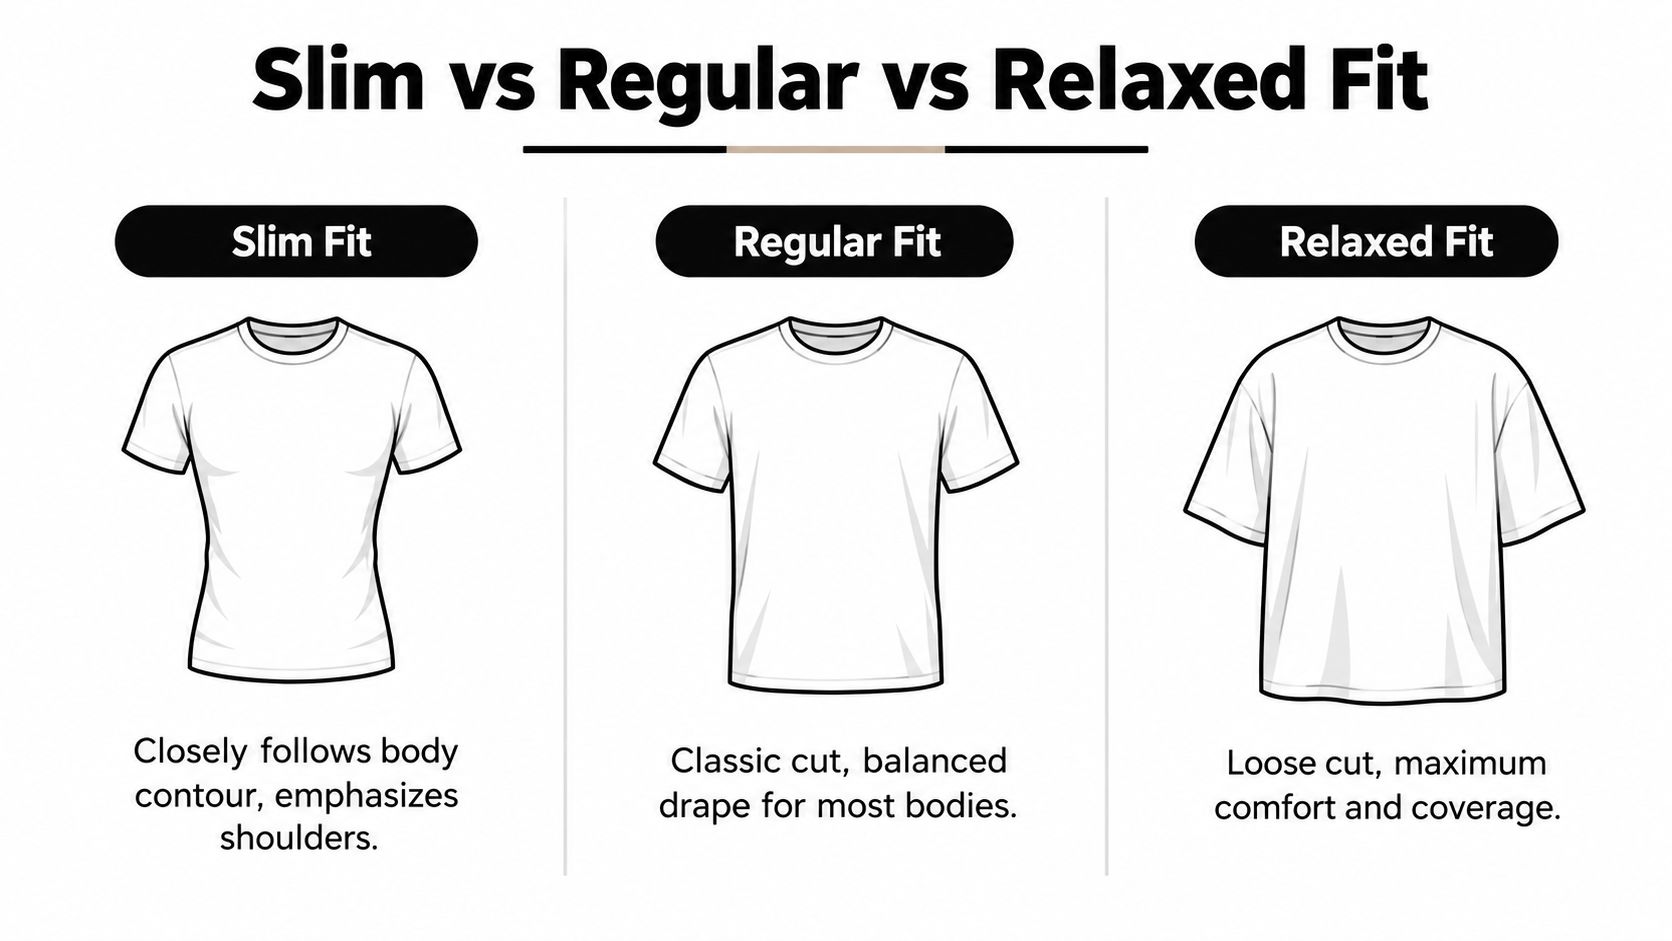
Customers often use “fitted” to describe three different silhouettes. That creates confusion at the sales counter and in online orders. Separate the categories by how they distribute space, then match the distribution to the wearer and the artwork.
Slim fit
A slim-fit T-shirt follows the body closely through the chest, waist, and sleeves. It emphasizes the shoulders and torso, which makes it a strong choice for structured brand graphics, fitted lifestyle collections, and customers who want a sharper outline.
The tradeoff is limited tolerance. If the wearer has broad shoulders, a fuller bust, a muscular upper arm, or a longer torso, the shirt may fit one area while failing another. A slim shirt can also pull a large center graphic across the chest during movement, especially when the knit has limited stretch or weak recovery.
Choose slim fit when:
- The silhouette is the product. The customer expects a close outline rather than generous drape.
- The artwork is controlled. Smaller chest marks, vertical designs, or graphics placed in a stable central zone are easier to manage than oversized prints spanning the torso.
- The size data is strong. You have actual garment measurements and know the shoulder and armhole proportions suit the audience.
Regular fit
A regular-fit T-shirt offers balanced room through the chest, waist, and sleeve. It usually provides the safest default for broad customer groups because it doesn't force every wearer into a narrow shape or an oversized look.
Regular fit also gives decorators more flexibility. It can support a center graphic without making the garment feel immediately restrictive, and it tends to accommodate ordinary movement better than an aggressively narrow blank. If your size information is limited, regular fit is the responsible starting point, not because it's universally perfect, but because it creates fewer extreme fit failures.
Use regular fit for event merchandise, everyday branded apparel, and collections sold to customers with varied body proportions. Pair it with clear garment measurements so buyers can compare the shirt with one they already own.
Relaxed fit
A relaxed-fit T-shirt adds room through the torso and often the sleeves. It suits customers who prioritize coverage, movement, or a less body-conscious silhouette. It can be more forgiving for broad, muscular, or fuller builds, but it changes the way the artwork reads.
A small logo can disappear on a roomy front. A large graphic may look balanced, but the added fabric can produce folds that interrupt fine details. Placement should follow the actual front panel, not an assumed center based on a narrower shirt.
| Fit | Silhouette | Main strength | Decoration concern |
|---|---|---|---|
| Slim | Close to the body | Sharp, shaped appearance | Less tolerance for stretch and measurement errors |
| Regular | Balanced drape | Versatile everyday option | Requires clear sizing to avoid being mistaken for slim |
| Relaxed | Loose and comfortable | More coverage and movement | Small artwork can look undersized or lost in folds |
Don't use fit labels as your entire recommendation. A customer may prefer a slim aesthetic but need a regular cut because of shoulder width or torso length. A store experience built around clear product options can make those choices easier. For an example of how apparel brands can present products through an online experience, review this custom Shopify build for True Linkswear.
The direct recommendation is simple: offer one reliable regular fit as the baseline, then add slim or relaxed options when your customer data supports them. Don't launch multiple silhouettes just to appear thorough. Each cut needs its own garment measurements, model photography, print-placement rules, and wash validation.
How Ease and Fabric Affect DTF Print Placement
Ease is not a visual impression. It's the difference between a body measurement and the corresponding finished garment measurement. Calculate it separately for the chest and hem. A shirt can sit close through the chest while hanging unnecessarily loose at the waist, or it can fit the waist while creating pressure through the armhole.
Fabric changes the result. A rigid or low-stretch knit generally needs more dimensional allowance at the chest, armhole, and sleeve opening than a stretchier knit. Two shirts can show similar flat-lay measurements yet feel very different when the wearer raises an arm, reaches forward, or sits down.
The research on apparel fit and digital clothing pressure reinforces the practical point: ease allowance alone doesn't fully describe how a garment feels under movement. Pressure created by the clothing can reveal problems that a flat measurement misses.
Put the largest graphics on the calmest fabric
A large DTF graphic needs a stable surface. Avoid placing it directly across the armhole, over the side seam, or in a zone that expands and contracts constantly with shoulder movement. Those areas experience repeated extension, which can affect the visual condition of the transfer and make the garment feel tighter during wear.
That doesn't mean every large front print will fail. It means you should match scale and placement to the garment's behavior:
- Chest graphics: Keep the design within a zone that doesn't cross the armhole or side seam.
- Full-front graphics: Check the artwork while the wearer reaches forward and raises both arms.
- Back graphics: Inspect the upper back for tension caused by shoulder movement and a narrow across-back measurement.
- Sleeve artwork: Treat the sleeve opening and upper arm as movement zones, especially on slim blanks.
- Seams and hems: Keep important artwork away from areas where sewing, folding, or repeated bending can interrupt the surface.
Use a T-shirt material guide to compare the blank's fiber and knit characteristics before you approve a decoration method. The fabric decision should follow the design brief, not the other way around.
Test the shirt in motion
A production sample should be evaluated in at least four positions:
- Neutral standing, to check the intended silhouette.
- Arm elevation, to identify armhole pressure and hem ride-up.
- Forward reach, to expose drag lines across the back and chest.
- Seated posture, to check body length, waist tension, and graphic distortion.
Record the finished dimensions before and after laundering. If the chest looks correct on the table but the neckline pulls or the hem rides up when the wearer moves, the sample isn't approved. If the transfer looks clean while flat but stretches visibly during reach, change the placement or the blank before scaling the order.
Practical rule: A print file can be technically perfect and still be a poor production choice if the garment forces it to stretch with every normal movement.
How to Choose Fit by Body Shape and Use Case
Chest circumference is useful, but it isn't enough. A customer can match the chest measurement and still experience shoulder restriction, neckline gaping, waist ride-up, or an exposed midriff after laundering. Choose a fit profile by looking at several body landmarks and the way the shirt will be worn.
Research on women's ready-to-wear sizing compared retail charts with actual measurements from 300 Indian women aged 18 to 38, including shoulder, bust, waist, and hip dimensions, which supports a broader approach than relying on one circumference alone. The practical lesson applies across markets: body shape varies, and a single number can't describe garment balance. See the research on apparel sizing and fit measurements for the underlying sizing discussion.
Start with the shoulder
Shoulder width determines where the garment begins to hang. Customers with narrow shoulders may find a relaxed blank too broad and prone to slipping outward. Customers with broad shoulders may find a slim blank restrictive even when the chest measurement seems acceptable.
Ask whether the shoulder seam should sit close to the natural shoulder joint or extend beyond it as part of a deliberately relaxed design. Don't call a dropped shoulder “bad fit” if the product is intentionally oversized, but don't sell a dropped shoulder as fitted either.
Then assess torso shape
Use these fit profiles to guide recommendations:
- Narrow shoulders: Favor a proportionate shoulder seam and avoid excessive width unless the relaxed look is deliberate.
- Broad shoulders or muscular upper body: Allow room in the shoulder, armhole, and upper sleeve before judging the chest.
- Fuller bust: Check bust ease, neckline recovery, and body length. A shirt that fits the bust but is too short can create constant upward tension.
- Straighter torso: Regular or slim fits may maintain a clean line without adding unnecessary fabric at the waist.
- Curvier torso: Separate chest and hem ease. A shirt may need more room at the bust and hem without becoming oversized at the shoulder.
- Longer torso: Prioritize body length. A fitted shirt that ends too high will ride up during ordinary movement.
- Preferred ease: Ask whether the wearer wants a close outline, balanced comfort, or generous coverage. Preference is a specification, not an afterthought.
Build a product page that answers fit complaints early
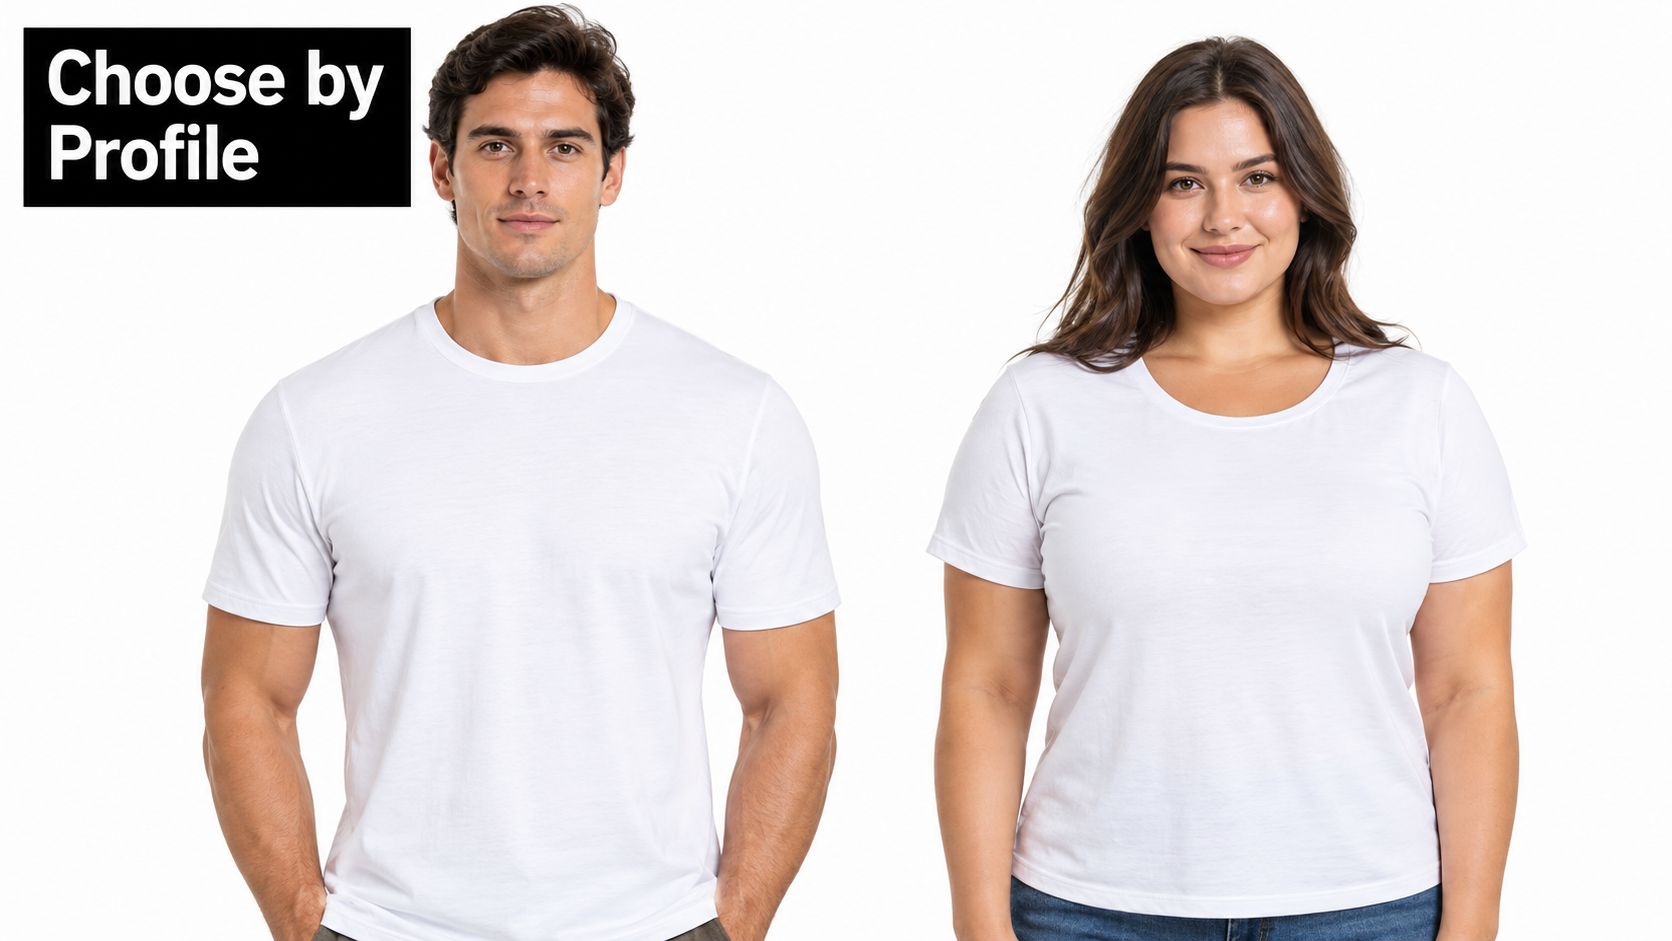
Publish both body-size guidance and actual garment measurements. Tell customers how to measure themselves, then show chest, shoulder, body length, sleeve opening, fabric stretch, and shrinkage expectations. Include model photos with enough information for the buyer to understand proportion, not just color and styling.
A useful size guide should let the shopper compare the finished shirt with a garment they already own. That approach is more reliable than asking the customer to trust an inconsistent label. For custom sellers, it also creates a support record. If a buyer chooses a size after reviewing the finished measurements, you can diagnose the issue more clearly if the order generates a complaint.
Fit photos should show more than one body shape where possible. The point isn't to promise that every body will look identical in the garment. The point is to show how shoulder width, bust, torso length, and ease change the result.
Why Post-Wash Fit Often Overrides the Original Size Choice
The shirt that fits perfectly on the product page may not be the shirt the customer wears after repeated laundering. Cotton can change in length, width, balance, and skewness, and a fitted silhouette makes those changes more noticeable.
A 2025 study of 100% cotton T-shirts assessed garments after 1, 5, 10, 15, and 20 washing cycles using 3D body scanning and visual evaluation. After 20 washes, some garments reportedly shrank enough to reduce the effective garment size by two sizes and developed significant skewness, as described in the study of post-wash T-shirt fit.
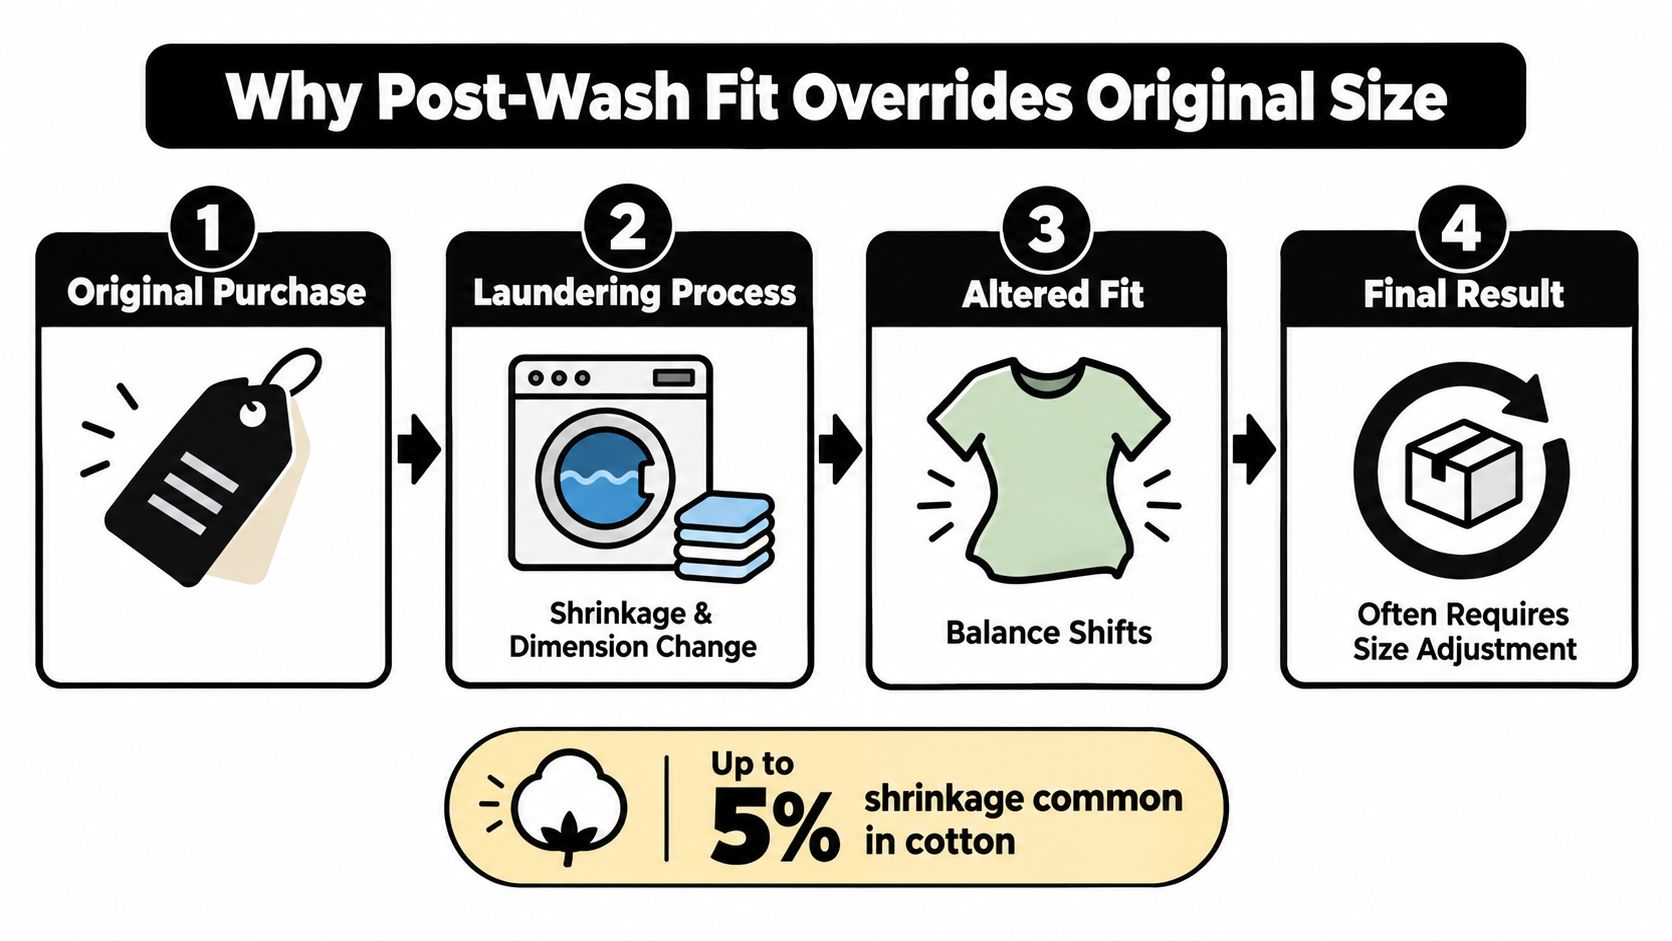
Independent testing also found meaningful variation between cotton jersey brands. After 20 washes, the greatest tested overall shrinkage was 4.6%, while another garment changed by 2.3%. The cited ASTM dimensional-change maximum was 3%, so you shouldn't assume that every cotton blank will behave the same way or remain within the same tolerance. Those figures come from the same post-wash fit research and should be treated as a reason to test, not as a universal prediction for every shirt.
Why tight blanks create expensive problems
A tight blank leaves little room for dimensional loss. A small reduction in body length can make the hem ride up. A small reduction in width can increase chest and armhole pressure. A neckline that loses recovery can change the entire visual balance, while skewness can make a centered graphic appear misaligned even when the transfer was applied correctly.
This is why a slightly relaxed blank can produce a more consistent finished fit than an initially tight blank, particularly when customers use warm or hot drying. The relaxed option isn't automatically superior. It gives the garment more tolerance when laundering changes the dimensions.
Approve the decorated sample, not the blank alone
Run the wash test on the complete product:
- Use the final blank. Substituting a similar-looking shirt defeats the test.
- Apply the actual transfer. Print size, ink coverage, and placement affect how the garment behaves.
- Record pre-wash measurements. Include chest, length, shoulder, sleeve opening, and hem.
- Launder according to the care instructions. If customers commonly use dryers, include realistic heat exposure.
- Measure again. Note shrinkage, skewness, neckline recovery, print appearance, and balance.
- Inspect movement. Wear the washed sample and check the same positions used during fit testing.
Give customers clear care instructions through resources such as this guide to washing graphic T-shirts. Care guidance won't eliminate every change, but it sets a realistic expectation and gives the customer a way to protect the finished garment.
The first fitting approves the purchase. The post-wash fitting approves the product.
Fit and Print Checklist for Custom Apparel Orders
Use this checklist before you commit a fitted T-shirt to a production run. It turns fit from an opinion into a repeatable handoff between the seller, decorator, and customer.
Confirm the commercial fit
- Name the silhouette: Record slim, regular, or relaxed. Don't approve “fitted” as the only description.
- Define the wearer: Note shoulder profile, torso length, preferred ease, and likely use.
- Set the garment measurements: Record finished chest, shoulder, body length, sleeve opening, and hem.
- Publish the numbers: Show body guidance and garment measurements on the product page.
- Check the blank after laundering: Don't approve a shirt from an untouched sample alone.
Confirm the technical fit
- Inspect shoulder and armhole: Look for restricted reach, pressure, and diagonal drag lines.
- Separate chest and hem ease: A close chest doesn't justify an unnecessarily loose waist.
- Assess the fabric: Match stretch, recovery, and stability to the artwork size.
- Mark high-extension zones: Identify the armhole, side seam, upper back, sleeve opening, and areas that fold during movement.
- Place artwork on stable surfaces: Keep large transfers away from repeated strain wherever possible.
- Test movement: Evaluate standing, arm elevation, forward reach, and seated posture.
- Measure after washing: Compare the decorated sample before and after laundering.
Make the product page do useful work
A product description should answer the questions your support inbox will otherwise receive. State who the fit suits, where the shoulder seam sits, how much body coverage the garment provides, whether the fabric stretches, and how customers should compare measurements. Guidance on writing product descriptions for omnichannel growth can help you turn those specifications into clearer sales copy.
Keep the production record with the artwork file. Save the blank style, size, finished measurements, transfer dimensions, placement reference, press settings, care instructions, and wash-test observations. That record lets you reproduce a successful order and identify the exact variable when a complaint appears.
For a small apparel business, the most useful approval question is not “Does this shirt look fitted?” Ask instead, “Does this garment keep the intended fit and protect the artwork through movement and laundering?” If the answer is yes, release the order. If the answer is uncertain, change the blank, placement, or size guidance before the customer receives it.
Cobra DTF offers Direct-to-Film transfers and a gangsheet builder for arranging custom artwork before ordering, which can support a fit-first workflow when you need to test several placements or sizes. Review the finished blank, place the graphic away from high-stretch zones, and visit Cobra DTF to prepare the transfer for your next production sample.