
A Practical Guide to DTF Transfer Gang Sheets
Ever found yourself printing a single small logo on a big piece of transfer film and cringing at all the wasted space? That's where DTF gang sheets come in, and they are a total game-changer for anyone in the custom apparel business.
Think of it like this: instead of baking one cookie at a time, you roll out a huge sheet of dough and cut out dozens at once. It's simply a smarter, faster, and more efficient way to work. For small businesses, this method isn't just convenient—it's how you boost your bottom line.
What Are DTF Transfer Gang Sheets Anyway?
Let’s get practical. Imagine you're juggling a few different orders. One customer needs 10 small chest logos, another wants 5 big graphics for the back of some hoodies, and a third needs a dozen sleeve prints.
Instead of printing each of those 27 designs on its own little piece of film, you arrange all of them onto one large sheet. That consolidated, jam-packed sheet of designs is what we call a DTF transfer gang sheet.
The whole idea boils down to one word: efficiency. When you group—or "gang"—multiple jobs together, you pay for the entire sheet, not for each individual transfer. This move drastically cuts your cost per design, turning what would have been wasted film into pure profit. It's the ultimate production hack for any custom apparel creator.
The Power of Batching Your Designs
Working with gang sheets shifts your whole mindset from one-off jobs to a smooth, production-focused workflow. It gives you the power to combine different customer orders, run a few test prints for new designs, and even sneak in your own branding like neck tags—all in a single print run. The flexibility is incredible, especially if you handle lots of diverse, smaller orders.
This kind of efficiency is a huge reason the Direct to Film printing market is booming. The global DTF printing market was valued at around USD 2,720 million and is expected to hit USD 3,920 million by 2030, growing at a compound annual growth rate of 6.0%. This isn't just a trend; it's a reflection of businesses demanding smarter, more cost-effective ways to create custom apparel, which is exactly what gang sheets deliver. You can see more data on this industry trend from Grand View Research.
A gang sheet transforms your printing from a series of small, expensive tasks into one large, cost-effective project. It’s about working smarter, not harder, to maximize every square inch of film you purchase.
If you're still getting your feet wet with this technology, getting the fundamentals down is key. To build a solid foundation, I'd highly recommend reading our guide on what Direct to Film printing is and how it works before diving into more advanced techniques.
Core Business Advantages at a Glance
So, what does all this really mean for your shop's profitability? The benefits of using gang sheets are tangible and you'll feel them almost immediately, from your production speed right down to your profit margins.
Here’s a quick breakdown of why this method is so powerful for small businesses.
Key Advantages of Using DTF Gang Sheets
| Feature | Benefit for Your Business | Impact |
|---|---|---|
| Cost Efficiency | Reduces the price per individual transfer significantly. | Higher profit margins on every single item you sell. |
| Material Savings | Minimizes wasted film by filling every available space. | Lowers your overall material costs and reduces environmental waste. |
| Increased Flexibility | Print multiple designs, sizes, and colors all at once. | Fulfill diverse customer orders in a single print run, boosting productivity. |
In short, integrating gang sheets isn't just an option; it’s a strategic move that makes your business more competitive and profitable.
How to Nail Your Gang Sheet Layout
Alright, let's move from theory to action. Designing a great gang sheet is where your creative side and your business smarts really need to work together. Picture your blank roll of film as a digital canvas. Your job is to arrange every single design onto it with Tetris-like precision, making sure every piece fits snugly with no wasted space.
When you get this right, you're not just printing graphics—you're literally manufacturing profit. Every square inch of film holding a design is money in your pocket, while every blank spot is money left on the table. Mastering this layout process is one of the most important skills for getting the most out of your DTF transfers.
This workflow diagram shows how your designs, time, and money all funnel into the central gang sheet production process.
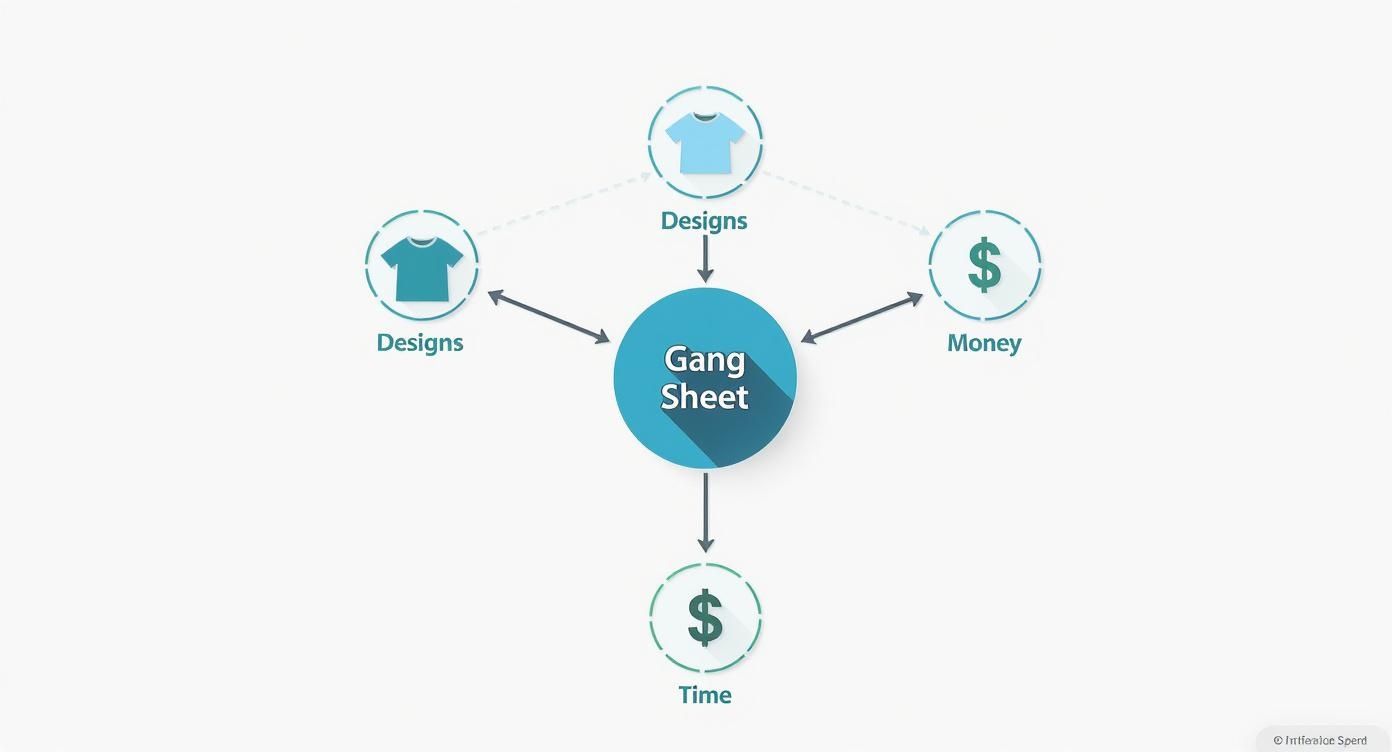
As you can see, the gang sheet is the heart of the operation where your creative assets become real, profitable products. That makes getting the layout perfect an absolute must.
Mastering Nesting and Arrangement
The secret to a perfectly packed gang sheet is a technique called nesting. It’s a simple concept: you tuck smaller designs into the awkward empty spaces left by your larger or oddly-shaped graphics. Got a big circular logo? The corners around it are prime real estate for small sleeve logos, neck tags, or pocket-sized designs.
Don't just place designs next to each other; think about how they can fit together. A well-nested gang sheet is a puzzle you solve to unlock maximum profit.
To get good at this, just follow a simple order of operations. Start by placing your largest, highest-quantity designs on the sheet first; think of them as your "anchor" pieces. Next, fill in the big gaps with your medium-sized graphics. Finally, use your smallest designs—like custom neck tags or simple logos—to fill in every last nook and cranny. This methodical approach ensures you don't miss a single opportunity.
File Requirements: The Non-Negotiables
Before you even start arranging your designs, you have to make sure your files are technically sound. Sending in a flawed file is the fastest way to get a bad print, wasting both your time and money. There's no "fixing it in the print"—the final transfer will only be as good as the digital file you upload.
Here are the absolute must-haves for your artwork:
- Resolution: Your files have to be 300 DPI (dots per inch) at the exact size you want them printed. A low-res image will look blurry and pixelated, which is not a good look for your brand.
- Background: Every design needs a transparent background. If your image has a white box around it, that white box is going to get printed right onto your transfer, adhesive and all.
- File Format: The most reliable and universally accepted file format is PNG. That said, high-quality vector files like AI (Adobe Illustrator) or a print-ready PDF also work great.
When you're prepping designs, high resolution is king. If you're stuck with an image that needs a boost, look into using tools like Photoshop AI Upscale tools to sharpen details and ensure a crisp, professional print.
Sizing Your Designs for a Perfect Fit
Getting the size of each design right is just as crucial as the overall layout. A common rookie mistake is to just eyeball the dimensions, only to find the printed transfer is way too big or small for the garment. Do yourself a favor and always measure the actual area on the shirt or apparel where the design will go.
For a complete rundown of standard dimensions for different placements—from full-front graphics to left-chest logos—be sure to check out our detailed guide on choosing the right DTF transfer sizes for your projects. It’s a great resource for standardizing your products and avoiding costly sizing mistakes. A few extra moments double-checking these details will guarantee a professional result every time.
From Printed Film to Finished Product
So, your freshly printed DTF transfer gang sheet has just landed on your doorstep, and it looks incredible. That roll of film is pure potential—the final link between your digital ideas and a rack of high-quality, sellable apparel. Now comes the fun part, the hands-on process where your technique and attention to detail really shine.
Turning that sheet of transfers into a finished garment is pretty straightforward, but every little step counts. From cutting out your designs to getting the heat press settings just right, a good process is what guarantees a vibrant, durable, and professional-looking product. This is where all that time spent perfecting your designs finally pays off.

Preparing Your Transfers and Garments
First things first, you'll need to cut the individual designs from your gang sheet. A good, sharp pair of scissors or a rotary cutter is all you need. You don't have to be a surgeon here and cut perfectly along the edge of the graphic; just leave a small border of clear film around it. This makes the transfer much easier to handle and place on the garment.
With your designs separated, your focus shifts to the garment itself. Before you even think about laying that transfer down, you have to pre-press it. Just place the shirt or hoodie on your heat press and give it a quick press for about 5-10 seconds at your application temperature.
Don't skip this. This simple move does two critical things:
- It Wrings Out Moisture: Fabric holds a surprising amount of moisture from the air. If you don't press it out, that moisture turns to steam and can completely mess up the transfer's bond.
- It Creates a Smooth Surface: The pre-press flattens out any wrinkles or creases, giving you a perfect canvas for a flawless application.
Honestly, skipping the pre-press is one of the biggest rookie mistakes and the cause of most print failures. It’s a tiny step that saves you from the massive headache of peeling prints and unhappy customers.
The Golden Triangle of Heat Pressing
A perfect DTF application all comes down to a delicate balance of three things: temperature, time, and pressure. I like to call this the "golden triangle" of heat pressing. When you nail these three settings, you get a durable, long-lasting print that feels great and can survive wash after wash.
Your specific settings will always depend on your supplier. Don't just guess! Always check the instructions that came with your DTF transfers, because their unique film and adhesive powder will have specific requirements for the best results.
While you should always start with your supplier's specs, here are some common baseline settings for applying DTF to cotton or poly blends:
- Temperature: Usually somewhere between 280-320°F (138-160°C).
- Time: The first press is typically around 10-15 seconds.
- Pressure: You're looking for medium to firm pressure.
These settings are designed to melt the adhesive powder just right, allowing it to fuse deep into the fabric fibers. Using a quality heat press that delivers even heat and consistent pressure is absolutely non-negotiable for getting professional-grade results.
Hot Peel vs. Cold Peel: The Final Step
After that first press, you have one last crucial step: removing the carrier film. This is where the terms hot peel and cold peel come into play, and you have to know which kind of transfer you're working with.
- Hot Peel: Just like it sounds, you peel the film away immediately after the press opens, while everything is still piping hot. It's fast, efficient, and usually leaves the design with a softer, more matte finish.
- Cold Peel: With these, you have to exercise some patience. Let the garment and transfer cool down completely before you even think about peeling the film. This method is known for creating an incredibly strong bond and can result in a slightly glossier finish.
Get this wrong—peeling a cold peel transfer while it's hot or letting a hot peel get cold—and you'll ruin the print. For a much deeper dive into the nitty-gritty of application, check out our guide on DTF transfer sheets that are ready to press.
Once the film is off, most pros (including myself) recommend a quick final press for 2-5 seconds. Just place a Teflon sheet or some parchment paper over the design and press it one last time to lock it in and boost its durability.
Calculating Costs To Maximize Your Profits
This is where the magic of DTF transfer gang sheets really hits the bottom line. Knowing your true cost-per-design is absolutely critical for setting smart prices, protecting your margins, and building an apparel business that actually lasts. It’s not just about what you pay for the sheet; it’s about what you get out of it.
Let's walk through the simple math that shows just how powerful this method is financially. Stop seeing that roll of film as just a supply item and start thinking of it as valuable real estate, where every square inch is an opportunity to make money.
The True Cost Per Design
The price on the gang sheet listing is only half the story. To figure out what you're really paying for each design, you have to look at the whole picture. The formula is simple: divide the total cost of the sheet (including shipping) by the number of designs you managed to fit on it.
For instance, say you grab a gang sheet for $25 and shipping is another $5, bringing your total to $30. If you cleverly arrange 20 different designs on that single sheet, your cost-per-design drops to just $1.50. Now, stack that up against ordering those same 20 transfers individually, which could easily cost you $3-$5 apiece. The savings are immediate and significant.
The goal is simple: pack as many designs onto each sheet as you possibly can. The more you print in one go, the lower your cost for each individual transfer becomes, which directly fattens the profit on every single t-shirt you sell.
Gang Sheet Savings: A Clear Comparison
To really see the difference, let’s look at a side-by-side comparison. The cost-efficiency of DTF gang sheets is a huge reason they’ve become a favorite for custom apparel shops trying to boost their profitability. You’ll find many suppliers offering standard sizes like 24” x 60” for anywhere between $15 to $30 a sheet, making it a budget-friendly way to produce a lot of transfers without the high setup fees of other methods.
This table shows just how fast the savings add up when you switch from buying one-off transfers to using a gang sheet.
Cost Per Print Comparison: Gang Sheet vs. Individual DTF
| Number of Designs | Estimated Cost (Individual Prints) | Estimated Cost (Gang Sheet) | Potential Savings |
|---|---|---|---|
| 10 Full-Chest Logos | $40 (at $4/print) | $30 (1 Sheet) | $10 |
| 25 Mixed-Size Logos | $90 (at ~$3.60/print) | $30 (1 Sheet) | $60 |
| 50 Small/Sleeve Logos | $125 (at $2.50/print) | $30 (1 Sheet) | $95 |
The numbers don't lie. As you pack more designs onto your sheet, your savings multiply. This is a game-changer for businesses that juggle lots of smaller, custom orders. You can combine jobs from different clients onto one sheet and get bulk-style pricing on every run.
Setting Prices For Healthy Profit Margins
Once you’ve nailed down your cost-per-design, you can price your finished apparel with confidence. A common approach is to use a straightforward markup formula. For example, many shop owners aim to price their final product at 3x or 4x their cost.
So, if your transfer cost is $1.50 and the blank shirt costs you $4.00, your total production cost is $5.50. Applying a 3x markup gets you a retail price of $16.50. This ensures you cover your materials, your time, and other business overhead while still making a healthy profit.
Of course, your material cost is just one piece of the puzzle. For a deeper dive into your shop’s overall financial health, it’s worth understanding your business's overall contribution margin. This will help you make even smarter decisions about everything from pricing and marketing to operational spending.
Finding the Right DTF Print Supplier
Picking a partner to print your DTF transfer gang sheets is a huge decision for your apparel business. This isn't just about bargain hunting for the lowest price—it's about finding a reliable link in your supply chain so you can deliver quality products on time, every time. A great supplier feels like an extension of your own team; a bad one becomes a constant source of stress.
The right partner gives you more than just ink on film. They offer consistency, good communication, and a process you can count on, taking the guesswork out of your production schedule. When you find a printer you trust, you can finally stop worrying about production and focus on what you do best: designing and selling awesome apparel.
Key Factors in Choosing a Supplier
Not all DTF printers are created equal. When you're looking for a partner, you need to look past the flashy ads and dig into the details that actually impact your day-to-day. A little research now will save you a world of hurt later.
Here’s what you should be looking for:
- Print Quality and Consistency: Always ask for samples. A good supplier’s prints will look vibrant, feel durable, and have crisp, sharp edges. Just as important, that quality shouldn't change from one order to the next.
- Realistic Turnaround Times: Be wary of printers promising the moon. "Same-day" turnarounds might mean they're cutting corners, while a two-week lead time can bring your business to a grinding halt. Look for clearly stated, reliable production times.
- Shipping Reliability: Fast printing doesn't matter if your package gets stuck in transit for a week. Check their shipping partners, costs, and how quickly they can actually get a package to your door.
- Responsive Customer Service: What happens when an order goes wrong? You need to know there’s a real person on the other end who can solve problems quickly and professionally.
The Advantage of a Domestic Supplier
With so many options out there, choosing a US-based supplier like Cobra DTF can be a game-changer. Working with someone stateside means you can forget about the logistical nightmares of international shipping—no customs delays, surprise tariffs, or trying to communicate across a 12-hour time difference.
The demand for small-batch custom apparel is exploding, pushing the DTF market to a projected 15–20% annual increase through 2026. This surge usually hits its peak between August and October, which is exactly when you need a fast, reliable supplier the most. You can dive deeper into this DTF gang sheet trend on accio.com.
With a domestic partner, you get your transfers in days, not weeks. That speed lets you be more agile, say "yes" to last-minute jobs, and keep less money tied up in inventory.
Navigating the Ordering Process
Once you've found your supplier, the final piece of the puzzle is mastering their ordering system. Thankfully, most modern printers, including Cobra DTF, have user-friendly online gang sheet builders that simplify everything.
Here’s what that process usually looks like:
- Select Your Sheet Size: First, pick the dimensions that make the most sense for the designs you need to print.
- Upload Your Artwork: Drag and drop your print-ready PNG or AI files right onto the digital canvas.
- Arrange Your Layout: Use the builder's tools to nest and arrange your designs, packing them in to use every last inch of film.
- Review the Digital Proof: CRITICAL STEP! Before you hit that "approve" button, triple-check everything. Make sure every design is sized correctly, placed where you want it, and looks clear. This digital proof is your last chance to catch an error before it heads to the printer.
By choosing your supplier carefully and getting comfortable with their ordering process, you build a rock-solid foundation for your business to grow on.
Got Questions About DTF Gang Sheets? We've Got Answers.
Even with a solid plan, jumping into the world of DTF transfer gang sheets can feel like learning a new language. That's totally normal. Getting the little details right is what separates the beginners from the pros and makes sure your first order comes out looking incredible.
To help you get there faster, we've pulled together the most common questions we hear from people just like you. Think of this as your personal cheat sheet for sidestepping the usual headaches and getting straight to the good stuff.
What’s the Best File Type and Resolution for My Designs?
This is probably the single most important question because your final print quality is decided right here, at the file creation stage. If you want sharp, professional-looking transfers, your artwork has to nail two critical things.
First, your design must have a transparent background. If you see a white box around your art on the computer, that box is going to get printed, complete with adhesive, and end up on your shirt. Second, the resolution needs to be 300 DPI (dots per inch) at the size you want it printed.
A low-resolution file is a one-way ticket to a blurry, pixelated mess on your garment. Printers can't magically add detail that isn't there; the transfer will only ever be as good as the file you send.
The go-to file format for this is PNG. It’s reliable and supports transparency perfectly. That said, vector files from programs like Adobe Illustrator (saved as AI or PDF) are also fantastic and will give you super crisp results. Taking a minute to double-check your files is the best thing you can do to guarantee a great print.
Can I Mix Different Designs and Colors on One Sheet?
Absolutely! This is the whole point—the real magic—of using DTF gang sheets. You have total freedom to arrange a whole mix of designs on a single sheet without worrying about colors or complexity.
You can literally place a super colorful, detailed photograph right next to a simple one-color logo. Unlike screen printing, where every single color adds another layer of cost and labor, DTF printing doesn't care. A design with ten colors costs the same to print as a design with one.
This is a game-changer for small businesses. You can use a single sheet to:
- Knock out orders for several different clients at once.
- Combine all the graphics for your latest clothing drop.
- Print front logos, back pieces, and sleeve hits for the same job.
- Even sneak in your own branding, like custom neck tags, to use every last inch of film.
How Should I Store My Extra DTF Transfers?
Proper storage protects your investment and keeps your transfers ready to go whenever you are. The adhesive powder on the back of DTF transfers is sensitive to its environment, so where you keep them really matters.
The golden rule: store them in a cool, dry place, far away from direct sunlight and humidity. Heat can start to activate the adhesive before you're ready, and moisture can ruin its ability to bond to the fabric, causing presses to fail later on.
Here are a few practical tips that work:
- Keep them flat. Never roll or fold your transfers. This can cause the ink and adhesive to crack and separate.
- Use protective storage. An artist's portfolio, a flat-file cabinet, or even a simple plastic storage tub will do the trick.
- Mind the climate. A damp basement or a sweltering garage are terrible spots. You want somewhere with stable temperatures.
When stored correctly, your DTF transfers can stay in perfect, ready-to-press condition for a year or even longer. This lets you order in bulk to save money and then press on-demand as orders come in—a smart way to manage your inventory.
Why Is My Transfer Peeling After I Wash It?
It's a frustrating problem, for sure. The good news? It’s almost always preventable. When a transfer peels, cracks, or falls apart in the wash, the problem nearly always traces back to the application process, not the transfer itself.
There are three main culprits behind a bad press:
- Wrong Pressure: Your heat press has to clamp down with firm, even pressure. Too light, and the adhesive won't get pushed deep into the fabric fibers to form that permanent bond.
- Wrong Temperature: Too low, and the adhesive won't melt correctly. Too high, and you can scorch the adhesive or the shirt, which also kills the bond.
- Moisture in the Garment: This is the silent killer. Fabric is like a sponge; it soaks up moisture from the air. If you don’t pre-press the shirt for 5-10 seconds to steam that moisture out, it will interfere with the adhesive and prevent it from curing properly.
Always, always follow the time, temperature, and pressure guidelines from your transfer supplier. And honestly, investing in a quality heat press that provides consistent heat and pressure is one of the smartest moves you can make for your business.
Ready to create your own high-quality custom apparel with less waste and more profit? The team at Cobra DTF is here to help. Build your first gang sheet with our easy-to-use online tool and experience the difference of working with a US-based, family-owned business. Check out our premium DTF transfers today at https://cobradtf.com.