

Can You DTF on Polyester a Practical Guide
Yes, you can DTF on 100% polyester. Keep the press near 150–155°C and never above 160°C on polyester, because excessive heat can cause dye migration and scorching.
The question usually appears at the worst possible moment, with a stack of polyester tees beside the heat press, a fresh transfer ready to apply, and a customer order that can't afford pink shadows, shiny patches, or peeling edges. Polyester isn't incompatible with DTF, but it gives you less room for error than cotton.
DTF has become a mainstream apparel workflow across cotton, polyester, blends, and specialty fabrics. One industry report estimated the global direct-to-film printing market at USD 2.72 billion in 2024, with a projection of USD 3.92 billion by 2030, an increase of about 44% according to Grand View Research's direct-to-film printing market report. That scale matters because polyester is no longer an occasional test substrate. It appears throughout sportswear, uniforms, performance apparel, and short-run production.
The right way to think about polyester is not as a yes-or-no fabric. It's a fabric with a tighter process window. Lower heat, controlled dwell time, suitable peel behavior, blocker films, and a genuine wash test turn the job from a gamble into a repeatable production process.
The Short Answer for Polyester Printers
Yes, DTF works on polyester, including 100% polyester, polyester blends, and many performance garments. The transfer bonds through its thermoplastic polyurethane adhesive layer, so the bond doesn't depend on cotton-like fiber absorption. The main limitation is heat sensitivity, not basic compatibility. Independent polyester compatibility guidance recommends keeping the press around 150–155°C and never exceeding 160°C on polyester.
For a standard polyester job, begin with this working range:
- Temperature: 150–155°C
- Dwell: 10–15 seconds, adjusted to the transfer manufacturer's instructions
- Pressure: Medium, firm enough to create full contact without flattening the garment
- Peel: Warm or cold according to the film specification
- Protection: Use a blocker film or barrier sheet on dyed garments with a high risk of migration
Two problems cause most failed polyester transfers. The first is dye migration, where color from a sublimated or heavily dyed blank moves into the transfer and changes white ink into pink, beige, gray, or another unwanted shade. The second is surface damage, including gloss, scorching, or a pressed-in platen mark caused by excessive heat or pressure.
Polyester's smoother surface also gives adhesive less mechanical texture to grip than cotton. That makes even pressure and complete adhesive flow important, but more heat isn't the answer. Too much heat can soften the garment surface and release dye before the adhesive has a chance to form a clean bond.
A short pre-press helps remove moisture and stabilize the blank. A blocker film protects against dye movement, while a controlled peel prevents the warm adhesive from being stretched away from the fabric. The fiber behavior explains why these steps matter.
How Polyester Fibers React to Heat and Adhesive
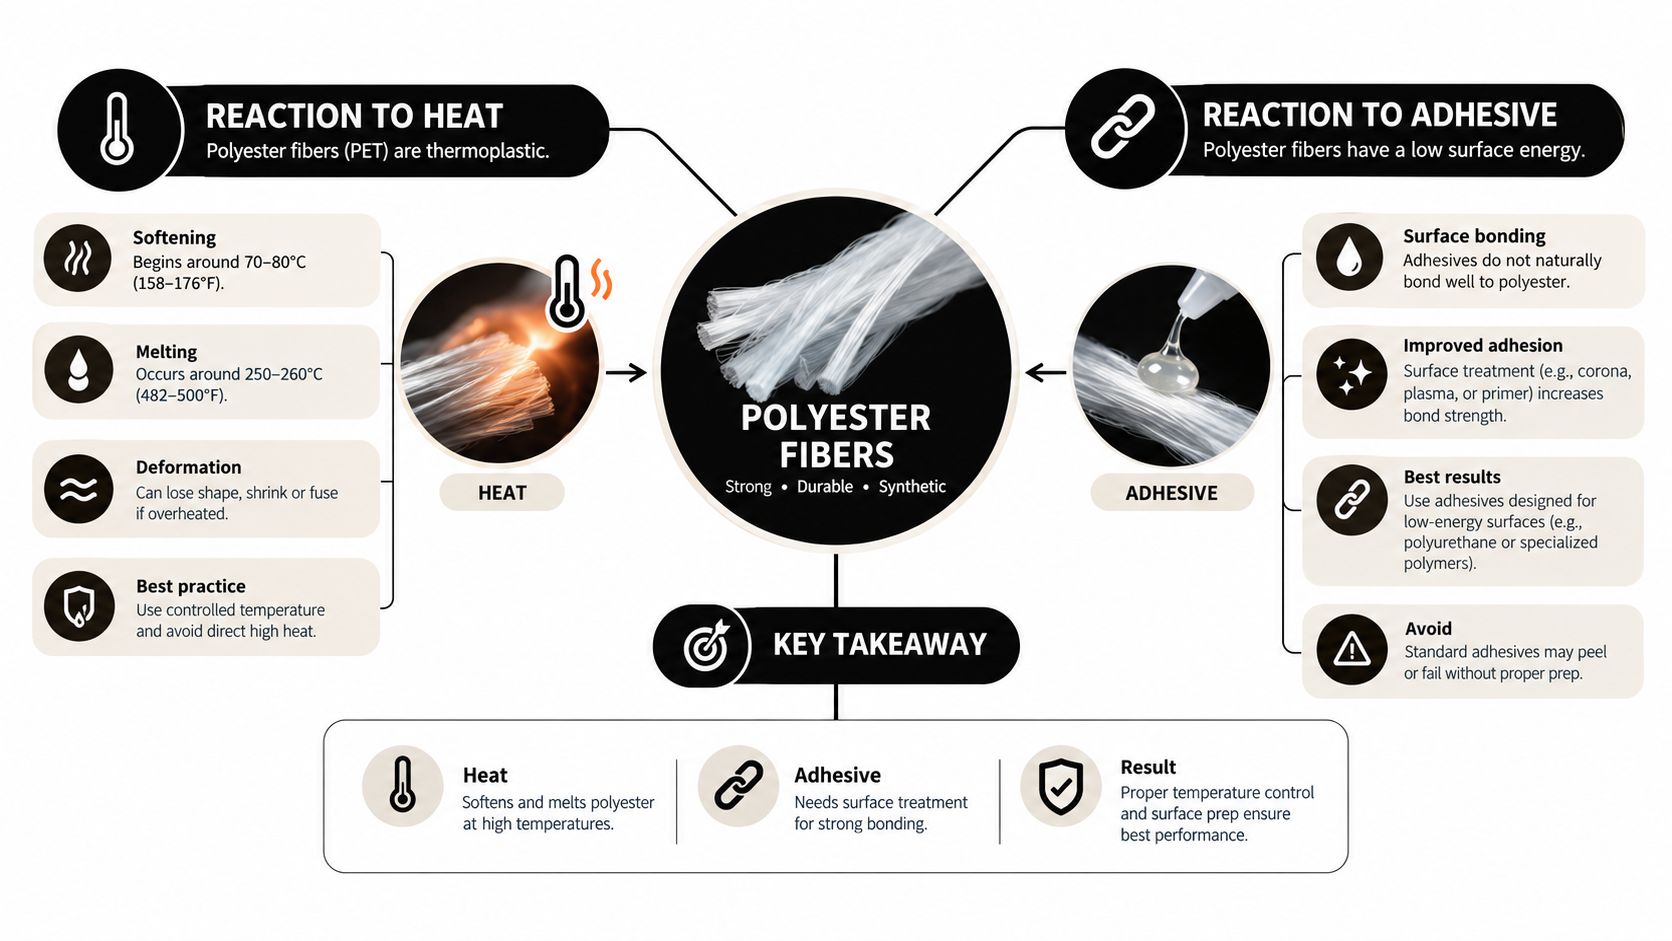
Cotton behaves more like a dry paper towel. It has a textured, absorbent surface and generally tolerates the heat used for ordinary DTF application. Polyester is closer to a thermoplastic surface, more like a material that softens when heated and becomes less forgiving when the platen stays closed too long.
The result is visible at the press. High heat can make the face of the garment look polished or glossy. Excessive temperature can also push dye out of the fabric and into the transfer, especially when the blank is dark, richly colored, or made for sublimation. A red polyester shirt can tint a white print pink even when the transfer looked clean before pressing.
What the operator feels at the press
Three material behaviors matter most:
- The surface softens under heat. Excessive heat can produce scorch marks, gloss, or distortion. Lower polyester settings protect the face of the garment.
- The fiber surface is smooth. The adhesive has less surface texture to hold than it does on cotton, so full contact and appropriate pressure matter.
- Dye can move under heat. Disperse dyes in polyester may migrate into the transfer. Controlled heat, shorter exposure, and a blocker film reduce that risk.
The adhesive powder is the working bridge between the film and fabric. It melts during pressing, flows into contact with the garment, and then sets as the transfer cools. It doesn't need the polyester fiber to absorb ink, but it does need a clean, stable surface and enough pressure to prevent gaps.
This is why DTF Transfers By Size can be useful when a design needs a precise chest, sleeve, or full-front dimension. Correct sizing doesn't solve heat sensitivity, but it reduces unnecessary trimming and helps the transfer sit flat on the garment, which supports more even pressure.
A low-temperature polyester workflow protects the garment surface. Controlled dwell time limits the opportunity for dye to migrate. A blocker film separates the unstable dye from the transfer. Each measure addresses a different failure mechanism, so changing only one setting won't always solve the problem.
Press Settings That Actually Work on Polyester
Start with the transfer manufacturer's instructions whenever they differ from a general polyester range. Film construction, adhesive powder, ink load, and peel design all affect the application window. For a conventional polyester DTF job, a practical starting point is 150–155°C for 10–15 seconds under medium pressure, with the peel chosen for the film rather than guessed from the fabric alone. Guidance on polyester application also identifies a lower range around 135–149°C, short dwell times, and medium pressure as useful for heat-sensitive materials in this DTF transfer durability guide.
| Parameter | Recommended | Maximum or caution point | Reason |
|---|---|---|---|
| Temperature | 150–155°C | Never above 160°C on polyester | Protects against scorching and dye migration |
| Dwell time | 10–15 seconds | Avoid prolonged exposure | Gives the adhesive time to flow without over-heating the blank |
| Pressure | Medium, even pressure | Avoid crushing the fabric | Creates contact without flattening or marking the surface |
| Peel | Warm or cold, film-dependent | Don't peel against the film rating | Prevents stretching, edge lift, or incomplete release |
Temperature comes first
If the blank is dark, sublimated, or known to bleed, begin at the lower end of the permitted range. A transfer that looks slightly under-bonded can be corrected through a controlled test, but a white design stained by migration may not be recoverable.
Don't copy a cotton setting automatically. Polyester can look fine immediately after an overheated press, then develop tinting as residual heat continues to affect the dye. The safe correction is usually less heat and controlled exposure, not a hotter second press.
Choose the peel deliberately
A warm peel can work when the film is designed for it and the adhesive has stabilized enough to remain on the garment. A cold peel gives the transfer more time to set before the carrier is removed and can be useful on especially heat-sensitive garments. Some films are specifically rated for low-temperature or cold-peel workflows, so the supplier's specification takes priority.
After peeling, let the print settle briefly, then test an inconspicuous edge with a fingernail. If the edge lifts easily, the likely causes are incomplete adhesive flow, insufficient pressure, premature peeling, moisture, or a contaminated garment surface. Don't immediately repress the same transfer at a higher temperature. Diagnose the cause first and test a fresh piece.
For more detail on how time, heat, and pressure interact, use this heat press settings guide for DTF alongside the film supplier's application instructions. The press temperature is only one part of the process. A clean, dry blank and a stable platen contact pattern matter just as much.
Pretreatment and Pre-Press Habits for Synthetic Blanks
Polyester usually doesn't need liquid pretreatment. The fabric isn't relying on ink absorption in the way a direct-to-garment process does, and the DTF carrier film supplies the printed layer. Adding liquid unnecessarily can introduce moisture or another variable without improving the bond.
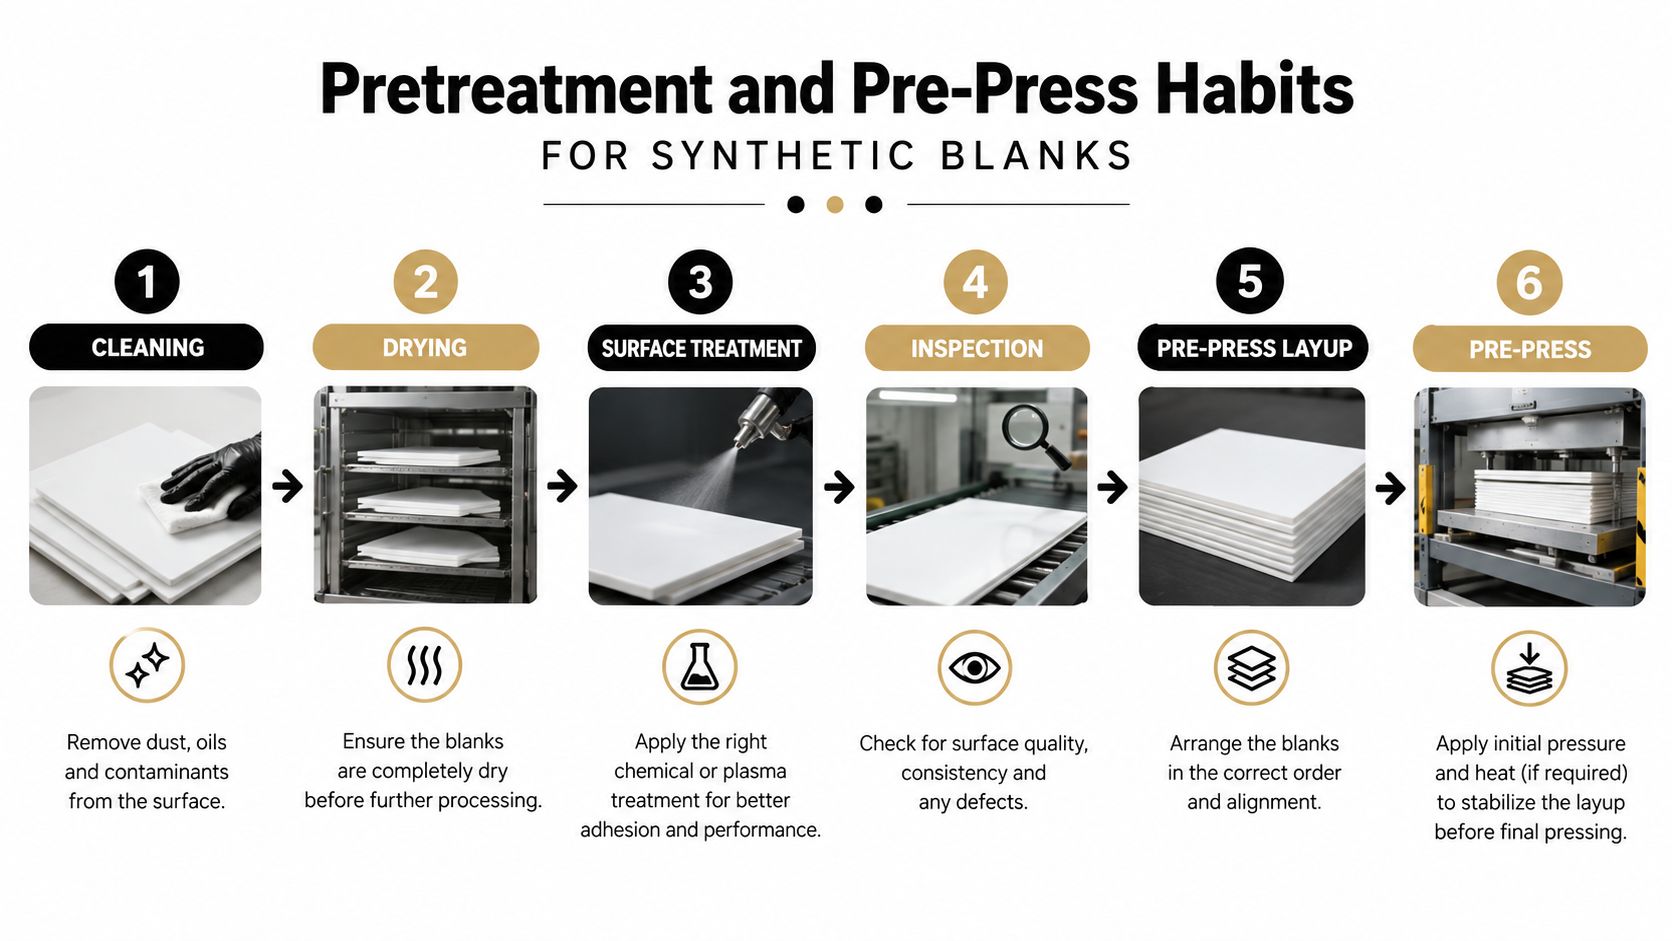
A short pre-press is more useful. Use approximately 3–5 seconds to remove surface moisture, release some factory finish, and flatten the garment before applying the transfer. The guidance for polyester workflows also describes a short pre-press as a way to stabilize the fabric before application.
A practical preparation sequence
- Identify the blank. Check the fiber content, color, finish, and whether the garment is sublimated or likely to bleed.
- Place it flat. Keep seams, collars, pockets, and thick hems away from the transfer area.
- Pre-press briefly. Use a short, controlled pre-press rather than a long exposure that heats the garment unnecessarily.
- Add protection when needed. Use a PTFE blocker sheet or polyester-specific barrier film for dyed blanks with migration risk.
- Position the transfer. Make sure the film has complete contact with the fabric and isn't bridging over a seam.
- Press to the film specification. Use the lower end of the polyester range when the blank is unfamiliar.
- Peel according to the film. Let the print cool or settle when the carrier requires a warm or cold peel.
On a sublimated red, navy, or similarly saturated blank, the blocker film is not decorative protection. It creates a barrier between migrating dye and the transfer surface. Test the barrier itself because different films and sheets can change pressure and release behavior.
Don't use a polyester routine blindly on a blend. A 50/50 garment contains cotton fibers that may benefit from a different preparation approach, while a treated performance fabric may resist adhesion because of its surface finish. Before production, verify the artwork is sharp and properly sized. If the source image needs cleanup or enlargement, this guide to optimize photos for print with MyImageUpscaler can help before the file reaches the transfer stage.
Cotton vs Polyester vs Blends on the Same Press
A heat press doesn't know what fabric is underneath the platen. The operator has to identify the substrate before choosing temperature, dwell, pressure, and peel. Treating cotton, a blend, a triblend, and polyester as interchangeable is a common way to get inconsistent results across one production run.
The following table gives starting points for common garments. These are process ranges, not permission to skip a test press.
| Fabric | Temperature | Time | Pressure | Peel | Pretreatment |
|---|---|---|---|---|---|
| Cotton | Follow the transfer specification | Follow the transfer specification | Medium to firm | Film-dependent | Usually none for DTF |
| 50/50 cotton-poly blend | Use a blend-appropriate setting | Controlled dwell | Medium | Warm or film-dependent | Test whether the cotton content benefits from preparation |
| Triblend | Use the lower heat range | Short dwell | Light to medium | Warm | Test the exact garment |
| 100% polyester | 150–155°C | 10–12 seconds as a starting range | Light to medium | Warm or cold, film-dependent | No liquid pretreatment; use a blocker film on dyed blanks |
The cotton versus polyester comparison guide is useful when switching jobs because the garments can look similar while reacting differently under the platen.
Cotton generally gives the adhesive a more forgiving surface. A blend introduces competing behavior, because the cotton portion and polyester portion respond differently to heat and moisture. A triblend adds another variable through its rayon content, so a setting that works on a regular cotton tee isn't automatically safe.
For polyester, the priority is heat control and dye management. If a mixed order contains several fabric types, group the garments by substrate instead of relying on a single press recipe. Record the setting that worked on the approved sample and keep the garment lot with its test result.
Why Polyester Fails When You Treat It Like Cotton
Many polyester failures look like adhesion failures, but the underlying problem is often heat management. The operator sees an edge lift and assumes the transfer needed more heat. On a polyester blank, more heat may worsen the surface damage or push more dye into the print.
Cotton settings are especially risky when transferred without adjustment. A longer or hotter cotton press can soften the polyester face, create a glossy patch, and release dye into white areas. Seams and collars can show damage first because their thickness changes how the platen transfers heat and pressure.
Read the evidence on the garment
- Gloss patches indicate that the fabric face has been polished, compressed, or overheated.
- Tinted white ink points toward dye migration rather than ordinary adhesive failure.
- Scorching near seams or collars suggests uneven contact or concentrated heat.
- Edge lift after cooling may come from early peeling, insufficient pressure, moisture, or an unstable surface.
- Adhesive lines or pressure marks can appear when the platen compresses the fabric too aggressively.
A transfer can look perfect when it leaves the press and still be a poor production result. Polyester dye may continue moving while the garment cools, particularly when the original process used excessive heat. The visible print isn't the only pass-fail criterion. Check the garment surface around the design, the color of the white areas, and the bond at the edges.
Production rule: If a polyester print needs brute force to stick, stop increasing the heat. Check moisture, pressure, film compatibility, dye migration, and peel timing first.
The fix is usually a narrower, better-controlled process. Lower the temperature, limit dwell, use a suitable blocker film, and make sure the garment lies flat. DTF is not identical to HTV, and neither process makes every polyester blank behave the same way.
Testing and Troubleshooting Adhesion on Polyester
A test press should answer more than “did it stick?” Give the sample time to cool, then inspect the transfer and fabric together. Run a firm thumb rub over the design, check the edge with a fingernail, and stretch the fabric gently along its normal direction. Look for lifting, gloss, color change, or a transfer that feels poorly bonded around the perimeter.
Use a fresh sample when changing a setting. Repressing a failed transfer can hide the original cause and may add more heat damage to the garment.
| Symptom | Likely cause | Fix |
|---|---|---|
| White areas develop a pink, beige, or gray tint | Dye migration from the blank | Lower heat, reduce exposure, and add a polyester blocker film |
| Gloss patch surrounds the print | Excessive heat or pressure | Reduce heat and pressure, then test a fresh garment |
| Edge lifts after a warm peel | Peel was too early, or the film requires a different peel | Use the specified cold or warm peel and verify adhesive flow |
| Adhesive track lines appear | Pressure is too high or uneven | Reduce pressure and ensure the garment lies flat |
| Print feels secure in the center but lifts at the edge | Uneven platen contact, moisture, or insufficient pressure | Pre-press, remove seams from the print area, and test medium even pressure |
A wash test that reflects production
Approve a new film batch or garment lot with at least two test garments before running the full order. Keep one sample as a control and wash the other according to the intended care routine. Turn it inside out, use cold water and mild detergent, avoid bleach and fabric softener, and dry gently or hang it to dry.
Inspect the transfer after the first wash, then continue checking it at later wash milestones that reflect the customer's expected use. A passing sample should retain its color, show no obvious edge lift, and avoid cracking that changes the appearance of the design. Also inspect the blank itself, because dye migration can become more visible after repeated heat exposure.
If adhesion fails, change one variable at a time. Adjusting temperature, dwell, pressure, film, and peel together prevents you from learning which correction solved the problem. Record the garment brand, fiber content, color, film batch, press setting, peel method, and wash result.
A sample that survives the press has passed only the first test. A sample that survives handling and washing has earned a production slot.
Wash Durability and Your Polyester Decision Checklist
Polyester becomes dependable when the operator repeats the same preparation and verification routine. The fabric itself isn't the decision. The specific blank, dye load, finish, transfer film, and press behavior determine whether the job is ready for production.
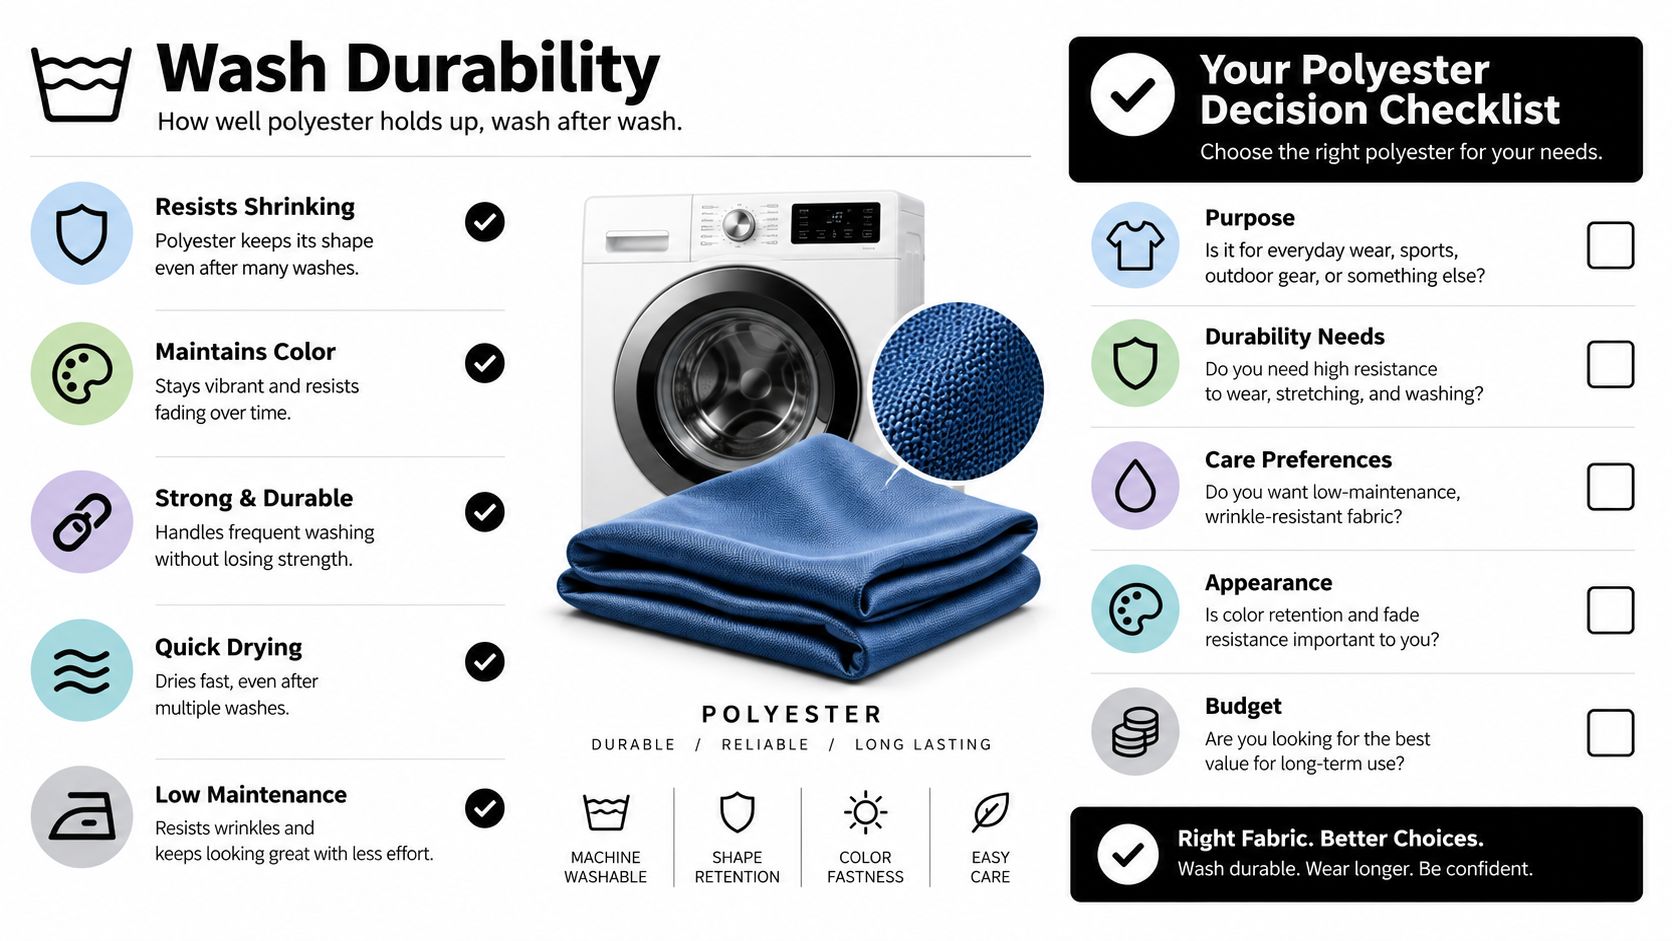
Wash test every new combination of garment and transfer. Turn the garment inside out, wash with cold water and mild detergent, and keep bleach and fabric softener out of the process. Use low heat or hang drying, then inspect the print for cracking, edge lift, color change, gloss, and distortion.
Check the sample at several points during the test rather than waiting until the end. Early inspection catches adhesion problems. Later inspection reveals whether the transfer and garment continue to behave normally after repeated handling.
Keep this checklist beside the press
- Confirm the garment: Verify whether it's 100% polyester, a blend, sublimated, dark, coated, or unfamiliar.
- Pre-press briefly: Remove moisture and stabilize the fabric without adding unnecessary heat.
- Protect dyed blanks: Add a blocker film when migration is possible.
- Set the platen carefully: Start around 150–155°C and stay below the polyester ceiling.
- Control dwell: Use a short, film-approved press time instead of copying a cotton recipe.
- Use even pressure: Make sure seams and thick areas aren't preventing full contact.
- Follow the film peel: Choose warm or cold based on the carrier specification.
- Test the edge: Rub and inspect the cooled print before committing to the full run.
- Wash-test the combination: Approve the garment lot and transfer batch only after the print meets your durability standard.
For customer-facing care instructions, use this guide to washing instructions for polyester. Clear care guidance protects the print, but it also gives you a consistent standard for evaluating samples before shipment.
Polyester is a practical high-volume substrate once this checklist becomes routine. The reliable workflow isn't “press every garment the same way.” It's identifying the blank, controlling heat, protecting against migration, confirming adhesion, and recording the result.
Cobra DTF offers DTF transfers in size-specific formats for garment placements such as chest logos, sleeve graphics, and full-front designs. If you need polyester transfers prepared for a controlled application workflow, visit Cobra DTF, choose the transfer format that matches your layout, and validate it on the exact garment lot before starting production.