
Your Ultimate DTF Heat Press Guide for Flawless Prints
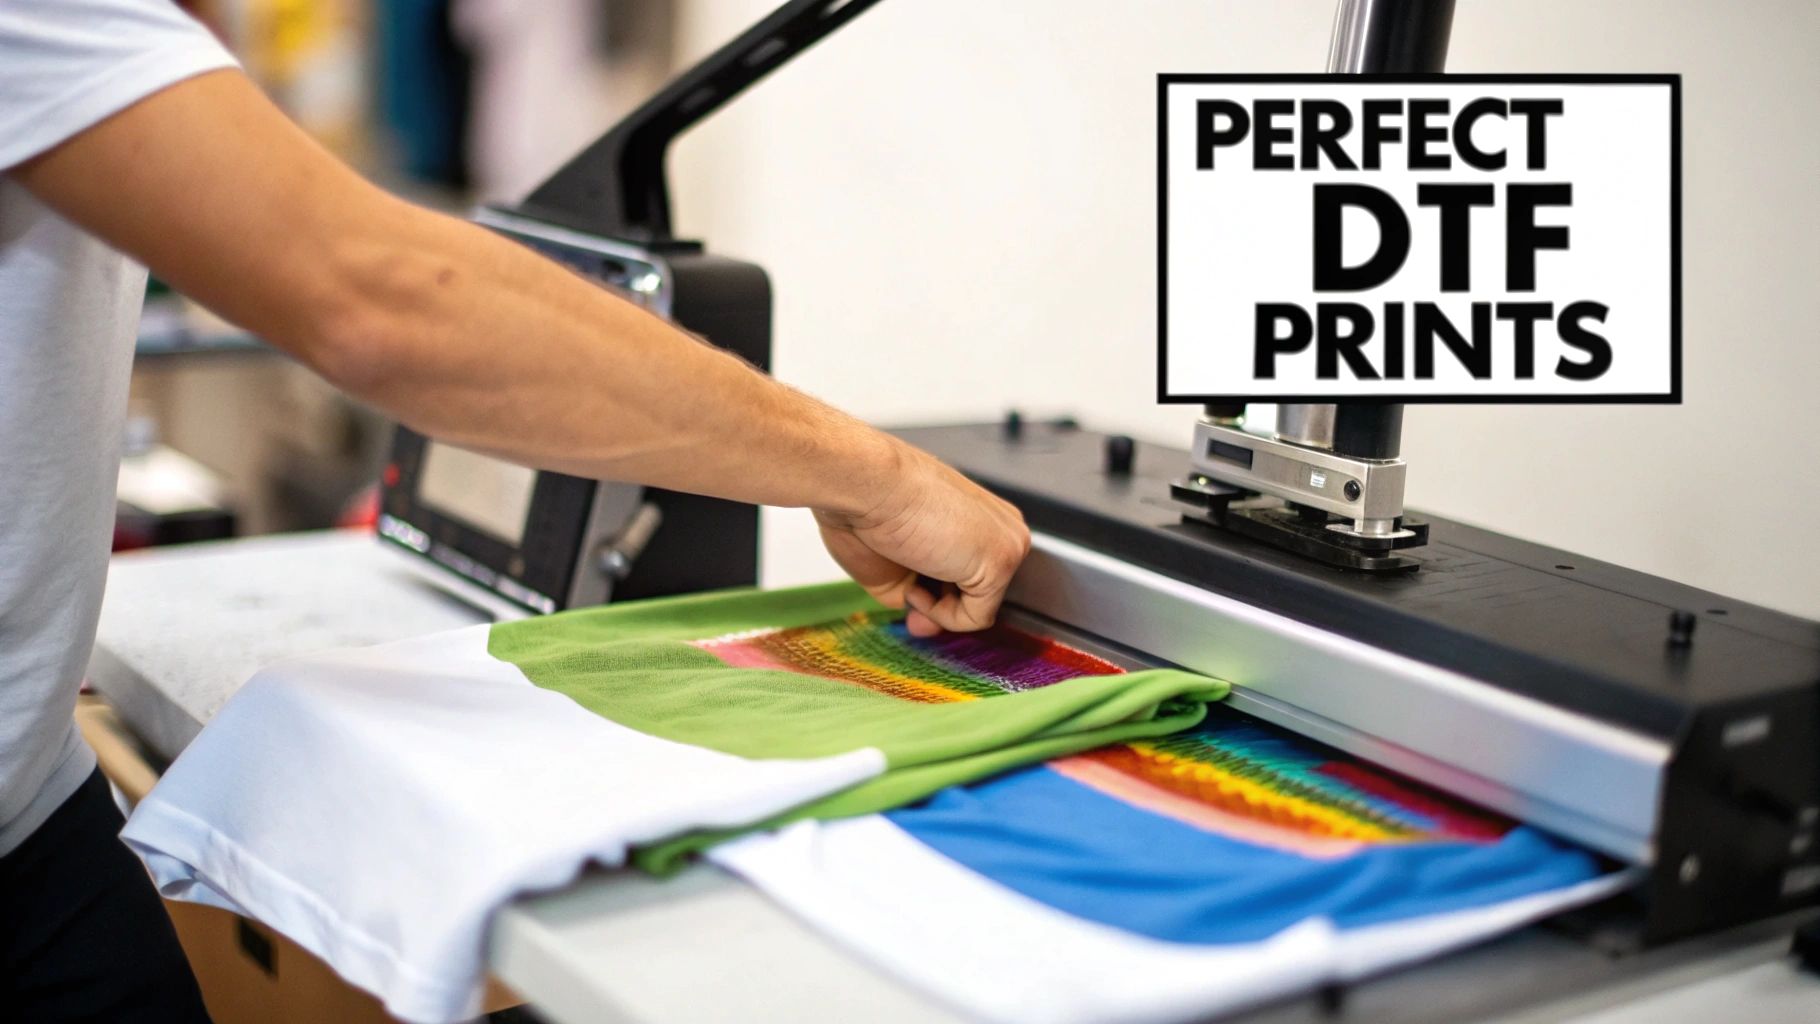
If you're serious about creating custom apparel, your Direct-to-Film (DTF) heat press isn't just a tool—it's the heart of your operation. This is the final, crucial step where a vibrant design becomes a permanent, professional-quality garment. The difference between a print that sells and one that gets tossed often comes down to how well you use this machine.
Getting the Perfect DTF Press Every Time
Let's cut to the chase: your heat press is the final quality check. You can have the best Cobra DTF transfer in the world, but if the application is off, the result will be a disappointment. This guide is all about getting past the generic advice and giving you the real-world, practical steps to nail it every single time.
Consider this your roadmap to making prints that are not only durable but also have that soft feel that keeps customers coming back. We’ll cover everything from what makes a great press to choosing the right machine and avoiding those frustrating, costly mistakes.
Why Your Heat Press Matters So Much
The custom apparel world runs on reliable gear, and the heat press is front and center. The market for these machines was valued at around USD 829 million in 2024 and is expected to climb to nearly USD 1.32 billion by 2032. That growth is fueled by the boom in methods like DTF, where the press is what physically bonds the graphic to the fabric.
This boom tells us one simple thing: shops are investing in quality equipment because it pays off. For any business that wants to produce consistent, flawless prints, integrating modern quality assurance processes is just as vital as the hardware itself.
Your heat press application is the moment of truth. It’s where a great design on a film either becomes a premium product or a costly mistake. Getting it right consistently is what separates hobbyists from professionals.
The Three Keys to a Flawless Application
Before we get into the nitty-gritty, let's look at the three critical elements that determine the quality of every single press you do. Think of these as the dials you need to tune perfectly for a great result.
Key Variables for a Successful DTF Heat Press Application
| Factor | Why It Matters for DTF | Typical Starting Point |
|---|---|---|
| Temperature | Activates the adhesive powder on the transfer. Too cool, it won't stick; too hot, it can scorch the fabric or damage the ink. | 280-320°F (138-160°C) |
| Pressure | Ensures the entire design makes firm, even contact with the garment. Uneven pressure leads to peeling edges and patchy spots. | Medium to Firm (60-80 PSI) |
| Time | The duration the heat and pressure are applied. Just enough time is needed to cure the adhesive without overbaking the print. | 8-15 seconds |
Getting this combination of heat, pressure, and time right is the secret sauce for a durable bond and a soft-hand feel that customers love. We'll break down each of these elements in detail, giving you the confidence to turn your heat press into the most reliable money-maker in your shop.
Picking the Right DTF Heat Press for Your Shop
Choosing your DTF heat press is easily one of the most critical decisions you'll make for your apparel business. This isn't just a machine that gets hot; it's the tool that locks in the quality, feel, and durability of every single product you sell. A solid press gives you consistent, beautiful results every time, while a cheap one will just lead to peeling prints, wasted materials, and frustrated customers.
At the heart of any reliable DTF heat press are three things that are absolutely non-negotiable: consistent platen temperature, accurate digital controls, and perfectly even pressure. If your press is missing even one of these, you’re basically just gambling with every single garment.
This industry is really taking off. The global market for Direct to Film printing was pegged at around USD 2.72 billion in 2024 and is expected to climb to USD 3.92 billion by 2030. That kind of growth tells you one thing: you need reliable equipment that can actually keep up with the demand.
Understanding Different Press Styles
Not all heat presses are created equal. The style you pick directly affects your daily workflow, the kinds of items you can press, and how much elbow room you'll need in your shop. Let's look at the main players.
A great starting point is understanding how the different mechanical styles compare for a typical DTF workflow.
DTF Heat Press Style Comparison
| Press Type | Best For | Pros for DTF | Cons for DTF |
|---|---|---|---|
| Clamshell | High-volume T-shirt & flat garment production; shops with limited space. | Fast workflow, smaller footprint, generally more affordable. Great for cranking out standard jobs. | Limited clearance can make placing transfers on bulky items (hoodies, polos) tricky. Can be harder to avoid touching the hot platen. |
| Swing-Away | Precision placement on all items, especially bulky ones like jackets, hoodies, and items with zippers or collars. | Excellent visibility and access to the lower platen, making alignment a breeze. Reduces the risk of burns. | Requires a much larger operational footprint. The swing-arm mechanism can slow down high-volume production slightly. |
| Draw Press | Shops wanting the easy access of a swing-away but in a more compact design. A good middle-ground option. | The slide-out lower platen gives great access for layout without the large side-to-side space requirement of a swing-away. | Can be more expensive than clamshells. The sliding mechanism adds another moving part to maintain. |
For most shops focusing on standard garments like t-shirts and sweatshirts, a high-quality clamshell press is a fantastic, efficient workhorse. But if you know you’ll be working with a lot of zippered hoodies or polos with thick collars, the clear access you get from a swing-away or draw press will save you a ton of headaches.
Key Features That Actually Matter for DTF
When you're looking at different models, you need to look past the basic specs and focus on what really makes a difference for DTF.
A precise digital controller is an absolute must. Those old-school analog dials just don't have the accuracy you need to hit the specific temperature windows that DTF transfers demand to cure properly.
Another thing to get picky about is the quality of the heating elements inside the platen. Cheaper presses are notorious for having "cold spots," where the corners and edges never quite reach the temperature you set on the screen. This is a classic reason why the edges of a big transfer will fail to stick. A simple infrared temperature gun is a fantastic tool to check any press for these kinds of inconsistencies before you buy, or to troubleshoot your current one.
Pro Tip: A heat press with interchangeable platens is one of the smartest investments you can make. The ability to swap out the standard platen for a smaller one for sleeves, youth apparel, or left-chest logos is a total game-changer. It lets you isolate the print area and avoid pressing over thick seams—a guaranteed way to ruin your pressure and cause a failed transfer.
Budgeting for Your Business Growth
Think of your heat press budget not as a one-time cost, but as a serious investment in your business's future. It’s so tempting to grab the cheapest press on Amazon, but I can promise you that a low-quality machine will cost you far more in the long run with all the wasted transfers and ruined garments.
As you plan this investment, make sure you look into all your financial options. Getting familiar with the different types of equipment financing for small businesses can often make a higher-quality, more reliable machine affordable right from the start. That means you can produce better products from day one. Your heat press is the cornerstone of your production, and choosing a durable, accurate, and versatile machine will pay for itself for years to come.
The DTF Transfer Process From Start to Finish
You've got the right machine, now for the part that really counts: applying the transfer. This is where a great design becomes a durable, professional-quality garment. The secret to getting it right every time isn't magic; it's a consistent, repeatable workflow that minimizes errors and keeps quality high across the board.
I break the process down into four main phases: prepping the garment, the first press, peeling the film, and the final cure. Each one is as important as the last. Once you get this sequence down, you'll be knocking out flawless prints with confidence.
Before you even turn the press on, though, it's smart to think about the big picture—how your volume, workspace, and budget influence your setup.
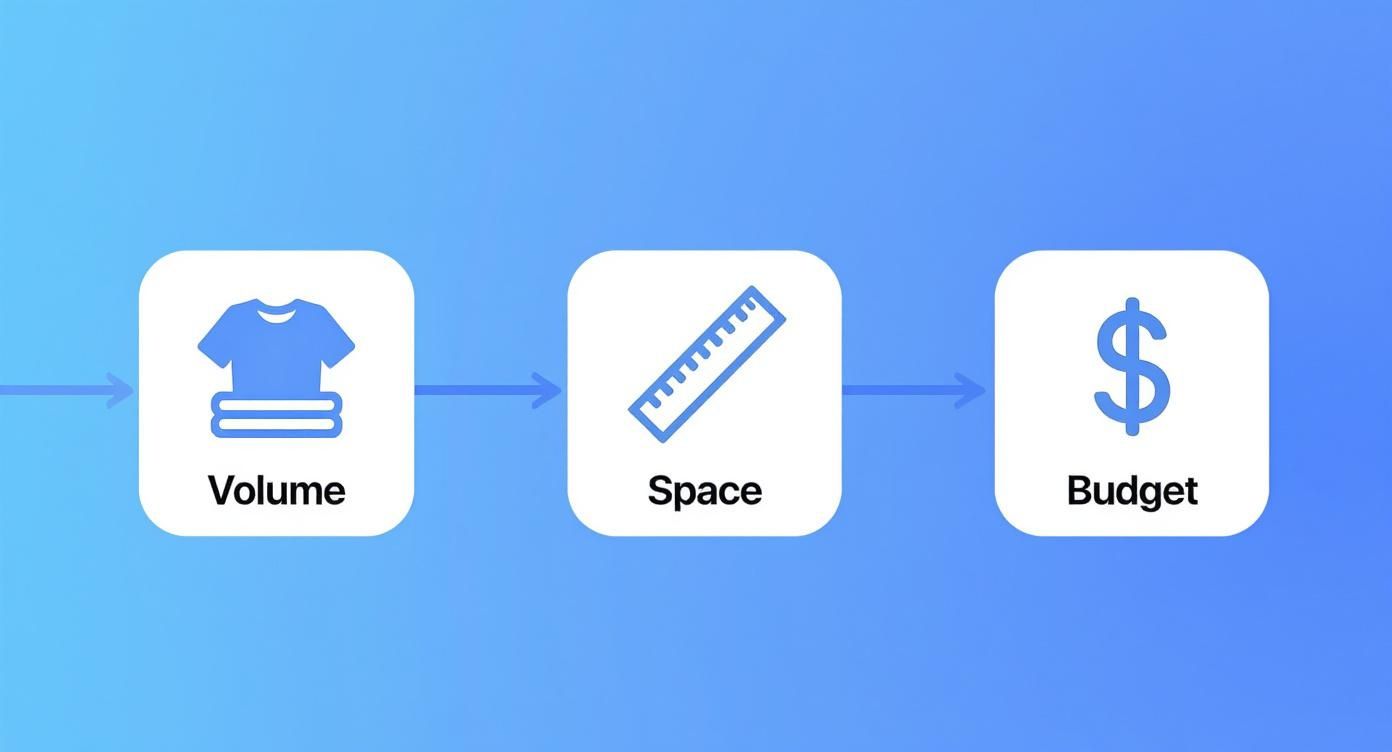
This just reinforces that the best process starts with having the right tools for your specific needs.
Garment Preparation and Pre-Pressing
Before a transfer even gets near your garment, you need to prep your canvas. I always start with a quick pass with a lint roller. It’s amazing how much dust and stray fibers are on a seemingly clean shirt, and any of that debris can get trapped under the transfer, creating ugly little bumps in the final print.
After that comes the single most critical step people skip: the pre-press. Every garment, especially cotton, soaks up moisture from the air. If you press a transfer onto a damp shirt, the heat creates steam that literally pushes the adhesive away from the fabric fibers. It’s a guaranteed recipe for a failed press.
To get rid of that moisture, just press the empty garment for about 5-7 seconds. You'll often see a little puff of steam—that's proof it's working! This also gives you the bonus of a perfectly smooth, wrinkle-free surface to work with.
Aligning and Pressing Your Transfer
With a dry, flat garment ready, it's time for placement. Lay your DTF transfer down, making sure the adhesive powder side is against the fabric. Don't rush this part. For consistent, pro-level results, especially on bigger orders, I recommend using a T-square ruler or a laser alignment system. It takes the guesswork out of it.
Once you’re happy with the position, it’s time to press. Getting the "golden trio" of time, temperature, and pressure right is everything. While you might need to tweak things slightly for your specific press, a great starting point for most cotton and poly-blends is:
- Temperature: 300-315°F (149-157°C)
- Time: 10-12 seconds
- Pressure: Medium to Firm (think 60-70 PSI on an auto press)
Pro Tip: Always use a protective cover sheet. A simple Teflon sheet or piece of parchment paper protects your heat platen from any residue and helps distribute heat evenly across the transfer. It's a cheap piece of insurance for your equipment.
If you're just starting out, it’s worth dialing in your settings. We put together a detailed guide covering the best heat press settings for different DTF applications to help you master the process on any fabric.
The Critical Art of the Peel
Okay, the buzzer sounds. What you do next is crucial. Cobra DTF transfers are a hot peel, which is fantastic for workflow because you can peel the film off the second the press opens. No waiting around.
The key to a perfect hot peel is a smooth, confident motion. Grab a corner of the film and pull it back low and steady. Don't yank it or hesitate halfway through. A single, fluid peel will release the transfer perfectly, leaving all that vibrant ink right where it belongs.
What if part of the design lifts with the film? Stop immediately. This is almost always a sign of not enough pressure or lingering moisture in the shirt. Just lay the film back down, cover it, and give it another press for a few seconds before trying to peel again.
Finishing With the Final Cure
The print looks awesome, but there's one last step to take it from "good" to "professional grade." This final press, or curing press, is the secret to making a print that lasts.
This quick press does two vital things. First, it permanently sets the ink into the fabric, dramatically improving wash durability and stopping any cracking or peeling down the road. Second, it knocks down that initial glossy look, giving the transfer a soft, matte finish that feels integrated with the shirt, not like a sticker sitting on top.
Here’s how you do the final cure:
- Cover the now-exposed transfer with parchment paper or a matte finishing sheet.
- Press again for another 5-10 seconds at the same temperature.
- Back the pressure off to medium.
This last, quick step completely elevates the look, feel, and longevity of your work. It's what turns a printed shirt into a high-quality product that will keep your customers coming back.
Troubleshooting Common DTF Heat Press Problems
Even when you follow the instructions perfectly, things can go sideways. It happens to everyone. The real difference between a pro and a novice is being able to diagnose a problem on the fly and fix it without creating a pile of wasted shirts. Think of this as your field guide for those frustrating moments with your DTF heat press.

From what I've seen, most issues boil down to the big three: time, temperature, and pressure. A small adjustment to one of these is usually all it takes to get you back to producing flawless prints. Let's walk through the most common headaches and how to solve them.
The Transfer Is Not Sticking or Peels Up
This is, without a doubt, the most common and maddening issue, especially when you're just starting. You go to peel the film, and parts of your beautiful design—or the whole thing—lift right off with it.
Don't panic. This is almost always caused by one of these culprits:
- Lingering Moisture: I can't stress this one enough. Even if a shirt feels bone dry to the touch, it’s holding onto ambient moisture. When you press it, that moisture turns to steam and gets in the way of the adhesive bond. The fix is simple: always pre-press your garment for 5-10 seconds to cook out that moisture before you place the transfer.
- Insufficient Pressure: This is the runner-up for the biggest reason for failure. If your pressure is too light, the adhesive just can't make full contact with the fabric fibers. Crank your pressure up a notch and try again. On a manual press, you should feel some real resistance when locking that handle down.
- Cold Spots on Your Platen: Cheaper heat presses are notorious for this. The center might read 310°F, but the corners are struggling to hit 280°F. An infrared temperature gun is an incredibly valuable tool for checking your platen for consistency.
If you've checked all these boxes and you’re still stumped, our complete guide on proper DTF press instructions offers a deeper dive into the setup.
The Print Feels Stiff or Like Plastic
A great DTF print should feel soft and flexible, almost like it’s part of the shirt. If your final product feels thick, stiff, or like a heavy sheet of vinyl, you’ve probably overdone it.
This "bulletproof" feel is a classic sign of too much heat or too much time under the press. The excess heat essentially over-bakes the ink and adhesive, melting them into a single, rigid sheet instead of letting them bond gently into the fabric.
Solution: Try lowering your temperature by 5-10 degrees or cutting your initial press time by a couple of seconds. A small change here can make a world of difference in the final hand-feel of the garment. The goal is to apply just enough heat and time to activate the adhesive, and not a second more.
Dye Migration on Polyester Garments
Here’s a soul-crushing scenario: you press a crisp white design onto a red polyester shirt. You peel it, and it looks perfect. A few hours later, you glance over and the design has a faint pinkish hue. That’s dye migration, a frustrating reality when working with polyester and poly-blends.
It happens when the heat from the press causes the dyes in the polyester to sublimate, or turn into a gas. This colored gas then works its way into your transfer ink, staining it from the inside out.
To fight back, you need to change your game plan:
- Lower Your Temperature: This is your best weapon against dye migration. Try pressing at a much lower temperature, somewhere around 270-285°F (132-140°C).
- Shorten Your Press Time: With that lower temp, you might need to adjust your timing. Press for a full 15 seconds to ensure a good bond.
- Use Subli-Blocking Transfers: For really stubborn fabrics, you can find specialized transfers with a charcoal-based blocking layer. They’re usually more expensive, but they can be a lifesaver.
By keeping the heat low, you can apply your transfers without waking up those pesky fabric dyes. This kind of methodical problem-solving is what makes a DTF heat press such a reliable workhorse for any custom apparel business.
Optimizing Your Workflow for Speed and Profit
Once you've nailed that single perfect press, the next question is always, "How can I do this faster?" This is the moment you start thinking like a business owner, not just a crafter. Moving from one-off shirts to handling real orders is all about building a smart, efficient workflow around your DTF heat press.
The good news is that scaling up doesn't mean you have to immediately buy a ton of new equipment. It's about being clever with your process. Small, strategic tweaks can make a massive difference in your speed, consistency, and ultimately, your profit margins.
Batching for Maximum Efficiency
The biggest mistake I see newcomers make is pressing one shirt from start to finish before even touching the next one. A much, much better way to work is batch processing. It’s simple: you group all your similar tasks together to cut down on wasted time and movement.
Instead of a start-to-finish approach for each shirt, break it down into stages:
- Prep in Bulk: Got a 10-shirt order? Great. Pre-press all 10 of them at once. Get all the moisture and wrinkles out so they're ready to go. This gets the most tedious prep work out of the way upfront.
- Align in Sequence: Now, take that stack of pre-pressed shirts and lay out your transfers on each one. This lets you focus completely on getting the placement just right, without constantly opening and closing the press.
- Press Consecutively: With everything prepped and aligned, you can finally get into a rhythm. Load a shirt, press it, unload it, and immediately load the next. It becomes an assembly line, and you'll be shocked at how much faster a 20-shirt order gets done this way.
This method just works because it lets you stay in the zone for each task instead of constantly shifting gears.
Creating an Ergonomic Workspace
Don't underestimate how much your physical setup affects your output. An organized, comfortable workspace means less physical strain and fewer wasted steps, which adds up big time over a full day of pressing.
I always recommend setting up your heat press as the heart of a U-shaped or L-shaped workstation. Keep your blank shirts on one side and a table for cooling or folding on the other. This way, everything you need is just a quick pivot away. No more walking back and forth a hundred times an order.
When your transfers, tools, and garments are all within arm's reach, you work faster and smarter. You can find a lot more tips like this by reading up on proven techniques for production efficiency improvement.
Tackling Tricky Items with the Right Tools
Of course, not every job is a basic t-shirt. Hoodies, polos, and anything with zippers or thick seams can be a real headache. If you try to press over a zipper or a heavy collar seam, the area around it won't get the pressure it needs, and your transfer will fail. It’s a guarantee.
The fix is simple and cheap: a heat press pillow. These are just foam-filled, heat-resistant pads that you slide inside the garment. They lift the printing area up, allowing those bulky seams and zippers to fall off the sides. This ensures your platen makes solid, even contact right where the transfer is. It's a small tool that solves one of the biggest frustrations in a print shop.
Advanced Technique: The Two-Press System
When you're ready to seriously ramp up production, setting up a two-press system is a total game-changer. This means you have two heat presses working side-by-side, each with a specific job:
- Press #1 (The Application Press): This press does one thing and one thing only: the initial press that applies the DTF transfer to the garment.
- Press #2 (The Curing Press): Sitting right next to the first one, this press is used exclusively for that final 5-10 second curing press after you've peeled the film.
This dual-press workflow creates a non-stop production line. As one shirt is curing on the second press, you're already loading and pressing the next one on the first. You completely eliminate the bottleneck of waiting for a single machine to do both steps. It can practically double your output without making the process any more complicated.
Common DTF Heat Press Questions Answered
As you get into the rhythm of pressing DTF transfers, you'll inevitably run into some specific questions. I've put this section together to tackle the most common ones we hear from people getting serious about their craft. Think of it as a cheat sheet to get you past those final hurdles and pressing like a pro.
My aim here is to give you straight-up, practical answers that build on what we’ve already covered. These are the little details that can take your prints from pretty good to absolutely perfect.
Can I Use My Vinyl Heat Press for DTF Transfers?
Good news: yes, you almost certainly can. If you have a quality heat press that you're already using for heat transfer vinyl (HTV), it's likely good to go for DTF. The core principles are the same—you need consistent, even heat and pressure across the entire platen.
But there is one little catch. DTF transfers can be a bit more finicky about temperature than vinyl is. You really need to be sure your press holds its temperature accurately, not just in the middle but all the way out to the corners. A cheap press with cold spots is a recipe for disaster and will lead to transfers that just won't peel right.
My Two Cents: Before you ever press a customer's order, run a few tests. Seriously. This is the only way to dial in the settings for your specific machine and make sure you can get a perfect result before a real garment is on the line.
Why Do I Need to Press a Second Time After Peeling?
That quick second press—often called a finishing or curing press—is the secret sauce. It might feel like an unnecessary step, but it’s what makes the difference between a shirt that looks homemade and one that looks like it came from a high-end store.
This final press, which only takes about 5-10 seconds, is non-negotiable for two big reasons:
- It locks in the design. This step essentially melts the ink deeper into the fabric fibers, drastically improving the print's durability and washability. This is what keeps the design from cracking and peeling down the road.
- It refines the look and feel. The second press knocks back that initial plastic-y shine, giving the transfer a softer, more premium matte finish. The design ends up feeling like it's part of the shirt, not just a sticker sitting on top.
Skipping this is one of the most common rookie mistakes. It's a tiny time investment that delivers a massive payoff in quality and longevity.
How Can I Stop Leaving a "Press Box" on Shirts?
Ah, the dreaded press box. That faint, shiny outline left by the edge of the heat platen is a dead giveaway of a DIY job, and it’s especially obvious on certain fabrics and colors.
Thankfully, avoiding it is pretty simple. The best tool for the job is a heat press pillow or even a pad of dense foam placed inside the shirt. A pillow raises the print area so that only the part of the shirt with the transfer on it gets the full force of the pressure.
All the lumpy parts—the collar, seams, and hems—fall away around the edges of the pillow, so the platen never smashes them flat. Combining a pillow with the lightest pressure setting that still gives you a clean transfer is the most reliable way I know to get a crisp, box-free finish every single time.
Ready to create stunning, durable custom apparel without the hassle? Cobra DTF provides premium, USA-made DTF transfers with vibrant colors and a super-soft feel. Get same-day shipping and the confidence of a satisfaction guarantee. Order your custom transfers today!