
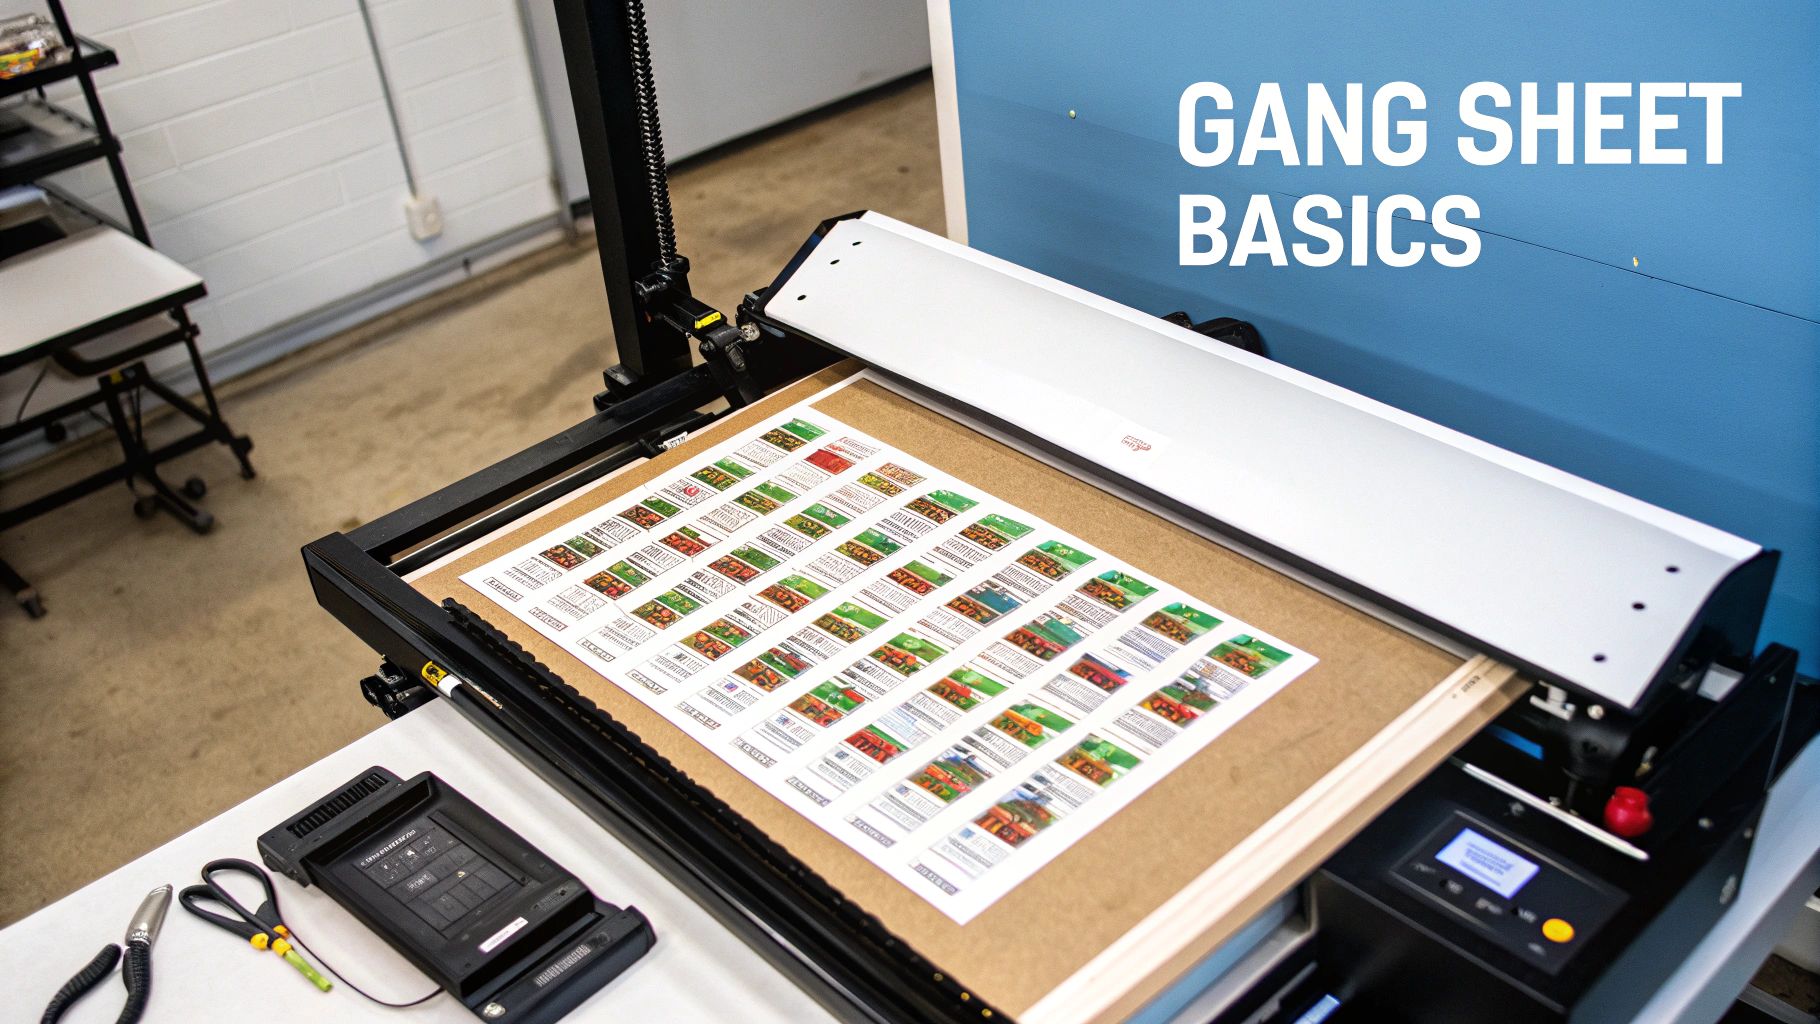
A Business Owner's Guide to DTF Gang Sheets
Let's get straight to it: DTF gang sheets are all about working smarter, not harder. They are large sheets of transfer film where you can print multiple different designs all at once. For any apparel business, this is a game-changer. It lets you group different jobs, logos, and graphics onto a single sheet, which cuts way down on wasted material and precious production time.
Think of it like printing a whole page of stickers in one go, instead of printing each sticker individually. That’s the core idea.
What Exactly Are DTF Gang Sheets
Here's a simple analogy I like to use: baking cookies. You wouldn't bake just one cookie on a huge tray, right? Of course not. You’d fill the entire tray with dozens of cookies to make the most of your oven space and time. A DTF gang sheet follows that exact same logic for printing on apparel. The term "ganging" just means grouping, or "ganging up," a bunch of different print jobs into one big layout.
This whole process is a fundamental part of Direct-to-Film (DTF) printing, where your designs get printed onto a special film first, then transferred over to the fabric. If that's a new term for you, our guide on what Direct-to-Film printing is is a perfect place to get up to speed. The gang sheet is basically the canvas where all the magic starts.
The Core Concept of Ganging Designs
At its heart, using a gang sheet is all about efficiency. Instead of firing up your printer for a single chest logo, then running it again for a sleeve print, and a third time for a neck tag, you put them all on one sheet. This strategy is a lifesaver for small businesses juggling lots of different customer orders.
Here’s what that looks like day-to-day:
- Order Consolidation: You can fit orders for ten different clients onto the very same sheet.
- Design Variety: It's perfect for mixing large t-shirt graphics with smaller logos for hats, bags, or anything else.
- Waste Reduction: By packing the printable area of the film, almost no material gets tossed out. That goes straight to your bottom line.
A well-organized gang sheet is more than just a printing layout; it's a strategic tool for profitability. It turns what would be multiple, costly, small-batch print jobs into a single, efficient, and cost-effective production run.
From Digital Layout to Physical Product
The whole journey begins with a digital file. You (or your printing partner) will arrange all your different designs onto a large digital canvas. The key is to leave just enough space between them so you can easily cut them out later.
Once the layout is set, that file is sent to a DTF printer. The printer puts down the full-color design, a white ink base, and then a special powdered adhesive. After it's cured, you have a sheet full of transfers that are ready to press. All you have to do is cut out each design and apply it to your garment with a heat press. It’s a beautifully simple workflow that makes custom apparel faster and more affordable than ever.
Why Gang Sheets Are a Game-Changer for Your Business
Once you get the basic idea behind DTF gang sheets, you can start to see just how powerful they are for your business's bottom line. This isn't just a clever printing technique; it’s a strategic decision that transforms your entire operation. It all comes down to three huge wins: serious cost savings, a major boost in speed, and a ton of new creative possibilities.
Switching from printing designs one-by-one to grouping them on a gang sheet is a conscious move to get the most out of every resource you have. This single change can help you tackle more complicated jobs, slash your turnaround times, and scale your business in ways that just weren't feasible before.
Maximize Profit by Slashing Waste
The first thing you’ll notice with gang sheets is how much less material you waste. Picture that roll of DTF film. Every square inch you leave blank is literally money down the drain. Gang sheets force you to treat that film like prime real estate, fitting your designs together like a game of Tetris to cover as much surface as possible.
This smart layout strategy directly cuts your cost per print. Instead of paying for a whole sheet just to print one small chest logo, you can pack that same sheet with dozens of logos, neck tags, and sleeve designs right next to your bigger graphics. These savings add up fast, giving you a much healthier profit margin on every order you send out the door.
Put Your Production Workflow into Overdrive
In this business, time is money. Gang sheets are your secret weapon for getting more time back in your day. Printing designs one at a time is slow and clunky—every single print needs its own setup, its own print job, and its own handling. This creates bottlenecks that grind your whole operation to a halt and limit how many orders you can actually finish.
Gang sheets completely bulldoze those barriers.
- Combine Multiple Jobs: You can print orders for several different clients all on the same sheet, dramatically cutting down on setup and printer run time.
- Press Continuously: With a whole sheet of transfers ready to go, you can move from one garment to the next without stopping to print another design.
- Take on More Orders: A faster workflow means you can confidently say "yes" to more customers and even take on those profitable rush jobs.
The effect on your productivity is huge. Industry reports show that shops using this method can cut their film costs in half and reduce production times by up to 50%. You can dig into some great data on maximizing efficiency in custom merch printing to see just how big the impact can be.
Think of it this way: by grouping jobs, you stop running a bunch of short sprints and start running one long, efficient marathon. Your shop can suddenly handle a much higher capacity without you needing to work longer hours.
Unlock New Creative and Business Opportunities
Beyond saving time and money, gang sheets open up a world of creative freedom and business agility. This approach makes small-batch runs and highly customized orders not just possible, but profitable.
To see the difference clearly, let's break down how the two methods stack up against each other.
Gang Sheet Printing vs Single Design Printing
| Metric | Single Design Printing | DTF Gang Sheet Printing |
|---|---|---|
| Material Cost | High per design (wasted film) | Low per design (maximized film use) |
| Setup Time | Required for each individual print | One setup for multiple prints |
| Order Volume | Best for large, single-design runs | Ideal for mixed and small-batch orders |
| Profitability | Lower on small or varied jobs | High on all job sizes |
As you can see, the gang sheet model wins out for anyone doing varied or custom work. This flexibility gives you a serious competitive edge. You can now offer clients a single logo in multiple sizes without hitting them with huge setup fees.
It also lets you test new ideas with almost no financial risk. Wondering if that new t-shirt graphic will sell? Just add a few to your next gang sheet instead of committing to a massive, expensive print run. This lets you stay nimble, react to trends, and keep your product line fresh and exciting for your customers.
How to Prepare a Perfect Gang Sheet File
Creating a killer DTF gang sheet doesn't start at the printer—it starts with your file. Think of your file as the blueprint for your finished shirts. A good blueprint gets you a solid, impressive final product. A bad one? Well, that leads to wasted materials and a lot of frustration. Getting your file setup right from the get-go is the secret to transfers that look sharp, vibrant, and exactly how you pictured them.
This guide will walk you through the nitty-gritty of file prep, from setting up your canvas to exporting a print-ready file. Once you master these fundamentals, you'll be creating perfect layouts every single time, which is a huge win for your wallet and your watch.
Setting Up Your Digital Canvas
First things first: you need to create a digital workspace that perfectly matches the physical gang sheet you're ordering. This digital canvas is the foundation for everything else. So, if you're ordering a 22" x 60" gang sheet, your canvas in Photoshop, Illustrator, or Canva needs to be set to those exact dimensions.
Why is this so critical? Because it eliminates any guesswork. When your canvas size is correct, there's no risk of your designs being unexpectedly stretched, shrunk, or cropped when we go to print. What you see on your screen is exactly what you'll get.
Next up is resolution, and this one is non-negotiable. You absolutely must set your file to 300 DPI (Dots Per Inch).
- What's DPI? It's just a measure of print detail. More dots of ink per inch equals a sharper, cleaner image.
- Why 300 DPI? It's the gold standard for professional printing. If you use a file with a lower resolution, like the 72 DPI common for web images, your prints will come out looking blurry and pixelated. Nobody wants that. Always start your project at 300 DPI from the beginning.
Pro Tip: Don't ever try to take a low-resolution image and just "change" it to 300 DPI. The software will just stretch the existing pixels, making a blurry image look even worse. You have to start with high-quality artwork.
Arranging Your Designs for Maximum Efficiency
Now for the fun part—actually laying out your designs. This is where the real magic (and money-saving) of dtf gang sheets happens. The goal here is to play a bit of Tetris and fit as many designs onto the sheet as you can. This process is often called "nesting."
Think of it like packing a suitcase for a long trip. You don't just toss things in randomly. You fold, roll, and arrange everything to use every last inch of space. Do the same with your designs. Rotate your smaller graphics to tuck them into the empty areas around larger ones. For example, you can fit a bunch of small sleeve logos or neck tag designs into the awkward gaps next to a big front-chest print. Mastering this skill directly lowers your cost per transfer.
As you place your designs, just be sure to leave a little breathing room—at least a quarter-inch—between each one. This buffer makes it easy to cut them apart later without accidentally nicking an adjacent design. If you're stuck on what sizes to make your graphics, our guide on standard DTF transfer sizes is a fantastic starting point for everything from pocket logos to full-back pieces.
Finalizing and Exporting Your File
Once all your designs are perfectly nested and you’ve given everything one last look, it’s time to export. Your final file has to meet two critical requirements: a transparent background and the right file format.
The only file format we accept is a Transparent PNG (Portable Network Graphics). This is crucial because you only want us to print the ink for your design, not a big white box around it. A transparent background ensures that only the graphic itself is printed and transferred onto the garment.
Before you hit that export button, run through this final checklist:
- Canvas Size: Does it perfectly match the gang sheet you’re ordering?
- Resolution: Is it set to 300 DPI?
- Background: Is it 100% transparent?
- Placement: Are your designs nested efficiently with enough room to cut?
- File Type: Are you saving it as a PNG?
Following these steps takes the guesswork out of the process and ensures you’re sending us a professional-grade file. A little prep work upfront guarantees your printed transfers will be crisp, clean, and ready to bring your vision to life without any costly surprises.
From Digital File to Finished Product
With your perfectly prepped digital file in hand, it's time to watch the magic happen. This is the moment your designs jump from pixels on a screen to a real, vibrant product you can hold. It's a fascinating dance between specialized tech, top-notch materials, and a bit of hands-on precision.
The whole physical process boils down to a few key players. First up is the specialized DTF printer, which is the conductor of this orchestra. It carefully layers brilliant CMYK inks onto the transfer film, bringing your designs to life with incredible accuracy.
This simple flowchart breaks down the critical first steps in your digital prep work.
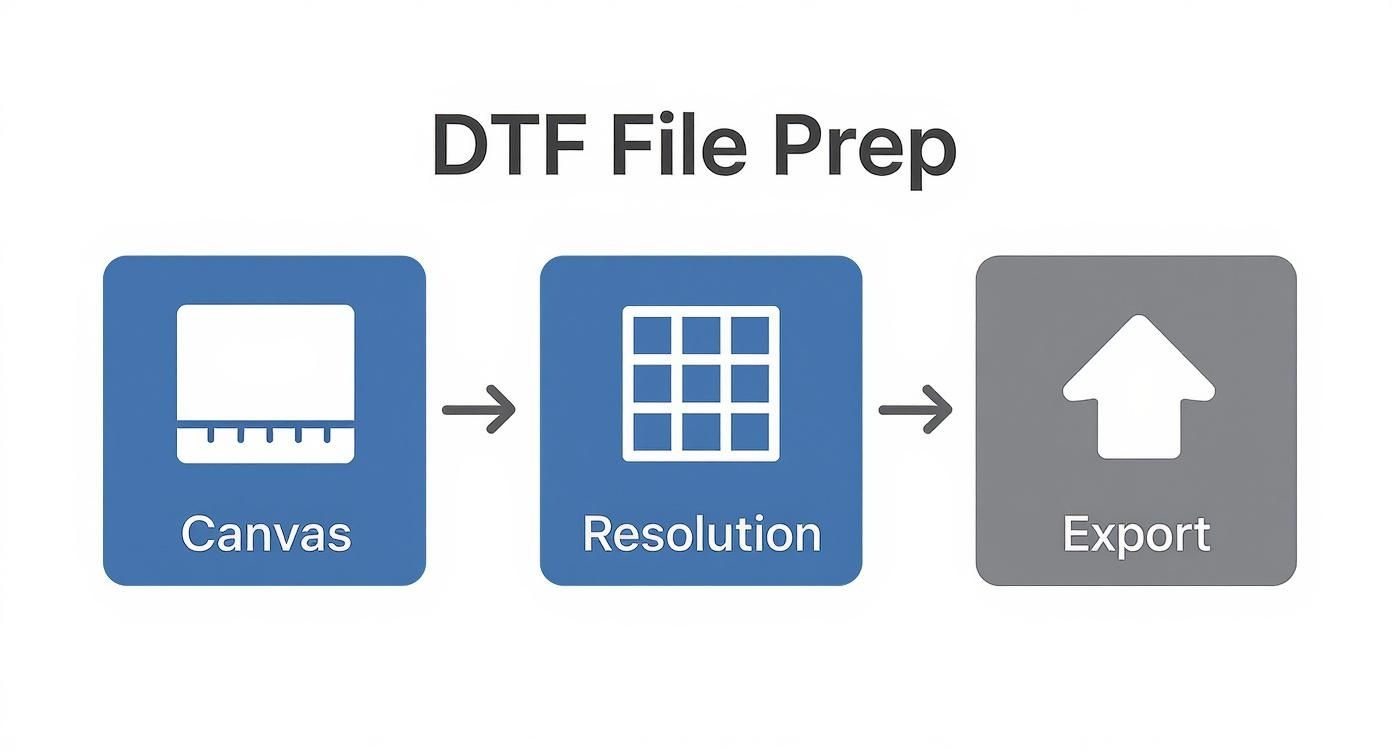
As you can see, locking in the right canvas size, resolution, and export settings is the bedrock for a flawless print later on.
The Printing and Curing Process
Once the color layer is down, the printer adds a solid white ink underbase. This is the secret sauce that makes your colors pop, especially on dark shirts. Without it, your designs would look washed out and see-through.
Next, the printed film rolls through a shaker that coats the wet ink with a fine adhesive powder. Imagine sprinkling flour on a countertop before rolling out dough—it’s a similar idea. This powder is what will eventually fuse your design to the fabric. Finally, the sheet glides through a curing oven, which melts the powder into a smooth, even adhesive layer, and just like that, the transfer is complete.
Pressing Your Transfers for a Perfect Finish
When your cured dtf gang sheets arrive, all you have to do is cut out the individual designs. Now for the fun part: applying them with a heat press. This step is all about precision—get it right, and you'll have a permanent, flexible transfer that feels fantastic on the garment.
To nail the application, you need to dial in three things on your heat press:
- Temperature: How hot the press needs to be to activate the adhesive.
- Time: How long you need to apply that heat.
- Pressure: The amount of force required to bond the design into the fabric's fibers.
These settings can change depending on the material you’re working with. For a detailed walkthrough, check out our complete DTF press instructions. We've laid out specific recommendations for different fabrics to help you get it perfect every single time.
Getting your press settings right isn't just about making the design stick. It’s about ensuring wash-after-wash durability, a soft-hand feel, and a professional look that keeps customers coming back.
Hot Peel Versus Cold Peel
After pressing, the last decision is when to pull off the clear film carrier. This is known as the "peel," and you have two main options. A hot peel is exactly what it sounds like: you remove the film right after the press opens while it's still hot. This usually gives you a matte, softer finish that feels more integrated with the fabric.
A cold peel, on the other hand, means you let the transfer cool down completely before removing the film. This method often leaves a glossier, slightly thicker finish and can make certain colors appear even more vibrant. The right choice really just comes down to the look you're going for.
This push for high-quality, efficient printing is fueling some serious market growth. The global DTF printing market was valued at USD 2.72 billion in 2024 and is projected to hit USD 4.56 billion by 2032. This boom shows just how many businesses are switching to DTF for its superior results and easier workflow.
Of course, once you’ve created your awesome custom tees, you need to show them off. Learning some effective strategies for T-shirt product photography can make a huge difference in how well they sell.
Finding a DTF Printing Partner You Can Trust
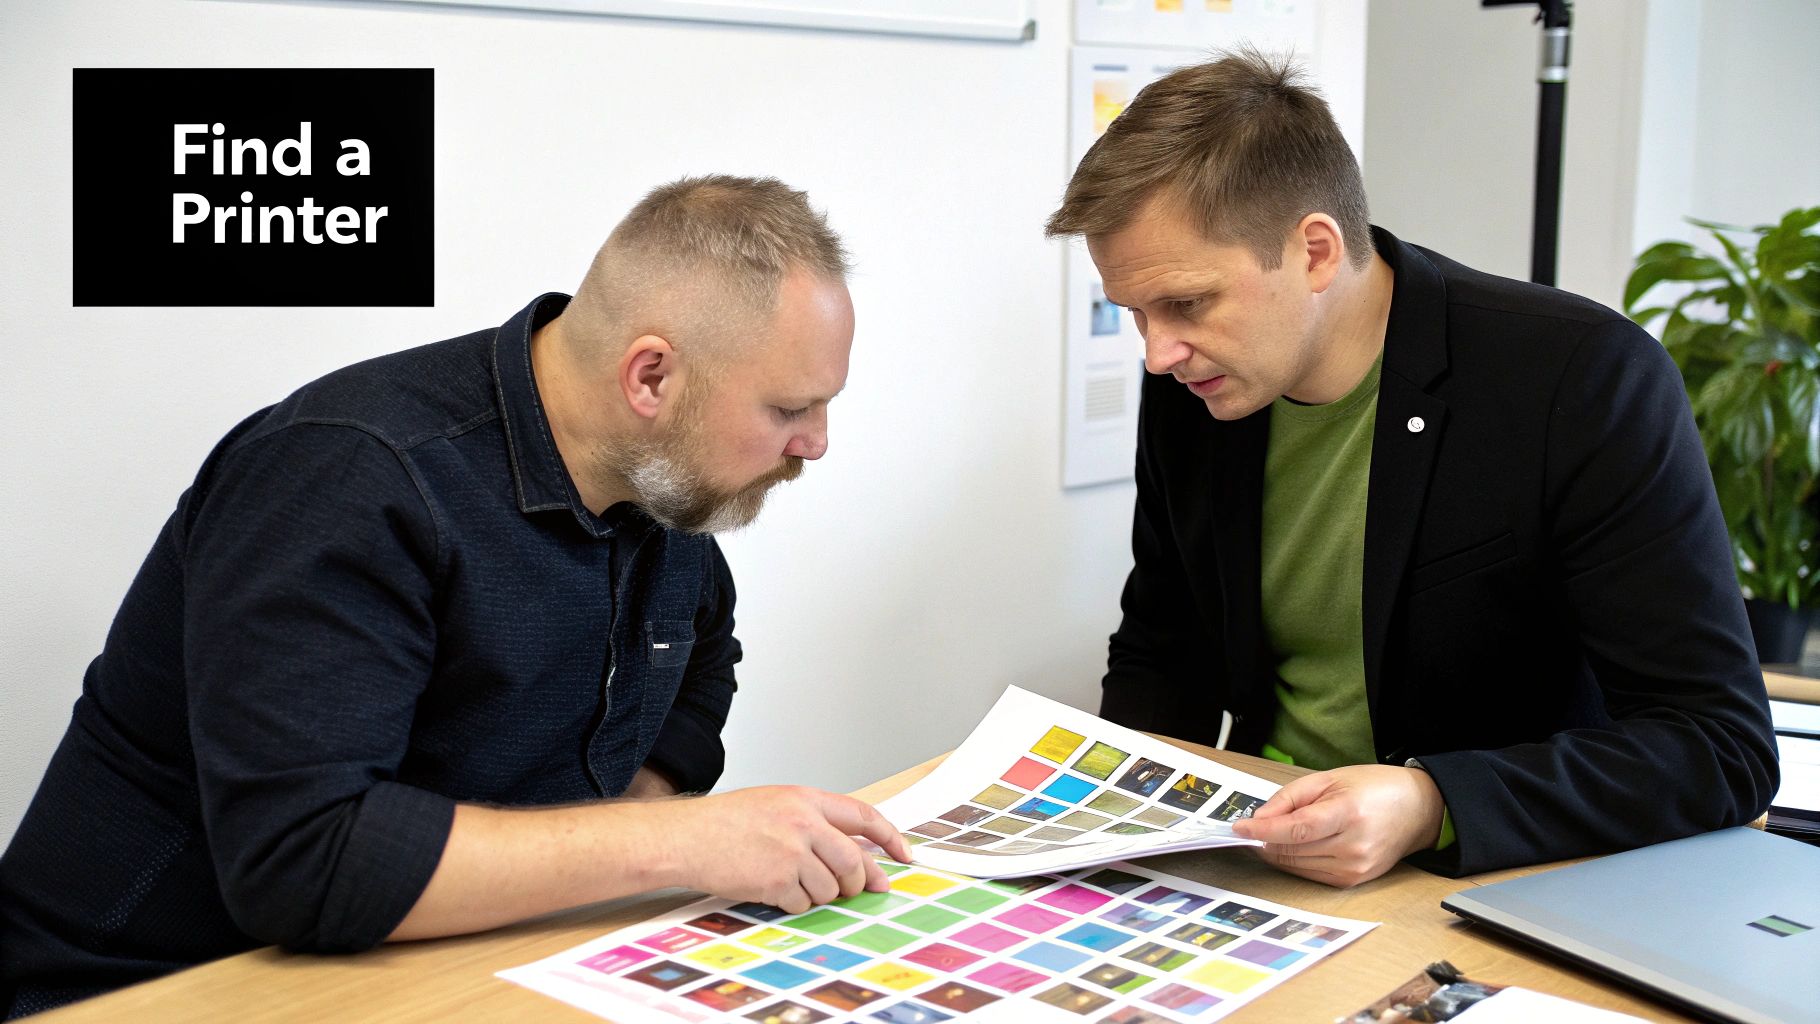
Handing off your DTF gang sheet printing can be a game-changer for your shop, but remember this: your final product is only as good as the partner you choose. This isn't a decision to rush. A great provider feels like an extension of your own team, while a bad one can quickly lead to missed deadlines, shoddy quality, and seriously unhappy customers.
Finding the right printer means looking beyond just the price tag. You need to really dig in and check a few key things that directly impact your brand’s reputation and, frankly, your own sanity.
Your Vetting Checklist
Before you ever commit to a big order, do your homework. Any reliable printer will be transparent about their process and proud of their quality. Here’s what you should be looking for:
- Request Samples: Never, ever place a bulk order without seeing and feeling their work first. A sample pack is your chance to check the transfer's texture, see how the colors pop in person, and run it through a real-world wash test.
- Verify Material Quality: Don't be shy—ask what specific inks and films they use. Top-shelf, USA-sourced materials, like those we use at Cobra DTF, produce brighter colors, a much softer feel, and transfers that won't crack or peel after a few washes.
- Check Turnaround Times: In the custom apparel world, speed is everything. Keep an eye out for printers offering same-day shipping. That’s how you keep your projects on track and your customers smiling.
- Assess Customer Support: What happens when a file has an issue or a shipment gets delayed? A responsive and genuinely helpful support team can be an absolute lifesaver when you're on a tight deadline.
A true printing partner knows their success is tied to yours. They won’t just print your files; they’ll deliver a reliable, high-quality product that helps your business grow.
The Advantage of a USA-Based Provider
Choosing a domestic, USA-based printer for your dtf gang sheets gives you a massive leg up over overseas alternatives. This isn’t just about patriotism; it’s about making a smart business decision.
For starters, you get dramatically faster and more reliable shipping. With a partner like Cobra DTF, located right here in Texas, you can get your transfers in just 1-3 days. This completely sidesteps the long waits, customs headaches, and unpredictable supply chain issues that plague international orders.
Second, the quality control is almost always higher. Domestic companies operate under strict quality standards, ensuring the materials are safe and the final product is consistently great. That reliability is what protects your brand’s reputation with every single shirt you sell.
This focus on domestic production is part of a bigger picture. North America has become a hotbed for DTF printing, and the U.S. market alone is projected to hit a value of $81.6 million by 2032. This boom is happening because the technology is so accessible to everyone, from home-based startups to large-scale apparel operations. You can learn more about the growing North American DTF market on kbvresearch.com. By partnering with a printer invested in this ecosystem, you're building a more stable and resilient supply chain for your own business.
Solving Common DTF Printing Problems
Even when you’ve nailed the file prep and picked a great printing partner, the hands-on process of heat pressing can still throw you a curveball. The good news? Most DTF issues are surprisingly simple to fix once you know what to look for.
This isn’t about panic; it’s about having a game plan. Let's walk through the most common headaches—from stubborn transfers to off-key colors—so you can save time, materials, and keep your orders flying out the door.
What to Do When a Transfer Won't Stick
It's the most frustrating moment in the print shop: you peel back the film, and the design comes right up with it. When a transfer fails, it almost always boils down to one of three things: heat, pressure, or the garment itself. Your heat press is the final step, and getting it right is everything.
If your design peels off immediately or fails after the first wash, start your investigation at the press.
- Incorrect Temperature: If your press is too cold, the adhesive won't melt and bond with the fabric. If it's too hot, you can burn the transfer and even scorch the garment.
- Uneven Pressure: If your press isn’t clamping down with firm, even pressure across the entire design, some areas won't stick. This is a common issue with clamshell presses that don't have adjustable pressure.
- Problematic Fabrics: Some materials, especially certain synthetics, are treated with waterproof or chemical coatings that actively block the DTF adhesive. A quick pre-press for 5-10 seconds can burn off moisture and some of these coatings, giving the transfer a much better surface to grip.
Here's the golden rule: consistency is key. Taking a few minutes to calibrate your heat press and run a quick test on a scrap piece of fabric can prevent 90% of adhesion issues. It's the best insurance policy you have.
Why Do My Colors Look Dull or "Off"?
You sent in a file with a brilliant, eye-popping red, but what came out on the shirt looks more like a faded brick. What happened? More often than not, the problem started way back when the design file was created. If you designed in RGB (the color mode for screens) instead of CMYK (the standard for printing), a color shift is practically guaranteed.
The other big variable is the quality of the ink itself. Cheap, low-grade inks just can't produce vibrant, saturated colors. They often look muddy or washed out right from the start. This is exactly why we’re so committed to using premium, USA-made inks—it's the only way to ensure the colors you designed are the colors you get.
Preventing Cracking, Peeling, and Annoying Halos
Nothing hurts more than seeing a great-looking print start to crack and peel after just a couple of washes. This is a classic sign of improper curing or pressing. If the adhesive powder wasn't fully melted during the printing process, or if the heat press settings were wrong, the transfer never formed that strong, flexible bond it needs to survive daily wear. Always follow the recommended pressing instructions for your dtf gang sheets and the specific fabric you're using.
Another common pet peeve is the "halo effect"—that faint, glossy outline of adhesive you can sometimes see around the edges of a design. This happens when excess adhesive powder clings to the film where it doesn't belong. A professional print partner has their process dialed in to avoid this, giving you a clean, crisp transfer with no distracting outlines.
Your Top Questions About DTF Gang Sheets, Answered
Even when you've got the basics down, you're bound to have questions as you start working with DTF gang sheets. Let's tackle some of the most common ones we hear from print shop owners and creators every day.
What Fabrics Can I Actually Use DTF On?
This is where DTF really shines. Its versatility is a game-changer. Forget being locked into just one type of material; DTF transfers play nicely with a massive range of fabrics.
You can confidently press onto:
- Cotton: Perfect for that classic, soft-hand feel on 100% cotton tees.
- Polyester: It bonds incredibly well to synthetics, making it your go-to for athletic apparel.
- Blends: Got 50/50s or tri-blends? No problem. DTF adheres beautifully.
- Beyond the Basics: We're talking denim, canvas, leather—even some hard goods.
This means you can use the exact same transfers for t-shirts, hoodies, tote bags, hats, and pretty much anything else you can dream up.
Seriously, How Durable Are These Prints?
When you press them right, DTF prints are built to last. We're talking about serious durability that can handle dozens and dozens of washes without cracking, peeling, or fading away. The magic is in how the adhesive powder melts and fuses the ink directly into the fabric's fibers.
For the longest possible life, just give your customers the standard advice: wash inside out in cold water and tumble dry on low. If you avoid harsh detergents and high heat, that print will stay bright and flexible for years.
A great DTF transfer doesn't just sit on top of the shirt like a sticker. It becomes part of the material. That's why it stretches so well and often outlasts the garment itself.
Are Gang Sheets Really a Good Deal for Small Orders?
One hundred percent. This is precisely why small businesses and independent brands are flocking to them. Older print methods often hit you with high setup fees and big minimums, making small runs or one-offs a money-loser.
DTF gang sheets completely flip that script.
You can fill a sheet with ten different client designs, a few of your own brand logos, and some fun one-off ideas all at once. You pay for the sheet, not for each individual setup. This makes it an incredibly profitable way to handle custom requests and test new products without any real risk.
Ready to see the difference for yourself? Cobra DTF prints all our transfers right here in the USA, and we offer premium, same-day shipping on our gang sheets so you can keep your projects moving.